Backpacking the Santa Monica Mountains’ Backbone Trail
67 mile hiking and backpacking trail in southern california

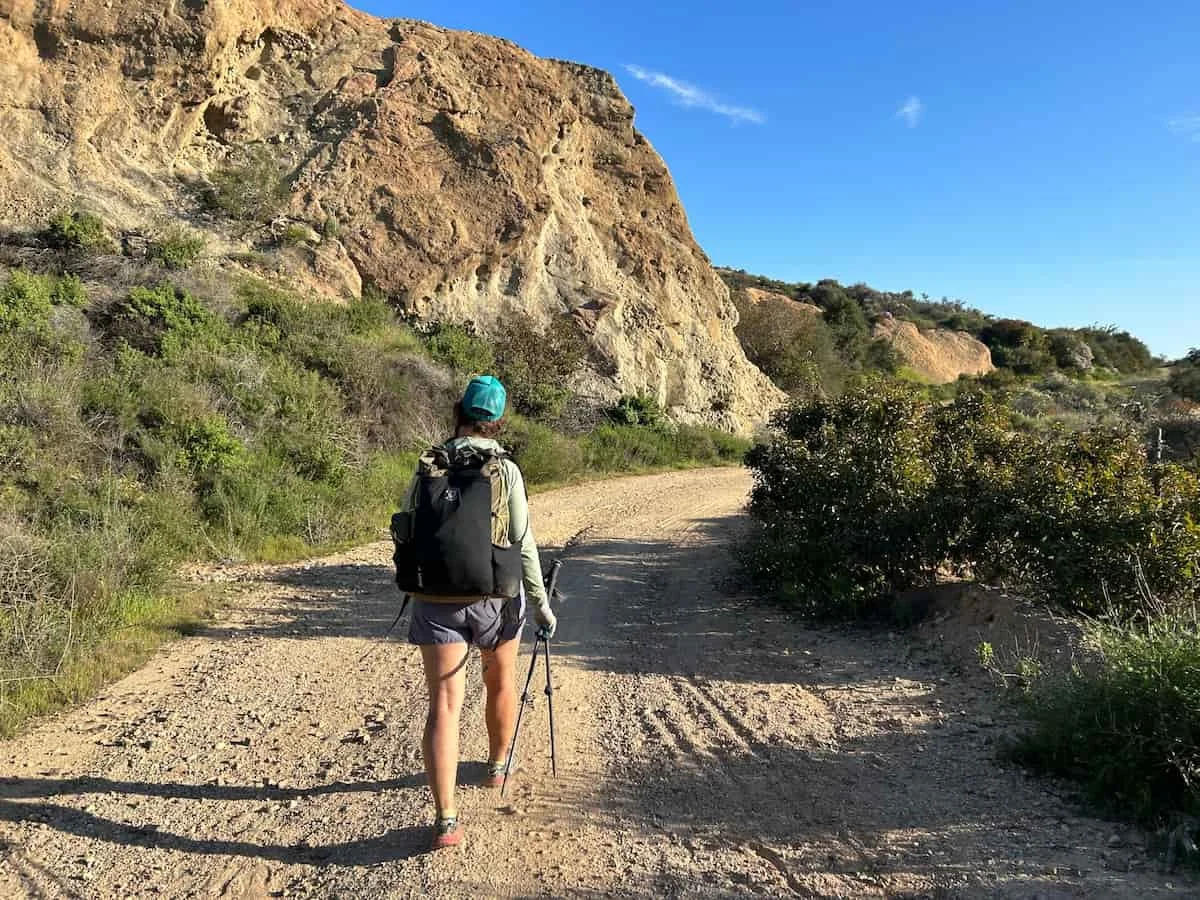
The Backbone Trail traces a rollercoaster path across the spine of Southern California’s Santa Monica Mountains, traversing craggy peaks, lush canyons, and grassy ridgelines, often within view of the Pacific Ocean. It makes for a gorgeous backpacking route in winter and spring when hillsides explode with bright bursts of wildflowers and carpets of impossibly green foliage. Lack of “legal” campsites and natural water sources, however, creates a tricky logistical puzzle for hikers who want to cover its entire length in one go.
After connecting the dots on a recent eastbound winter thru-hike of the Backbone Trail, I hope to demystify this incredible route so that more people can experience what I feel is one of the best—and most challenging—multi-day backpacking trips located near a major city (that’s Los Angeles, if you’re wondering).
Distance: The National Park Service lists the official distance at 67 miles, and I measured 71.3 (although that included starting from Pacific Coast Highway, a short side trip to Sandstone Peak, and a one-way hike back to the trail from the Malibu Creek State Park Campground)
Days: 3 to 5 days
Elevation gain/loss: 13,710 feet / 13,247 feet (eastbound)
Highest elevation: Sandstone Peak (3,111 feet)
Best season: Winter and early spring
Permits: No hiking permits required; California Campfire Permit for campfires and stoves
Difficulty: Moderate hike to strenuous endeavor (the difficulty eases with more days on trail)


We create reader-supported, objective, independently-selected gear reviews. This story may contain affiliate links, which help fund our website. When you click on the links to purchase gear, we may get a commission — without costing you an extra cent. Thank you for supporting our work and mission of outdoor coverage for every body! Learn more.

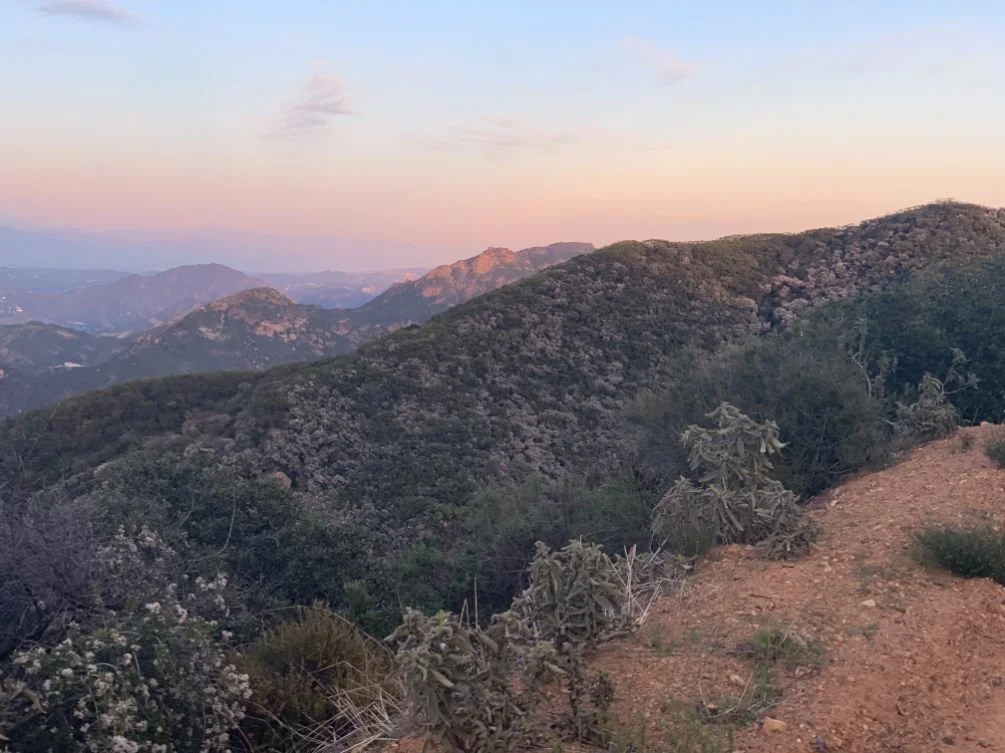
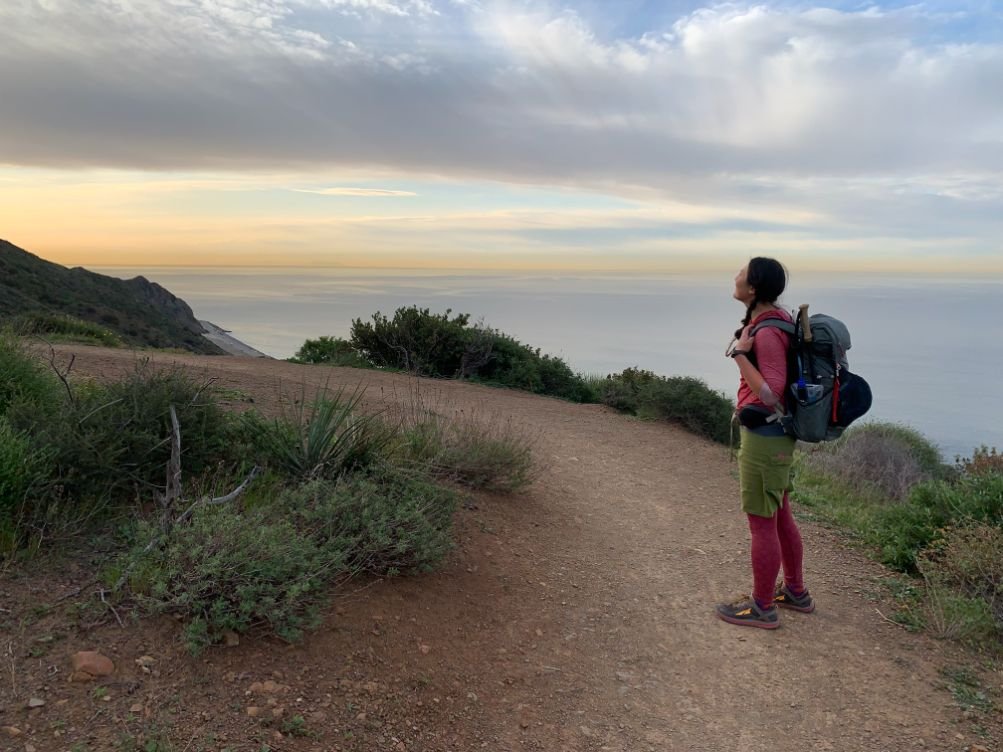
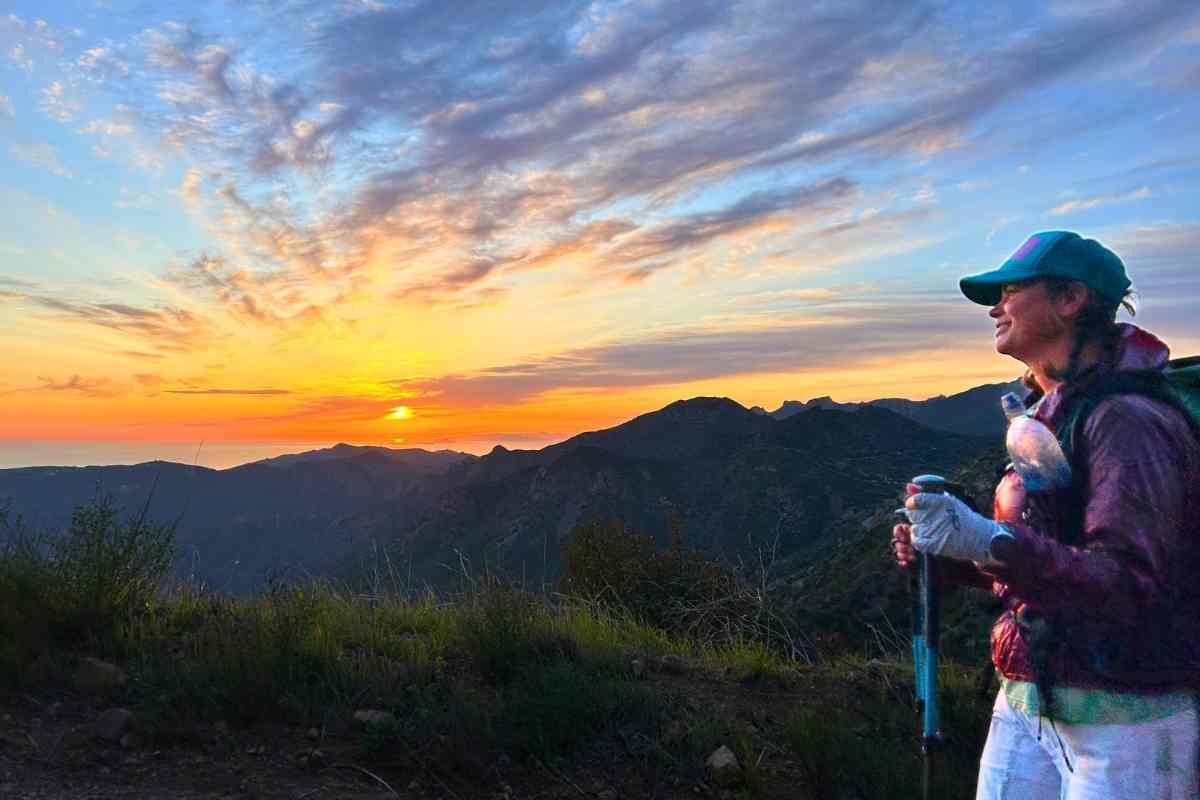
The author at sunset near Mulholland Drive on the Backbone Trail with the Pacific Ocean and Sandstone Peak in the background.
Backbone Trail Background
The Backbone Trail runs roughly east-west for 67 miles (or so) through Southern California’s Santa Monica Mountains National Recreation Area, passing through a patchwork of federal and state lands that include: Point Mugu State Park, Circle X Ranch, Zuma-Trancas Canyons, Malibu Creek State Park, Topanga State Park, and Will Rogers State Historic Park. This National Recreation Trail's western terminus is located just a short distance from the famed Pacific Coast Highway at Point Mugu’s Ray Miller Trailhead; its eastern terminus sits in a somewhat arbitrary location just north of the main parking lot at Will Rogers State Park.
While the trail’s rough idea was batted around for decades, its existence didn’t become a reality until construction began on a handful of segments in the 1980s. Even then, private inholdings prevented the trail’s completion, and it remained a hodgepodge network of “Backbone”-branded trails and connector roads. That is, until 2016, when the final section was completed with (among other things) the donation of critical acreage by actor and former California Governor Arnold Schwarzenegger and pioneering women’s fitness advocate Betty Weider.
Thousands of years before the Backbone Trail was a glint in any hiker’s (or bodybuilder’s) eye, though, these lands flourished with bustling Chumash villages. While the violent forces of conquest and colonization led to the destruction of not just townships but also a way of life, Chumash and other Indigenous peoples persevered and remain deeply connected to this landscape today. On either end of your trip, visit the Satwiwa Native American Indian Culture Center, located north of Point Mugu State Park at Rancho Sierra Vista / Satwiwa, to learn more about the Santa Monica Mountains’ Indigenous past, present, and future.
Highlights and Challenges
Highlights
The views are often absolutely jaw-dropping, from expansive ocean vistas that sometimes include Catalina Island and the Channel Islands, to surprise peeks of the distant (and sometimes snow-capped) San Gabriel Mountains and San Bernardino Mountains
During a wet winter and early spring, the Santa Monica Mountains practically glow with chlorophyll and wildflower explosions, a rarity in Southern California
From end to end, the trail is packed with unique rock formations and several peak-bagging opportunities
Despite its proximity to the Los Angeles sprawl, the trail offers plenty of quiet and solitude, especially as you pass through the Boney Mountain State Wilderness on its west end
Because it crosses all of the major north-south roads in the Santa Monica Mountains, the trail is incredibly easy to access (or to bail on, if need be)
You can scratch the itch for a winter backpacking trip without needing to pack snowshoes and a four-season tent

The author on the climb up to the Sandstone Plateau
Challenges
Dispersed camping is not allowed anywhere in the Santa Monica Mountains; furthermore, there are very few “legal” campgrounds and the ones that do exist are either located far off-trail or are spaced too far apart to allow for “reasonable” mileage days
There are no reliable, year-round, natural water sources available on trail; human-made sources, such as spigots, are spaced somewhat far apart
The western trailhead’s remoteness, spotty cell service, lack of affordable nearby camping, and difficulty of coordinating overnight parking on either end can make logistics frustrating
Overall, the trail is poorly signed and requires a good knowledge of the local trail systems or at the very least, rapt attention to your map/GPS devices
The Santa Monica Mountains’ endless undulations make for an exceptional amount of gain and loss for a relatively short backpacking route
Shade can be difficult to find outside of canyon bottoms and some tree-dotted slopes

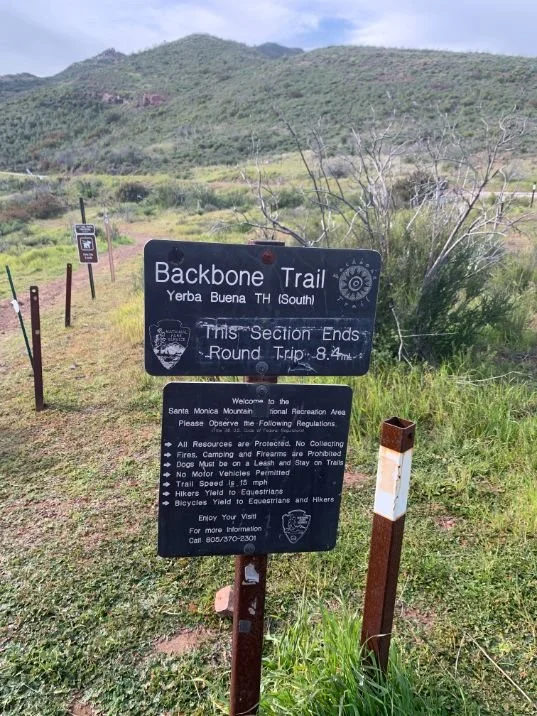
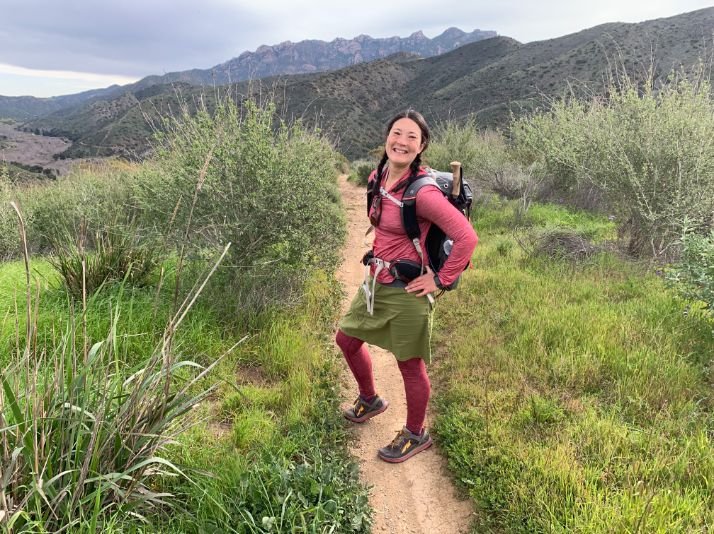
The author with the green hills of the Santa Monica Mountains on the Backbone Trail in February.
Best Season
While backpacking in Southern California is often a four-season pursuit, the best time to hike the Backbone Trail is during winter and early spring when temperatures are cooler, wildflowers are in bloom, and natural water sources are most likely to flow. Cool ocean breezes help extend the season into late spring, but the closer we draw to summer, the hotter, drier, and browner things become.
Slightly decreasing temperatures can make for comfortable hiking in the fall, but the landscape will not appear as lush as it does in spring, and natural water sources may not flow until the winter’s first (or second, or third) rain. I wouldn’t recommend attempting a thru-hike in the summer; temps can often rocket into the triple digits, and the trail is largely shadeless outside of canyons and some north-facing, oak-studded hillsides.

The Backbone Trail is subject to erosion after rain. Here. a large section of the trail gave way.
Difficulty and Required Skills
Navigation
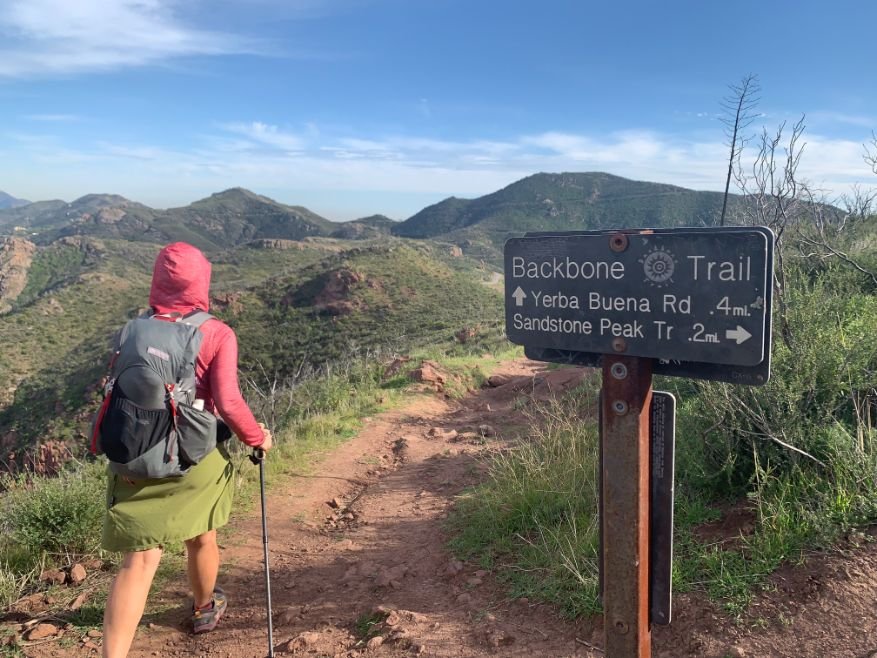
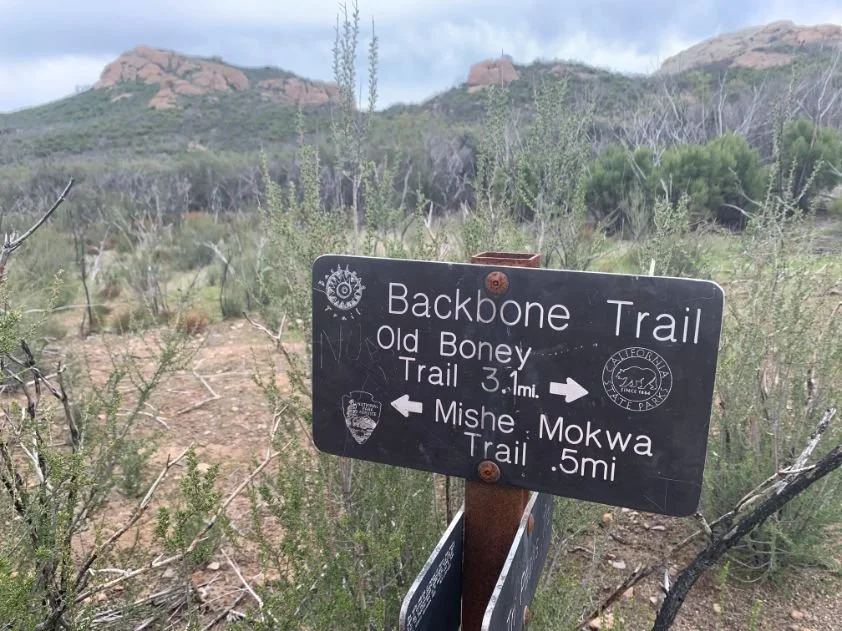
While the entire Backbone is located on-trail, the route itself isn’t generally well-signed or marked, with few exceptions. Some blame falls on past wildfires scorching the paint from existing trail markers, but other areas— including some critical junctions—look to have never featured any signage. While we were excited to discover that the trail has its own logo (a spiral-centered sun), it appeared on signage more rarely than the words “Backbone Trail.”
I recommend carrying the Tom Harrison Backbone Trail map and supplementing it with the Gaia GPS app, which we frequently referenced to ensure we were on the correct route. For the latter, download the map area onto your phone before leaving home since cell coverage can be spotty.
Rough Terrain / Scrambling / Rock Climbing
The entire Backbone Trail is a Class 1 endeavor—that is, you’re following what is generally a well-graded, single-track trail interspersed with segments located along dirt and gravel roads (and the rare, but mercifully short road walk). The only light scrambling you’ll encounter is voluntary, found in rocky areas around Sandstone Peak, the Mesa Motorway near Corral Canyon, Saddle Peak, and Eagle Rock. With that said, heavy rains and mudslides can and do occasionally damage the trail.
Thanks to a series of ferocious storms that passed through not long before we hiked in February 2023, we encountered some exceptionally rough and rutted tread and several washouts, including a hiker-swallowing, 5-foot-deep gash in the trail located along the eastbound climb toward Saddle Peak. Trail crews are active in the Santa Monica Mountains, however; major trail issues are usually fixed as time and resources allow. If you’re so inclined, you can even sign up to volunteer with them to help speed things along.

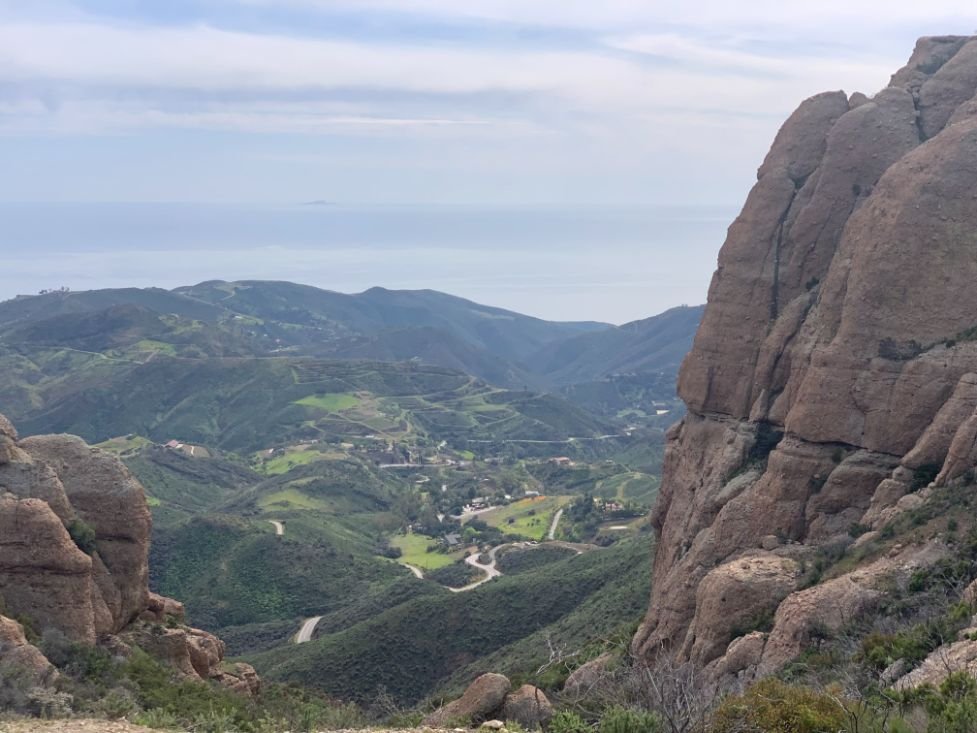
Looking down into Malibu Canyon, one of the biggest climbs and descents of the Backbone Trail.
Elevation Gain / Elevation Loss
With the trail’s high point located a scant 3,111’ above sea level at Sandstone Peak, it’s easy to shrug off the Backbone Trail as a low-stakes outing—especially if you’re used to hiking in taller ranges like the Sierra Nevada or the Rocky Mountains. Look at the elevation stats or a profile, however, and you’ll quickly realize that there’s a lot of up and down crammed into these 67-ish miles. Once you set foot on the trail, you’ll also realize that there aren’t many flat areas in which to knock out cruiser miles.
My hiking buddy and I completed the trail in a (quite literally) blistering 60-hour sprint, which included two marathon days with well over 5,000’ of gain each and similarly knee-busting descents; I wouldn’t necessarily recommend this unless you enjoy suffer-fests. I was grateful for all of the hill training I’d done during my trail runs in prior months—and perhaps even more grateful for my decision to carry trekking poles and as light a pack as possible!

The Eastern Terminus of the Backbone Trail is Point Mugu State Park. Since the true terminus doesn’t have a notable trailhead sign, this is the best place to get your start photo.
Trailheads
The Backbone Trail crosses every major paved road that runs north-south through the Santa Monica Mountains, providing countless entry (and exit) points for day hikers, section hikers, or backpackers ready to return to “civilization.” For the sake of thru-hiking, however, there are two main trailheads to plan your logistics around, listed below. Because overnight parking is slightly difficult to arrange at either end, many hikers use a ride-share service, friend, or family member to reach their starting point.

The author at sunrise climbing the Backbone Trail in Pt. Mugu State Park
Ray Miller Trailhead
Located inside Point Mugu State Park, just a stone’s throw from the Pacific Ocean, this is the trail's western terminus. The park’s access gate is only open between 8 am and 10 pm, so if you’re setting off outside of those hours, you’ll need to walk an extra 0.2 miles from Pacific Coast Highway to reach the trailhead, which is what we did.
There’s not much to see here besides a spartan kiosk bearing the words “Backbone Trail” and a tacked-on Tom Harrison map (a common theme for trailhead kiosks throughout the route, we discovered). There is, however, a pit toilet nearby, along with a pay lot, which is for day use only; you’ll need permission from the State Park (and you’ll need to pay a daily fee) to park here overnight. The La Jolla Group Campground is also located nearby; reservations are required in advance, and the fee is quite hefty ($225 as of this writing), so if you want to camp here the night before setting off, consider inviting 10 or 20 of your nearest and dearest to join the party. We chose to camp less than 10 minutes down the road at Point Mugu’s less-expensive Sycamore Campground and arranged to be dropped off at the trailhead to begin our eastbound hike.
Will Rogers State Historic Park
The trail’s eastern terminus is located in what feels like a very random spot near the junction of the Inspiration Loop Trail and the park’s service road, roughly 0.1 miles north of the main (pay) day-use parking lot and bathrooms for Will Rogers State Historic Park.
As with the Ray Miller Trailhead, you won’t find much here to celebrate besides a kiosk featuring rough map signage. Unlike Point Mugu, however, overnight parking is not allowed under any circumstance, no matter how nicely you request it.
Instead, we set up this end of our “shuttle” by parking just over a mile away in a neighborhood free of parking restrictions. (I used the free Spot Angels app to pick a potential spot and cross-checked with street signs when we arrived). We used a ride-share service to ferry our weary bodies back to my car at the end. While we initially considered hoofing it there from Will Rogers Park, I don’t recommend walking the steep and winding descent from the park, nor the stretch of Sunset Boulevard located just south of it due to fast traffic and a lack of sidewalks.
PERMITS
Permits are not currently required to hike the trail. However, a free California Campfire Permit is technically required for campfires and any open-flame stoves (such as most backpacking stoves) used on federal lands in California. Permits are valid for a year and can be obtained online after watching a short video and answering a short quiz. I’ve never been asked to show mine in all the years I’ve backpacked in California, but I still renew the permit yearly and print out a scaled-down version that fits into my hiker wallet.

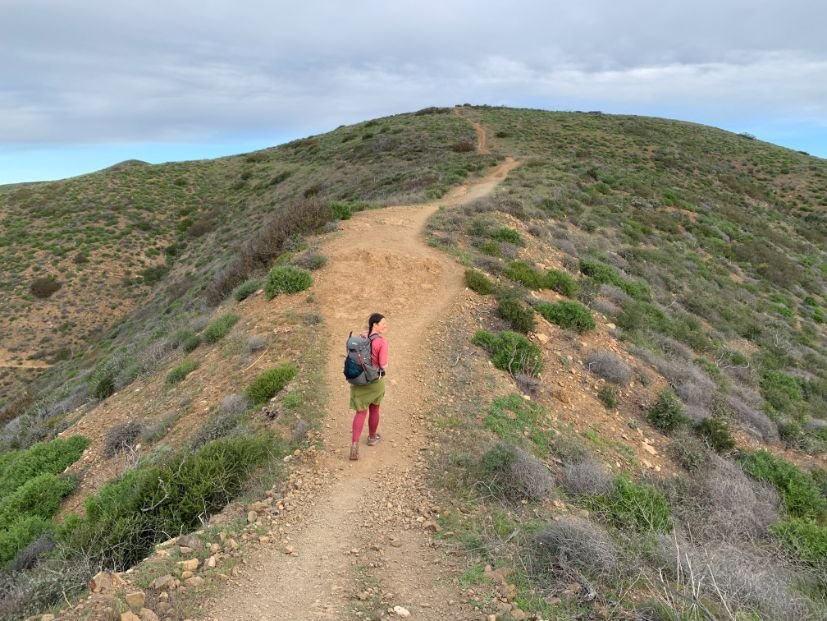
As Eastbound hikers, we started the first day with the biggest climb of the trip to Boney Mountain and Sandstone Peak.
Which Direction to Hike the Backbone Trail?
My research shows there’s slightly less cumulative elevation gain in the westbound direction. The thing is, having hiked most of this trail in segments before completing this thru-hike, all of that up or down kind of feels like six or half a dozen going either way and both ends feature significant gain nearly right off the bat. Choose your adventure!
A few other details might sway you in one direction or the other. First, consider transportation logistics. If setting up a two-car shuttle, you save a bit of time by dropping off the “end” car en route to your start point. If you depend on using a ride-sharing app on one end of your trip, you might find that cell reception is a bit easier to come by on the eastern end at Will Rogers Historic State Park.
The author on the climb up to Sandstone Peak on Day 1.
Second, consider your daily mileage, which is a daunting task considering the scarcity of approved campsites; organize your start point according to the mileage you wish to hike on your first day. An eastbound start gives you the shortest distance to the first possible campsite, La Jolla Valley Walk-In Camp. The camp is located roughly 5.5 miles from the Ray Miller Trailhead, about a half-mile off of the Backbone. Musch Camp in Topanga State Park is about 10 miles from the eastern terminus.
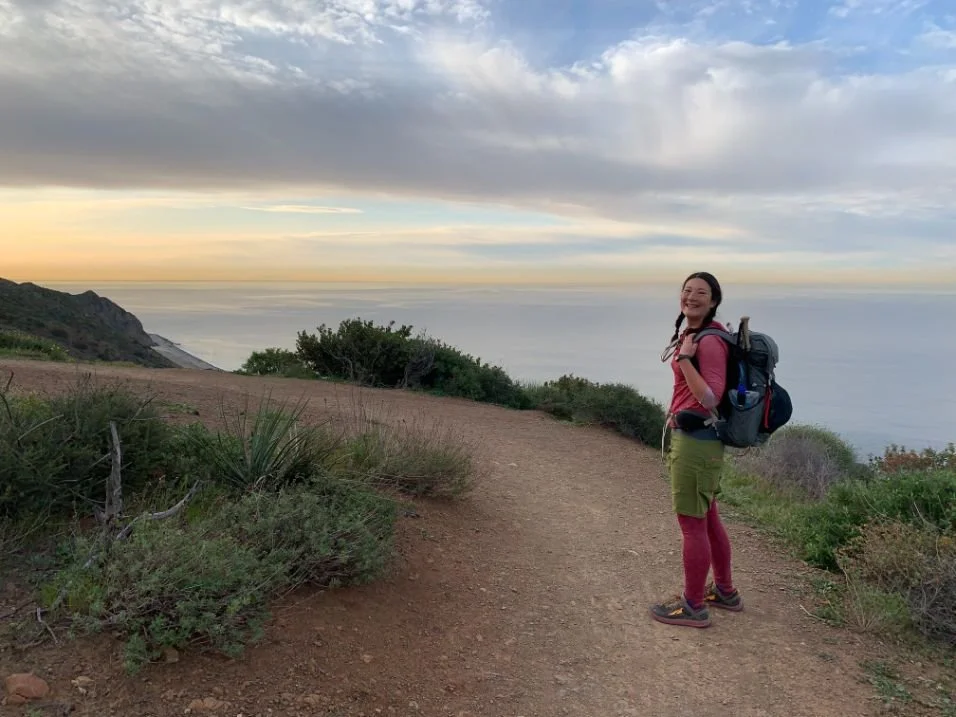
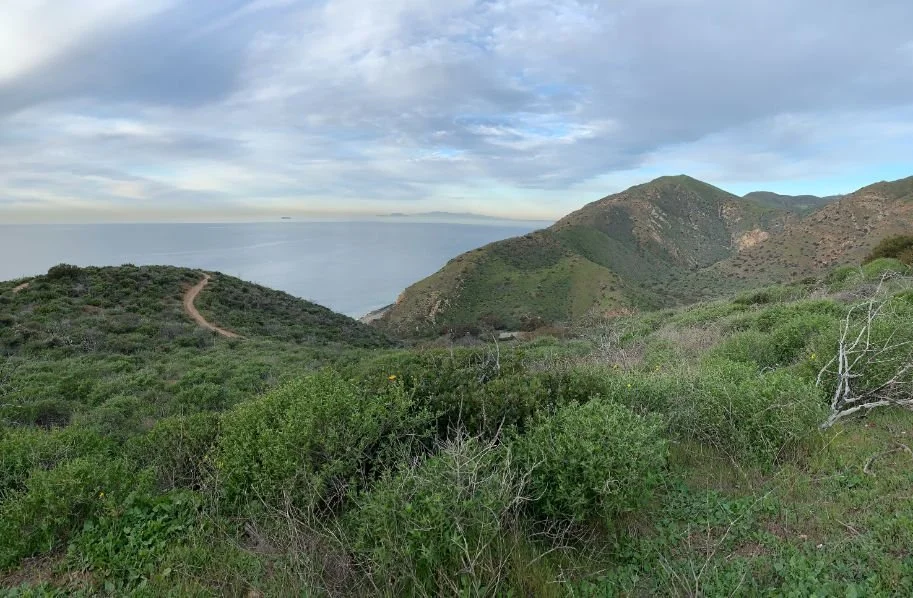
In addition, think about how you want to end your hike. Heading westbound means rounding out the trip with some of the Backbone Trail’s most stunning scenery and its most remote terrain as you pass through the Boney Mountain State Wilderness. Going eastbound, you’ll earn unique views of the curve where the Pacific Ocean meets the coastline known as Santa Monica Bay, especially beautiful at dusk and sunset, when twinkling city lights do their best to compensate for the lack of visible starlight above. You’ll also be fairly close to plenty of grocery and dining options in the Pacific Palisades community and beyond, should you want to immediately ingest untold amounts of calories in celebration.
Finally, there’s always the possibility of completing the trail as a yo-yo—that is, reaching one end, then turning around to head right back the way you came—if you’re really into putting a hurting on your quads. While it might not seem that enticing an idea, we did stumble upon a crew waiting for an ultrarunner to come through during her yo-yo of the trail. As a runner (and as a mere mortal), I salute them.

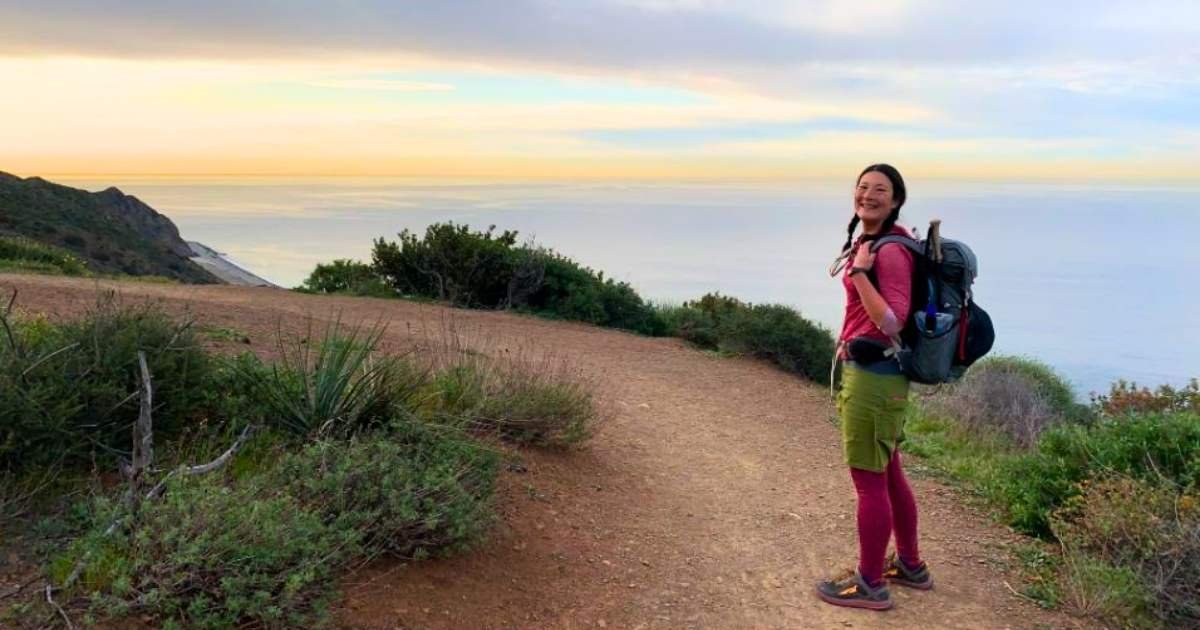
The descent to Decker Road/Mulholland highway on Day 1 happened at sunset for some pretty impressive views of the ocean.
Route Summary and itinerary
The route described here is eastbound, which worked out better for us since we were able to leave my car in a neighborhood close to Will Rogers, and had a shorter drive home after a long, 27-mile final day on the trail. This explains our 3-day itinerary.
Day 1
Starting your eastbound Backbone Trail hike at Point Mugu State Park’s Ray Miller Trailhead throws you into the action (and the beauty), with a winding climb that tops off in under three miles with expansive views of the Pacific Ocean crashing far below. This first high point also reveals what’s coming up, as the serrated ridgeline of Boney Mountain and its neighbors dominate your views to the east.
First, though, gawk at wildflowers if you’re lucky enough to be here in late winter or early spring, then wiggle around a bit before launching a steady descent to Sycamore Canyon. Its namesake dirt road deposits you at Danielson Ranch around 8 miles in, where you’ll find water spigots, portable toilets, and a large group campsite, complete with a fireplace and a small army of picnic tables. I stayed here once during a friend’s section hike of the Backbone, and we had an absolute blast cozying up to the fire and cooking up a smorgasbord that included, inexplicably, couscous topped with Reese’s Pieces. To each their own.

The author looking down from the Sandstone Plateau on Day 1.
From here, you’re traveling through Blue Canyon—and possibly in and out of a small creek, if you’re hiking after rains. If you’re staying the night at Danielson Ranch, the dusk and sunset views up this canyon are sublime, so hike in a bit to snap some photos or simply appreciate the scenery before bedding down.
Either way, enjoy your time here; it’s not long before you begin what might be the trail’s biggest, burliest, and most sustained climb. First, you’ll climb to a view-soaked saddle, then even further up to weave among the pinnacles scattered along the Boney Mountain ridgeline. The landscape here is downright dramatic, so much so that some people choose to hike westbound to experience some of the trail’s most stunning views as they’re winding down.
The impressive rock formations and stellar sights continue as you finish the bulk of this climb on what I like to call the “Sandstone Plateau,” a small, flattish area hemmed in by scenic pinnacles including Sandstone Peak and Tri-Peaks. A side trail departs to the left for the latter, but the Backbone swerves around to the right, passing beneath Inspiration Point (a brief and worthy detour). Whether or not you take the detour, though, you’re in store for amazing views if you ascend Sandstone just ahead (which you should, since it’s just above the trail), with rough use trails departing on your right not long after the 14-mile mark.
The descent from Sandstone deposits you at Trifuno Pass, where speedy Yerba Buena Road straddles a pair of rough parking lots for the Mishe Mokwa Trail and Backbone Trail Access at Mishe Mokwa; luckily, the larger of the two, across the road, usually has a portable toilet in place. You’ll wiggle around a bit after this on trail and fire road, but know that all of the climbing you’re doing (again) is worth it for the truly expansive views of accordion hills and the Pacific beyond, plus a surprise hanging lake, which is especially magical at dusk and sunset. The hanging lake is a true mood-lifter when you are, say, in the home stretch of a 26-mile first day and need a little pick-me-up—but I can’t promise it’ll be there if conditions have been dry.
Eventually, the wiggling begins a downhill trend, landing you at Decker Road / Mulholland Highway, a great place to arrange for a pickup, since this’ll take you down to Pacific Coast Highway and campgrounds in that area. (We pre-arranged for a friend to pick us up here, since we had a reservation at Point Mugu’s Sycamore Campground that night).

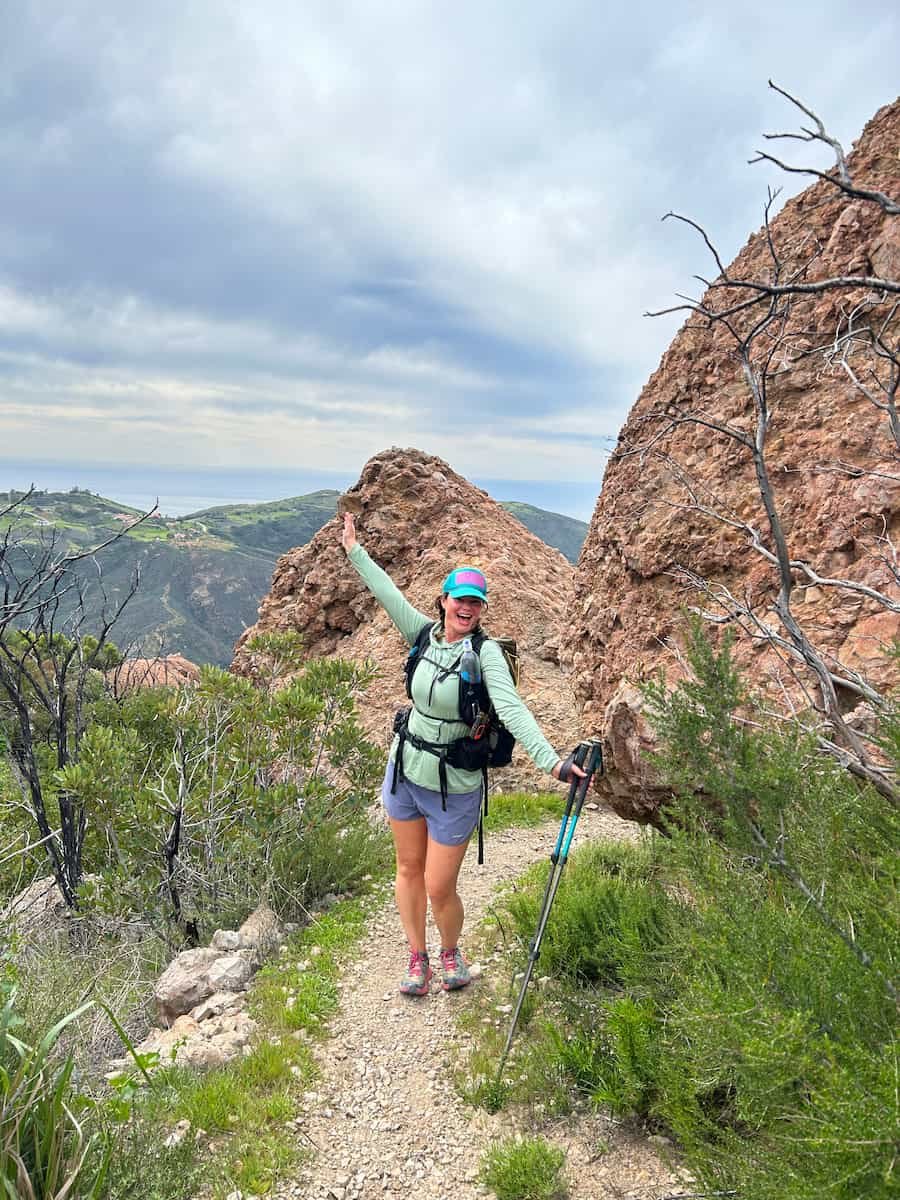
Wild and wonderful rock formations guard the entrance to the unpaved Mesa Peak Motorway on Day 2.
day 2
Just over a mile after Mulholland/Decker Road, you emerge at one of the nicest trailhead areas I’ve ever seen, located on Encinal Canyon Road. We saw a gaggle of cyclists when we popped out here, along with a shockingly clean pit toilet and shaded picnic table, which we happily used. There’s also water available just down the way at a fire station within sight of the trailhead.
Resist the urge to cut straight across the road from the bathrooms to what feels like an obvious trail—that is not your trail, although it does lead to a hilariously (and aptly) named mountain bike route called “Agony.” Instead, follow the Backbone, which curves around the parking area, to begin your descent into the lovely Zuma-Trancas Canyons segment, which a cyclist happily told us was “20 degrees cooler” than the parking lot. They weren’t wrong, thanks to lush foliage and high canyon walls. This area is one where you might find a flowing creek if it’s been raining (we did)— however, we wouldn’t count on it otherwise.
As you travel through on a mixture of single-track and fire roads, keep an eye out for two things—a small monument to Backbone donors Arnold Schwarzenegger and Betty Weider, and (a couple miles into the canyons) the sight of Upper Zuma Canyon Waterfall splashing (or trickling) down a cleave in the hillside. Not too long after you spot the falls, you’ll cross a relatively new bridge spanning Zuma Creek, a great place to stock up on water (if it’s running) during this lengthy spigot-less segment.
A descent and a climb bring you to another nice trailhead roughly a mile past the bridge, with a large parking lot, pit toilets, and shaded seating. This one is at busy Kanan Dume Road, another great pick-up spot because of its north-south access. Instead of playing Frogger here, you ascend a rough road to cross on top of a tunnel. Once on the other side, it feels like you’ve crossed into Narnia, the shady, tree-filled landscape a world away from the sunny, chaparral-clad slopes you just experienced.
A stout climb brings you to Latigo Canyon Road, which sets you up for more up and down, including a descent into Upper Solstice Canyon, which was filled with highly eroded trail and roughly a million little creeks when we passed through after the storms; the trail here was bad enough that a cyclist we’d met decided not to ride it and instead huffed his bike back up the hill.
Happier times await, especially once you enter Malibu Creek State Park, reaching the broad Corral Canyon saddle, where wild and wonderful rock formations guard the entrance to the unpaved Mesa Peak Motorway. It’s fun (especially for weary feet) to walk the slick rock here, but even when you’ve passed that section and encounter a series of stubborn little uphills, the views into the State Park and lands beyond serve as a real mood booster.
Eventually, what goes up must go very, very far down, all the way to what I’ve heard referred to as both the Piuma Trailhead and the Tapia Trailhead. There’s a bathroom and (paid) parking here, and more facilities in nearby Tapia Park (you can get water at the bathrooms). You’ll walk through these via the Tapia Spur Trail if taking a detour to camp at Malibu Creek State Park. (We thumbed a ride from a cyclist who’d just finished his ride, but hiked the side trail back to the Backbone in the morning).
The author hiking near Temescal Peak after Hub Junction on Day 3.
Day 3
If you’ve glanced at your map or an elevation profile, you know what’s coming next—probably the second-largest climb of the entire trail. First, you have to make your way under Malibu Canyon Road, along the creek bed, and then up to Piuma Road for a short road walk before striking back out on a single-track trail to your right not long after; there may be water here if it’s been raining. You’ll pass through the California Wildlife Center facilities (look for the trail’s continuation on your left), then begin making your way along shady hillsides that stay shady for much of the morning—a miracle of miracles!
Yes, it’s climbing, but the route keeps things interesting with great views, a little hanging valley of sorts, and then some striking rock formations as you near Saddle Peak (which is a short detour from the trail). If it’s a day of the week ending in “y,” you’ll probably spot some climbers near here—just make sure you turn left along the obvious rock wall to stay on the Backbone unless you’re planning to join them.
Not long after you pass Saddle Peak, the trail spits you out at a large tank, then down to the Lois Ewen Scenic Lookout at Stunt Road, with excellent views over Simi Valley and peaks beyond. Continue past the signage here to eventually pick up singletrack through another shady section, then steady your knees for a long descent into Hondo Canyon, which may have some flowing water near the bottom. Cross the creek (if it’s there), then pop up to Old Topanga Canyon Road. Making a right here and walking for about a half-mile takes you into Topanga Canyon, where you’ll find restaurants and a general store with groceries and other sundries.
Bust out your GPS after this—the connector segment between “old” and “new” Topanga Canyon Boulevard is a bit of a mish-mash of confusing trails. After this, however, you enter Topanga State Park, where things begin to feel a lot more straightforward—and where you’ll have several opportunities to grab water over the next few miles. The first chance is at the Dead Horse Trailhead (which also features bathrooms with flushing toilets), then at Trippet Ranch, and finally at Musch Camp (more bathrooms!), a hike-in campground located roughly 10 miles from the eastern terminus at Will Rogers. For better or worse, the end is nigh!
The landscape here is rolling and incredibly lush in the wet season. As seems to happen on the Backbone quite a lot, you’ll wonder if you once again stepped through that magical wardrobe. Make your way up to Eagle Junction, then lead left on a fire road with Eagle Rock in sight—yes, it’s that impressively large rocky outcropping; no, it doesn’t look anything like an eagle, at least to these eyes. You can pop off the Backbone to wander up its sloped backside for a grand view just ahead.
The fire road takes you to Hub Junction, which features some interpretive signage, a shaded seating area, and a pit toilet pitched at a precarious angle. Curve around beneath Temescal Peak, then pick up the singletrack on your left that crosses the head of Temescal Canyon en route to the homestretch, a series of somewhat interminable ridgelines with just enough short bursts of uphill to inspire frustration. You’ll know you’re almost there when you descend past a short, railing-lined segment to reach Chicken Ridge Bridge, a scenic spot for a photo break unless you don’t like the feeling of gentle swaying when you’re straddling a gorge.
With about a mile to go, you’ll enter Will Rogers State Park and intersect its Inspiration Point Loop Trail; the viewpoint itself is just a short distance off the trail. The vista is incredible during the day, but has a certain charm at night when it feels like all of Los Angeles is twinkling below. Soak it in, then finish your final mile at a rather nondescript kiosk marked with “Backbone Trail” before walking a short bit down to the parking lot (and bathrooms—with running water!) below. Congratulations—you’ve just thru-hiked the Backbone Trail!
If you’d like more route detail, I’ve shared my Backbone Trail GPS tracks, elevation profiles, and rough data book from the trip here as a service to other hikers. Please note that mileages in the databook may be off slightly here and there, since they’re based on map data rather than GPS data.
Maps and Guidebooks
Gaia
We used the Gaia GPS app on our phones to occasionally double-check our location. Using Gaia is especially helpful because the Tom Harrison map, while wonderful, is somewhat difficult to read in certain sections.
Maps
Tom Harrison’s Backbone Trail map covers the trail’s entirety. It was certainly not just helpful for navigation but also for piquing our interest to check out other areas nearby. My only gripe is that the trail isn’t highlighted or marked in a distinctive, cohesive way across the map sections, which means that you have to keep re-locating it among the many dashes and squiggles each time you pull out the map.
Guidebooks
While I didn’t use any particular books to prepare for our trip, since I’d already hiked most of the trail in segments and was fairly familiar with the areas we’d pass through, several trail-specific guidebooks do exist. The newest are Doug and Caroline Chamberlain’s The Complete Hiker’s Guide To The Backbone Trail (Amazon | Bookshop.org) and Sam Ward’s Plan & Go: Trans-Catalina & Backbone Trails (Amazon | Barnes & Noble), both from 2017.
Robert Stone’s slightly older Day Hikes in the Santa Monica Mountains: From Los Angeles to Point Mugu, Including the Entire Backbone Trail (Amazon | Bookshop.org) also details, well, the whole trail.

The view from Will Rogers State Park, where you should have cell reception and can arrange for a ride share service to pick you up.
Getting There
By Plane
The nearest major airport is Los Angeles International (LAX), roughly 15 miles south of Will Rogers State Park. There are many car rental options from there.
By Car
Both ends of the trail (and points in between) are easily accessed by car. Coming from LAX, Los Angeles, or points south and east, you’ll connect with the northbound Pacific Coast Highway (State Route 1 / PCH), with easy access to both Will Rogers and the Ray Miller Trailhead. The PCH runs the length of the west coast, making it a convenient access point for folks coming from Ventura, Santa Barbara, and other points north. If coming from further inland, including the Antelope Valley, San Fernando Valley, and San Gabriel Valley, you’ll take U.S. Highway 101 to reach a number of north-south roads and highways that will bring you to the PCH and either trailhead.
Bus and Shuttle Services
Metro’s 602 bus line runs through Brentwood and Pacific Palisades, with two stops just south of Will Rogers. The first, at Sunset and Evans, allows you to link up with the Sunset Trail, which climbs toward the park’s Polo Field and main parking lot. The other, at Sunset and Will Rogers State Park Road, makes for a longer walk up the winding pavement to reach the same spot. Unfortunately, there are no public transportation options to reach the western terminus at the Ray Miller Trailhead and no trail shuttle services in the area (unless you count ride-sharing apps).
Post-Trip Favorite Restaurant
Because we ended at Will Rogers in the dark, after a rowdy 27-mile day, with a long drive ahead, our priority was to simply chug as much cold liquid and scarf as much hot food as we could find within the shortest radius of my car. We ended up at an upscale grocery in nearby Pacific Palisades, where I spent an eye-watering amount on a slice of gluten-free pizza, some caramelized sweet potatoes, and life-affirming sparkling water. If I hadn’t been so exhausted (and if it hadn’t been so late), I would have driven a couple of miles southeast into Santa Monica to annihilate a plate of steaming enchiladas at El Cholo. If we’d finished at Ray Miller, I wouldn’t have even tried to resist the lure (pun intended) of fried seafood waiting just down Pacific Coast Highway at Neptune’s Net.
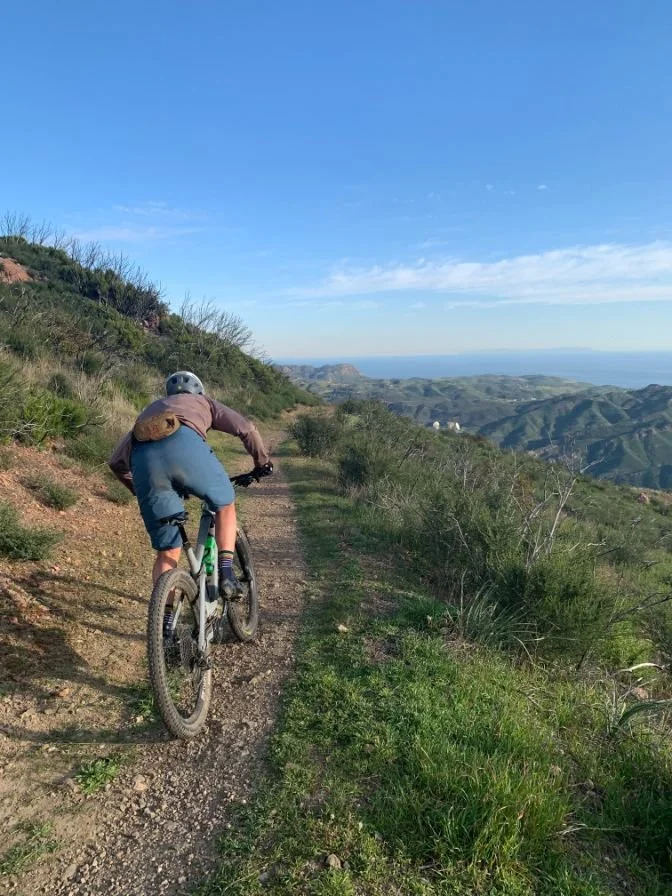
43 miles of the Backbone Trail is open to bicycles.
Regulations
It’s always best to practice a good relationship with the land and follow Leave No Trace Ethics
Dispersed camping is not allowed; you can only camp in designated campgrounds
Fires are only allowed in established campground pits
Leashed dogs are allowed on portions of the trail administered by the National Park Service, but they are not allowed on trails in California State Parks
Roughly 43 miles of the route is open to bicycles; they are not allowed on some portions, however, including in the Boney Mountain State Wilderness
Resupply
Because of its relatively short length as far as thru-hiking is concerned, coordinating resupply is not a factor for most people who backpack the Backbone Trail. That said, the easiest access to town goodies comes when the trail nears the small community of Topanga Canyon. Depart the trail around mile 54 at Old Topanga Canyon Boulevard and head southeast for just under a half-mile. There, you’ll reach the main drag, (New) Topanga Canyon Boulevard (State Route 27), where you’ll find restaurants, boutiques, and the grocery-filled Topanga Creek General Store. Be cautious walking near SR 27, as traffic moves incredibly fast through this area.
Though the trail is routed in a way to trick you into thinking you’re in a remote, wilderness, you are never far from the built environment while on the Backbone Trail.
Camping
While we met several backpackers who opted to engage in a little stealth camping regardless of the regulations (and despite the limitations of a rarely-flat landscape), dispersed camping is currently not allowed anywhere in the Santa Monica Mountains. Here lies a major crux of attempting a thru-hike on the Backbone Trail.
Unless you’re an ultrarunner powering through in one hefty push, your options are limited to the following: a pair of backcountry walk-in camps located fairly close to the western and eastern trailheads, an expensive group site at Danielson Ranch (located 8 miles into the trail from the Ray Miller Trailhead), and a smattering of somewhat pricey State Park campgrounds. None of the State Park campgrounds are located adjacent to the trail and they should be reserved ahead of time to ensure you have a site if you wish to camp at any of them.
The nearest State Park campground, at Malibu Creek State Park, is about 1.6 miles off the Backbone via the Tapia Spur Trail. (Pro tip: a connector trail spits you out right at site #3.) Reaching other campgrounds requires a vehicle. You can do this via a pre-planned pickup (which is how we stayed at Point Mugu’s Sycamore Canyon Campground for our first night on trail), a ride-share service (which will depend on the availability of cell service), or thumbing it (which we did on our second night to avoid that extra off-trail mileage to Malibu Creek).

During a month or two in the spring of wet years, you may find a fair amount of running water. Our writer has hiked this trail several times and Winter 2023 was the first time she’s seen water here.
Water Planning
Herein likes the other crux of thru-hiking the Backbone Trail. While we were fortunate to hike after a series of historic rain storms that sent water coursing through what seemed like every tiny tributary in the Santa Monica Mountains, natural sources are typically nonexistent. Plan to carry several liters at a time, depending on the weather and your hydration habits.
If you’re hiking in a wet year or shortly after significant precipitation, you’re most likely to find at least a trickle in the following locations: Blue Canyon (located just past Danielson Ranch), Trancas Canyon (appx. mile 26), Zuma Canyon (accessed below the bridge near mile 30), Cold Creek (near the Piuma Road trailhead around mile 42), Dark Canyon (just before beginning the switchbacks en route to Saddle Peak around mile 44), and near the bottom of Hondo Canyon (roughly mile 53, then again less than a half-mile ahead before you cross Old Topanga Road).
With that said, don’t plan for water to be present in any of those waterways if it hasn’t been raining. Dependable on-trail water sources are located at the following locations: a roadside spigot in Big Sycamore Canyon (around eastbound mile 6), Danielson Ranch (mile 8), at the fire station located at the intersection of Encinal Canyon Road and Rattlesnake Road, about a tenth of a mile west of the Encinal Canyon Road Trailhead (mile 26), at the bathrooms in Tapia Park Day Use Area (a bit off-trail, near mile 42), Dead Horse Trailhead at Topanga State Park (mile 54.2), Trippet Ranch (mile 55.5), and Musch Camp (approaching mile 57).
Wildlife and Food Storage
Bears are long gone from the Santa Monica Mountains, but that doesn’t mean a frisky squirrel or trash panda won’t try to make off with your snacks. While there are no specific food storage regulations along the Backbone Trail, keeping food close at hand is still a smart idea. Unlike many thru-hikes, there are plenty of opportunities to toss your wrappers and other food waste in garbage receptacles, especially after you leave the Boney Mountain State Wilderness and head east into more populated communities and parklands.
While there are mountain lions in the Santa Monica mountains, you are unlikely to encounter one. Read Wildlife Safety Tips and familiarize yourself with what to do if you see a mountain lion. The entities that manage the Backbone Trail have put together this flier about mountain lions.

The summit of Sandstone Peak (3,114 feet) is the highest point in the Santa Monica mountains and a side-trip well worth taking.
Side Trips
Tri-Peaks:
Named for the three prominent bumps on its rugged ridgeline, this formation comes into view as you close in on the approach to Sandstone Peak. You’ll get incredible views at the latter, but if you want to expand your horizons and don’t mind some light scrambling (and a roughly 1.2-mile diversion), pick up the marked Tri Peaks Trail on your left around eastbound mile 13.
Sandstone Peak:
Listen, you pass right beneath it—you gotta go up there. Obvious spur trails will begin to appear around eastbound mile 14; it’s a short, choose-your-own light scramble from here. On top, a monument tells you that you’re at Mt. Allen, the peak's unofficial name (despite the official plaque), given by local Boy Scouts to honor the late Herbert Allen, whose donations supported Scout camps in the area.
Upper Zuma Falls:
If you’re hiking during a wet spell, you’ll be able to see this waterfall from the Backbone. If you want to get closer, keep your eyes peeled for an unsigned side trail less than a half-mile past the junction with the Zuma Ridge Motorway that will take you there.
Saddle Peak:
You’ll pass very close to Saddle Peak after moving through the fantastic rock formations along its shoulder. An obvious spur trail on your right heads up to the summit, less than 0.2 miles from the Backbone.
Eagle Rock:
Pick up a signed side trail that quickly leads to an easy walk-up of the broad backside of this sandstone outcropping, perhaps Topanga State Park’s most famous feature (and its best views).
Temescal Peak:
Here’s another one that you walk right under! If you’re in peak bagging mode, look for a spur trail on your left about 0.1 miles in once the Backbone becomes a singletrack after departing the Temescal Ridge fire road.
Gear Rentals
While there are REI stores in Santa Monica (located approximately 4 miles southeast of Will Rogers State Park) and in Woodland Hills (about 9 miles north of Topanga Canyon), neither offers backpacking gear rentals.

The author with her Six Moon Designs Swift V on the Backbone Trail with Saddle Peak in the background.
Gear List
TENT:
All of the elevation gain on this trail meant that I wanted to keep my pack as light as possible, so I carried Gossamer Gear’s “The One,” which was plenty easy to stake down in that cush campground soil. See our Best Backpacking Tents guide for more recommendations.
BACKPACK:
While I probably could have gotten away with a smaller pack, considering my light kit and the fact that we never carried more than 3 liters of water at a time, I’m a huge fan of the comfortable fit (and many, many Flight Vest harness pockets) of the Six Moon Designs Swift V. See our Best Backpacking Backpacks guide for more recommendations.
SLEEPING BAG:
While temps never plummeted much below 40 at night, I’m a cold (and fussy) sleeper, so I brought along my beloved Enlightened Equipment Enigma 10-degree quilt. See our Best Sleeping Bags story for more recommendations.
SLEEPING PAD:
Figuring three days was a low-stakes way to test out a new piece of gear, this was my Therm-A-Rest NeoAir XLite’s maiden voyage, and it passed the comfort, warmth, and packability tests with flying colors! See our Best Backpacking Sleeping Pads story for more recommendations.
TREKKING POLES:
All that elevation gain and loss (and the fact that I needed them to pitch my tent) meant that I freaked out when I realized I’d left my workhorse Black Diamond Trail trekking poles in my car. Thankfully, my hiking buddy’s partner was still at camp with us, and I borrowed their car to retrieve them—crisis averted! For more recommendations, see our Best Trekking poles story.

Aside from water capacity, the Backbone Trail is not a route that requires carrying a bunch of gear in typical weather.
COOKING SYSTEM:
To save weight, I considered going stoveless…but the promise of hot coffee on chilly mornings meant that my lightweight and compact Soto WindMaster made the cut. See our Best Backpacking Stoves story for more recommendations.
COOKING POT:
As with the sleeping pad, this was the first time on the trail for my new TOAKS Titanium 750ml pot, the perfect little lightweight vessel for cradling that crucial morning coffee and boiling water for dehydrated meals at night. See our Best Cooking Pot section for our recommendations.
WATER PURIFIER:
I usually wouldn’t carry a purifier on this route since there’s usually little running water, and it’s okay to drink from the spigots along the way. However, our wet winter gave me a reason to tote (and use) my itty bitty Sawyer Micro Squeeze. Check out our guide to the Best Water Filters and Purifiers for Backpacking.
HEADLAMP:
Doing big mileage days in winter meant that we would be hiking in darkness a few times. I carried my trusty Black Diamond Astro, which kept things well-lit. See our recommendations in our Best Headlamps story.

Mornings and evenings can be cool on the Backbone Trail, especially with a breeze off the ocean. Be sure to pack layers.
CLOTHING
SHOES OR BOOTS:
Ah, the eternal question! I am a huge fan of wearing trail runners for backpacking trips since I feel more agile (and less sweaty) in them; so, I wore an old pair of Hoka Speedgoat 2’s. I love the cushion and soft materials used in the older Speedgoat models, so I keep an eye out for them on sites like eBay and Poshmark. However, one thing I wished for after our first 26-mile day was a touch more room for my swollen feet; next time, I’ll search for a half-size up.
RAIN JACKET:
With this winter being a very unusual and extreme exception, SoCal doesn’t usually see much rain, even in the cooler months. Since this was a shorter trip, I looked at the forecast and decided not to carry a jacket—but if we’d been caught in the rain, I would have wanted my Montbell Versalite for its light weight and packability. For more recommendations, see our Best Rain Jackets article.
DOWN OR SYNTHETIC JACKET:
As I mentioned, I run cold. While most people (who don’t live here) think of SoCal as sunny and warm, I learned quickly after moving here that temps plummet once the sun goes down. I was thrilled to have my cozy, super lightweight, and compressible Montbell Superior Down Parka to cuddle up in at night.
See our recommendations in our Best Synthetic Jackets article. Check out our Best Down Jackets guide if you prefer down for its better warmth-to-weight ratio.
SUN SHIRT:
Ok, so that stuff about how it’s not always sunny and warm here? Well…it’s often sunny and warm here, especially when hiking through shadeless chaparral-covered hillsides as you are on much of the Backbone. I am a mega-fan of Ridge Merino’s Solstice hoodies (men's and women's), which offer lightweight but relatively full (and stink-free) coverage, and I wore mine throughout nearly all 60 hours of this trip. See our Best Sunshirts guide for more recommendations.
WIND SHIRT:
Since I left my rain jacket at home, I carried my so-small-and-light-you-don’t-know-it’s-there Montbell Tachyon wind shirt, which proved invaluable while hiking during the early morning and late afternoon chill, and when the wind picked up as we navigated across gusty ridgelines. See our Best Men's Windbreaker jackets guide or Best Women's Running Jackets guide for more recommendations.
HIKING PANTS:
I am a through-and-through shorts hiker, but I fell in love with Mammut’s Runbold Pants a few years back, and they’ve become a layering staple on all of my backpacking trips. I warm up quickly when hiking, but I love starting and ending the day with these lightweight, quick-drying pants over my shorts; the leg holes are just big enough to slide them off over my shoes. See our guides to the Best Women's Hiking Pants and Best Men's Hiking Pants for more recommendations.
SHORTS:
Like I said—I’m a shorts person. I swear by Patagonia’s Nine Trails shorts (men's and women's) for backpacking, since they’re breezy (I wear the ones with a 4” inseam), feature a flat and comfy waistband that sits well under packs, and because it’s relatively easy to wash out the lightweight liner each night. For more recommendations, see our Best Men's Trail Running Shorts guide, Best Women's Trail Running Shorts guide, Best Men's Hiking Shorts guide, or Best Thru-hiking Shorts guide.
BASELAYER:
As a creature of habit, I am rarely found without mid-weight Smartwool merino base layers (men's and women's) in my pack for overnight trips—they’re lightweight, they’re warm, and they’re cozy. For more recommendations, see our Best Baselayers guide.
UNDERWEAR:
I generally only carry underwear for sleeping since I hike in shorts with a built-in liner, but I do love GoLite’s ReActive undies, which are made from recycled bottles—although sadly, they don’t seem to manufacture them (or any of the fantastic ReActive line) anymore.
SOCKS:
I’ve been a toe sock enthusiast for at least a decade—my piggies prefer to be separated from one another, which seems to cut down on hot spots and blisters. That said, my feet swelled more than they usually do thanks to the huge mileage days, so I should have also carried a pair of toe-free moisture-wicking socks like those made by Darn Tough (men's and women's) to swap out when my toes got puffy. Check our Best Hiking Socks guide for more recommendations.
WARM HAT:
Again, do not let the “Sunny SoCal” thing lead you astray—it gets cold here at night, especially when you’re traipsing around right next to the Pacific Ocean. I was very happy to have my REI wool beanie on hand for cool mornings and evenings.
SUN HAT:
I love using a trucker hat (my current rotation is one from Trail Sisters, an organization that creates community and provides support for women interested in trail running)—they’re lightweight and breathable. When used in combo with a hooded sun shirt, they keep just about all of my delicate areas protected. Check out our Best Sun Hats guide for more recommendations.
GLOVES OR MITTENS:
My favorite backpacking gloves for 3-season conditions are a pair of Icebreaker merino glove liners that are meant to go under larger snow mitts, and these were plenty warm enough for this trip. See our Best Winter Gloves guide for more recommendations on lightweight but warm gloves.
Miscellaneous Gear Items
Map and Compass
First Aid Kit—including extra blister supplies due to the rough terrain and long miles
Sun Protection—sunblock, sun gloves, chapstick, and sunglasses
Small Pocket Knife and Gear Repair Kit (duct tape, light cord, patch kit)
Sit Pad
Portable Battery
Earplugs—especially helpful as the campgrounds were quite loud in the evening


