How to Repair a Tent
Fix Rips, Leaks, and Broken Poles to Prolong the Life of Your Tent
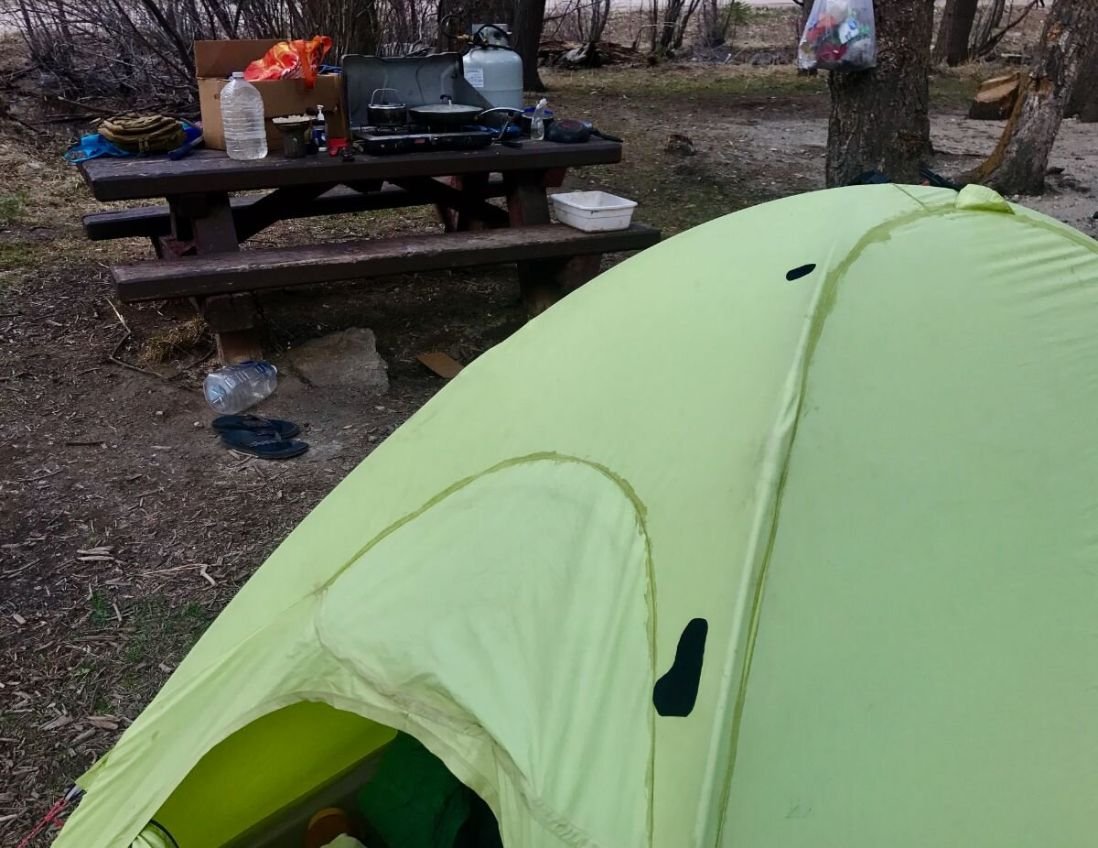
Patched tent in camp. Photo by Brandon Lampley
Your tent is your backcountry or campground home, and like any home, it’ll require some maintenance and upkeep at times. Tent repairs, whether done in the field or at home in between trips, should be only minor setbacks and most issues can be fixed in a pinch.
Tents, like most other major pieces of outdoor gear, are meant to last through several seasons of use chock full of use—in some cases, decades. Regular maintenance and repair will do more than just keep your tent in your gear quiver longer; it’ll lighten the load on your wallet and put less strain on the environment since you’ll be buying new gear less often.
When it comes to tents, it’s ideal to opt for home maintenance in order to avoid in-field repairs as much as possible. At the beginning of your backpacking or camping season, take your tent out and examine it for any holes or tears. Set up the fly and pour water over it or gently hose it down to test for leaks if can. If you catch any tears or leaks, you can repair them at home before heading out on your first trip and avoid that unfortunate scenario out in the backcountry.
With the tips in this guide on tent maintenance and repair, you’ll be prepared for the season and able to make your backcountry dwelling last as long as possible.
Related: The Best Backpacking Tents and The Best 4-Season Tents and The Best Camping Tents
Read More: How to Fix a Zipper on Outdoor Gear

How to Fix a Leak in your Tent
Check for Leaks Before You Leave
Discovering a leak in your tent while out on a rainy trip is never fun. While some leaks can be repaired in the field, major issues with the tent's seams or waterproofing will need to be dealt with back at home. So before you head out, inspect your tent for problems like a leaking seam, weak seam, or issues with the rain fly. If you catch these issues before heading out, you can avoid major leaks in the field.
When inspecting your tent, scan over all the seams on both the tent body and the rain fly to ensure that the seam tape is not worn or peeling in any areas. Spray a bit of water on the rainfly and check that the water beads up and drips off the tent, rather than soaking into the fly’s fabric. If you discover any of these issues, you can fix them at home before a trip.
Reapply Seam Sealant
If you discover weak seams in your tent, either on the tent body or fly, you can reapply seam sealant to prevent leaks. A waterproof seam sealer like Seam Grip from Gear Aid works well. Always clean the seam and the area you’re resealing (a wipedown with rubbing alcohol is best), and let the tent dry completely dry before beginning.
Allow the Tent to Air Dry
As you’re preparing, have your tent set up for easy access to the seams; if you’re re-sealing a seam on the inside of the rainfly, set it up inside-out on the tent for easier access. Remove any seam tape that may be peeling off before applying a new coat of seam sealer. Apply the seam sealer to each seam that needs it. Allow the sealer to dry completely before taking down and packing your tent. If you can give the tent a few extra hours to let the sealer cure after drying, even better.

Waterproofing on a tent can easily be replenished with spray-on DWR. Photo by Stasia Stockwell.
How to Repair Waterproofing on a Tent
Set up Your Tent
If the waterproofing on your tent is failing, re-applying Durable Water Repellent (aka DWR) to the fly and the tent fabric can help you stay dry. Use a spray like Nikwax Tent and Gear SolarProof before heading out on your next trip to refresh the waterproofness of your tent.

Two easy spray on wash and treatments for tents. Photo by Stasia Stockwell.
Apply DWR
Following the instructions on the bottle, set up your tent and get it wet before applying the solution. Spray the solution over the tent body and fly, wiping off any excess solution after letting it sit for a couple of minutes. Note that it may take more spray solution to treat a heavier fabric tent like a canvas tent compared to a more lightweight tent fabric found on a nylon tent.
Let the Tent Air Dry
Let your tent dry completely before repacking. (Note: Never put your tent in a dryer. Unlike GORE-TEX jackets and other apparel, drying a tent can ruin or tear it. Always let your tent air dry.)
How to do Tent Repair in the Field
Use Gear Tape
If you discover a leak in your tent while in the field, it may be tougher to repair. Small holes and easy-to-spot seam leaks may be temporarily reparable with a piece of gear tape (or duct tape in a pinch) on the outside of the tent, though it is better to do these repairs in a clean and dry environment to ensure they last.
Repair Again at Home
If you do have to make a repair in the field, be sure to check your work when you’re back home. Carefully remove duct tape. You can redo the patch or repair in a clean and dry environment at home if necessary in order to avoid more in-field fixes.
We discuss repair tape and patches in our Eco-Friendly Gear Swaps to Reduce your Footprint guide. We think they're an essential part of a field repair kit
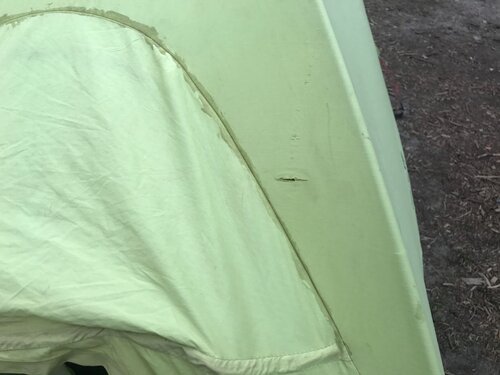
BEFORE: Tear in tent fabric. Photo by Brandon Lampley.
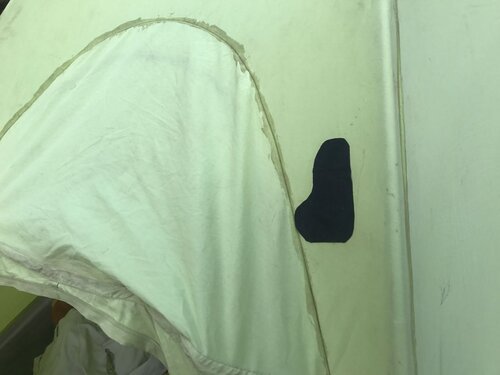
AFTER: The same tear with a cut-to-size patch. Photo by Brandon Lampley
How to Repair a Tear in your Tent
Rips and snags in your tent’s rain fly or body can happen, especially if you transport your tent with other gear in the trunk of your car or on the outside of a backpack. Inspecting your tent before a trip will help you catch these so you can make repairs at home instead of outside.
Before You Leave
If you find a tear in the rain fly or the tub or floor of your tent before heading outside, you’ll want to use a piece of gear tape to patch it up. Clean the area by wiping down with a bit of rubbing alcohol before applying the gear tape. Cut a piece of gear tape to the appropriate size. Align the fabric along with the tear on the outside of the tent and adhere to the tape. For best results, give the adhesive adequate time to cure-leave the tent standing for 24 hours if you can before taking down and repacking the tent. Some patches come with super glue and suggest using glue as an extra adhesive to keep it in place.
While at Camp
If you do discover a new tear in your tent body or tent fly while at camp, there are some things you can do to fix it. Follow the same steps, using a rag, clean bandana, or whatever is handy in your pack to clean the area as best as possible before applying the gear tape to the outside of the tent. Giving the adhesive time to cure at camp before packing your tent away will yield the best results.
Note that using gear tape works best when your tent is clean and dry. If you have to patch a wet tent in a pinch, know that the tape may not stick as well and the repair will not last as long. The same is true for a dirty tent. But gear patches are an easy way to problem-solve in the field.
Mesh Repairs
If you have a tear in the mesh of your tent, use a mesh patch instead of gear tape to cover the hole. This is an easy fix that can be done in or out of the field on small mesh tears, as long as the mesh is dry before you apply the patch. Even if the hole in your mesh isn’t big enough to let bugs in, patching tears in the mesh is important because they can easily turn into bigger tears.
How to fix a broken tent pole
A broken pole is a major nuisance in the field, second only to forgetting your tent pole entirely. (Hey, it happens to the best of us.) Whether it’s high winds or a simple accident, repairing a tent pole in the field is a manageable task as long as you have the right tools.
Use Manufacturer Parts
The best option for tent pole repair is to use one of the spare parts specifically made for that tent. When you get a new tent, it usually comes with a repair kit that includes items for pole repair, specifically a spare joint (also called a splint). In the field, there's no need to carry a full replacement pole for your backpacking tent as long as you have a splint.
Use a Tent Repair Kit
If you purchased your tent used or it didn't come with a tent repair kit, you can buy a pre-made tent repair kit to have on hand. A good tent repair kit should include the correctly sized tent pole splint, a glue or seam grip like adhesive, a tent seam ripper, needle and thread, patches, and cleaners. Some even come with a zipper repair kit (we cover how to use these in our How to Repair Zippers guide).
Slide the splint over the broken area of the pole and secure it by wrapping a few layers of duct tape around it. If you don't have a splint for pole repair, a tent stake or other piece of metal (or plastic) that you have on hand can work as a splint in a pinch. If the tent pole has a shock cord, thread it through the repaired pole.
Buy a Replacement Pole
When you get home, you may consider purchasing a replacement tent pole from the tent manufacturer.
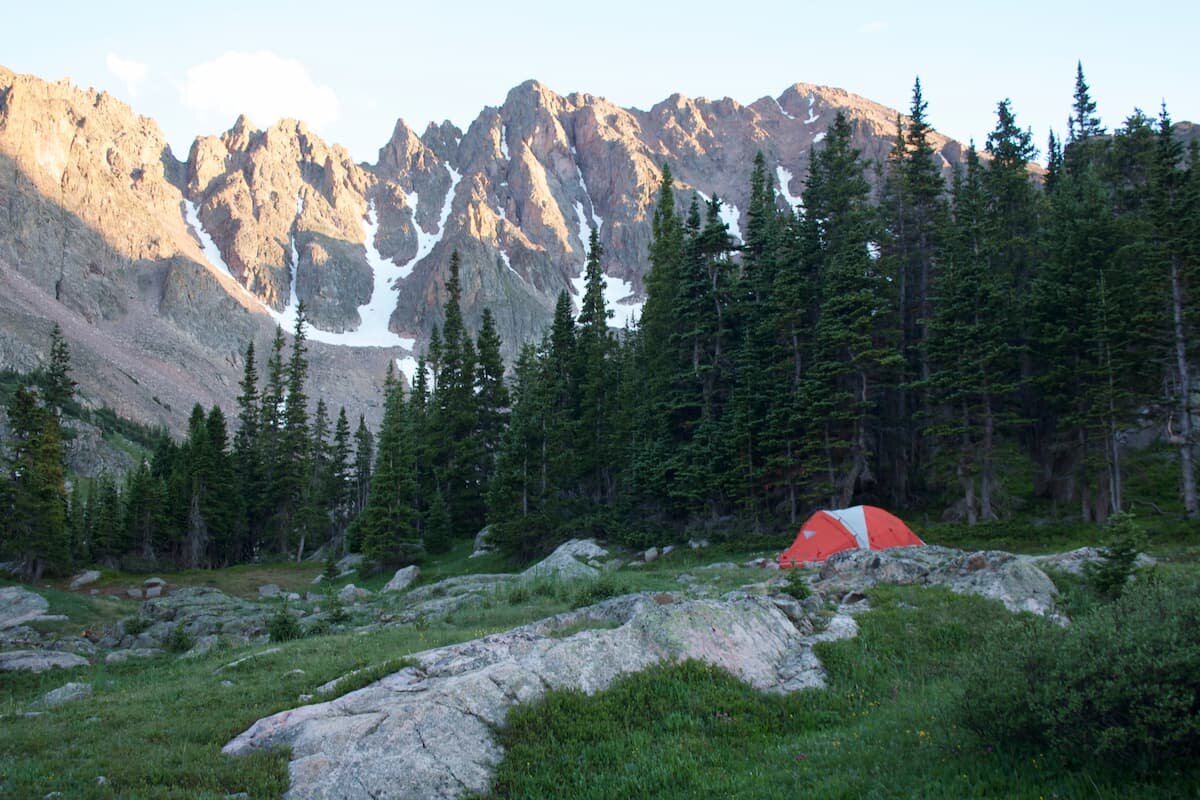
Take good care of your tent so that it can last many years of taking you to the places you love. Photo by Stasia Stockwell.
How to Care for a Tent to Keep it in Good Shape
Taking care of your tent in and out of the field can help you avoid issues at camp, helping your tent last as long as possible.
Inspect Before You Leave
It’s always a good idea to give your tent and other gear a check before heading out. This way, you can take care of any of these types of repairs before you’re out in the elements.
Choose Your Tent Site Carefully
There are also a few things you can do when you’re at camp to help keep your tent in good shape. Survey your tent site before setting up. Look for protruding rocks and sticks that could cause holes or tears and move them out of the way.
Use a Tent Footprint
For extra protection in rocky or rough areas, using a tent footprint beneath the body of the tent can stop additional wear on the tent floor. To avoid an accidental leak test, examine the terrain directly surrounding your tent site to ensure you won’t be setting up in an area where rainwater might puddle up should a storm roll in.
Prepare Your Tent for Storage
After every trip, shake dirt and debris out of your tent and hang it to dry completely before storing it. This will prevent mildew and help to keep the waterproofing intact.
Does your tent have a Broken zipper? See our guide to How to Fix a Zipper on Outdoor Gear.
Why You Should Trust Us & About the Author
Stasia Stockwell is a lifelong skier who has spent an average of 50 days skiing each season since she could walk. She has taken classes on all-mountain skiing techniques and has her AIARE Level 1 avalanche safety certification. Her work in the industry spans from testing and reviewing skis for Backpacker Magazine to working on ski videos for Atomic skis.
Stasia has written for Backpacker Magazine, REI Co-op Journal, The Dyrt Magazine, and more. You can find more of her writing, gear reviews, and adventures on her website.


