Best Bikepacking Bikes of 2024
We researched and tested bikepacking bicycles for muddy dirt tracks, fast-rolling gravel roads, and occasional technical singletrack to find the best bikepacking bikes for most people.
Home > Gear Reviews > Bike
February 20, 2024
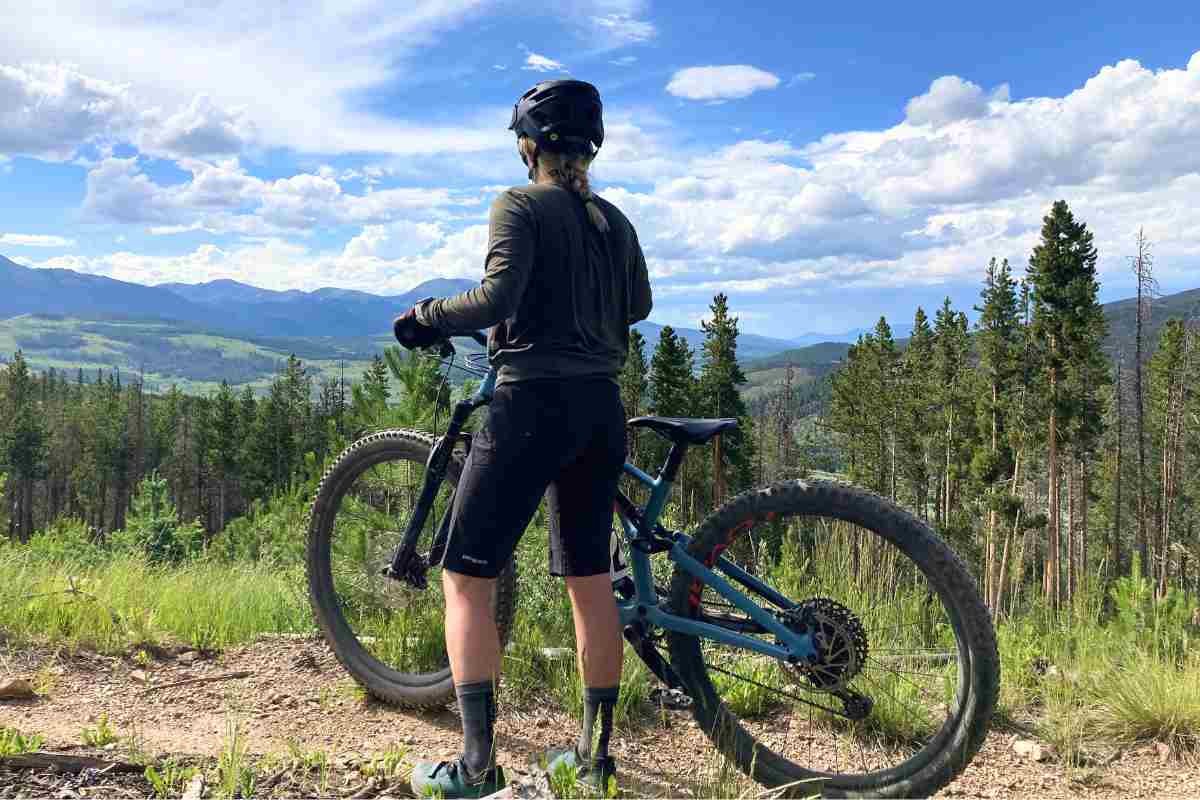
Bikepacking is a hybrid between bike touring and backpacking. Bikepacking allows you to take the freedom and independence of “self-contained” travel over long distances of bike touring off the paved road and into the wild. Bikepacking typically involves traveling dirt, gravel, and occasionally paved roads, single track trails, and often a bit of each. Therefore, most folks should look for a bikepacking bike versatile enough to handle different travel conditions.
We think the Surly Bridge Club is the best bikepacking bike for most. It is rugged, reliable, and excellent on muddy dirt tracks, fast-rolling gravel roads, and the occasional technical singletrack. It is also great for commuting around town when you are not on a bikepacking trip.
The Salsa Fargo Apex 1 is our favorite gravel-specific bike. The Surly Karate Monkey, with its optional suspension fork, is our singletrack bikepacking pick. The Salsa Journeyer Claris 700 is our budget gravel bikepacking pick.
And if you’re looking for a mountain bike that will also work well for bikepacking, we think the Surly Krampus is the best choice.
We create reader-supported, objective gear reviews independently selected by our editors. This story may contain affiliate links, which help fund our website. When you click on the links to purchase gear, we may get a commission, without costing you an extra cent. Thank you for supporting our work and mission of outdoor coverage for every body! Learn more.
Comparison Table
| BIKEPACKING BIKE | TREELINE AWARD | TYPE | MSRP | WEIGHT (lbs) | SIZES | WHEEL SIZE | MAX TIRE SIZE | SUSPENSION | FRAME | WARRANTY |
|---|---|---|---|---|---|---|---|---|---|---|
| Surly Bridge Club | Best overall Read why |
All Terrain | $1,499 | 30 | XS, S, M, L, XL | 27.5" x 2.4" | 27.5" x 2.8” or 26" x 3” | Compatible | Chromoly Steel | 3 year on frame |
| Salsa Fargo Apex 1 | Best gravel bike for bikepacking Read why |
Gravel | $2,599 | 28 | XS, S, M, L, XL | 29" x 2.2” | 29" x 2.4" or 27.5" x 3" | Compatible | Chromoly Steel | 5 year on frame |
| Salsa Journeyer Claris 700 | Best budget gravel bike for bikepacking Read why |
Gravel | $999 | 28 | 50, 52, 54, 55.5, 57, 59.5 | 27.5" x 2.1" | 27.5" x 2.2" | No | Aluminum | 3 year on frame |
| Surly Karate Monkey | Best singletrack Read why |
Singletrack | $1,849 - $2,600 | 25 | XS, S, M, L, XL | 27" x 3" | 29” x 2.5” or 27.5" x 3" | Optional | Chromoly Steel | 3 year on frame |
| Salsa Timberjack XT 27.5 | Best budget singletrack Read why |
Singletrack | $2,499 | 30 | XS, S, M, L, XL | 27.5" x 2.8" | 27.5" x 3" or 29" x 2.6" | Yes | Aluminum | 3 year on frame |
For more of our favorite bicycle recommendations, see our most popular Gear Guide stories:
The Best Bikepacking Bikes
Best Overall Bikepacking Bike: Surly Bridge Club

Type: All terrain
MSRP: $1,499
Weight: 30 lbs
Available Sizes: XS, S, M, L, XL
Wheel Size: 27.5" x 2.4"
Max Tire Size: 27.5" x 2.8” or 26" x 3”
Suspension: Compatible
Frame: Chromoly Steel
Warranty: 3 year on frame
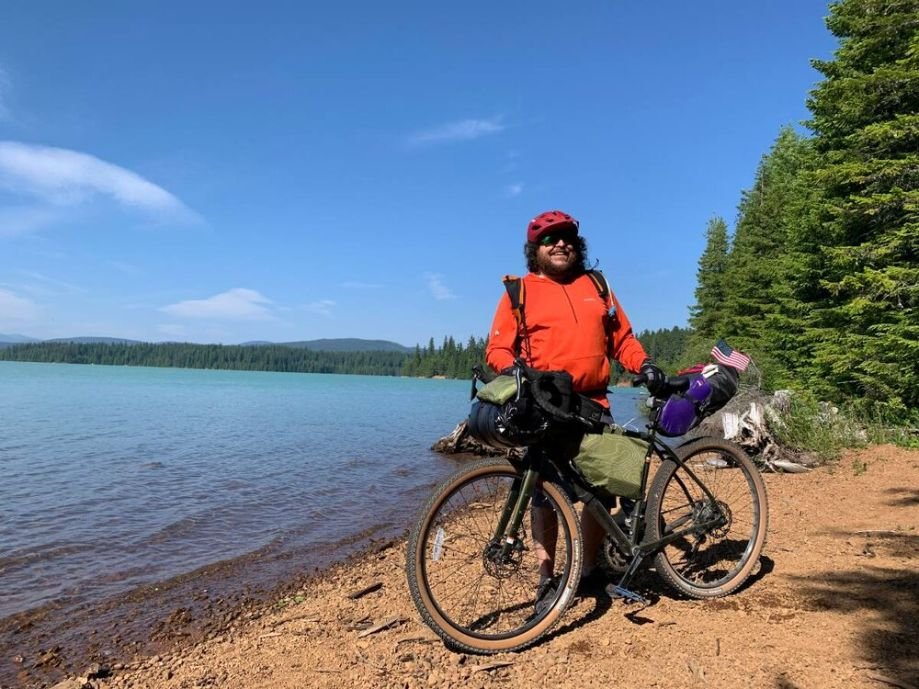
The Surly Bridge Club is a highly versatile all-road rig. It is designed to seamlessly transition between dirt, gravel, or paved city streets. With plenty of attachment points, it can easily be fitted with all the bags, racks, or panniers you need for bikepacking adventures or city commutes.
The Bridge Club has Surly’s rugged Chromoly steel frame and comes with 27.5 x 2.4” tires. It can accommodate up to 27.5 x 2.8” tires. We think the Bridge Club is an excellent affordable option capable of taking on The Great Divide Mountain Bike Route or the Trans-WNC (Western North Carolina) Route, which has a blend of fire roads and rooty east coast singletrack. It comes with decent stock components, including hydraulic disc brakes.
Compare Prices Of The Surly Bridge Club
The Bridge Club's geometry is designed for comfort and stability. The bike offers a more relaxed riding position that can be appreciated on longer rides. Despite this, it doesn't compromise on handling, with a quick and responsive feel that offers plenty of control both on-road and off.

The Surly Bridge Club fully loaded with bikepacking bags. Photo courtesy Graham Hodge.
The Surly Bridge Club also comes in a more pavement-oriented build kit (700c) for $100 less that would be a great city commuter bike with the ability to take on dirt tracks when needed.

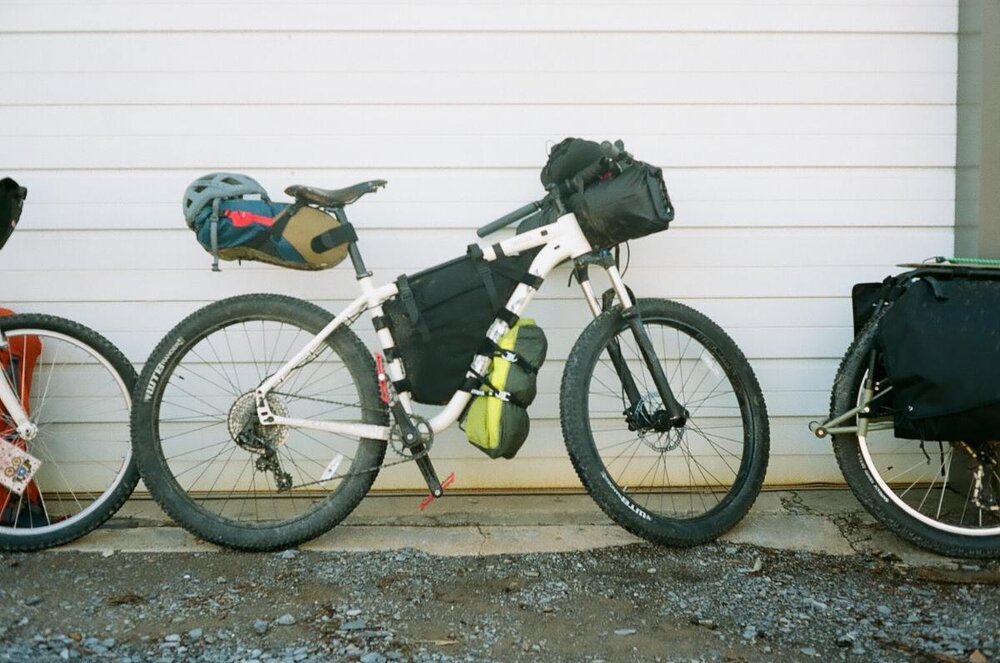
The Surly Bridge Club is a versatile, reliable, and affordable rig that meets budget bikepacking bikes. Photo courtesy Graham Hodge.
We think of the Surly Bridge Club is the 'jack of all trades' of the bicycle world. It excels at being a solid, reliable, and versatile machine, capable of adapting to a variety of situations and terrains. If you value versatility, durability, and the freedom to customize your ride, the Bridge Club is our top choice.
The Best Gravel Bike for Bikepacking:
Salsa Fargo Apex 1

Type: Gravel
MSRP: $2,599
Weight: 28 lbs
Available Sizes: XS, S, M, L, XL
Wheel Size: 29" x 2.2”
Max Tire Size: 29" x 2.4" or 27.5" x 3"
Suspension: Compatible
Frame: Chromoly Steel
Warranty: 5 year on frame
As gravel bike riding becomes more popular, bike brands are dedicating a lot of attention to gravel-specific bike builds. Because of this, gravel bike options can be overwhelming. There are many great options, but we believe the Salsa Fargo Apex 1’s versatility, stock build, and price make it the best choice for folks looking for a gravel-specific bike.
The Salsa Fargo Apex 1 is a burly steel frame gravel bike. The stock build features Salsa Woodchipper drop bars, a 1x11 drivetrain, and 29 x 2.2” tires. The stock build alone is excellent for immediately hitting a trail such as The Great Divide Mountain Bike Route. But if you want more cushion in the tire area, the bike can accommodate up to 3” wide tires in both 27.5” and 29” wheel sizes (the x-small frame size does have some limitations on the 29” plus tire sizes so be sure to check with Salsa when figuring out what tire you can run).
View The Salsa Fargo Apex 1
The Fargo is also a great pick because of its versatility. Compared with other bikes, it has more possibilities to adapt to meet your needs. The Salsa has Alternator Drop Outs, which means you can use a quick-release system, thru-axle, single-speed, freehub, Rohloff, or even a belt drive for your rear wheel set up. The stock fork is also a lightweight but sturdy carbon fork that is peppered with mounting points for racks, bottles, and anything cages. You can also add a suspension fork to the Fargo Apex 1.

The Salsa Fargo Apex 1 is the best bikepacking bike for gravel riding. Photo by Pepper Cook.
If you are looking into a gravel bike for fast rides or long-distance bikepacking trips, the Salsa Fargo Apex 1 is a jack of most trades and is an excellent option.
Related: How to Train for a Century Ride
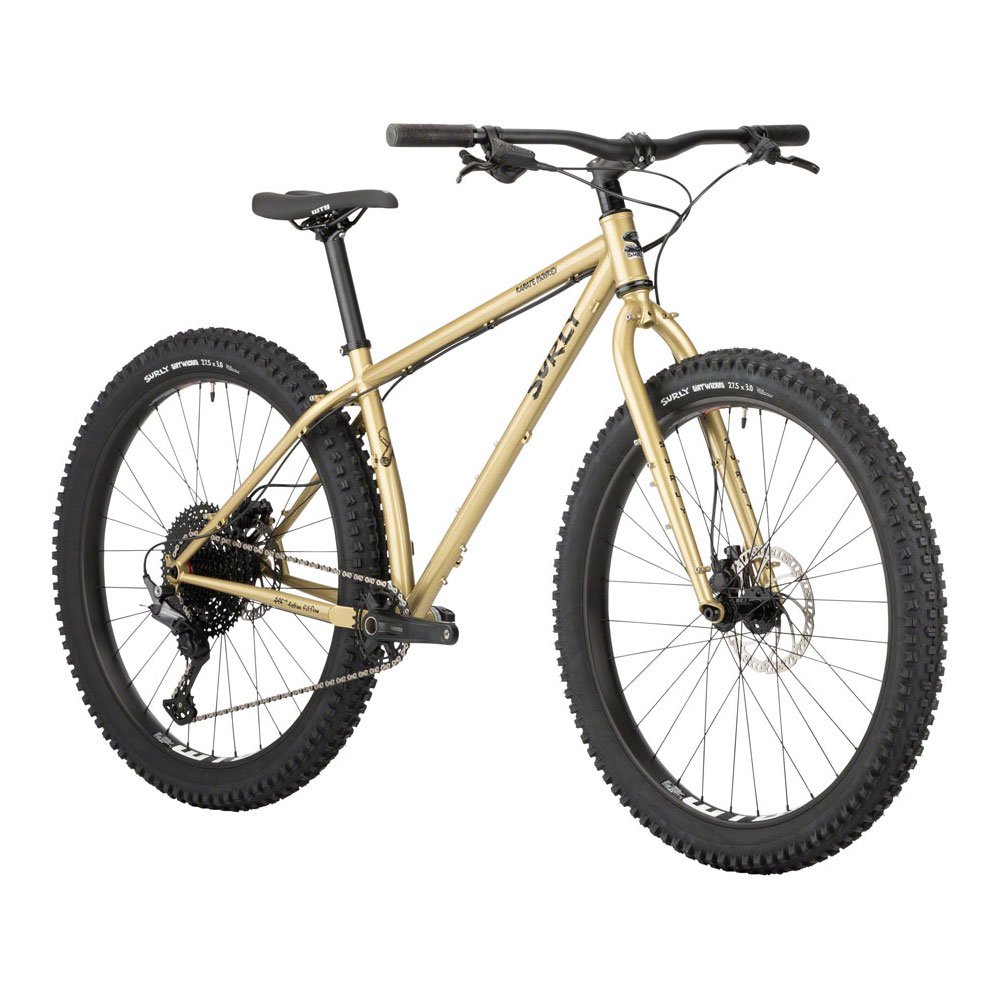
The Best Singletrack Bikepacking Bike:
Surly Karate Monkey
Type: Singletrack
MSRP: $1,849 - $2,600
Weight: 25 lbs
Available Sizes: XS, S, M, L, XL
Wheel Size: 27" x 3"
Max Tire Size: 29” x 2.5” or 27.5" x 3"
Suspension: Optional
Frame: Chromoly Steel
Warranty: 3 year on frame
The Surly Karate Monkey is designed to handle technical mountain biking trails as well as be loaded with all your bikepacking gear. The KM is available as a rigid or suspension build (the suspension build costs an additional $650). It comes with 27.5 x 3” tires but has clearance for 29 x 2.5” tires. The Karate Monkey has Surly’s rugged Chromoly steel frame. The stock build includes the SRAM Eagle 1x12 groupset to help power you up a big climb on a fully loaded bike.
Compare Prices Of The Surly Karate Monkey

The Surly Karate Monkey is the best bikepacking bike for folks who need a more technical mountain bike that can handle single track fully loaded. Photo by Andrew Gage.

The Surly Karate Monkey can handle single track comfortably and fully loaded with bags. Photo by Andrew Gage.
Available as a rigid or suspension bike, the Karate Monkey can tackle a variety of rough terrain. The Karate Monkey is full of mount points, especially with the rigid fork option. Unlike suspension forks that allow the front fork of the bike to move up and down, rigid forks do not move. Because a rigid fork consists of two non-moving metal supports, the manufacturer can add mount points to it without compromising the structural integrity of the fork.
The Surly Karate Monkey will handle most everything you throw at it. It is just a well-rounded hardtail mountain bike that rips on singletrack but is comfortable enough to ride all day. If you want to tackle some rough bikepacking routes, such as the Oregon Timber Trail or the Colorado Trail, we would recommend a bike like the Karate Monkey.
Read More: The Best Mountain Bike Hip Packs
The best Budget Gravel Bikepacking bike:
Salsa Journeyer Claris 700

Type: Gravel
MSRP: $999
Weight: 28 lbs
Available Sizes: 50, 52, 54, 55.5, 57, 59.5
Wheel Size: 27.5" x 2.1"
Max Tire Size: 27.5" x 2.2"
Suspension: No
Frame: Aluminum
Warranty: 3 year on frame
If you like the Salsa Fargo Apex 1, but find the price a bit too high, we recommend considering the Salsa Journeyer Claris 700. For under $1,000, you can get a great gravel bikepacking bike. The Journeyer Claris 650 runs 27.5” tires and has all the attachment points you need to customize your bikepacking setup.
The Journeyer Claris has an aluminum frame, which is lighter, but less durable or flexible, as the CroMoly steel frame of the Fargo Apex (see What Should I Look For In a Bikepacking Bike? for more information on frame options). In addition, the stock components are not as good as the Fargo Apex’s stock set.
Compare Prices Of The Salsa Journeyer Claris 700
The Salsa Journeyer Claris is our choice for a reasonably priced gravel bike. Photo by Graham Hodge.
The Journeyer Claris comes in two types that Salsa describes as: the fast and efficient (700 c) or comfortable (650 b). Many first time bikepackers may appreciate the comfort of the 650, but the 700 is often easier to find.
The Journeyer is a great entry-level gravel bikepacking option. It’s an excellent alternative to the Salsa Fargo and an incredible deal for what you get for the money.
The Best Budget SingleTrack Bikepacking Bike With Suspension:
Salsa Timberjack XT 27.5

Type: Singletrack
MSRP: $2,499
Weight: 30 lbs
Available Sizes: XS, S, M, L, XL
Wheel Size: 27.5" x 2.8"
Max Tire Size: 27.5" x 3" or 29" x 2.6"
Suspension: Yes
Frame: Aluminum
Warranty: 3 year on frame
If you are interested in a singletrack mountain bike and the Surly Karate Monkey is a little spendy for you, the Salsa Timberjack XT 27.5 is an excellent, budget-friendly option. I rode a 2017 version of this bike on many trips around the southeast and was sad to let it go when I decided to switch to gravel bikepacking (and a gravel bikepacking-specific bike).
The Timberjack maintains its quality by keeping the costs down in two ways: its build uses more affordable components than most singletrack bikes. The aluminum frame also helps keep the costs down.
Compare Prices Of The Salsa Timberjack Xt 27.5
The Salsa Timberjack. Photo courtesy Graham Hodge.
Despite those two factors that make the bike more affordable, the geometry and overall bike make for a comfortable mountain bike that is more than capable of handling rooty single track trails than other bikes in its price range (or even more expensive bikes). It rides well even while being loaded up with bikepacking bags.

The Salsa Timberjack 27.5 can handle technical singletrack. Photo by Graham Hodge.
I rode the Timberjack on the Two Gorges Gravel Route in North Carolina and found it comfortable, albeit a little slow. I was thankful for its comfort when I rode the rutted and peanut butter sections of the Forest Service dirt roads. I also found that the Timberjack truly shined on the single-track sections of routes like the Trans North Georgia Route. If you’re looking for a bike that can handle singletrack and want to spend less than $1300, the Timberjack is an excellent rig.
Best Bikepacking Mountain Bike: Surly Krampus
Type: Singletrack
MSRP: $2,499
Weight: 30 lbs
Available Sizes: XS, S, M, L, XL
Wheel Size: 27.5" x 2.8"
Max Tire Size: 27.5" x 3" or 29" x 2.6"
Suspension: Yes
Frame: Aluminum
Warranty: 3 year on frame
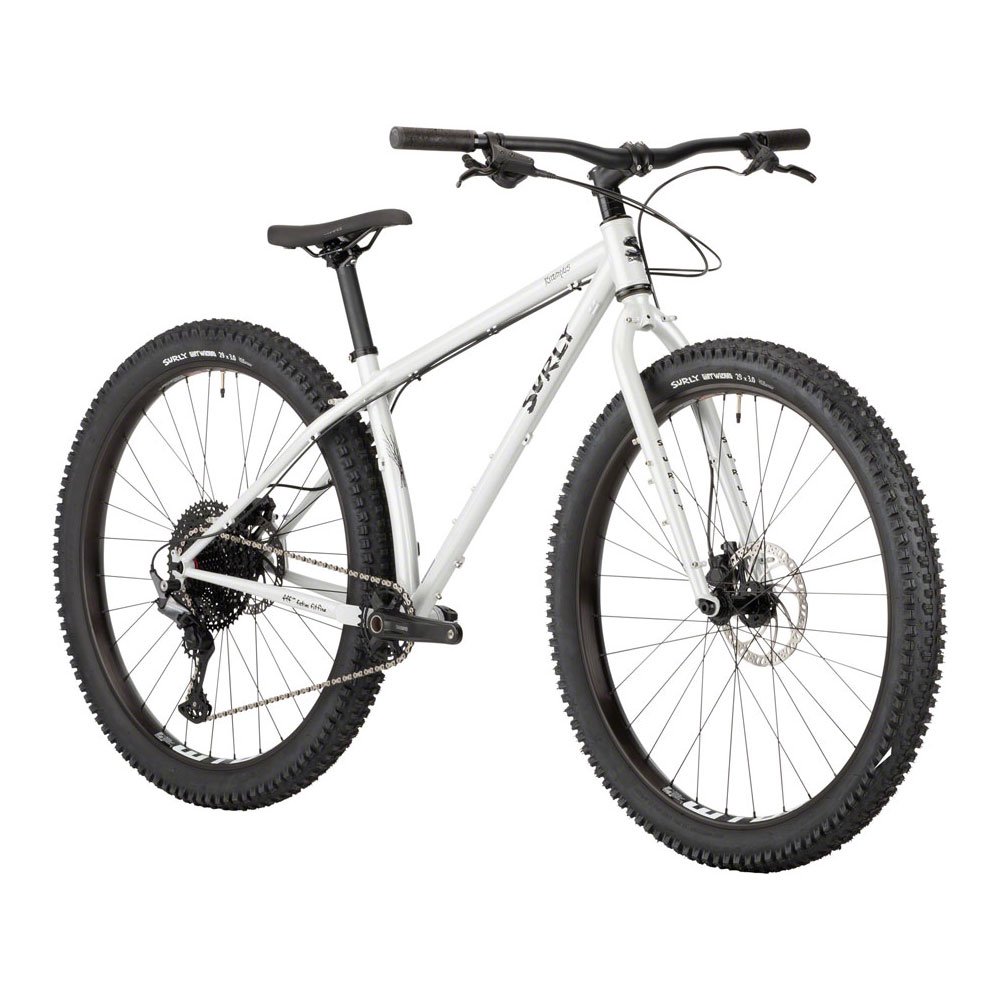
If you're looking for one bike for both singletrack and bikepacking, we think the Surly Krampus is your best choice. It's old school, well-balanced geometry works well over a wide range of conditions. It's excels on technical trails, but even after loading it up for bikepacking, it rides the same. It's a little Surly magic.
The less expensive version doesn't have front suspension, but for an extra $750 you can get it with a Rockshox fork. Our tester has the rigid version – he prefers the simplicity of a rigid bike since he's taking it over long miles in remote areas.

Treeline writer Mike Unger testing the Surly Krampus in the Gifford Pinchot National Forest, still partially under snow.
The geometry of the Krampus, which leans towards the aggressive end of the spectrum, is designed to maintain stability when navigating rough surfaces. It provides an upright riding position that enhances control and reduces rider fatigue during long rides.
Don't let the 29" tires on the Krampus scare you. Our tester found that the better traction and efficiency on longer rides make up for any advantages of 27.5" tires. Once you get 29" tires up to speed, they take less effort to keep their momentum going. And with more surface area in contact with the ground, in general 29" tires have better traction than 27.5" tires.
Compare Prices Of The Surly Krampus

If you’re looking for maximum tire clearance on a fat bike frame, the Surly Ice Cream Truck will get the job done. With 26” x 5” clearance on 100 mm rims, it’ll roll over snow or sand. Maybe even snow on top of sand. It’s a beast.
However, the Surly Ice Cream Truck offers a surprisingly comfortable ride. The wide handlebars provide a relaxed and upright riding position, and the oversized tires act as natural shock absorbers, smoothing out bumps along the way. It's a bike you can spend hours on without feeling fatigued.
But unless you’re going into truly unknown trail conditions where snow is likely, the Ice Cream Truck is overkill for most people.
Dirt (All-Terrain) Touring vs. Gravel vs. Singletrack Bikepacking Bikes
Which bikepacking bike should I get?
Dirt Touring Bikes
Dirt or all-terrain touring bikes are designed to cover hundreds or thousands of miles over several days, weeks, months, and possibly years. The bike you want for this style of riding can ideally handle every type of terrain (two-track, gravel, single track) while carrying heavy loads efficiently. Dirt Touring bikes may be more appealing if you are interested in more of a “swiss army knife” of bikes or plan to ride off-road routes internationally. The best dirt touring bikes provide lots of gear mounting options, have a rigid steel frame (more reliable on an extended tour), and have a more upright geometry for increased comfort.
Gravel Bikepacking Bikes
Gravel riding is becoming more popular as bike riders continually try to avoid busier roadways and seek the routes less traveled by motorized vehicles. These sorts of routes can have a dash of singletrack trails but mainly consist of double-track trails, fire lanes, and forest service gravel roads. Gravel bikes are similar to typical road bikes with rigid frames and drop bars for more hand position options. Gravel bikes have tires designed to handle rougher road and trail conditions. Gravel bikepacking bikes, like our top pick the Salsa Fargo Apex 1, have a rugged steel frame and multiple attachment points to customize your gear bikepacking setup.
Singletrack (Mountain Bike) Bikepacking Bikes
If your bikepacking trips consist mainly of trails that are about the width of your bike and feature rougher terrain, we would suggest a bike more along the lines of a mountain bike. Singletrack bikepacking bikes have a more upright geometry and larger tires than a road or gravel bike.
Singletrack bikepacking bikes often have a front suspension fork to handle the roots and rocks of rough trails (the Surly Karate Monkey, our top pick, comes in both a rigid and suspension stock build). Although some routes may be more comfortable with a suspension mountain bike, we think most folks getting into bikepacking will be happy with hardtail and rigid mountain bikes. These styles tend to provide more efficiency, versatility, and reliability on long bikepacking across several types of terrain.
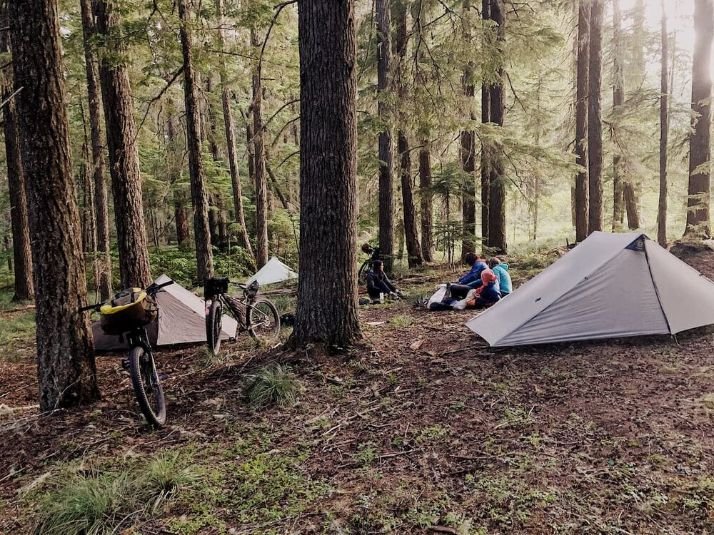
Camp on the first night of a bikepacking bike testing trip. Photo by Graham Hodge.
What to Look For In a Bikepacking Bike
There is no single best bikepacking bike for everyone. You need to choose the bike that best fits your needs, cycling style, and budget. Are you primarily interested in gravel riding or singletrack? Are you planning a months-long expedition? Do you want a single bike to do a bit of everything? Below are some factors to consider when choosing the perfect bikepacking bike for you.
Comfort
Someone once told me to always spend more on the things between you and the ground. Focus on finding the most comfortable bike for you. If a bike is uncomfortable, you may be less likely to ride it. If possible, test ride the bikes you are considering. You may even consider paying for a custom bike-fitting.
Make sure you select the correct bike size. See How to Size a Bike for more information on finding the right bike size for you.
Versatility
Nearly every bikepacking adventure will cover a variety of road and trail conditions. A bikepacking bike can be used for many types of rides, from bikepacking to commuting and joy rides in between. You could, of course, ride singletrack trails on a gravel bike and ride a mountain bike all day on gravel roads, but the appropriate bike would be more comfortable and fun.

Fully packed bikebags. Photo by Whitney LaRuffa.
Attachment points
A good bikepacking bike will have numerous attachment points allowing you to customize your gear setup.
Keep in mind how you plan to pack your bike (e.g., bikepacking tent, sleeping bag, food, water) using the following:
Frame bag
Handlebar bag
Seat bag or seat pack
Bottle cage
Pannier rack
Bike trailer

It doesn’t get much better than this!
Reliability
Reliability is a top priority for a bikepacking bike. An equipment failure days from town could be catastrophic. Look for bikes with quality components, like our Surly and Salsa picks. Consider forgoing front suspension (one less thing to fail). If you are considering remote international expeditions, consider a bike with 26” tires (more common internationally than 27.5 or 29” tires) and with rim brakes.
Tire Clearance
You may not be too worried about the widest tires your bike can fit, but having enough room if you choose to go wider can help. You could think of tire clearance like a Venn diagram in which tire size, bike speed, and comfort overlap. The fatter the tire, the more comfortable the ride. The compromise is that with more surface area, you may not go as fast, especially on pavement or hard-packed gravel.
There’s a balance many riders try to find between the three and paying attention to tire clearance helps find your zone. You may find yourself at the conclusion that 2.4” tires are not that slow for how much comfort they may add to your ride, but your bike can only run 2” tires, and now you're stuck wondering how those 2.4” would feel. We’re not saying to get the bike with the widest tire clearance, either. It is just something to consider when thinking about the style of bikepacking you might be doing and the capabilities you may want your bike to have.
Suspension
A lot of bikepacking consists of long days riding over a mixture of terrain. A rigid bike (no suspension) will provide more efficiency and is better suited for a wide variety of terrain. Some routes will have a higher percentage of rough riding than others. Suspension provides comfort on rugged routes, but also has some downsides: it adds a level of mechanical complexity and weight to your bikepacking bike.
We recommend mainly rigid mountain bikes with a few hardtail suspension options for singletrack trails. Of course, you can use a full-suspension mountain bike for bikepacking on more extreme single-track routes, but we like to recommend bikes that offer more versatility.
Geometry
A bike’s geometry can be a hot topic and even spark major debates in bike forum threads. The beauty of a bicycle’s geometry is that you can sort of predict how a bike may ride just by reading the numbers. A great way to learn is to test ride a few bikes. You can get the model and size information. Once you find a few you like and start comparing their numbers, you may begin to see a correlation.
The most comfortable bike frame is the one that fits. That being said, there are frame differences between gravel bikes, singletrack mountain bikes, and dirt or all-terrain touring bikes. See our section on Singletrack vs. Gravel Bikes for more on this.
Gravel bike frames are designed for faster riding. The frame’s geometry is often designed to have you leaning over a bit more and may feature a more horizontal top tube. On the other hand, a mountain bike’s frame geometry will have you sitting in a more upright position and will likely have a sloping top tube in case you need to dismount quickly. A dirt touring frame will likely place you somewhere in between the two. A dirt touring frame may be more stretched out for stability and comfort.
The website bikeinsights allows you to compare bike geometry. You can start learning about a bike’s stack, or the vertical distance from the center of the bottom bracket to the head tube, and how it relates to the bike’s reach, or the horizontal distance from the bike’s bottom bracket to the head tube.
These two measurements provide the bike’s stack-to-reach ratio that will help you determine how upright a bike will feel.
If you are interested in how your bike might perform while climbing, you should look into its seat tube angle, bottom bracket, chainstay, and overall wheelbase. While there are a lot of numbers and a bike’s geometry can help with decision making, just riding a bike will likely be the best way to determine whether a bike will feel right to you.
Price
There are many great bikepacking bikes under $2,000. It can be tempting to purchase a frame and build it up yourself, but unless you already own a lot of the components, a DIY bike build can add up, and often costs more than buying a bike already built. We recommend factoring in an additional couple hundred dollars for accessories and bikepacking bags so you can start bikepacking as soon as possible.
Weight
We have predominantly recommended aluminum or steel frame bikes because of their durability and affordability. Complete builds with these frames typically hover around 30 lbs. Carbon fiber bikes are more expensive, and there is some concern that they could experience more damage in a wreck. The weight savings may be worth it for a few folks. If you don’t mind spending a significant amount more on your bike, titanium frames are both lightweight and durable.

A Venn Diagram can help you find your sweetspot on what you want in a tire. Graphic by Graham Hodge.
Wheel Size (27.5” or 29” tires)
You may find yourself wondering if you should run 27.5” or 29” tires on your bikepacking bike. Our top all-terrain pick, the Surly Karate Monkey, can run either. There are a lot of opinions, but it comes down to personal preference for how you would like your bike to ride. Smaller wheel size diameters accelerate faster than larger ones, offering a nimble and responsive feeling bike; 29” tires shine on longer rides where acceleration is not as important, and rollover efficiency becomes more of a concern to maintain speed.
When comparing both 27.5” and 29” tires in regards to plus sizes (tire widths from 2.6” to 3”), the 29” tires will have more traction. If you are attempting to save weight where you can, the 27.5” tire will typically be the lighter option.
Ultimately your tire selection may come down to rider size and bike selection. Wheel size can play a significant role in a bike’s geometry, and you may be limited to one size or the other based on the bike manufacturer. Taller riders may consider 29” tires while shorter riders may prefer 27.5” tires. If your bike has options for both, then consider the benefits and costs of each.
I am 6’ tall and choose to run 27.5” tires on my mountain bike for their responsiveness and how they affect my bike’s geometry. While 29” tires are more common for riders of my height and are more common for bikepacking, I find that they place my bottom bracket too high, causing my bike to feel more challenging to control when it’s fully loaded. Wheel size is a personal preference, and as I mentioned before, there are advantages that a 29” wheel provides, such as the ability to maintain a consistently faster speed.
Some bikepacking bikes, such as the Surly Bridge Club, offer 700c wheel options. 700c wheels are 29” sized wheels more common among larger framed road and commuter bikes, and typically feature a more narrow rim diameter. Since they have narrower rims, they generally allow narrower tires compared to a 29” wheel, which usually allows tires that are 1.8 inches wide all the way to 3”.
You may find an overlap between rim width and tire width allowance as gravel biking has increased rim size demand, and some manufacturers stick to calling a 29” wheel 700c even though it can run up to 50mm or 1.8” wide tires. 700c wheels will often work on bike frames designed around 29” wheels.

Treeline Review writer Mike Unger testing the Surly Krampus on the Klickitat River Trail, Washington. Photo by Naomi Hudetz.
Component Quality
If you’ve ever wondered why are some bikes so much more expensive than others, the answer almost always comes back to the quality of the components. Bikes are one of those things where you really do get what you pay for.
That said, there is a point where the improvements are marginal and usually not noticeable to amateur riders. What you’re looking for is that “goldilocks” sweet spot where you spend just the right amount on component quality to realize the full benefits of what you’re paying for.
Think about Maintenance
If you’re going to be bikepacking in remote places without access to bike repair shops, you may want to think about keeping your bike as simple as possible. Eliminating suspension, rim brakes instead of disc brakes, and 26” tires for international trips are all ways to reduce the chances of a trip-ending repair.
Bike Frame material
When shopping for a bikepacking bike, you want to look for a bike frame that is durable and has good components. Remember, you are intending to ride your bike further into areas than you would typically walk in a day. You want a bike that is less likely to fail and leave you with a 60-mile walk back to your car.
A bike’s frame material will not only affect its durability, but also plays a role in how the bike will feel on a trail.
Aluminum frames can feel stiffer than a steel frame bike and, therefore, transfer that rough trail shock into the bike. An aluminum frame is weaker than a steel one and can be more prone to damage in a wreck or drop than a steel frame bike. Aluminum is not always lighter than steel, either. Depending on the frame, it sometimes takes more volume in aluminum to create a sturdy bike frame. More volume means more weight. I’m not saying aluminum is bad, and steel is the only way to go. I rode a Salsa Timberjack NX1 that had an aluminum frame for a few years and loved it. It was affordable and allowed me to get into bikepacking. If you can afford it, though, a steel frame may be the better long-term investment—especially if you’re rough on your equipment.
There are titanium versions of some of the bikes we recommend, such as the Salsa Fargo Ti. While titanium is certainly rad (it’s pretty much space metal after all), the frame alone costs an extra $1,800. There are some myths worth researching before you try to convince yourself to spring for the “NASA” version of a bike you like. Titanium is not always stronger than steel. Over the years, weaker versions of titanium have entered the market, and they are not always up to the standards of space exploration as the original titanium once was.
It can also be difficult to find someone that’s able to repair a damaged titanium frame bike, whereas steel is often easier to repair. The thickness of tubing needed to build a sturdy titanium bike factors into its weight. This means that a steel frame can sometimes be lighter than a titanium one.
Both steel and titanium will have a more absorbent and smooth ride, though, compared with aluminum. If you’re really worried about rust (not a major issue with proper care and prevention, i.e. don’t store your bike out in your backyard for days on end) then titanium is the better option.
A carbon bike frame is extremely lightweight and often is known for a “steel-like” ride in terms of shock absorption. They are not as ideal for bikepacking, though. Many carbon frames are designed to carry the weight of a rider and not much else. Not to mention, they are prone to damaging easily.
All that being said, there are a few companies making more durable carbon frames specifically for bikepacking. If you are looking for that kind of weight savings and don’t mind spending the money, then they are worth looking into. I’ve heard good things about the Salsa Cutthroat, an ~$5,000 carbon fiber bikepacking rig. For the price and durability factor, we don’t recommend getting a carbon frame as your first bikepacking bike.

A well sized bike will feel more comfortable. Treeline editor Mike Unger on the Klickitat River Trail. Photo by Naomi Hudetz.
How To Size a Bike
Pubic Bone Height
A good place to start when determining your size is by measuring your pubic bone height. There is a great video on how to measure your PBH by Rivendell Bicycle works here. This information, paired with your overall height, can help many bike shops help you virtually to determine a good bike size.
Standover Clearance
PBH also is a factor to consider when choosing which style of bikepacking bike you’re interested in. Your PBH determines your stand over clearance, which is how much room you have in relation to how tall the bike is when standing over it. The standover height is measured from the center of the top tube to the ground.
Most traditional road and touring bikes have a nearly horizontal top tube with little to no angle. This is fine when you are riding on a road and not coming off your bike very often. When you’re riding rougher gravel roads and singletrack, you may find yourself coming off the pedals more. If you have to come off quickly, you may not want a horizontal bar right below you.
You may notice that most mountain bike geometries have a more exaggerated top tube angle to help create a buffer area for quick dismounts. Gravel bikes have sort of a medium angle, somewhere between road and mountain bikes. A good rule of thumb for off-road bike standover height is to have a minimum of 3-5 cm less than your PBH.
Saddle Height
Knowing your PBH can help you quickly determine your saddle height as well! Your saddle height should be about 10-11cm less than your PBH. Measure your saddle height from the center of the bottom bracket to the top of the saddle.

We recommend your bars be level with or slightly above your saddle. Photo by Naomi Hudetz.
Handlebar Position and Stem Height
Knowing your saddle height can also help determine your handlebar position in relation to the seat. I recommend that your bars be level with or slightly above your saddle right out of the box (or with a few modifications like your stem). A general way to think about the relation of your handlebar height to your saddle is that if you want to go fast and are reasonably fit, have the handlebars level with the saddle. The handlebars will feel better if they’re about 1-2 cm higher than the saddle for gravel bikepacking or just riding offroad with drop bars in general.
If you consider yourself more of a casual rider, you may want your bars even higher. 7 cm above your saddle height isn’t crazy, it’s comfortable. If you can’t raise the bars to the height you prefer, then you should check your standover height for the next bike size up. It may just raise the bars to the height you're looking for while keeping them closer to your saddle than you may think.
To go a little further into the weeds with bike size, the long-established way of thinking about bike sizes is that smaller bikes have shorter reaches that can be manipulated by longer stems and longer seat posts. That is true and can be a place to start, but let's look at this idea with the Salsa Fargo Apex 1.
Earlier in this article, I briefly mentioned a bike’s reach—the horizontal distance from the center of the bottom bracket to the top of the head tube and stack, and the vertical distance from the center of the bottom bracket to the top of the head tube. Historically bike shops fit people based on the top tube length of a bike, which is how long the tube is that runs from a seat post to the head tub. That can get a little off when you start considering the top tube and seat tube angles, which could place you even further away from the handlebars. This is why focusing on stack and reach is important.
The small Salsa Fargo Apex 1 frame has a reach of 364 mm, while the medium frame has a reach of 368 mm. That’s only a 4 mm difference, and many riders could choose either frame size. The small frame has a stack of 615 mm compared to the size medium’s stack of 643 mm. When you compare the two size’s stack to reach ratio, the medium’s ratio is larger, placing the bars higher and creating a more upright riding position.
Think of a tool you need to reach on a counter high workbench. Say you drop that tool. At which point was the tool closer to your hand? When the tool was on the workbench or when it was on the ground? Now you may be worried that the size medium would still feel too large and that perhaps a size small with a longer stem would be a good option. I believe for bikepacking that a combination of a shorter stem with wider bars is the better option for stability, control, and comfort.
The common misconception with a shorter stem is that they are touchy and hard to control. If you look at what modern mountain bikers, dirt bikers, and even old road cyclists are riding, you’ll see wide bars with a short stem. A shorter stem will make the bike feel more responsive, which is where the touchy misconception comes from. A longer stem will shift your body weight towards the front of the bike and allows for a better pedaling position. This is why a lot of touring and road bikes typically have longer stems.
Remember, though, when bikepacking, you are riding your bike on rougher roads and even trails. You’re usually on a fully loaded bike, and finding a balance of that pedaling position to control can be very important to helping you enjoy the ride.

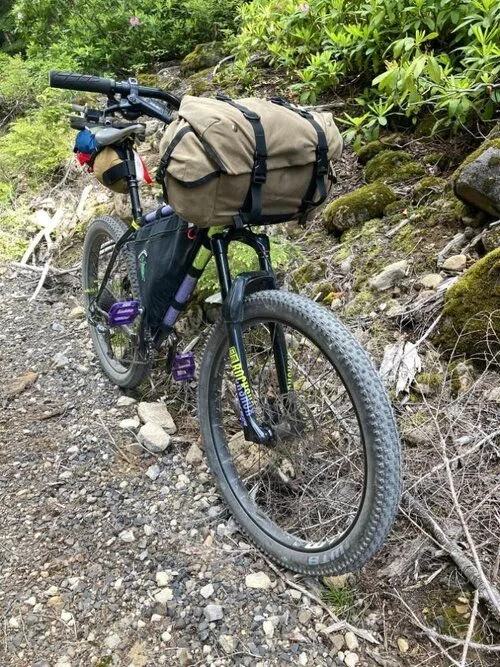
A bikepacking bike can handle rougher conditions than a commuter bike. Photo by Mike Unger.
FAQ
Can I Use My Bikepacking Bike as a Commuter Bike or Around Town Bike?
The answer is, ultimately, yes. With a lot of bikepacking bikes, especially mountain bikes, you may be slower on the road. This isn’t necessarily a bad thing if you are not in a hurry. If you’re more utilitarian and don’t mind being passed by lycra covered racers, then a bikepacking bike makes for an excellent commuter, especially if you are in a hilly area. If your bike can handle the Great Divide Mountain Bike Route, it can handle the trip to the grocery.
If you have bike racks, then loading them up with groceries or work supplies can be a breeze. If you use removable bikepacking bags without racks, that’s okay too. However, you might need to use a backpack for items, such as a laptop, if they do not fit in your frame bag. Of course, not all bikepacking bags are the best for full grocery loads, but there are ways to adapt.
What makes a bikepacking bike different from other bikes?
There are many different styles of bikes out there – from full-suspension mountain bikes to ultralight road racing bikes. Bikepacking bikes are in a category of their own and have some unique features that others won’t. One of the most significant differences with bikepacking bikes is that they generally have attachment points on the frame and other parts of the bike for storage and carrying extra bags and gear. These attachment points are necessary to bikepack with all the gear you need.
Other differences are in the frame itself. Some bikepacking bikes have frames that look like and are made of the same materials (like alloy or carbon) as other bikes. Sometimes they’re made of steel or other light and durable materials. It’s common for bikepacking bikes to not have any suspension (this saves weight and makes pedaling more efficient), though some do have shocks in the fork or the back of the bike.
What is the difference between bikepacking and touring bikes?
Bikepacking and touring bikes are often more similar to each other than other styles of bikes, but they still have important differences.
Frame materials and components on a bikepacking bike often have more of an emphasis on weight savings, while touring bikes can be on the heavier side. This is because bikepacking bikes are intended to be ridden on dirt roads or singletrack trails, which make riding tougher, while touring bikes are usually ridden on pavement.
Touring bikes are usually designed with simple, easy-to-fix components that can be fixed in the field.
Touring bikes are designed to carry very heavy loads and therefore have stiffer frames.
Touring bikes will always have fender and rack mounts, while not all bikepacking mounts will.
Bikepacking bikes will always have frame mounts for gear storage, not all touring bikes will (or may not have as many mounts).
Touring bikes usually have kickstands, but bikepacking bikes almost never do.
Can I use a regular bike for bikepacking?
If you want to use what’s already in your gear closet, many bikes will work as makeshift bikepacking bikes, but there are a few things to keep in mind. If you plan to ride dirt roads or singletrack, a traditional road bike with thin, sick tires will not work. Road bikes also won’t have the extra gear mounts, nor will they have the same level of durability.
Some bikes may be able to accommodate larger tires with more tread, but in general, road bikes are best left on the pavement. Many gravel bikes can double well as bikepacking bikes, and some gravel bikes have additional gear mounts.
Hardtail and full-suspension mountain bikes can work as touring bikes, too. Hardtails are better because of their lighter weight and more efficient pedaling, but also because the lack of rear suspension allows you to mount more frame bags and other gear storage to your bike.
Full-suspension mountain bikes can be used as bikepacking bikes, and some folks prefer them for rides like the Colorado Trail, where the trails can be rough, and the added suspension is nice for downhills. But that extra suspension not only makes the bike heavier, it also takes away possible gear storage on your frame. Overall, bikepacking bikes are ideal for folks who plan to overnight by bike because of how they’re designed and built.
How much weight can a bikepacking bike carry?
Most adult bikes can hold anywhere from 250 to 400 pounds, though that varies from one model to another. The manufacturer should state the max weight for the rider and gear on their bikes. But it’s good to remember that, much like backpacking, being conscious of not overpacking and saving weight can make a trip more enjoyable overall. Remember that once you load all that gear on your bike, you’ve then got to go pedal it for many miles.

The Surly ECR (now discontinued) and Surly Krampus at camp. Photo by Graham Hodge.
Bikepacking Glossary and Terminology
The world of cycling and bikepacking can be confusing. Below are some common terms to help you navigate the world of bikepacking.
Dirt Touring
Dirt touring takes the essence of bikepacking and extends it to a longer journey. A dirt tour will likely involve piecing together rides on country dirt roads, gravel fire lanes, and gnarly trails. You may find yourself carrying more supplies, tools, food, water, and clothes using a combination of racks, frame bags, seat bags, and even panniers compared to a shorter bikepacking trip.
Gravel
In the world of cycling, this can be anything from an unfinished alleyway to hundreds of miles of Forest Service gravel roads. Gravel riding is becoming a very popular trend in the cycling world as we all attempt to ride routes that have fewer motorized vehicles.
Plus-Size Tires
Plus-size tires are sized between a traditional mountain biking tire and a fat tire. By definition, they are between 2.8" and 3.25" wide.
Mounting/Mount Options
Mounting options are also referred to as bosses, braze-ons, or barnacles. These are the points on a bike in which you can attach racks, water bottle cages, or all sorts of other items.
The cassette is a cluster of sprockets. Photo by Graham Hodge.
Dropouts
Dropouts are the two slots or notches on the rear of your bike that hold your rear hub. Essentially, it’s where your rear wheel goes. Many bikes traditionally use a skewer that can be tensioned to hold the wheel in place. Also attached to a dropout is a hanger. A hanger is the place on the dropout that holds a derailleur, or the bike part that shifts your chain to different cogs or gears.
Thru-Axle
Unlike a traditional wheel system that uses a skewer to mount the wheel, a thru-axle is a wheel attachment system that secures a wheel to the hub between a pair of dropouts on a bicycle frame or fork. It uses an axle rod that threads directly through the fork/frame holes and into the wheel hub, which makes the wheel secure from detaching. Thru-axles are more common on mountain bikes.
Cassette
A cassette is the cluster of sprockets located on the rear hub of your bike, slotting onto a freehub body and held firmly in place with a threaded cassette lockring. Modern mountain bikes often feature a 1x11, 1x12, 2x9 or 2x10 drivetrain (i.e., one gear at the pedals and 11 sprockets in the form of a cassette attached to your rear wheel).

Bottom Bracket
A bottom bracket is the connection point of the crankset to the bicycle and allows the crankset to rotate freely. It contains a spindle to which the crankset attaches and the bearings that allow the spindle and cranks to rotate. The chainrings and pedals attach to the cranks. When looking into a bike, you may want to pay attention to your bottom bracket height, especially when converting tire and wheel sizes.
Rohloff Hub
A Rohloff Hub is an internally geared rear wheel hub that offers fourteen gears and replaces a typical drivetrain. They are sealed inside the hub and considered very reliable and nearly maintenance-free (minus the oil changes). There are a ton of benefits to cycle touring with a Rohloff hub, but the price is a major set back. Rohloff Hubs, on average, run about $1,600. The Surly Bridge Club is compatible with Rohloff hubs.
Front end suspension on a mountain bike. Photo courtesy Graham Hodge.
Singletrack
Singletrack refers to a trail that’s roughly the same width as a bike. It can be well-groomed or full of rocks and roots. Regardless of the condition, singletrack trails are sure to be a fun route into the backcountry.
Stock Build
Stock build refers to the way a bike is built and often highlights the components. Some bikes are sold completely built with better components than others. This is often reflected in the price.
Suspension
Suspension is used on bikes to soften the rider’s contact with rough terrain. Many mountain bikes feature a suspension fork in the front that moves up and down to absorb small bumps while keeping the tire in contact with the ground. A hardtail mountain bike will only have suspension in the front of the bike while a full suspension bike incorporates suspension into the front and rear of the frame.
For a full catalog of bike-related terminology, see Sheldon Brown’s Glossary.
National Bike Registry
Bike theft is a huge problem. We strongly recommend that you register your bike with the National Bike Registry. The Registry has teamed up with 529 Garage to create a North American database of bikes. Bike shops and law enforcement can use the database to find and return stolen bikes.

The author Graham Hodge out riding his bike. Photo courtesy Graham Hodge.
How We Tested
We tested our top picks in varied terrain, from urban jungle to desert to mountains. We also tested them on pavement, gravel roads, dirt roads, jeep roads, and singletrack. We’ve tested our bikes in Mt. Hood National Forest, Gifford Pinchot National Forest, Deschutes River Trail, Swale Canyon, Two Gorges Gravel Route, Trans North Georgia Route, and more.
About the author/Why You Should Trust Us
I’ve been working in the outdoor industry for the past eleven years. I got my start in the outdoor world climbing competitively in college and backpacking for leisure. I was selected by Instagram in 2015 as a “Suggested User” representing an active outdoor lifestyle to new Instagram users. I’ve worked as a photojournalist for publications such as Rock and Ice and Roots Rated.
I got into long-distance backpacking when I section hiked the PCT in 2016 while working with brands such as Leki, Osprey, and Nemo Equipment. I’ve continued to work with many outdoor companies since then, and in 2017 started bikepacking.
After riding hundreds of miles and several bikepacking routes, I began sewing my own bikepacking bags. After a lot of positive feedback, I started a small operation sewing custom bike bags for local customers in Chattanooga, TN. While my operation is small, it has allowed me to work with multiple styles and brands of bikes.
Sources