Bikepacking the Colorado Trail
ride your bike 500 miles from Denver to Durango on one of the most scenic mtb trails anywhere

Home > Trip Guides > Bikepacking
Updated August 31st, 2025
The Colorado Trail is a 539-mile high-elevation bikepacking and hiking trail that crosses the state of Colorado, connecting Denver and Durango.
Distance: 539 Miles, 867 Kilometers
The hiking route is 53 miles shorter (486 miles, 782 Kilometers)
Days: 1-2 weeks
Elevation gain/loss:
Gain: 72,500 Feet, 22,098 Meters
Loss: 69,664 Feet, 21,234 Meters
Unpaved: 80%
Singletrack: 55%
Best season: Summer
Permits: None
Difficulty: Very Hard


We create reader-supported, objective, independently-selected gear reviews. This story may contain affiliate links, which help fund our website. When you click on the links to purchase gear, we may get a commission, without costing you an extra cent. Thank you for supporting our work and mission of outdoor coverage for every body! Learn more.

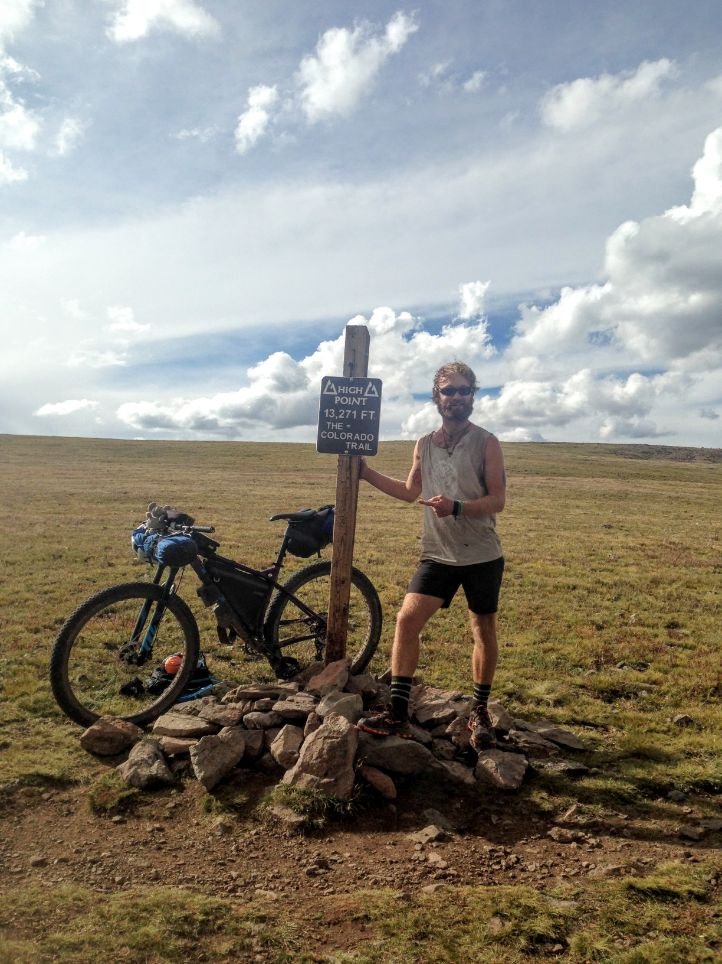
The author and his bike at the high point of the Colorado Trail, 13,272 feet.
Background
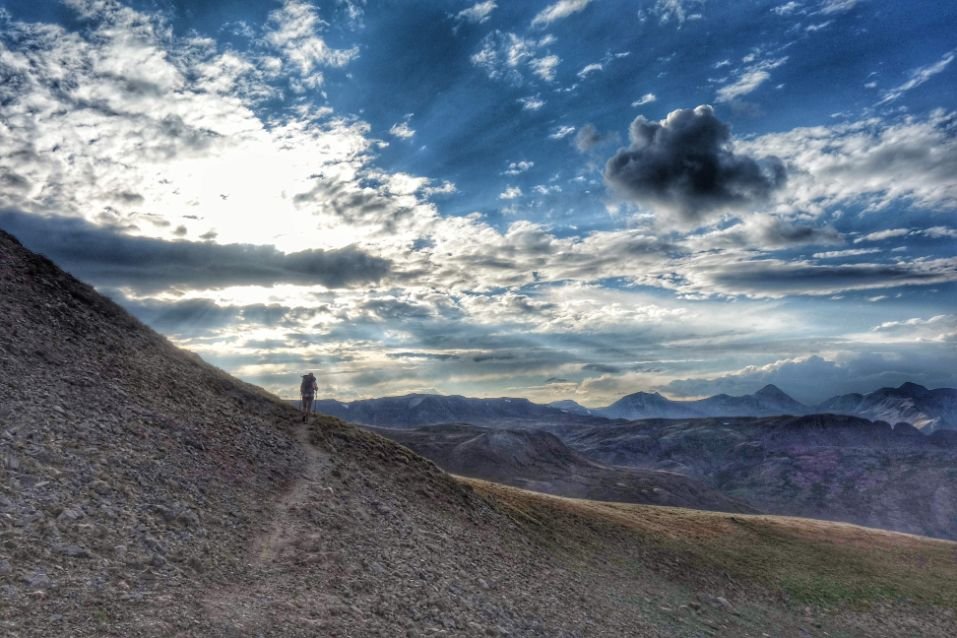
The Colorado Trail Bikepacking Route is a 539-mile mountain bike route that crosses many major mountain ranges across the state. Mile for mile, the Colorado Trail is one of the most beautiful trails I’ve ever ridden. The bikepacking route is mostly singletrack, except where it detours around wilderness areas. Every day on the Colorado Trail has steep climbs to passes with epic views and great campsites. The trail constantly gives the feeling that you’re out there because you are.
Completing the Colorado Trail is a rewarding and exhausting experience. It’s good to remember that this is a hiking trail that bikes are allowed on, not a mountain bike-specific trail. There are difficult singletrack sections, steep descents, and epic hike-a-bikes that are hard even to push a bike up.
Even though it is challenging, I keep taking my bike back to the Colorado Trail. I love this trail. I love the feeling of making it to the top of a steep pass and seeing layers upon layers of mountain ranges in the distance. Riding a bike down from those passes is worth all the hard work that goes into pushing your bike up the steep, loose, rocky trail to get there. Yes, bikepacking the Colorado Trail is difficult. And yes, it’s also worth the difficulty.

Bikepackers will have daily epic mountain views. Expect to bike a lot of up and down and have hike-a-bike sections.
I first bikepacked the Colorado Trail in 2015. Since bikepacking the trail, I have thru-hiked it twice. That first bikepacking experience was very challenging. Though I had lots of experience bike touring on pavement, the Colorado Trail was my first multi-day bikepacking trip on singletrack.
I was so tired by the end of bikepacking this trail that I didn’t even notice I had dropped my phone when I took a tumble. I was also using that phone to take pictures on this trip, so all the photos you’ll see here are from later bikepacking trips along the Colorado Trail and from the multiple times I’ve since thru-hiked the CT on foot.
Sometimes I think I’m misremembering how difficult bikepacking the trail is, but then I bikepack another segment of the Colorado Trail again and realize it’s still really hard. As my mountain bike skills progress, it has gotten easier. At the end of the day, the challenging sections of this trail are still some of the hardest things I’ve done on a bike.
Even though this is a challenging trail, there’s enough allure to riding on a trail that stretches across my home state that I return again and again. Plus, it makes the logistics of planning a trip that much easier-I’ve created many multi-day overnight bikepacking loops using the Colorado Trail and other trails in the area. Since bikepacking the entire Colorado Trail, I have section-biked the first 100 miles multiple times, and I’ve ridden sections near the Collegiate Peaks, the San Juans, and Cochetopa Hills.
I would bikepack the entire trail again and look forward to the day it happens. But, I also think the Colorado Trail is great to tackle in sections if you live in the Rocky Mountains. Whatever way riders choose to experience bikepacking this trail, you’re in for a treat.
Bikepacking curious? We have new bikepacking guides coming out all the time. Here are a few:

One of many incredible scenic views from the Colorado Trail.
Highlights
12-mile descent into Durango
Riding through the San Juan Mountains
Bombing downhill from Kokomo pass
Monarch Crest bike trail
Descent from Stony Pass Road into Silverton
Incredible epic mountain scenery every day
Challenges
Epically steep hike-a-bikes
Technical singletrack trails
Long sections above 10,000 feet
GEAR LIST
Here is a summary of the gear I used for my CT bikepacking trip. I explain the philosophy behind my selections later in the story.
| CT BIKEPACKING GEAR | OUR PICK(S) | MORE OPTIONS |
|---|---|---|
| Bike-Specific Gear | ||
| Bike | Specialized Fuse 27.5 Bike Surly Orge Bike |
Best Bikepacking Bikes |
| Helmet | Specialized Tactic Helmet | Best Mountain Biking Helmets |
| Seat bag | Revelate Designs Terrapin System Seat Pack | Best Saddle Bags and Seat Packs |
| Handlebar bag | Swift Industries Zeitgeist Pack | Best Bike Handlebar Bags |
Best Season
The best season to bikepack the Colorado Trail is summer after the snow has melted. The best month on the Colorado Trail is August, but the trails are usually free of snow and dry by early to mid-July. In the early alpine season of June and July, when the snow is melting, the trails are often still wet and patchy with snow. At this time of year, portions of the trail will be too muddy to bike on without damaging the tread. By late September, snowstorms become more likely in the alpine regions of Colorado, too. August is the perfect month to plan a Colorado Trail bikepacking adventure.

The Colorado Trail is difficult to bikepack. Trail quality is great for hikers, but can be rocky and require hike-a-bike sections for bikepackers.
Difficulty and Skills
The Colorado Trail is an extremely difficult bikepacking trail. You should be in excellent physical condition and have previous bikepacking experience to attempt a self-supported bikepacking trip on this route.
You should also be in good walking shape because you’ll be doing that a lot, too. I recently brought a friend out for a bikepacking trip on the Colorado Trail. He was in excellent biking shape but wasn’t prepared for all the uphill hike-a-bikes.
When I first bikepacked this trail, I crashed more times than I could count. Fortunately, most of these crashes were slow–usually a fall when riding up a steep incline that I should have been walking. I did crash a few times going downhill, too.

Navigation
The Colorado Trail is very well marked and easy to navigate. The wilderness detours aren’t marked, though. In these areas, you’ll have to pay closer attention to not miss a turn, but the turns are mostly obvious in these parts.
I only used the Colorado Trail Databook when I bikepacked the Colorado Trail for the first time. Since then, I’ve primarily used the FarOut guides Colorado Trail Biking Guide, and Gaia GPS for backcountry navigation on the Colorado Trail.
Technical Singletrack
Most of the Colorado Trail is technical singletrack-rocky, often narrow, and deeply rutted. Many of these rocks are the size of your head, too. There are many steep switchbacks as well. Getting around some of those switchbacks with a loaded bikepacking rig is almost impossible. All this makes the riding frustratingly slow at times. There are very few “flowy” sections. But, there are some long, steep, and fun descents where you can catch some serious speed.
Elevation Gain/Elevation Loss
Over the 539 miles of bikepacking the Colorado Trail from Denver to Durango, you climb 72,500 feet (22,098 meters). You’ll descend 69,664 feet (21,234 meters). There are big climbs every day. The climbing only stops when you’re white-knuckling downhill, and then you begin the next climb.
Many of the climbs are too steep to ride. I regularly pushed my bike up a steep climb, getting passed by hikers. It can be pretty demoralizing.
Permits
You don’t need any permits to bikepack the Colorado Trail.
Prohibited Areas
Note that bikes are prohibited in Wilderness areas, and there are six on the Colorado Trail. Bikes are required to detour around wildernesses, and bike map sets will show the detours.
E-Bikes
The US Forest Service considers eBikes to be a motorized form of travel. Therefore, they’re only allowed on approximately 15% of the Colorado Trail. Thru-biking the CT with an eBike is not currently possible.

The Colorado Trail starts with an easy stretch of gravel trail in Waterton Canyon, some of the most manageable miles of bike riding for the whole trip.
Route Description
The Colorado Trail starts in Waterton Canyon in the Denver Metropolitan area. The first 6 miles are on a gravel road and some of the most manageable miles of the trail. After you pass the Waterton dam, the trail turns to singletrack. Over the next 15 miles, you’ll see what you’re in for as the trail gets steep and rocky. Sometimes there will be loose dirt, sometimes it will be overgrown, and sometimes it will be too narrow to pedal.
After the first 15 miles, you’ll cross the Platte River and enter the Hayman Burn area, where 138,000 acres burned southwest of Denver in 2002. This section has no water, but it’s only 11 miles. The riding is slightly easier through this area, too. You’ll ride through the Buffalo Creek recreation area next. This short part of the trail is some of the smoothest trail you experience on the entire Colorado Trail.

One of many beautiful bikecamping sites on the Colorado Trail.
After that is the 71-mile detour around the Lost Creek Wilderness area. Some cyclists opt to ride Highway 285 instead of taking the official detour since the bike route is more than twice as long as the official CT through Lost Creek. However, highway 285 is a bustling and winding 2-lane road. I would never ride my bike on that road.
The Lost Creek Wilderness detour ends at Kenosha Pass. You’ll rejoin the CT on singletrack climbing to Georgia Pass, descend for a while before climbing up again, then descend into the outskirts of Breckenridge.
After Breckenridge, the climbing gets real. Crossing the 10 Mile Range, you’ll experience your first intense hike-a-bike on the Colorado Trail bikepacking route. It’s a long walk to the top, but you’ll be rewarded with 360-degree views of the mountainous landscape when you get there.

You’ll ride across a smooth alpine ridge when you finish the climb, then have a steep descent into Copper Mountain. Copper Mountain is a ski resort town, and you’ll ride under a chair lift climbing up the valley towards Searle Pass, then Kokomo Pass.
At this point, you understand the rhythm of bikepacking the Colorado Trail: climb to a pass, descend a beautiful valley peppered with wildflowers, climb some more, then go downhill again. This rhythm is only ever disrupted by the four more wilderness detours you’ll experience. And three of those detours will take you through a town where you can resupply. Though the detours are less scenic, the easier riding along dirt roads will probably feel like a welcome change from riding (and hike-a-biking) along singletrack.

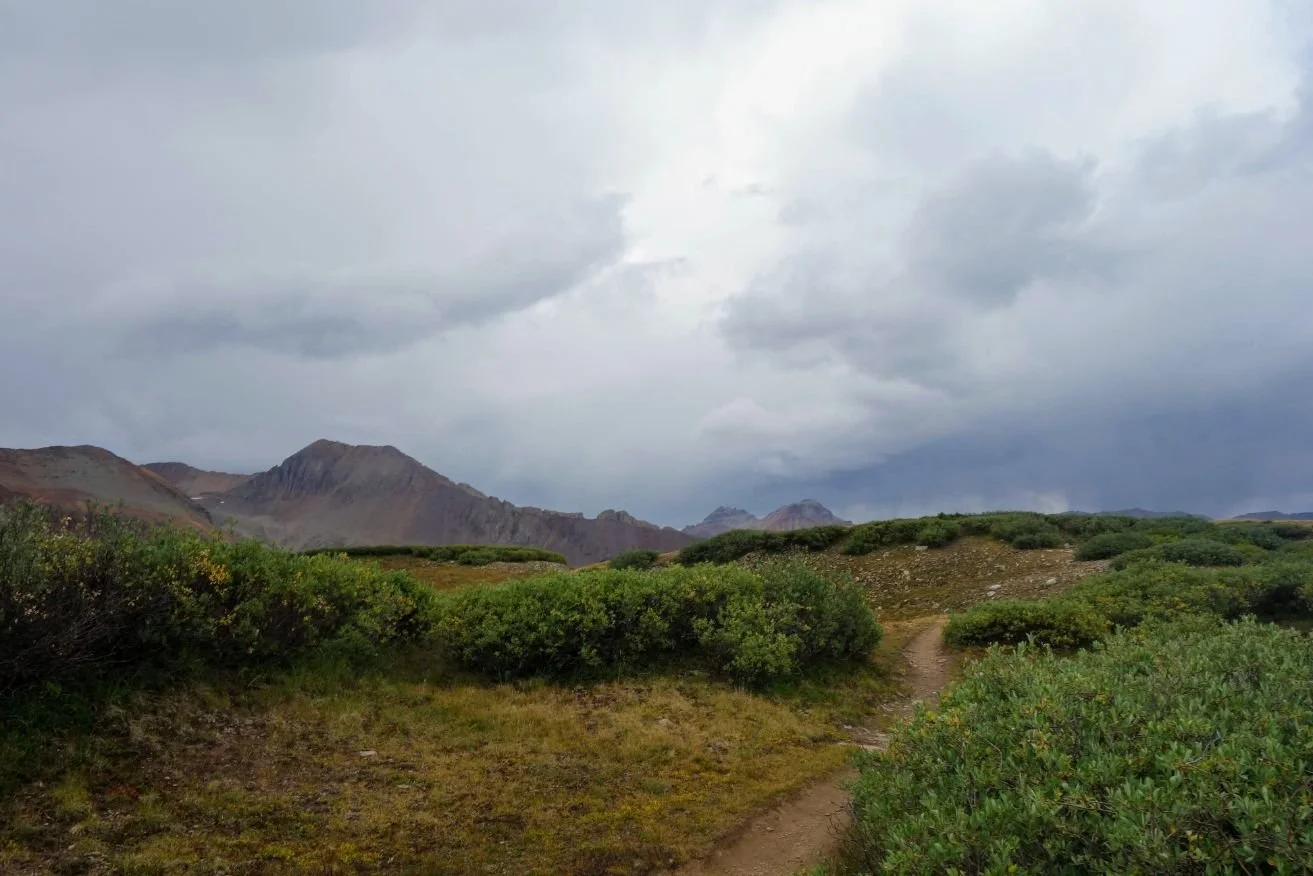
The Colorado Trail has you riding for long sections over 10,000 feet. As a biker, you’ll want to start after the snow has melted and mud has had a chance to dry out for easier riding.
You’ll be above 10,000 feet for almost all of the last 200 miles of trail, except when you detour around the Weminuche and La Garita wilderness areas. These last 200 miles are the most challenging. The track is often a deeply rutted thin strip of dirt that’s consistently bumpy enough to slow you down. By this point, you should be used to hike-a-bikes. They won’t let up here, though. This area has unrideable sections, including several talus fields that are downright impossible to ride across.
This area will also have many highlights, including the Colorado Trail high point. And when you get to Kennebec Pass, it’s almost all downhill from there. Those final 20 miles are a super-fun descent into Durango!

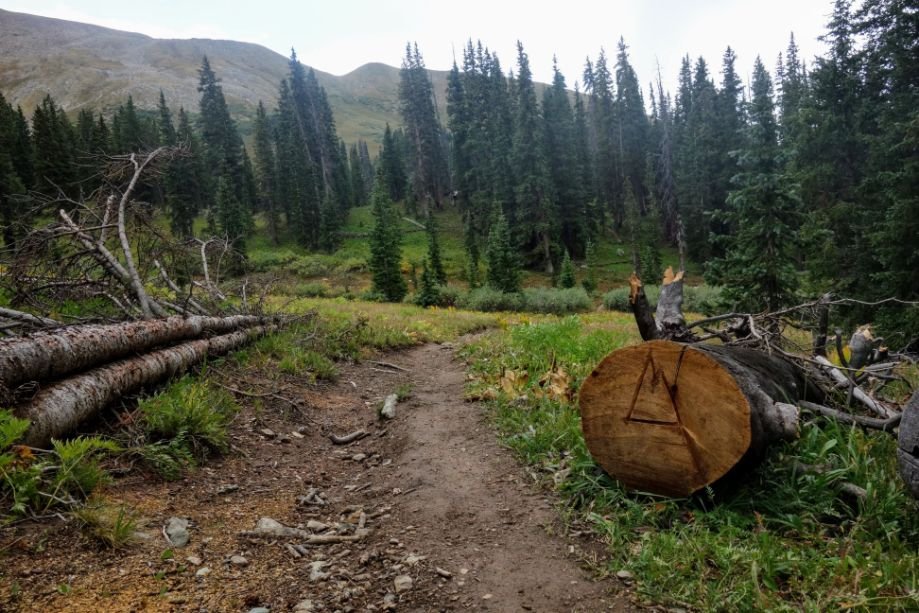
Expect some rocky sections like this when bikepacking the Colorado Trail
What I'd do differently next time
The first time I bikepacked the Colorado Trail, I rode a fully rigid (no suspension) bike with 27.5”/650B by 3” tires. My setup could have been lighter, and I used a clipless pedal/shoe combination. Since my first bikepacking trip on the CT, I’ve returned for more many times. My experiences bikepacking the CT have helped me further refine my setup.
Next time I bikepack the CT, I would use a hardtail mountain bike with 29” by 2.6” or 2.8” tires or a full suspension bike. I’d go as light as possible to make the bike handle better and easier to push uphill. I’d also wear a small backpack with my quilt, sleeping pad, and other bulky stuff. I’d avoid using anything but a small seat bag so I could use a dropper post. And, I wouldn’t use clipless pedals so I could wear shoes that are better for walking.

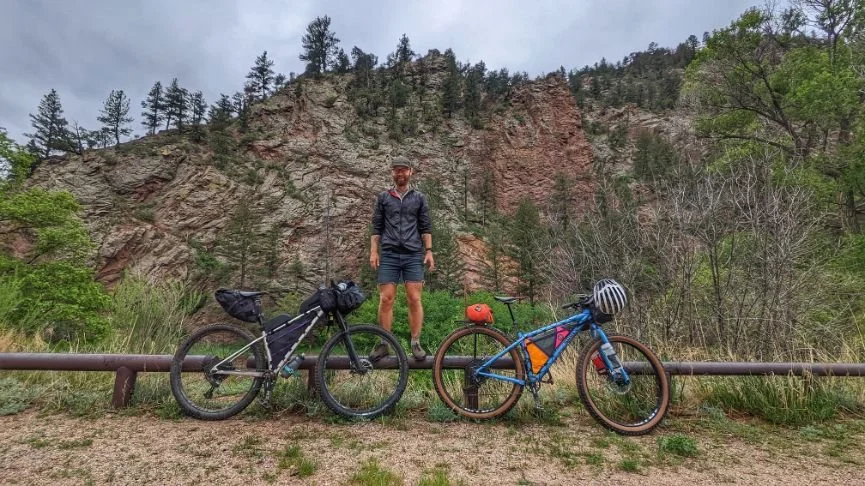
The Colorado Trail has bikepackers start in Denver or Durango, although most bikers find it easier to start in Denver as a warm-up.
Direction of Travel
Most people bikepack the Colorado Trail southbound, from Denver to Durango. The prettiest views, best camping, and longest backcountry stretches of the Colorado Trail are close to Durango, and I like to save the best parts last. I also think it’s good to warm up with the easier riding near Denver before getting to the most challenging sections, near Durango.
There are some benefits to riding from Durango to Denver (northbound). If you ride northbound, flying home will be easier at the end. There is also technically less climbing when riding Durango (elevation 6,995 feet at the Junction Creek trailhead) to Denver (elevation: 5,498 feet at Waterton Canyon trailhead). But, approximately 3,000 feet less elevation gain is a drop in the bucket compared to the 70,000 feet of total climbing. Getting to Durango to start your trip will be more logistically challenging than beginning in Denver.

The Colorado Trail is well-marked and signed. It shares trail with and intersects the Continental Divide Trail at certain points.
Maps and Guidebooks
Ride With GPS
You can find the Colorado Trail Route on Ride With GPS here.
Maps
National Geographic makes a map set for the Colorado Trail. These maps include information on all the bicycle wilderness detours, too.
Guidebooks
The Colorado Trail Databook is a handy book for planning and is small enough to bring with you on your trip.
Other Apps
The FarOut Guides Colorado Trail map set includes data on all the bike detours, and you can see all the information CT hikers leave on the app. Farout app users leave up-to-date information on water sources, trail conditions, and trail town information. Much of that information will be useful for bikepacking the CT.

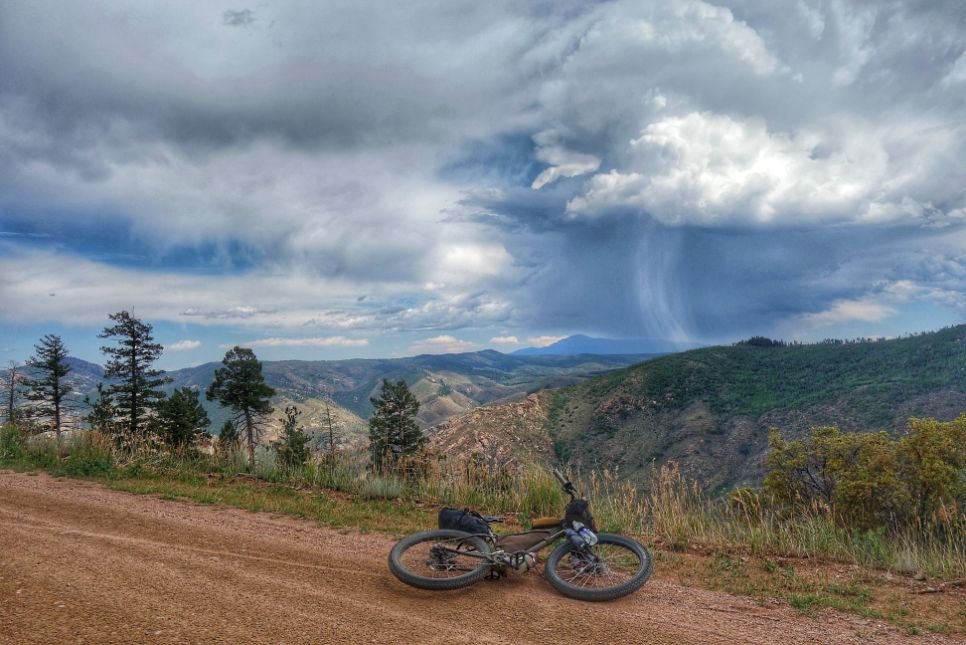
A bikepacker riding open gravel road on a wilderness detour towards the beginning of the Colorado Trail.
Getting To The Trailhead
By Plane
Denver International Airport is a large airport you can fly to from most other airports in the United States. (Note: Denver is a Southwest Airlines hub, which is a good option as they allow two free bags for your gear and $75 oversized fee for a bike). You can also take the RTD A Line from the airport to downtown Denver.
If starting at the southern end of the CT, Durango has a small airport, but it’s expensive to fly there. I’ve also had success flying from the Cortez Municipal Airport to Denver via Boutique Air. It only takes an hour to get from Cortez to Durango, but that’s only if you have a car. Also, you would have to ship your bike if you fly out of Durango or Cortez since you can’t bring a bike on small regional airplanes.
By Car
The Waterton Canyon Trailhead is located in Littleton, Colorado, just south of Denver.
The Junction Creek Trailhead is located in Durango, Colorado.
Bus and Shuttle Services
You can ride public transit within a few miles of the Waterton Canyon Trailhead. Take the Denver RTD Light Rail D Line to the Littleton/Mineral Station. The Little/Mineral light rail station is a 9-mile bike ride to the Waterton Canyon Trailhead.
Post Trip Favorite Brewery
Carver Brewing Company in Durango gives a free pint of their Colorado Trail Nut Brown Ale to everyone who finishes the trail. I drank one plus a couple more pints and ate some delicious food when I completed the CT.
Durango is also home to Ska Brewing, another great Colorado brewery.
Regulations
Follow Leave No Trace Ethics, including camping and pooping far from water.
Group size must be limited to 12 people or less.
Bikes are not allowed in wilderness areas. The Colorado Trail Foundation has maps for the bike routes.

A bikepacking campsite on the Colorado trail
Resupply
Most of the wilderness detours route you through towns along the CT. I recommend planning to resupply in Breckenridge, Leadville, Buena Vista, and Silverton since you’ll be riding through these towns anyway. As with any biking on road shared with cars, make yourself visible with reflective clothing and bike lights and avoid riding at night.
However, Buena Vista to Silverton is a 210-mile food carry. Depending on how much food you want to carry, you might also want to resupply in Lake City. But getting to Lake City is more logistically challenging than other resupplies on the Colorado Trail. It’s downhill into town, which means the ride back to the trail is uphill, on a paved highway with no shoulder.
Lake City is ten miles down a steep highway from Slumgullion Pass, where the La Garita Wilderness detour joins Highway 149 and follows it uphill for 8 miles to Spring Creek Pass. It is a fast downhill into Lake City, but riding back up that road is a slog. You already have to ride 8 miles on the side of that highway with no shoulder to get from Slumgullion Pass to Spring Creek Pass; adding another 10 miles to this wouldn’t be fun. I was able to get a hitch out of Lake City with my bike, but hitchhiking with a bike restricts you to only getting rides from pickup trucks.
Another resupply option that is new since I bikepacked the Colorado Trail is Cathedral Ranch Cabins. This resupply option is located one mile off the La Garita Wilderness detour (southbound mile 31.3) and accepts resupply packages. They have showers, laundry, and a lounge area for bikers with a place to charge your devices. You can stay the night here, too. They have cabins, a bunkhouse, and tent camping options.
They also have a small store that has dehydrated meals, bars, and other food items you could resupply from to tide you over until Silverton. Though resupplying here would be more expensive than at a grocery store, it probably wouldn’t be more than the extra $20 it costs to mail a box of food. Their store also has camp fuel, bike tools, brake pads, chamois butter, and other items you may need by this point on your trip. If you send a box here, be sure to send it via UPS because USPS doesn’t deliver to their location.
Slumgullion Pass to Silverton is only another 55 miles, where the resupply is easier. But by the time you get to Slumgullion Pass, you will have already biked 155 miles since Buena Vista. Resupplying in Lake City ultimately depends on whether you can carry 200+ miles worth of food over challenging singletrack.

Water is generally plentiful for Colorado Trail mountain bikers. Just be sure to bring a water filter.
Water Planning
There is plentiful water on most of the Colorado Trail, except in the area between the Marshall Pass Trailhead and the La Garita Wilderness detour. The Colorado Trail databook has information on all water sources on the trail, as does the FarOut Colorado Trail guide.
Bears and Food Storage
I recommend using an Ursack to store your food in areas with bears. See REI’s Food Storage story or REI’s Bear Canister story for other bear-proof food storage recommendations.
Side Trips
The Colorado 14ers Bikepacking Loop could provide some inspiration for a side trip or two.
Variations
There are many variations you could make to a Colorado Trail Bikepacking trip. If you’re not keen on all the technical singletrack riding, consider adding part of the Colorado section of the Great Divide Mountain Bike Route, which follows the Rocky Mountains from Canada to Mexico. The GDMR mostly follows dirt roads, which will be much less challenging.
You’ll want a good bikepacking bike to handle the roughness of the Colorado Trail.
Bike Rentals
Evo bike shop in Denver rents mountain bikes. 2nd Ave Sports in Durango also rents bikes.
Bike Repairs
There are more bike shops in the Denver Metro Area to list. They’re all swamped during the summer, so be nice to the employees when you’re there. And, don’t expect to get your bike repaired while you wait.
For mid-trip repairs, I recommend Leadville Bicicasa. They welcome all Colorado Trail bikepackers, and the owner is a bikepacker.
Durango Cyclery is my favorite bike shop in Durango for repairs.

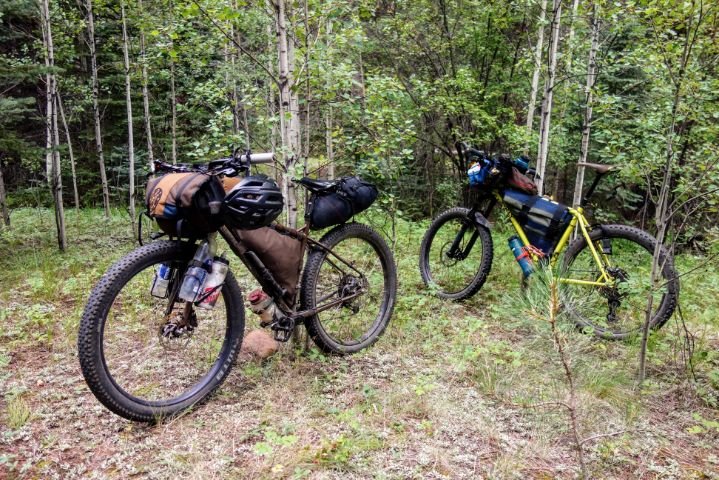
The author’s bikepacking set-ups for a section on the Colorado Trail
Gear DISCUSSION
Tent
I used a Tarptent Aeon Li tent for the Colorado Trail. I have experienced extremely high winds and snowstorms in the high desert regions of Colorado and Utah, and this tent always holds up well. For other backpacking tents we recommend, see our Best Backpacking Tents guide.
Sleeping Bag
I used a Cedar Ridge Outdoors Leconte 20F Quilt. It’s a high-quality down quilt that has reliably kept me warm for 1000s of trail miles. If you're interested in a dedicated sleeping bag instead of a quilt, see our Best Backpacking Sleeping Bags guide, or, find Ultralight Quilt Options.
Sleeping Pad
I used a Therm-a-Rest NeoAir XLite NXT for this trail. It’s reliable, keeps me warm, and Therm-a-Rest’s lifetime warranty is no joke. The XLite NXT is our overall winner in our Best Backpacking Sleeping Pads guide.
Bike
I first bikepacked the Colorado Trail on a cheap aluminum hardtail, a 2013 Specialized Hardrock Disc 29. This cheap bike was heavily modified with a 650B/27.5-inch “plus” wheelset, a rigid bikepacking fork, and a new drivetrain. I squeezed a 27.5/650B by 2.8-inch tire into the rear triangle of a bike designed for 29-inch wheels. I also swapped the cheap suspension fork on the bike with a rigid steel fork designed for a fat bike. This setup wasn’t ideal, but it worked. I did have to true the rear wheel several times so the tire wouldn’t rub on my frame, though. (Unfortunately, every picture I have of this setup was lost when I lost my smartphone on the Colorado Trail.)
Since then, I’ve upgraded my bikepacking bikes. I now have a Specialized Fuse and Surly Ogre. The Fuse can fit up to 27.5 by 3-inch tires and has a suspension fork. It is much more suited for singletrack riding, so this is my bike of choice for bikepacking on the Colorado Trail these days.
Check out more of our favorite bikepacking bikes in our Best Bikepacking Bikes guide.
Bike Bags
Revelate Terrapin saddle bag
MYOG clone of the Swift Industries Zeitgeist
Custom MYOG frame bag
See our Bikepacking guide section on Bike Bags for more details on choosing what to bring. We have complete guides for:
Best Bike Saddle Bags and Seat Packs

A bikepacking hammock camping set-up on the Colorado Trail.
Cooking System
MSR PocketRocket stove, which is the overall winner in our Best Backpacking Stoves guide
TOAKS 750 mL pot, which is the overall winner in our Best Backpacking Cookpot guide
Snow Peak Titanium Spork
Water FILTRATION
Sawyer Squeeze, which is a winner in our Best Water Filters and Purifiers guide.
Clothing
Evolv Rebel shoes (see our guide to the Best MTB Shoes)
Fingerless bike gloves. For more recommendations, see our Best Mountain Bike Gloves guide.
Specialized Tactic bike helmet. For more recommendations, see our Best Mountain Bike Helmet guide.
Generic padded bike shorts
Wool t-shirt
Patagonia Women’s Nylon Capri Pants cut into shorts
Enlightened Equipment Torrid puffy jacket. For more recommendations of puffy jackets, see our Best Down Jackets or Best Synthetic Jacket guides.
MYOG Polartec Alpha Direct hoody
Generic tights
Enlightened Equipment Torrid booties
Rain Gear
I brought an Ultimate Direction Ultra Rain Jacket for this trip. See our gear review of the Best Lightweight Rain Jackets for other recommendations.
Bike Lights
Any 500+ lumen headlight
Specialized Flashback tail light
Our Best Mountain Bike Lights guide also covers mountain bike-specific lights.
Headlamp
Petzl BINDI, which is a favorite of other Treeline Review writers and featured in our Backpacking Guide to the South Dakota Centennial Trail. We cover other lighting options in our Best Headlamps guide.
Bike Repair Kit
2 spare 27.5” tubes
Pedro’s tire levers
Lezyne Hand Pump (a winner in our Best Bike Tire Pumps)
Gerber Dime multitool with pliers
Zip ties
First Aid Kit
4 squares of gauze
Antibiotic ointment
Alcohol wipes
2 large square adhesive bandages
Ibuprofen
Sun Protection
Trucker hat
Sunscreen—see our Best Face Sunscreen and Best Sunscreen for your Body guide for our recommendations
You may also find our Mountain Bike Gear Checklist helpful.


