Yoga Poses for Downhill Skiers
strength, balance, stretch, and recovery for before skiing and Après Ski

Updated December 16th, 2024
Home > Learn Skills
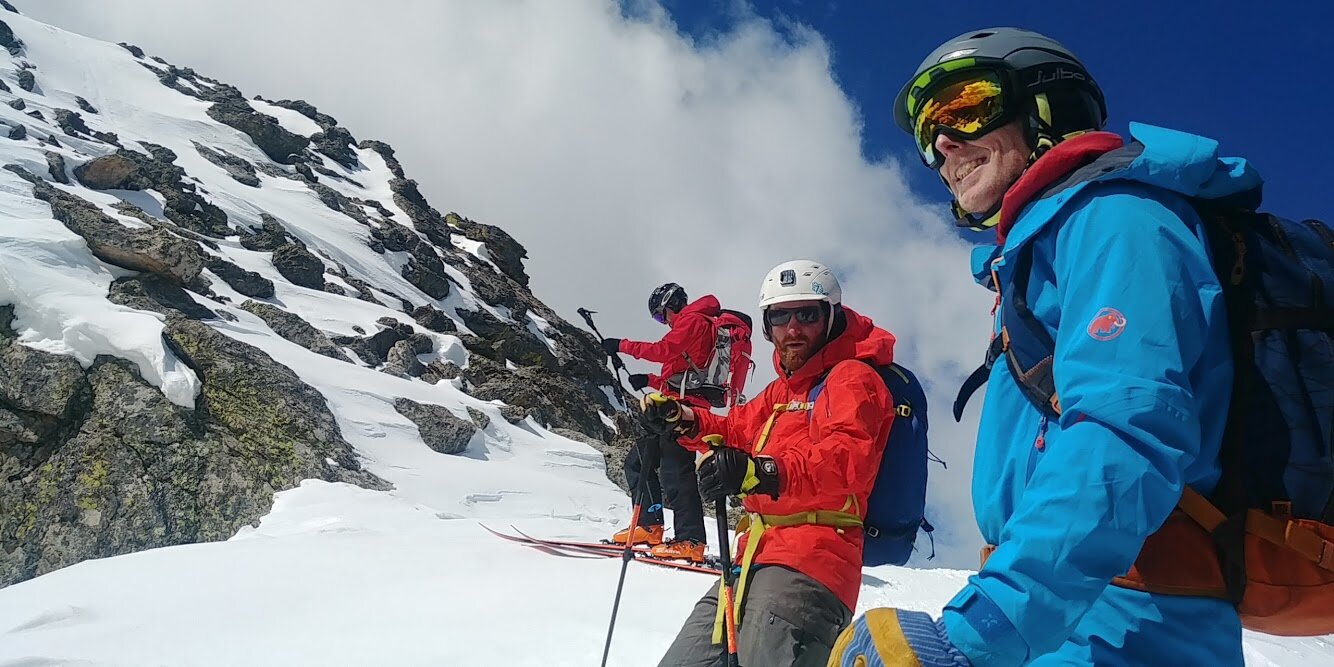
Yoga and skiing are a lot alike; bursts of intensity mix with strength, balance and fluidity to create moments of zen. With the right practice, you can become a better skier through yoga by incorporating a few simple poses into your routine. These yoga poses will help you prepare for downhill skiing and enhance your skills by developing better control and flexibility where needed most, while also easing recovery after a day on the slopes. The practices offer strengthening of the legs and ankles, balance practice, and shoulder work, as well as a restorative pose to balance you energetically.
Yoga is very adaptable to your schedule; even just 15 minutes of yoga twice a week can make a difference in your physical and mental health! The yoga poses described below are suggested as a sequence to do in order. But if you don’t have time to do all of the poses we list, feel free to pick one or two poses to do in the time you have.
Yoga is additive; no effort you put into it, however small, is wasted. Also, while these poses and sequences have been designed to target downhill skiers’ needs, they are not meant solely for skiers. They are great all-around poses that can be done whenever you want to do some yoga.
One last thing before we begin: breathe normally throughout the poses, and breathe through your nose!
Disclaimer: When participating in any exercise, you risk physical injury. By reading and voluntarily participating in these activities, you agree that you do so at your own risk and assume all risk of injury to yourself. By reading further, you agree to exempt Treeline Review and its associates from claims or causes of action, known or unknown. The information provided is not a substitute for professional medical advice, diagnosis, or treatment.
We create reader-supported, objective, independently-selected gear reviews. This story may contain affiliate links, which help fund our website. When you click on the links to purchase gear, we may get a commission, without costing you an extra cent. Thank you for supporting our work and mission of outdoor coverage for every body! Learn more.

Mountain pose is a beneficial yoga pose that can easily be practiced outdoors or indoors in a studio.
Yoga Poses to Prepare for Downhill Skiing
1. Mountain Pose (Tadasana)
Skiing requires having balance on your feet.
Mountain pose is the basic standing pose where you learn to stand well with confidence.
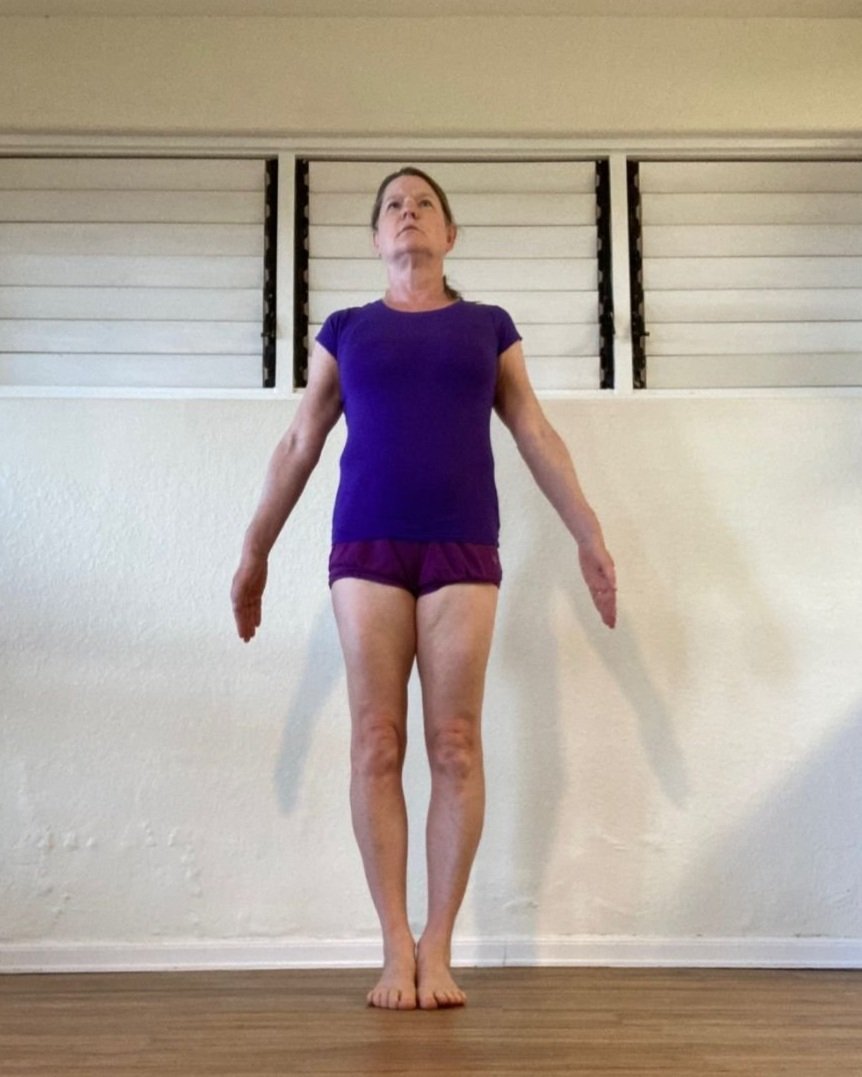
Mountain pose as shown from another angle and as practiced in a yoga studio. This yoga pose prepares you for skiing by practicing balance on your feet.
Stand with your feet together. Join the length of your big toes, your big toe mounds, and your inner heels.
Think of your foot like a tripod. The tripod points are your big toe mound, the center of the outer edge of your foot, and the center of your heel. Press all three of these points evenly into the floor with both feet.
Tighten your leg muscles to the bone, and use your quadriceps muscles to pull your knee caps up.
Lift the walls of your abdomen while descending the top of your buttocks.
Be tall in the sides of your trunk while stretching your arms down straight by your sides. Keep your palms facing the side of your hips, and look straight ahead.
Feel and sense your body, its steadiness, and vitality.
Tip: if you have bunions or knees that prevent you from joining your feet, stand with your feet slightly apart.
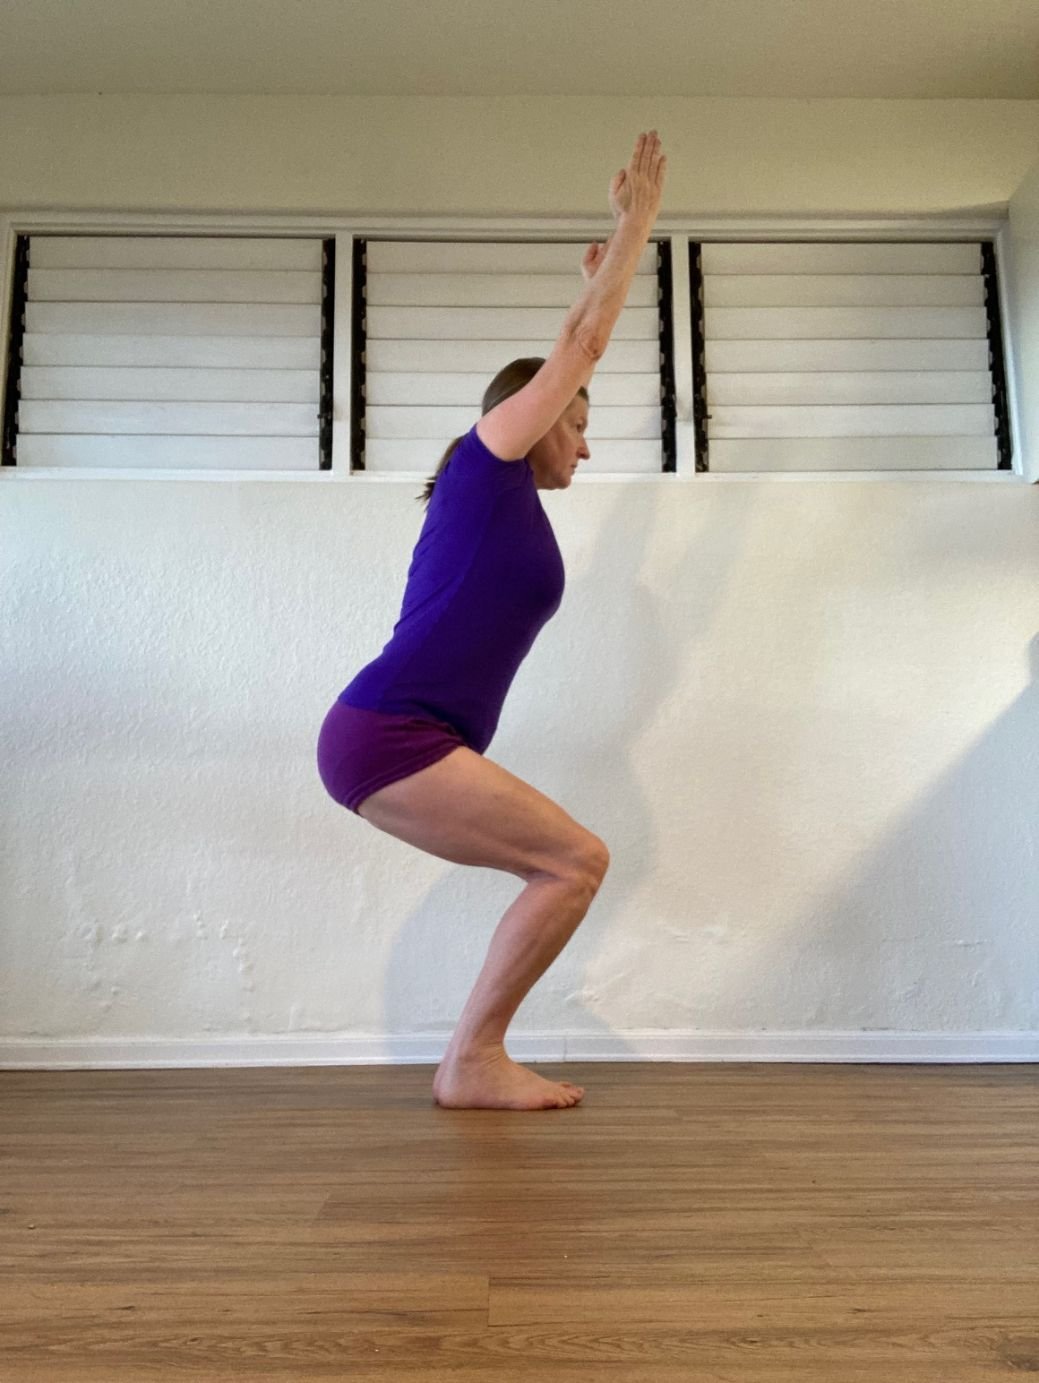
A side view of Powerful Pose. This yoga pose prepares the legs and lower body for activities like skiing.
2. Powerful Pose (Utkatasana)
Powerful Pose is also called chair pose. I like the name “powerful pose” because it prepares the legs and lower body to use their full power. It builds strength in the legs that is needed for skiing.
Stand in mountain pose.
With an inhalation, lift your arms up so that they are reaching to the ceiling. See that your arms are straight with your palms facing each other. Stretch your arms strongly upwards.
With an exhalation, keep the weight in your heels and bend all of your leg joints (ankle, knee, and hips). Your arms will also want to bend-don’t let them!
As you bend your legs, don’t let your inner ankles and inner knees press together. Lift your inner arches and ankles, and imagine that your outer knees are pulling back towards your outer hips.
Bend your legs enough to bring your thighs as parallel to the floor as possible. Keep the weight in your heels!
Don’t use your “buns of steel” for this yoga pose. Broaden your backside from sacrum to outer hips.
Stay in this pose for a few breaths, and then straighten your legs and your arms to release so that you are back in Mountain Pose.

A side view of Eagle pose. This yoga pose prepares you for skiing by strengthening ankles and hips and practicing balance.
3. Eagle Pose (Garudasana)
Eagle pose builds ankle and hip strength while working on balance, which is important for skiing.
Stand in Mountain pose. Then, bend both legs slightly.
Lift your left heel until most of the weight is on your right foot. Remember the tripod lesson of Mountain Pose.
Keep your right outer hip firm and your right leg bent. Then, lift your left leg up, roll it in towards the mid-line, and wrap your left thigh over the right. Tuck your left toes behind the left calf, or touch your left little toe to your outer right calf.
Add the arm position. Lift your arms in front of you until they are shoulder height, and then bend them at a right angle. Put your right upper arm on top of your left upper arm, crossing the elbows deeply. Now, wrap your forearms until the wrists entwine and your palms press into each other.
Balance here and observe your breath. Keep your shoulders relaxed and your elbows as high as your shoulders. Come out of the pose by unwrapping your arms and legs.
Tip: you can learn the arm and leg positions in separate attempts. If you have trouble with your balance, you can do the pose with your feet a few inches away from the wall and lean your buttocks on the wall.

Warrior 1 as seen from the side. This yoga pose prepares you for skiing by practicing ankle stability, flexibility, and leg strength.
4. Warrior I Pose (Virabhadrasana I)
Warrior I is an invigorating yoga pose that develops ankle stability, flexibility, and leg strength.
From Mountain pose, step your feet about 4 feet wide. Then, lift your arms up toward the ceiling with your triceps rolling forward and palms facing each other.
Turn your left foot in about 30 degrees, and your right foot and leg out 90 degrees.
Follow the turn of your right leg with your hips and your trunk until you are facing right.
Press the outer left foot strongly back and down as you exhale and bend the right leg to a 90-degree angle.
As you did in Powerful Pose, pull the outer right thigh towards the outer right hip to keep the right knee from falling inwards.
Lift your abdominal walls up as you descend the top buttocks.
Use your arms reaching skyward to create lift in the trunk and spine.
Ask your breath to become smooth, even as the intensity of the pose becomes apparent. Stay for a few breaths.
To come out of the pose, straighten your right leg and then release your arms down. Turn both of your feet forward and step them together to come back into Mountain pose.
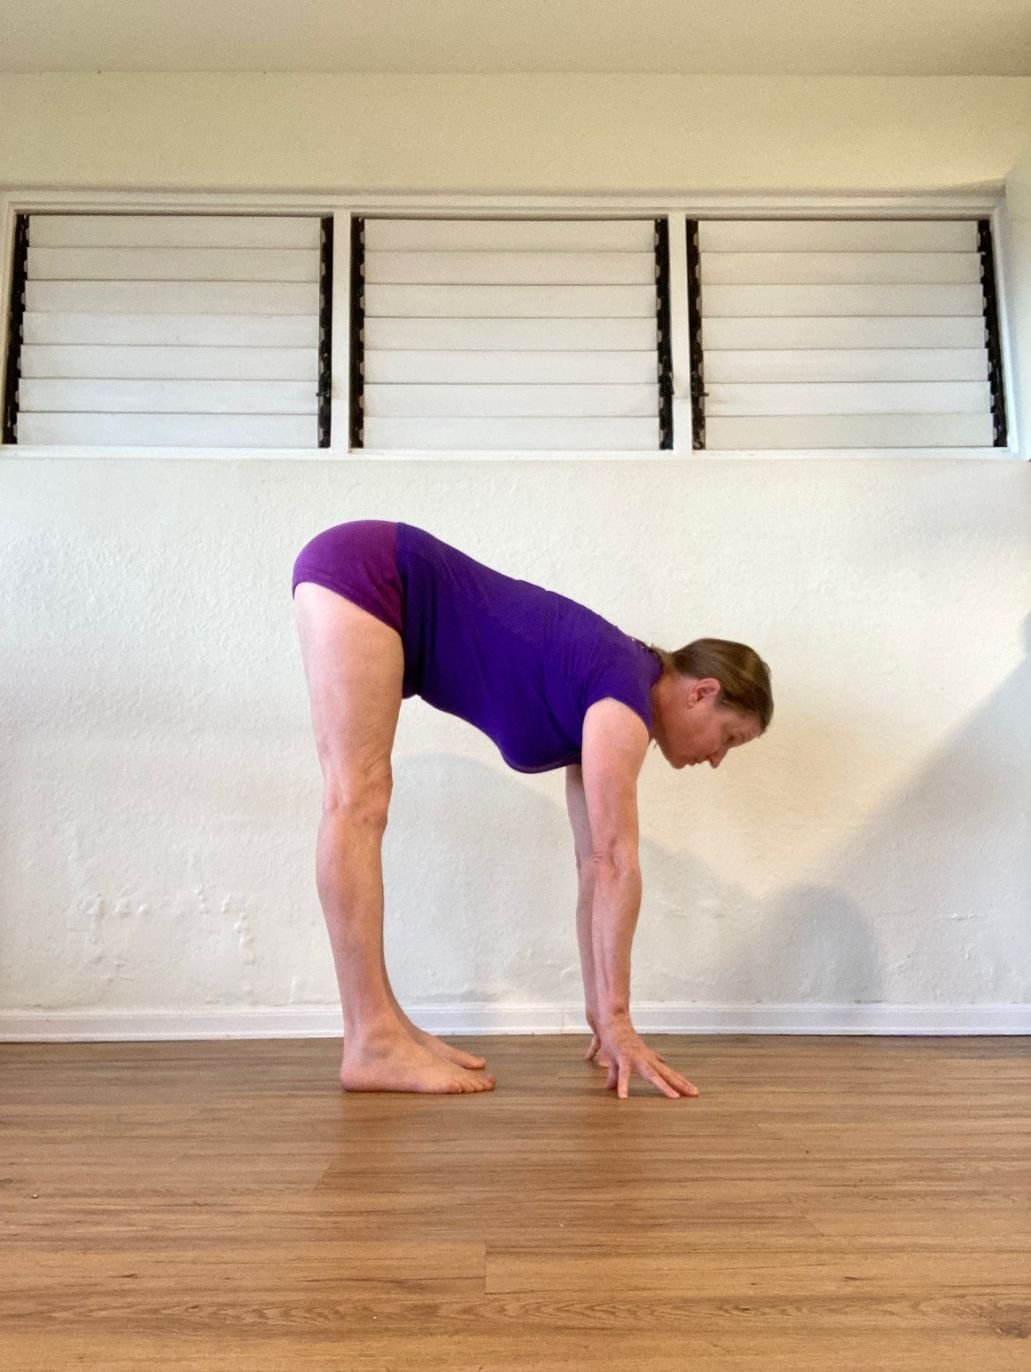
5. Intense Stretch Pose (Uttanasana)
This pose is aptly named! The Intense Stretch Pose gives the legs a great stretch and helps the spine and back benefit from gravity.
Stand in front of a chair with your feet hip-distance apart.
Press your feet into the floor, especially your heels, straighten your legs, and be tall.
As you exhale, bend from your top thighs and place your hands on the chair. See that your legs stay straight and your back stays unrounded. Take a few breaths.
If you want more of a challenge, walk your hands lower down on the chair legs as you exhale. Let your trunk extend towards the floor, and your head release down.
Hold for a minute, and then with firm legs, inhale to come up.
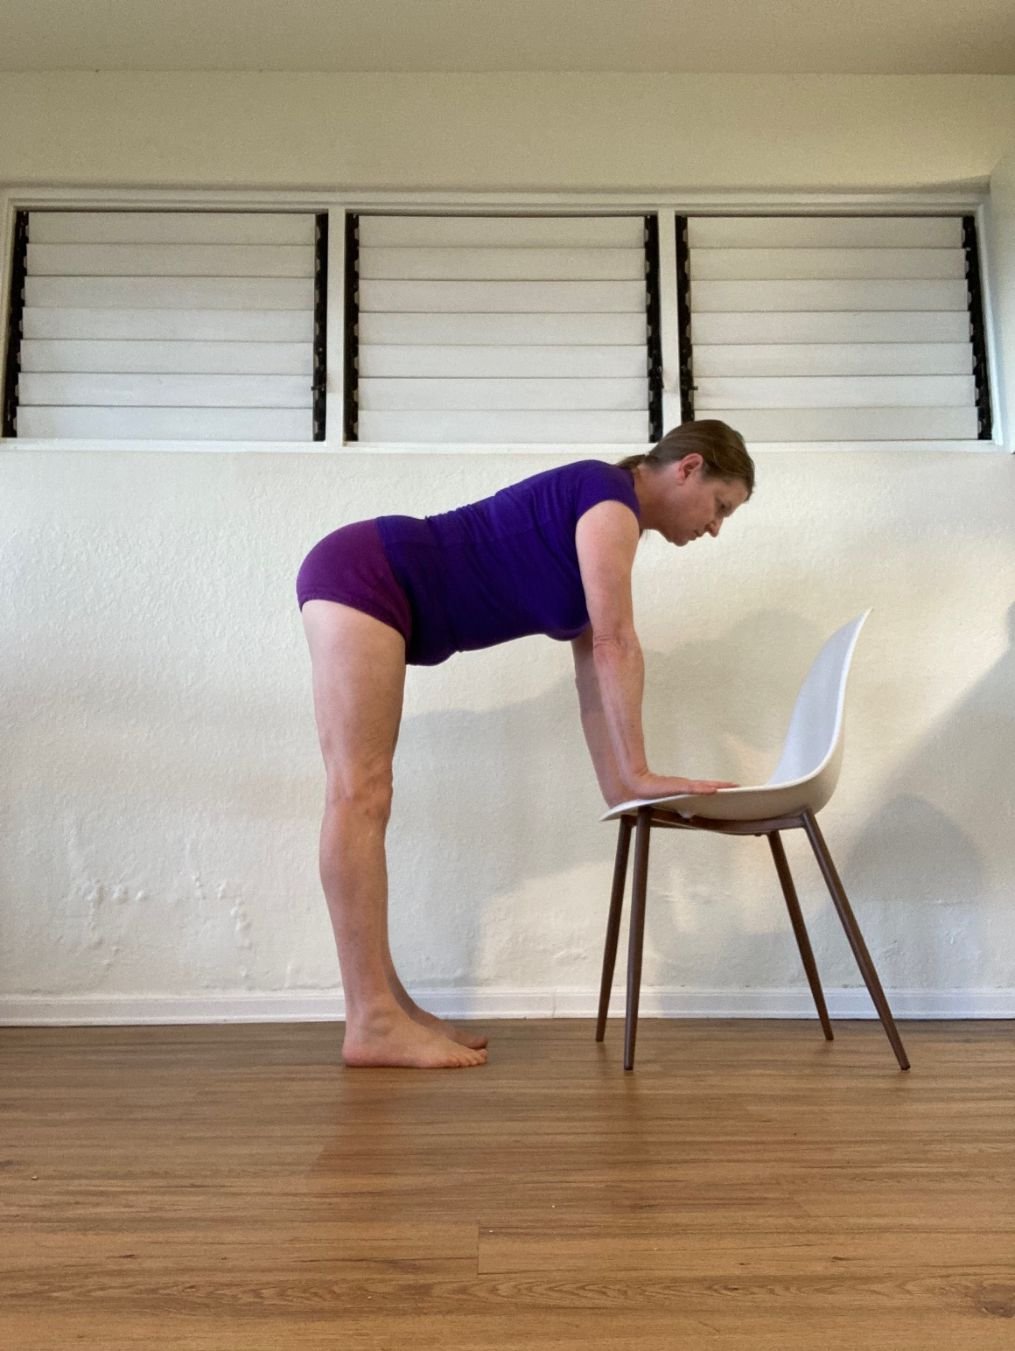
Intense Stretch pose with hands on the seat of a chair. This yoga pose prepares you for skiing by helping the spine and back benefit from gravity.
Intense Stretch Pose Stage 1 with hands lowered and trunk extending towards the floor. This more challenging expression of the yoga pose prepares you for skiing by using more gravity to benefit the back and spine.
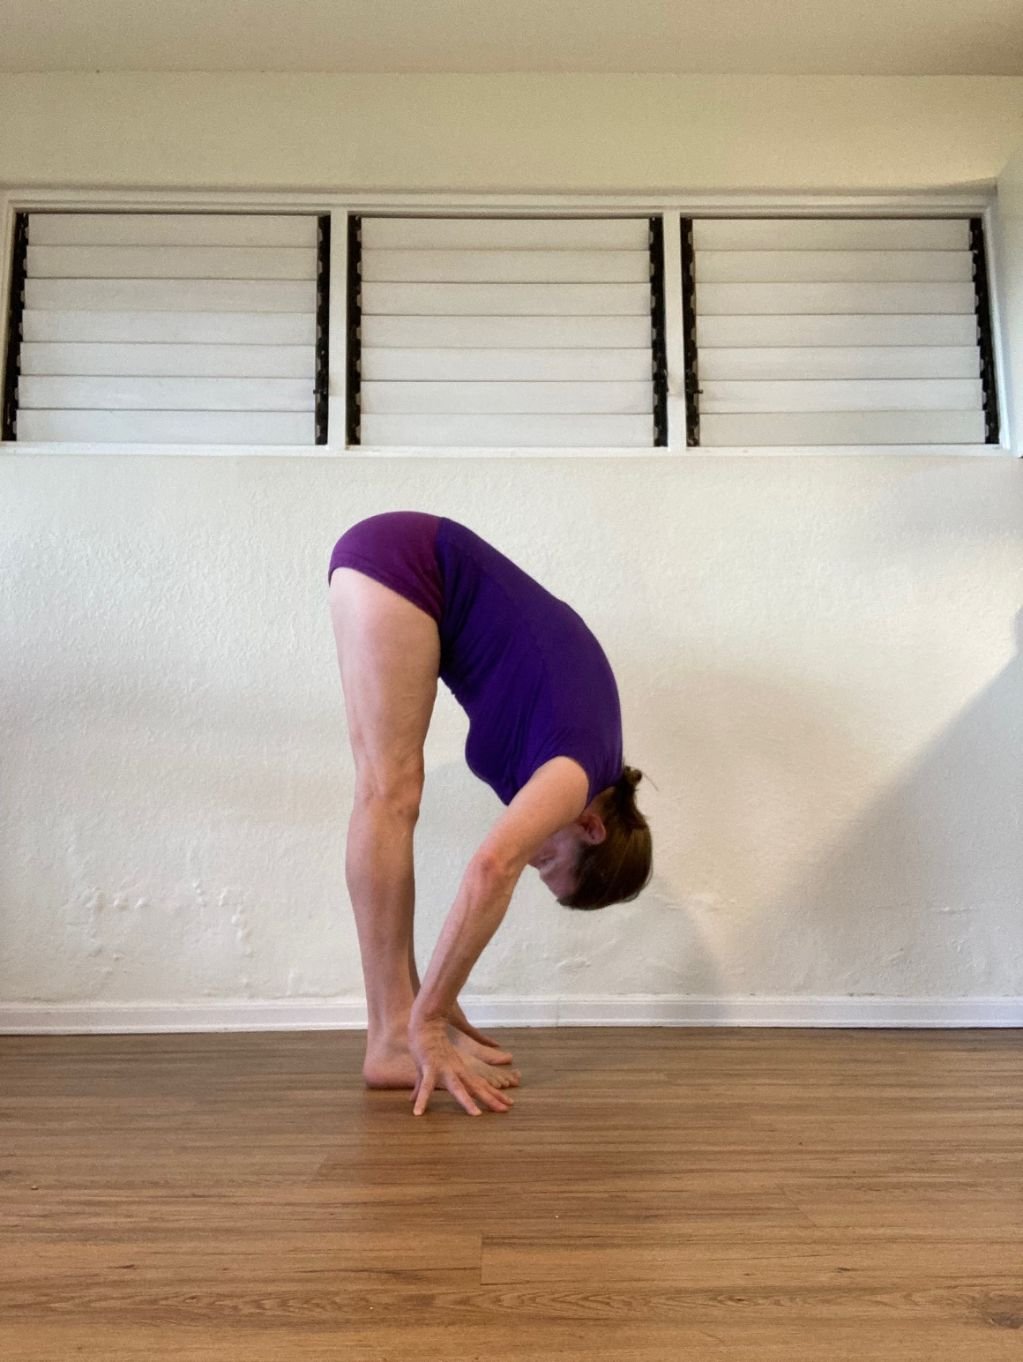
Intense Stretch Pose Stage 2 with head releasing down. This even more challenging expression of the yoga pose benefits skiers by using more gravity to benefit the back and spine.
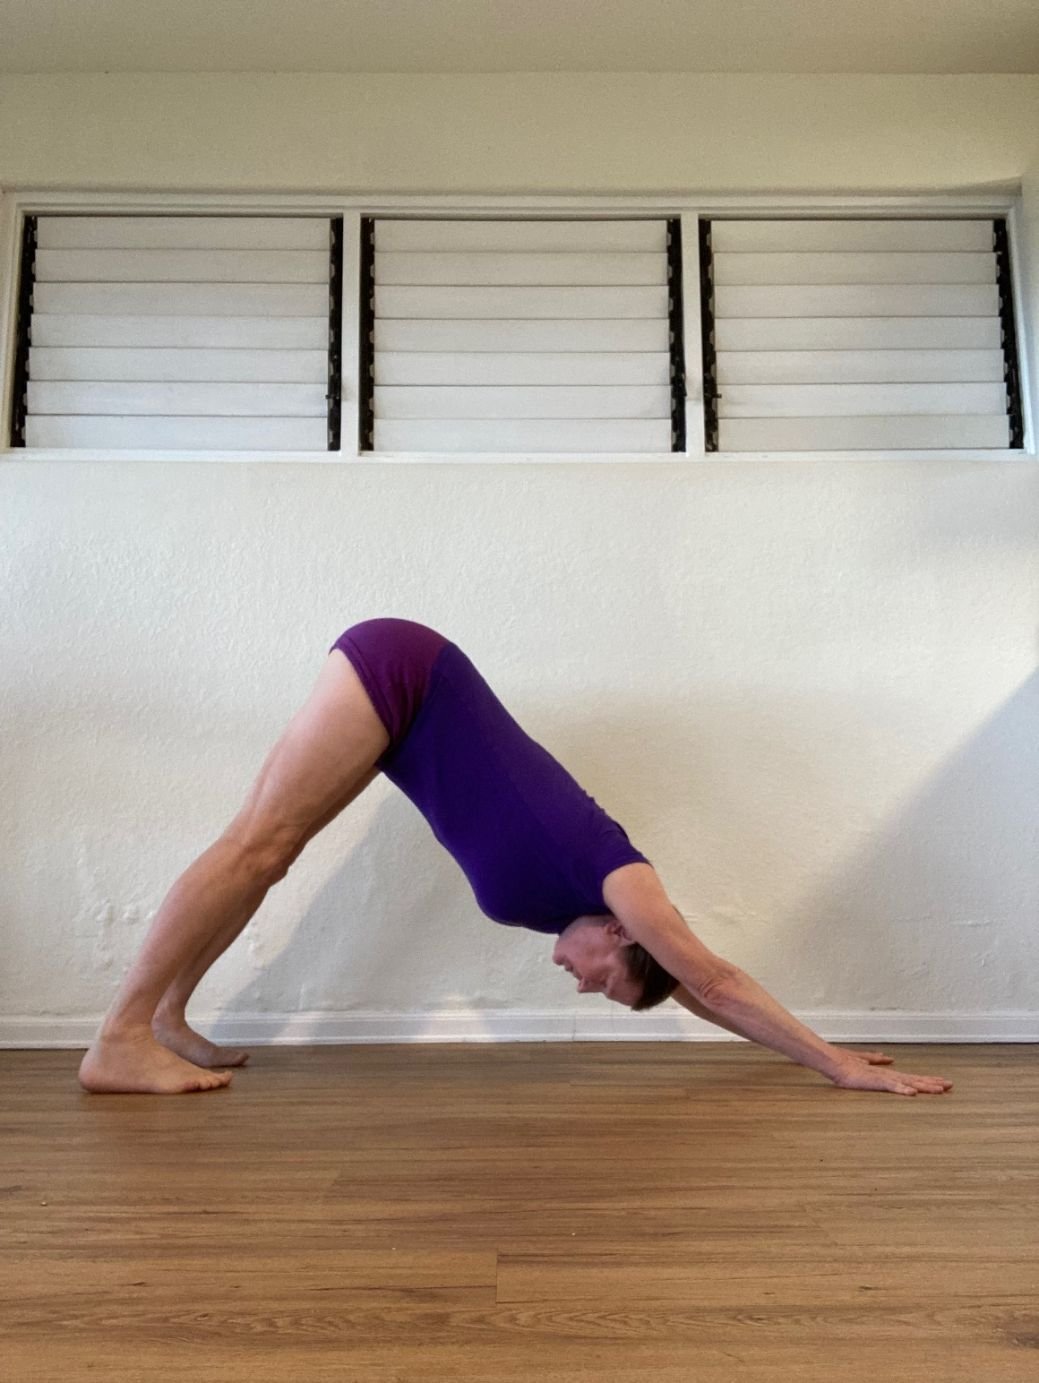
Dowward facing dog pose as seen from the side. This yoga pose prepares you for skiing by promoting a range of motion, especially in the shoulders.
6. Downward Facing Dog Pose (Adho Mukha Svanasana)
Downward facing dog pose lengthens the calf and hamstring muscles. It promotes a range of motion and strength in your shoulders.
Kneel on your hands and knees. Have your knees about hip-width apart and your hands a few inches wider than shoulder-width apart. Place your hands so that your middle finger is either straight ahead or slightly turned out. Press your palms into the floor and straighten your arms.
As you exhale, lift your knees. Press into your palms. Using the stability of your palms pressing into the floor, stretch your hips up and back.
With a further exhalation, straighten your legs and reach your heels back and down.
Hold for 30-60 seconds and then release.
You can also do this pose with your hands elevated on a chair. Place the chair at a wall to be stable enough to use for support.
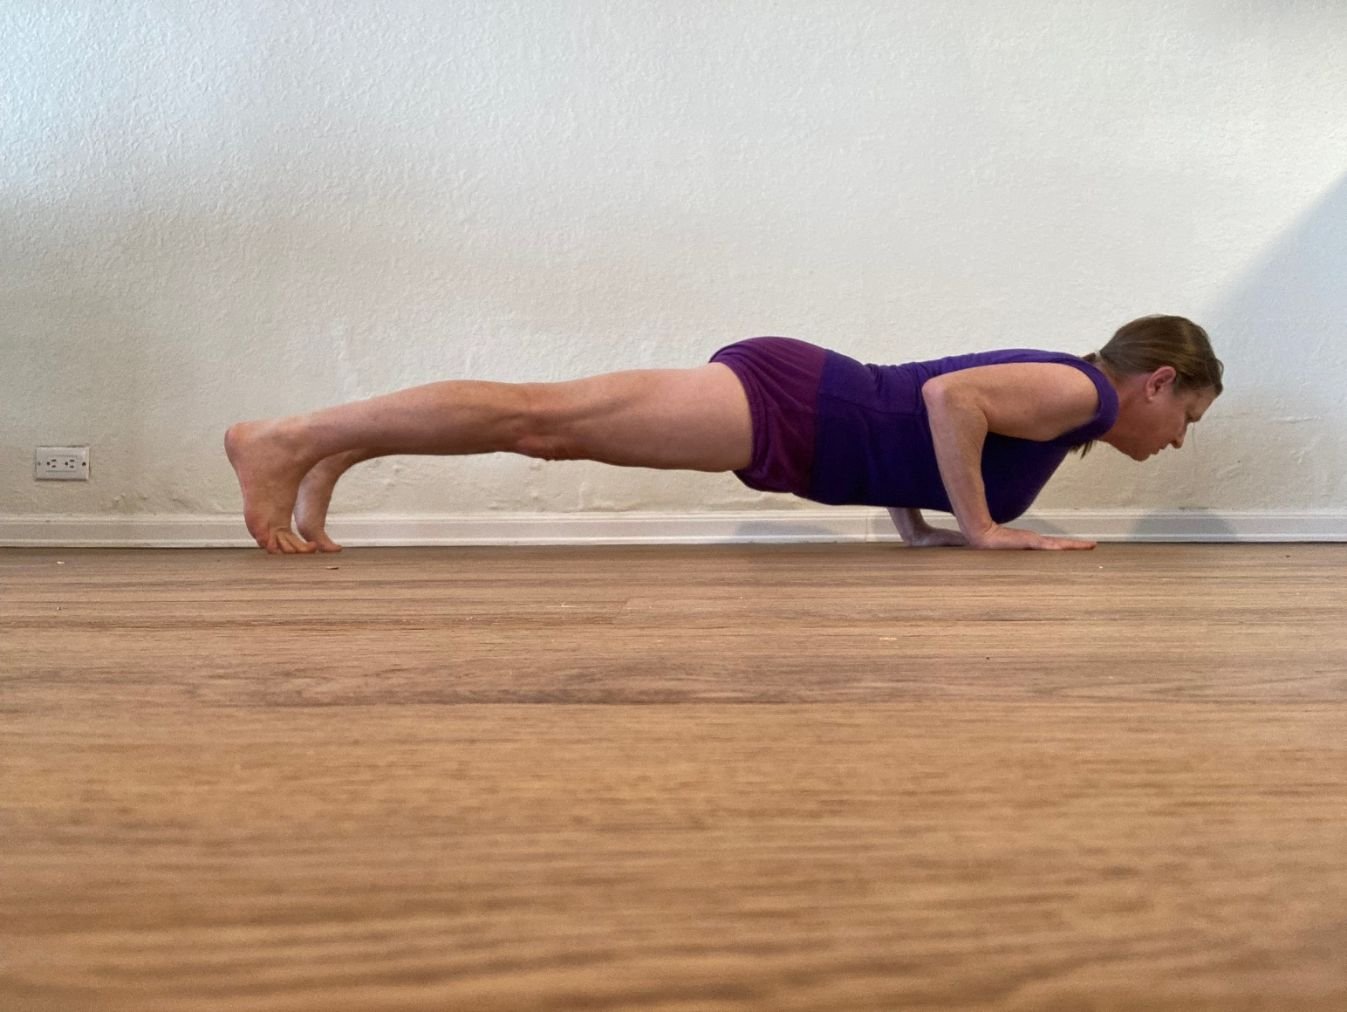
Four-footed staff pose prepares you for skiing by building strength in the upper body and abdominal muscles.
7. Four-Footed Staff Pose (Chaturanga Dandasana)
This pose is a bent-arm plank yoga pose. It builds the upper body, core muscles, and core strength.
Learn the plank position first. Kneel on all fours with the shoulders over the wrist and the knees a few inches behind the hips.
Press the palms into the floor and turn your upper arms so that the biceps turn slightly forward and the triceps turn towards each other.
With an exhalation, lift the knees off the floor and tighten the legs like you are in Mountain pose. Lengthen the abdominal walls towards the rib cage and move the buttocks towards the heel. Keep the head in line with the trunk. Release after a few breaths.
Now you are ready to try the bent arm version! Lie prone on the floor. Place your hands by your side ribs. Curl your toes and tighten the leg muscles in preparation. Also, to prepare, roll your shoulders away from the floor and feel your shoulder blades moving towards your back waist.
With an exhalation, press your hands and toes into the floor and lift your trunk off the floor to hover a few inches away from it. Your body should make a plank from shoulders to heels.
Release after a few breaths.
Tip: if this is difficult, put your trunk on some height, such as a few long-folded blankets. Learn the shape of the pose here and build strength by pressing the hands and trying to lift, even if you don’t lift off the blankets. Also, if your wrists are sensitive, turn your palms out 90 degrees or do the pose on your forearms.
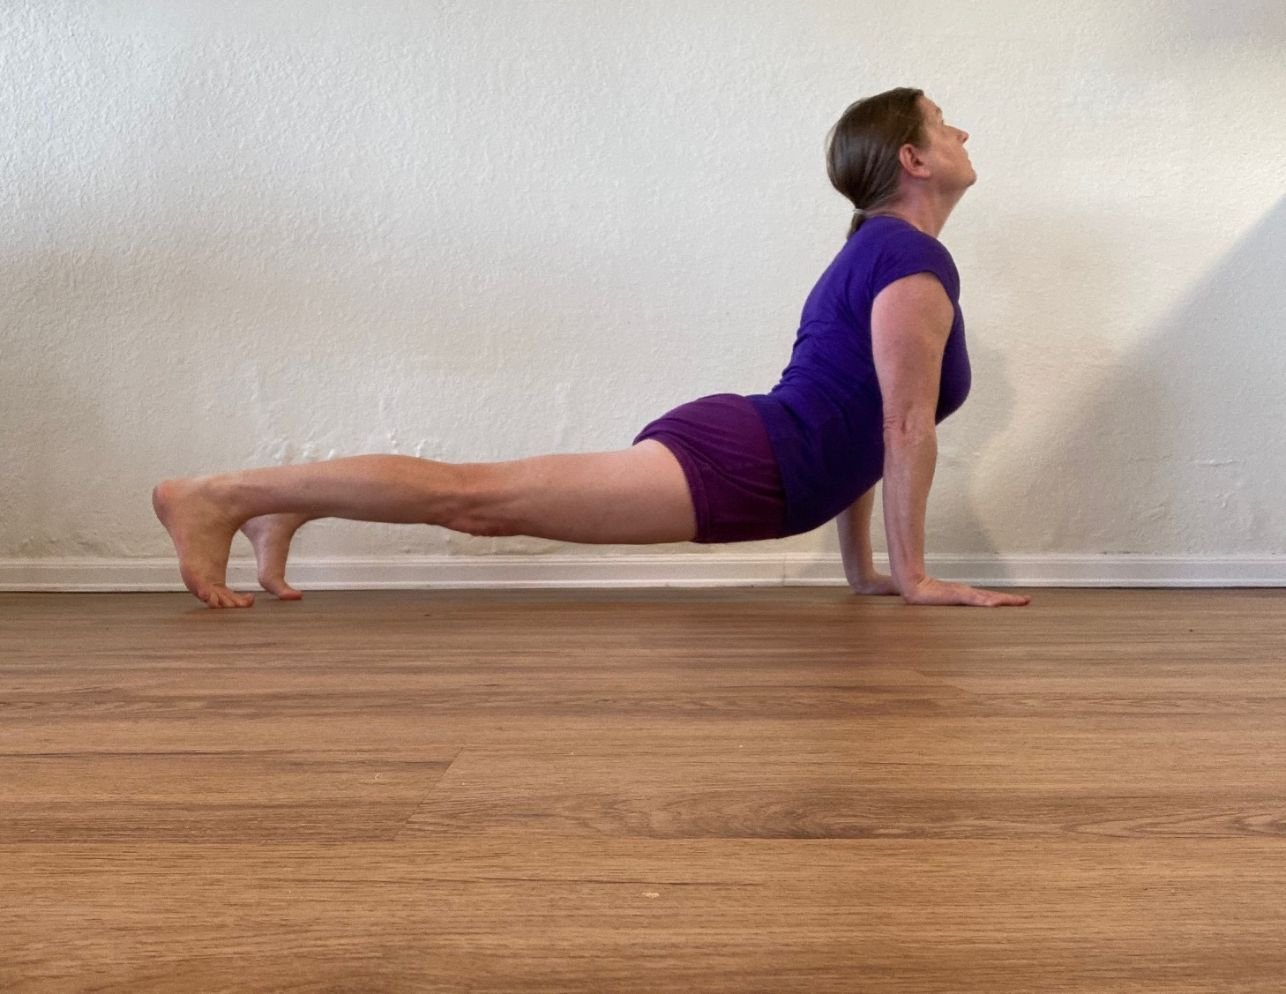
Upward Facing Dog yoga pose as seen from the side. This yoga pose builds strength in the arms and legs as well as developing spinal flexibility. This is important for skiers, who must be able to sustain quick bursts of movement.
8. Upward-Facing Dog Pose (Urdhva Mukha Svanasana)
Upward Facing Dog is a backward extension pose. It builds strength in the arms and legs and helps you develop more spinal flexibility, which can help during quick bursts of movements when you ski.
From Downward Facing Dog, keep your arms and legs straight and bring your chest forward between the arms.
Press back through your heels while lengthening the entire front body up to the collar bones.
Roll your shoulders back while lifting your side trunk up and moving your upper spine into your body.
To release, come back to Downward Dog with an exhalation and then come to your knees.
Tip: look forward at first. If your shoulders are back and your spine is well extended, explore taking your face upwards by pressing the shoulder blades forward.
9. Sun Salutations (Surya Namaskar)
Sun Salutations join together a group of poses to create a sequence or flow of poses. Practicing Sun Salutations as a skier will prepare you for short bursts of intensity needed for downhill skiing. Be sure to learn the poses above before practicing Sun Salutations. Here is a version of Sun Salutations that is great for downhill skiers because it incorporates Powerful Pose.
Start in Mountain Pose.
Inhale, lift your arms up.
Exhale, bend your legs to Powerful Pose.
Inhale, straighten your legs.
Exhale, bend forward to Intense Pose.
Inhale, bend your knees and put your palms on the floor.
Exhale, step back to Downward Facing Dog Pose.
Inhale, come forward to Upward Facing Dog Pose.
Exhale, to Chaturanga Dandasana.
Inhale, to Upward Facing Dog Pose.
Exhale to Downward Facing Dog Pose.
Inhale, step forward to Intense Pose.
Exhale, and pause.
Inhale, lift your arms and trunk up.
Exhale, bend your legs to Powerful Pose.
Inhale, straighten your legs.
Exhale, release your arms, and be in Mountain Pose.
Take a resting breath before beginning again.
See if you can do 12 Sun Salutations in a row!
Tip: once you know the pose components of this sequence, you can open your practice with Sun Salutations and then do other poses before ending your practice.

Corpse pose is an important yoga pose that allows us to integrate what we’ve been practicing and learning. Skiers who are practicing yoga should set aside time to complete the practice with corpse pose.
10. Corpse Pose (Savasana)
Yoga practice typically ends with a resting pose. Corpse Pose gives us time to integrate what the body has been practicing and learning.
Lie on your mat with bent knees. Place a thin blanket under your head and neck. Use just enough blanket so that your forehead is parallel to the ceiling.
Tuck your shoulders towards the waist, and then tuck your buttocks towards the heels.
Extend your legs along the floor, and then let your legs relax in the hip sockets. Let your big toes fall towards your little toes.
Close your eyes and relax. Stay 3-5 minutes. Do this pose just one time.
Tip: If your back is uncomfortable, put a rolled blanket behind your knees.
Yoga Poses for After Skiing
While skiing, the ankles spend much of the day in a fixed, flexed position.
When you ski, the front thighs (quadriceps) work hard and can become stiff and tight as a result.
The following are some of the best yoga poses to counter the aftereffects of skiing.
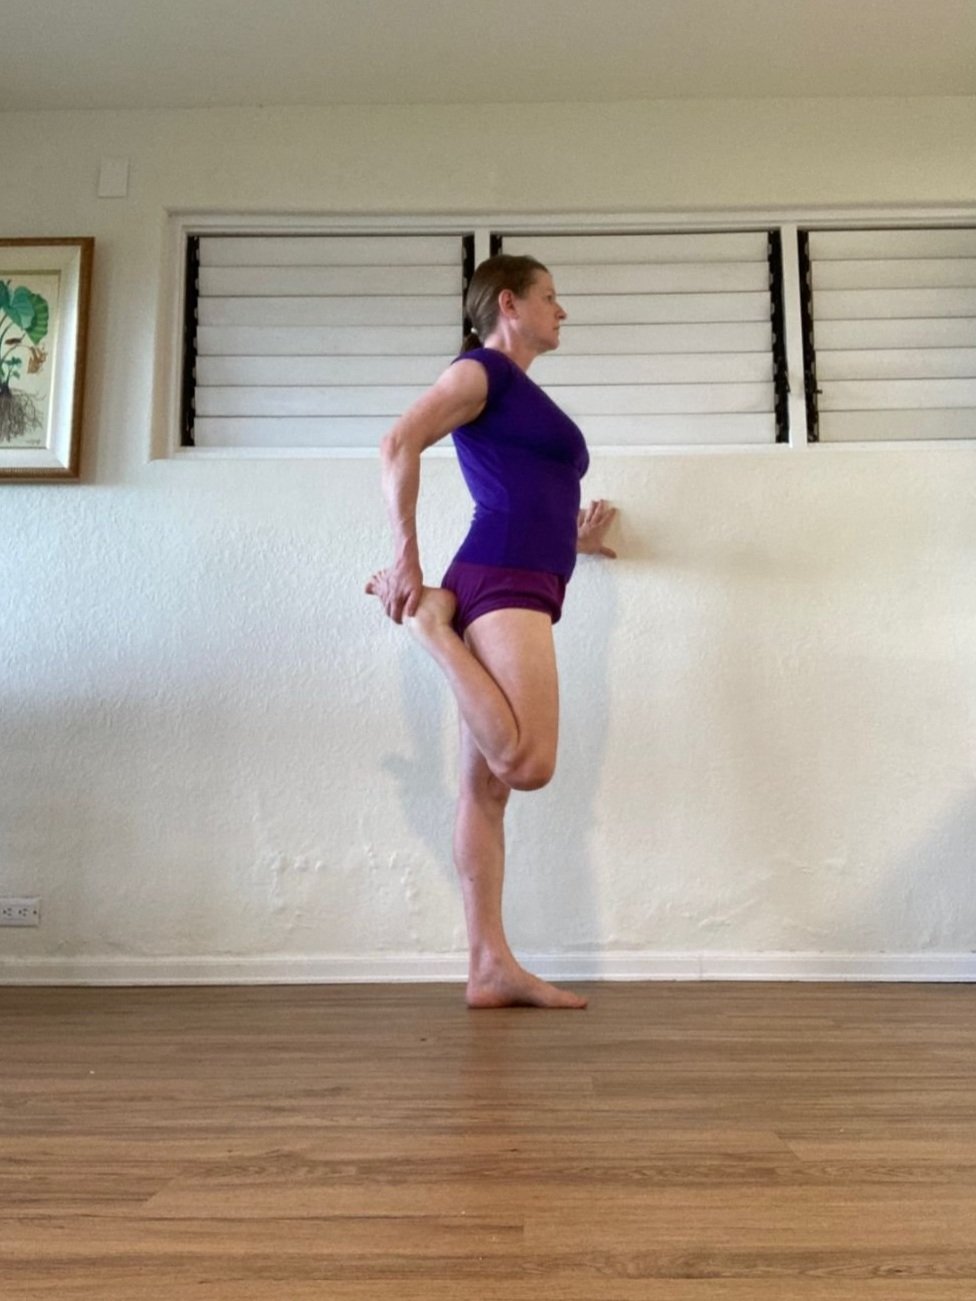
Standing frog pose as seen from the side. This yoga pose for after skiing benefits skiers by countering the after effects of working the quadriceps.
1. Standing Frog Pose (Bhekasana)
Stand facing a wall, with your left hand firmly on the wall for balance.
Bend your right leg and catch the front of your ankle or top of your foot.
See that you are upright in your posture. Then, attempt to line up the front of the right thigh with the front of the left thigh.
At the same time, move your tailbone forward towards the wall as you take the bent right leg back a little further.
Press the wall with your hand to lift the chest up.
Hold for 20-30 seconds, and then do the other side.
2. Hero’s Pose (Virasana)
Virasana is an upright seated pose that relieves the stiffness and sore muscles from being in ski boots.
Kneel on a blanket, join your inner knees and separate your feet to be just wider than your hips. Place a yoga block or a 4” height of firm blankets between your heels. Keep the block or blankets even with the heels. Do not bring the support under your thighs.
Dig your fingers behind the knees, then pull your calf flesh towards the heels and out as you sit back on the block or blanket stack. The buttock bones should sit directly on the block or blankets.
Sit up, lift your abdominal walls, and descend your top buttocks towards the support you are sitting on. Relax your shoulders, rest your hands on your thighs, and sit tall. Stay like this for a minute, taking easy breaths.
To come out of the pose, lean forward and come to all fours. One by one, stretch your legs back and straighten the knees fully. Then, sit with the legs in front of you and give them a good stretch. Following this pose with a downward-facing dog pose is a great idea.
Tip: your knees should not hurt or even feel a stretch. If this is the case, sit on more support, or sit on your heels instead. If the knees continue to be an issue, skip this pose until you can consult with an experienced teacher.

Hero’s pose as seen from the front. This yoga pose counters the after effects of skiing by relieving the feeling of being in ski boots for many hours.
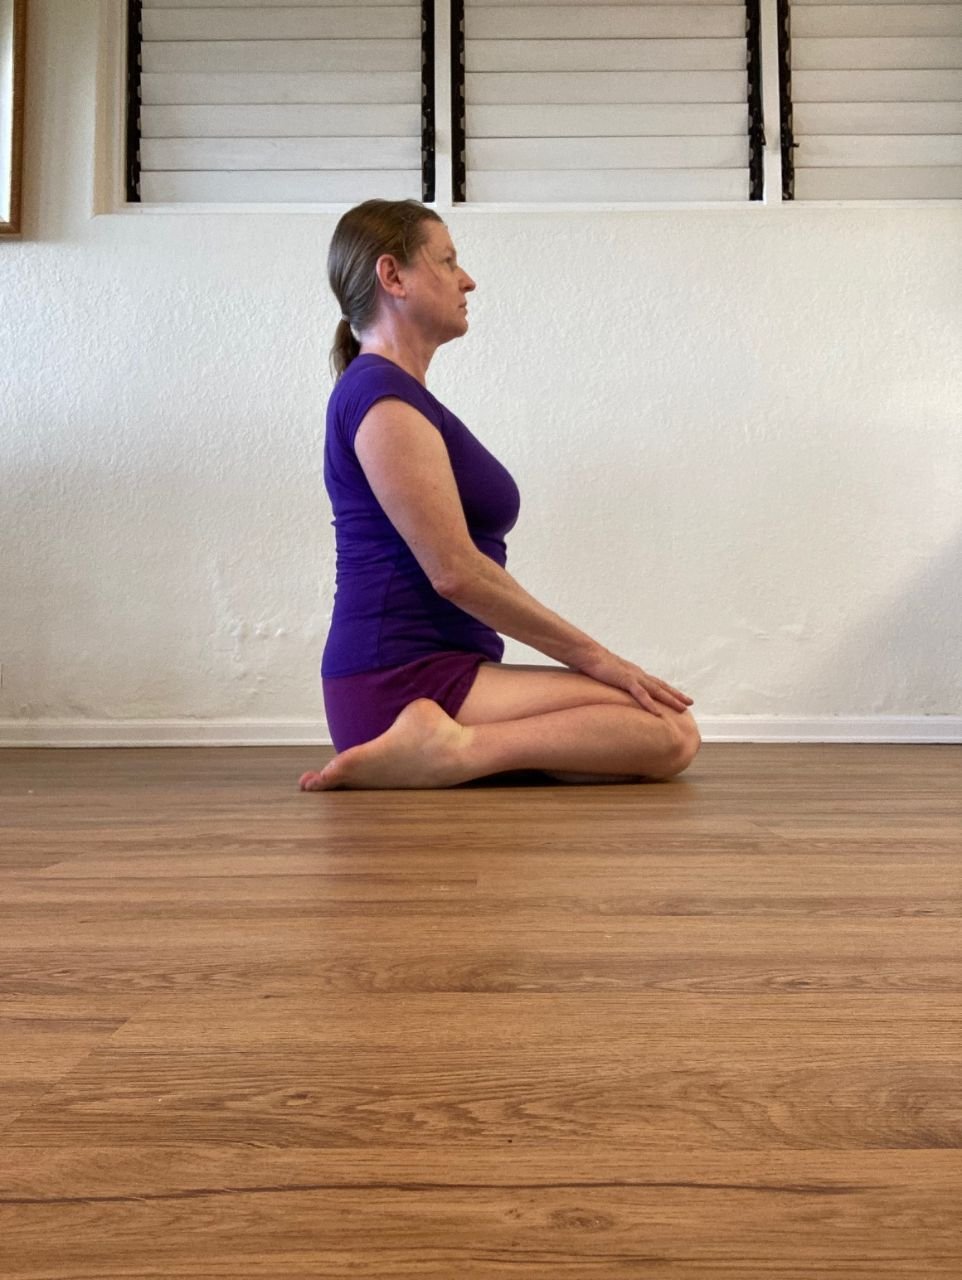
Hero’s pose as viewed from the side. This yoga pose counters the after effects of skiing by relieving stiffness and sore muscles.

You can always opt to sit on a support or your heels in Hero’s pose. Your knees should not hurt or feel a stretch.
3. Reclining Bound Angle Pose (Supta Baddha Konasana)
This is a supported resting pose to relax the groins and entire body. The purpose of this pose is to create a sense of opening for the body, mind, and breath.
You will need a few more props, including a bolster or a stack of firm blankets. If you have a yoga strap, that can be helpful but is not necessary for this pose. If you are not in a yoga studio or don’t have access to a bolster or yoga strap, a stack of firm blankets and a scarf or belt can work at home.
Take some time to set up your props. Fold the blankets in a long rectangular shape and place them lengthwise on your yoga mat. You can also use a bolster for this purpose. Place another blanket on the stack to use as a pillow for your head and neck.
Sit 3-4’ in front of the blankets. Bring the soles of your feet together and let the knees go wide. Move your heels fairly close to your body. If you have a yoga strap, you can use it here to secure the legs in this position. If you do not have a strap, you can use another blanket to secure the feet.
If your knees are not resting on the floor (and this is the case for 99% of people), then find some support for them (pillows, blocks, etc.); just be sure that the outer calves and thighs are resting on something.
Place your hands on the floor and press them down to lengthen your trunk. Keep lengthening your trunk as you recline onto the stack of blankets. Arrange the blanket “pillow” to support your head and neck comfortably.
Let your arms rest to the sides about 45 degrees away from the trunk, with your palms up.
Close your eyes. Relax completely. The pose should be entirely comfortable. Focus on your breath and take gentle inhalations. As you exhale, let your abdomen soften deeply. Stay for five to ten minutes.
To come out of this pose, let your eyes open and use your hands to press yourself to a seated position. Release your legs and sit quietly for a few moments.
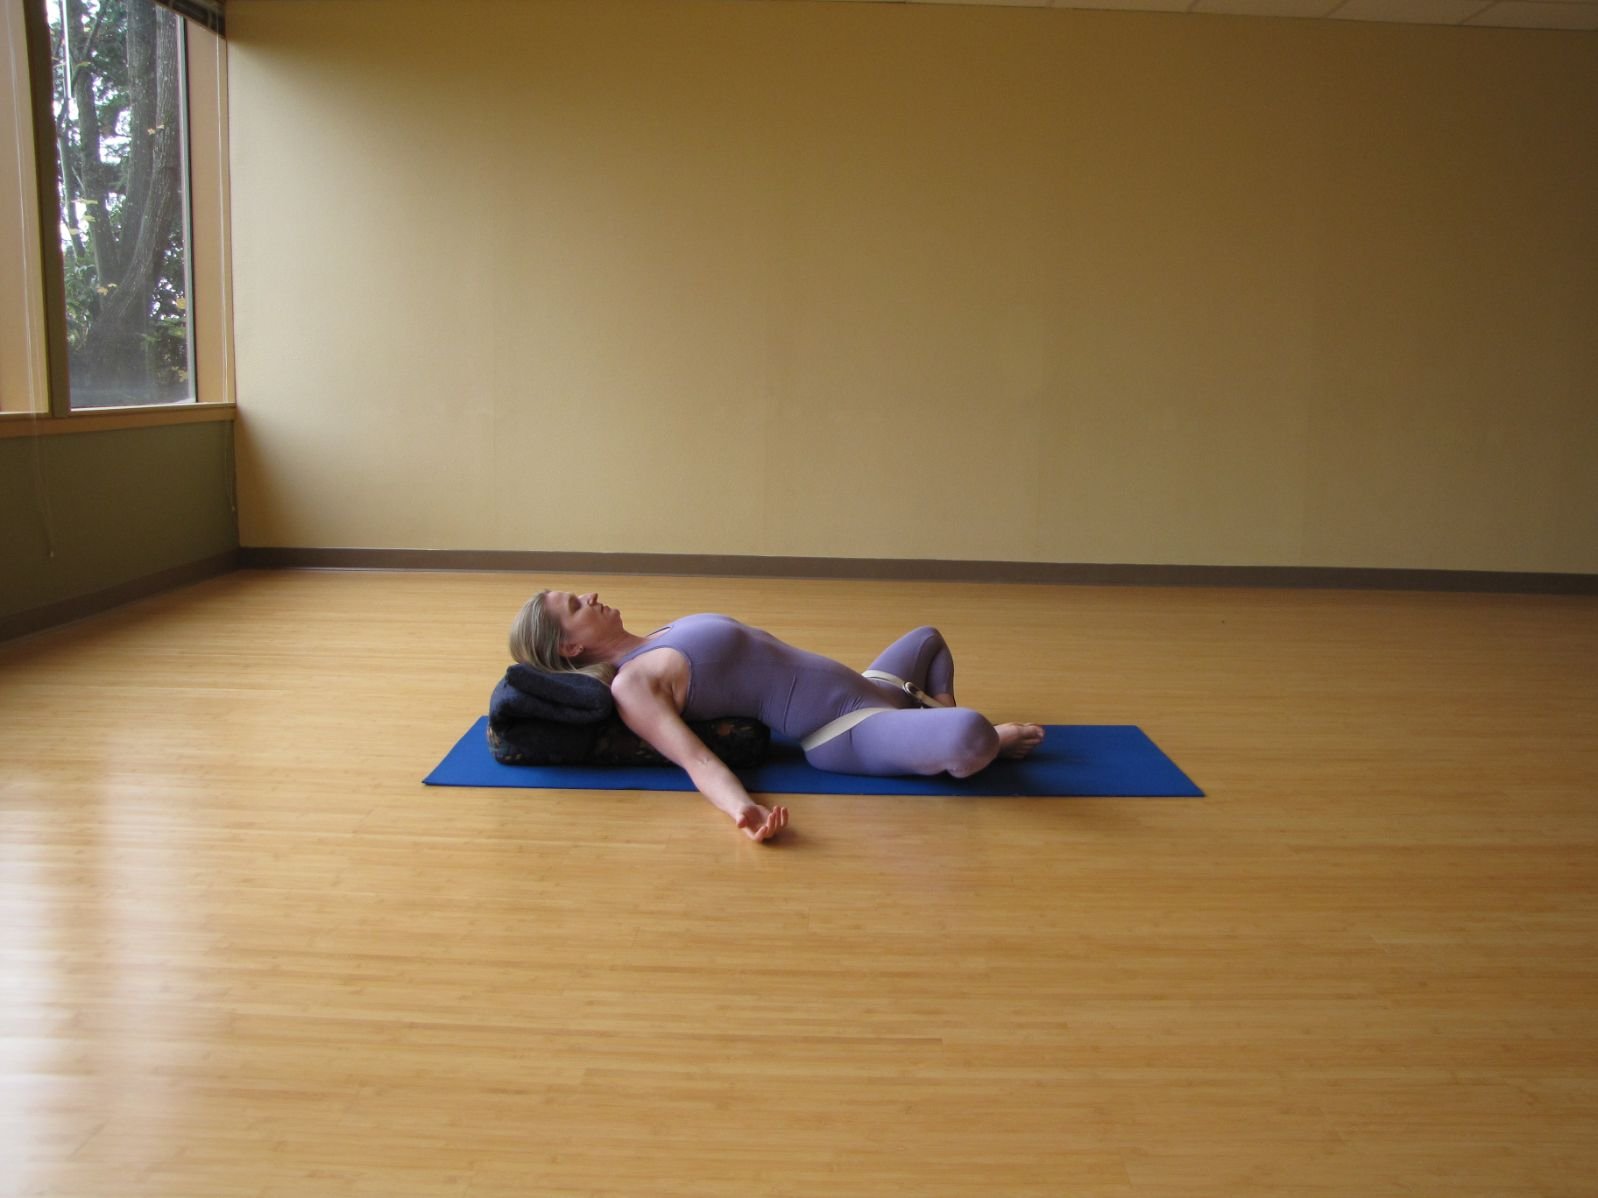
Reclining bound pose relaxes the groins and the entire body and can help as a post-skiing yoga pose.
Conclusion
These poses have been chosen to provide targeted yoga practices for the downhill skier. The practices offer strengthening of the legs and ankles, balance practice and shoulder work, as well as a restorative pose to balance you energetically. Give the poses a try and see how yoga can help enhance your skiing.

The author in the Columbia River Gorge.
Why You Should Trust Us
Nina Pileggi has taught yoga for over 20 years. She is a Certified Iyengar Yoga Teacher, an E-RYT 500, YACEP (Yoga Alliance), and a C-IAYT (International Association of Yoga Therapists).
Nina has also written for Treeline Review, covering Yoga for Hiking and The Best Rated Yoga Mats.
In addition to being a yoga instructor, Nina is an avid hiker, backpacker, and cross-country skier. She lives in White Salmon, Washington.
More about Nina, her yoga class, and workshop schedule can be found at www.ninapileggi.com.