Thru-Hiking Risk Assessment and Decision Making
evaluating risk, group decision making, gear, and skills assessment for high snow year backpacking
In high snow years, the trail may not be visible for many miles. Thru-hikers will need to learn how to navigate through the mountains without a trail and assess risk associated with these conditions based on their skillset and experience.
April 26th, 2023
Knowing how to assess risks and make decisions are skills we use often in the backcountry, even though we may not think about it. They are skills that can help us stay dry, avoid hurting ourselves, and in some situations, can save our lives.
Risk assessment and decision-making skills become even more critical when hiking in harsh conditions, such as thru-hiking in a high snow year. It can be scary to think about, but people do die hiking in the mountains.
As hikers, we are always trying to find a happy balance between a challengingly rewarding hike and a safe one. The frameworks in this article are tools we hope will help you navigate that balance for yourself and your group.
As a thru-hiker and Wilderness First Aid educator, I use a set of steps to conceptualize and assess risks while hiking. This article will take you through how to think about risks and safely make decisions with a group so that the entire group feels comfortable with the choice.
At the end of this article, you won’t have any answers about what your decisions should be; instead, you will leave with a framework that you can use to guide you through making your own choices so that you have a rewarding and safe hike.
This story may contain affiliate links, which help fund our website. When you click on the links to purchase gear, we may get a commission without costing you an extra cent. This allows us to create reader-supported objective gear reviews. Thank you for supporting our work and mission of outdoor coverage for every body! Learn more.

The author during a avalanche certification course.
USE YOUR EXPERIENCE TO MAKE DECISIONS
First off, who am I? Most importantly, I am not you. I have my own experiences, risk tolerance, and opinions. My choices may be different from yours, which is great.
That is a massive part of why the long-distance hiking community emphasizes Hike Your Own Hike (HYOH) as an important community value. Even if you find it cheesy, hold this principle close because it is beautiful and lets you define success for yourself.
I will take you through what I do when I make choices when hiking and backpacking so that you can see how I approach risk identification, risk assessment, preparation, and decision-making. Then, you can use this framework to make choices, whether or not your and my end decisions are the same.
A little bit about me—my trail name is Giggles, I am a long-distance hiker, and I work as an educator teaching Wilderness First Aid in San Francisco with my business, With The Wild Things. I am a Wilderness EMT, Leave No Trace Master Educator, Personal Trainer, California Naturalist, and I have my American Institute for Avalanche Research and Education (AIARE) I Certification.
I hiked the Pacific Crest Trail in the 2017 high snow year and the Continental Divide Trail in the 2019 high snow year. I've also hiked several high alpine routes (hikes with off-trail travel), such as the Sierra High Route (SHR) and the Wind River High Route (WRHR).

The Oregon/Washington state high point on the PCT in 2017.
pct and cdt as case studies
When I hiked the PCT and CDT in high snow years, I made two different decisions regarding risk based on the conditions I was facing that year and the time of year I was hiking.
When I hiked the PCT in 2017, I went through the Sierra in California (in mid-June). When I hiked the CDT in 2019, I decided not to hike through the San Juans mountains of Colorado (in mid-May).
On the CDT, I flipped, hiking the Great Basin in Wyoming and then hiking from the northern terminus heading south, and finished hiking the San Juans at the end of my hike (early Oct) when they were no longer covered in snow.
Throughout this exploration of risk assessment, I will reference the decisions I made in these two situations as a case study.

Understanding how you define success allows you to understand your values when making decisions.
The Importance of Alternate Success Stories
I believe it is essential to know why you want to do a long-distance hike to be able to succeed at completing one. I also believe having or allowing yourself to make alternate success stories is extremely beneficial. Your ‘why’ for your hike will keep you going when you have a bad day and help you reach the inevitable good day that tomorrow will be. Your alternate success stories are what allow you to be adaptable. They should mesh with your why; they should also be compatible with some of what you value about doing an adventure like this.
When weather, trail closures, fires, injuries, or off-trail life ask you to change your plans, having an alternate success story to fall back on allows you to respond to these things without feeling like a failure. Having more than one story in your head about what a successful hike looks like will allow you to be nimble and flexible while still being proud of yourself and having fun.
For instance, my first success story on the CDT was ‘hike the CDT Northbound (NOBO) and link it to the Great Divide Trail.’
When that no longer aligned with my risk assessment, I mourned and then fell back on my alternate success story—hiking the CDT with a continuous footpath and hiking the hardest alternates I possibly could. Whatever your success stories look like is totally up to you, but I highly recommend having more than one or allowing yourself to make new ones along the way.
When making your own success story, you can prioritize friends, seasons, miles, conditions, or challenges—figure out what you value about your hike and what matters to you and center your stories around those values.
Summit Fever
Before covering how to evaluate risks, it is important to be aware of a psychological phenomenon that can cloud your decision making–summit fever.
Summit fever refers to when you have a goal that you really care about like summiting a mountain, finishing a long trail, or reaching the next trail town and it becomes harder and harder to turn back or make an objective risk assessment the closer you get to completing the goal. This is because you are so close that it would be extremely frustrating to not successfully reach your goal. Simply being aware of this can start to help you reduce how much it clouds your choices.

Example of a snow bridge from the PCT, a place where a creek is melting underneath snow.
How To Evaluate Risks:
1) Identify hazards
Before you leave for your hike, spend some time identifying hazards and assessing if this is the right time and the right trail for you right now. In high snow years, for instance, icy slopes and river fords introduce or increase the frequency and severity of hazards. It is helpful to also spend some time in trail towns during your resupply stops identifying potential hazards in the upcoming section to be sure that you are prepared and have the gear you need for the next stretch of trail. (This research should happen in your planning, training, and preparation stage of your hike.)
Possible high snow year hazards
My article on How to Prepare for Thru-hiking in a Big Snow Year outlines common risks of hiking in big snow years as well as skillsets and strategies you can use to address hazards. In short, common hazards while thru-hiking in high snow years include:
Cold temperatures
Snow travel: having to hike on snow, sometimes on steep mountainsides
Navigating without a trail: the trail may be fully or partially covered in snow
Water-crossings: as the snow melts, rivers swell and rage
High UV exposure: the sun is reflected by the snow, causing sunburn (even in your open mouth)
Snow blindness: temporary loss of vision due to unprotected exposure to increased UV on snow
Water access: all the drinking water may be frozen at points of your day
Camping on snow: you may not be able to find dry ground to camp on
Avalanche danger: there may be avalanche danger depending on the snow and conditions
Storms: you may lose visibility, be stuck out for longer than anticipated, experience snow loading where snow weighs down the roof of your shelter
Slow Search and Rescue response: if conditions or weather are not optimal, search and rescue may be slower or unable to perform rescues
Late season fire danger: often in the mountainous west, a high snow year can mean more understory growth. Understory plants can more easily catch fire and that can mean a bigger fire season later in the season
Putting it into practice
PCT 2017: The PCT had all the snow hazards from above, except avalanche danger, because the snowpack had stabilized that year by the time I entered the snowbound section.
CDT 2019: The CDT had all the hazards except for fewer water-crossing hazards because most of the watersheds start near the divide, and thus the rivers are much smaller when you cross them on the CDT.

Despite not being able to see a trail when navigating in the snow, you may be able to see the boot pack. Here, the author navigates the Sierra Nevada range on the PCT in 2017, a high snow year.
2) Consider your skills in relation to the identified possible hazards
During my preparations at home before any long distance hike, I think about my skills in relation to my planned hike. I identify any gaps in my knowledge or skill set.
I try to learn what I need to learn to fill in the gaps and practice before I leave for my trip.
If I learn new skills, I reconsider my skills and how they relate to the identified possible hazards on my upcoming hike. Practice all your skills, new and old, before you go. My article on How to Prepare to Thru-hike in a Big Snow Year outlines specific skills to practice and where to take classes on avalanche awareness, wilderness first aid and backcountry medicine (including my with me, if you happen to be in the Bay Area), and more.
For more on diagnosing and preventing injuries, learn more in 5 Common Hiking and Backpacking Injuries and Gear Swaps to Help.
Putting it into practice
PCT 2017: I had a Wilderness EMT certification, navigation skills, and old waterfront lifeguard skills. Before starting my hike, I learned snow travel, ice ax, self-arrest, traction usage, and more navigation skills.
CDT 2019: I had a Wilderness EMT certification, navigation skills, old waterfront lifeguard skills, snow travel skills, ice ax, self-arrest, traction usage skills, off trail travel skills, snowshoeing, and some backcountry skiing skills. Before going, I learned avalanche safety (AIARE I), snow camping, and more advanced ice ax, traction, backcountry skiing, and snowshoeing skills.

A thru-hiker on the CDT in 2017 assesses conditions below.
3) Check the conditions
When I'm in a trail town, before heading back to the trail, I identify and research as best I can which possible hazards will likely be present in the next section. I also research how extreme they will be during the time I will encounter them. I carry an Emergency Beacon with two-way communication and weather reports so I can continue to monitor conditions from the trail as well, especially in sections that have hazards like high snow.
To check conditions there are a variety of tools you can use. Be aware when consulting sources that some sources are more objective, like avalanche reports and weather reports. On the other hand, some data sources are more subjective, like a hiker ahead of you saying “that was really hard.”
It can be helpful to use a combination of many resources and to weigh objective sources more strongly in your decision making.
Be sure you are also weighing in your own observations, experience and expertise when making decisions. Your own on the ground observations will be the most up to date.
To use some of these resources, you may need to develop skills to read and interpret them. This will allow you to understand what the current conditions are and how they might affect your hike. If you are relying on checking conditions through direct observations while hiking, you may need additional training to check certain elements. For example, avalanche training helps you know how to assess avalanche risk.
Resources to consult
In the panel and video recording on Thru-hiking in a Big Snow Year, we outline some of the resources we used and how we made decisions based on the resources. Here is an even more comprehensive list:
Local avalanche center websites like this one for the Sierra, for the Eastern Sierra and this one for Colorado (the Colorado Avalanche Center also has a wonderful instagram)
Call local ranger stations
Monitor trail organization websites and social media announcements like the PCTA and CDTC
Check local weather using NOAA
Check Postholer for snow levels
Consult SNOTEL monitors for snow and water information
Use CalTopo to look a slope angels, weather, fire, avalanche, snow information
The PCT Water Report and the CDT Water report also sometimes have information about snow and water crossings in additions to water sources in dry stretches
You can also use Far Out Guide notes from other hikers ahead of you, Instagram, trail journals, other social media or call hikers ahead of you, but beware conditions can change extremely quickly. One week can be enough for things to look completely different
Andrew Skurka also often releases some maps of alternates around rivers that are particularly notorious for being challenging in the Sierra
Putting it into practice
PCT: When I hiked the PCT, I determined that when I was going to enter the Sierra, there was a clear weather window and stable snow, so little risk of storms or avalanches. It was early in the melt period, so rivers were not as swollen as they would be a week later.
CDT: When I was planning to enter the San Juan mountains, there was a variable weather window with intermittent storms in the forecast. The avalanche conditions varied from a 1 (low) to 3 (considerable) on the danger scale.

Consider the slopes you will be crossing and what gear you will need to do it safely.
4) Consider what gear you need
Before leaving for my hike I consider what gear I need. I also assess this along the way, so that if conditions change, I can order things to a trail town and get any missing gear should I need it. When considering my gear, I ask myself: What gear might further increase my safety? What gear am I willing to carry? What gear do I have? What gear can I get?
Although you will likely not be hiking during true winter, it’s worth reading this article by Arlette “Apple Pie” Laan on What to Wear Winter for Winter Hiking.
Putting it into practice
PCT snow gear:
ice ax
warm layers
snow stakes for setting up a tent while winter camping
backpacking stove and cook pot for melting snow for drinking water
sunglasses that will actually stay on your face
warm hiking socks
When I was in fresh snow at the end of my hike, I got a larger pair of shoes, toe warmers and made makeshift waterproof socks— looking back I would have purchased waterproof socks. I got larger shoes to accommodate the toe warmers and thicker sock layers.
CDT snow gear:
warm layers
snow stakes
backpacking stove and cookpot
sunglasses and nose guard
For some parts of the CDT I brought:
skis
an ice ax
I considered snowshoes, but never ended up using them, though many other hikers without skis did.
CDT gear I did not carry included:
a shovel
beacon
probe
These three items are considered the minimum required equipment for avalanche safety. You can learn more about them in our How to get Started Backcountry Skiing guide. I did not carry these because of the weight and therefore made decisions based on the fact that I did not have these essential pieces of equipment for traveling in avalanche terrain.

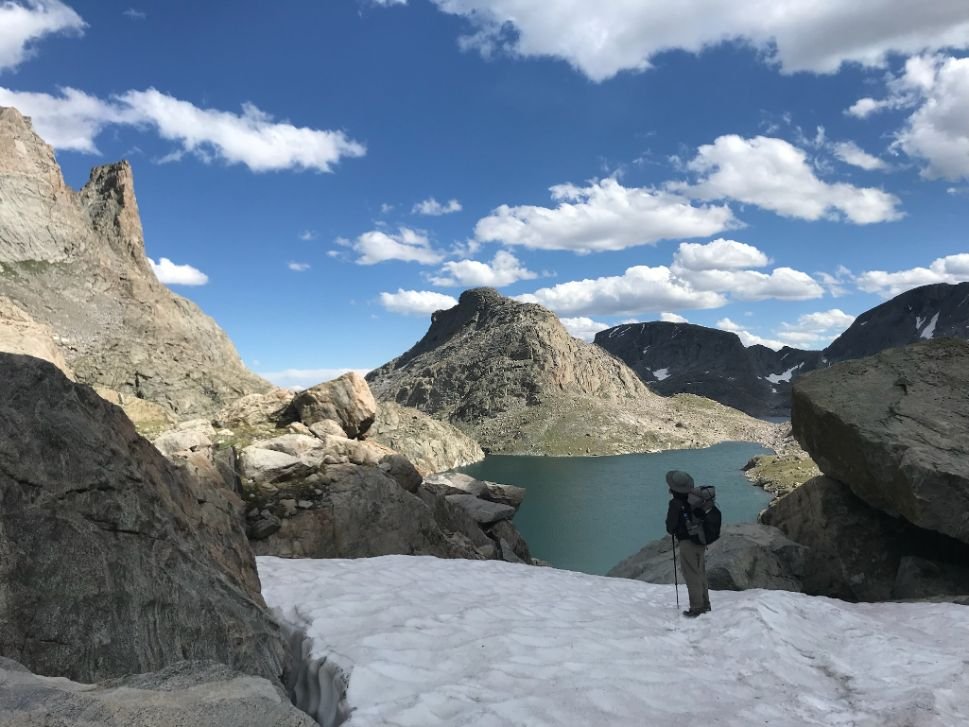
Check for unsafe snow conditions, avalanche danger, and melt-freeze cycles. The author saw this crevasse while thru-hiking the Wind River High Route, a type of snow hazard that usually occurs on glacial terrain and should not typically be a concern in the Sierra on PCT or in the San Juans on CDT.
5) Consider risk mitigation
Before my hike, in trail towns and as I encounter hazards during my hike, I consider if a particular hazard is present, can I reduce its risk with my skills, gear, or by making different choices?
For instance, if snow travel is a guaranteed hazard, can I reduce the risk by carrying UL crampons and an ice ax? Can I minimize risk by knowing how to self-arrest and use crampons when ascending and descending? Or by choosing lines that minimize the snow travel I must do? If yes, I have done something to mitigate the risk.
Some risks are easier to mitigate than others, for instance properly using a bear canister mitigates the risk of a bear eating your food. On the other hand, crampons may reduce the risk of traveling on slippery slopes, it does not get close to guaranteeing you won’t fall. Whether or not the remaining risk feels comfortable depends on the person and their risk tolerance.
Putting it into practice
PCT: I felt I could mitigate some of the risks of snow travel with my traction, ice ax, snow travel skills, and self-arrest skills. Being in a group and having old waterfront lifeguarding experience could help me mitigate some of the risks in river crossings.
CDT: I felt that skis or snowshoes could help me mitigate some of the snow travel risks. However, they could not reduce avalanche risk because avoiding avalanche terrain over long stretches of trail did not always seem possible. Most of my group did not have experience navigating avalanche terrain, and I was not traveling with a shovel, beacon, or probe. On top of all of this, I valued being able to hike the high altitude parts of the trail and being able to summit 14ers as side projects, none of which would be possible or safe in these conditions.

An example of a practice emergency scenario in a Wilderness Medicine course taught by the author in the snow.
6) can you control the hazards?
Similarly, I think about the level of control I have in regard to hazards. I think about this before setting out on my hike, during resupplies and as I hike. One question I ask is, how much control will I have over my exposure to the hazards present?
An example I like to use for this is a river crossing and lightning. River crossings are hazards where you have a lot of control over your exposure to them. As inconvenient as it may be, you can almost always look at a river, assess it and then choose not to cross it. It may be a real pain, but you typically can hike back, hike out, or make an alternate path instead of crossing.
Lightning, however, is a hazard over which you have very little control. Once in the backcountry, you can mitigate your risk of lightning by hiking down in elevation, finding an evenly wooded area, and getting into lightning position. But, you cannot avoid it like you could with the river. Like it or not, you may be in a thunderstorm and exposed to that hazard.
Putting it into practice
PCT: The hazards, such as snow travel and river crossings, mainly felt controllable. There is always a risk of lightning, which is an uncontrollable hazard. However, at the time I hiked the PCT, we happened not to experience any thunderstorms in the Sierra.
CDT: Snow travel mostly felt controllable, but avalanche danger and incoming weather did not feel controllable.

The author traveling with a group of hikers on the CDT.
7) are alone or in a group?
A question I ask myself is "Is this something I should be doing alone?"
There is one benefit of being alone: you can control all your decisions. Often, though, having other people with you can decrease your risk. There are more people to evaluate risks, more thoughts on decisions, more potential skill sets, more bodies and hands to help, and people around to rescue you and provide first aid if you get hurt or go missing. The big risk with groups is groupthink and decision making, which we will discuss later.
Putting it into practice
PCT: Though I started my hike alone, I was traveling with a group I had been hiking with for a long time.
CDT: Though I started my hike alone, I was hiking with a group of friends I had been hiking with for quite a while.

8) Check in with yourself
I find it really useful to take a pause and check in with myself. I have an earnest conversation with myself and my ego. I consider the risk after everything I have done to mitigate and avoid it with gear, skills, decision making and teamwork. I then consider: (1) the risk I am putting myself in, (2) the risk I am putting my group in (when relevant), (3) the risk I would be placing search and rescue in if I needed help, and (4) the risk I am putting the environment in if there is an emergency rescue.
Then I ask myself why I want to do this thing, and what parts of it excite and motivate me. How would it look if I made a different choice, approaching some of my goals differently? Lastly, I ask myself: is it worth it?
“Worth it” doesn’t mean that there is 100% no risk; it means given all that I know and all I can do to increase safety, the reward seems to outweigh the risk. If the answer is "yes, it feels worth it," I go for it. I continue to reassess along the way, both at resupply stops and as I reach each hazard. If the answer is no, I fall back on or come up with an alternate success story and shift how I approach my project.
Putting it into practice
PCT: I felt nervous but prepared for the challenge. I felt like my group and I could make good choices and keep ourselves safe. At the time, I wanted a straight NOBO hike, and it felt hard but worth it. There were plenty of people not in our group who decided to make different choices and flipped to do other sections of the PCT instead of going straight through.
CDT: I felt prepared but out of control regarding avalanche danger and weather. I felt scared and doomy. Though I longed to go, it did not feel like the right choice for me. I did not feel confident enough to keep myself and my group safe, nor did I feel sure that we wouldn’t need help evacuating if something did go wrong. Thus, it did not feel worth it to me. I was able to flip and still have a continuous footpath, so I did that instead. A part of the group I was with decided to go through.

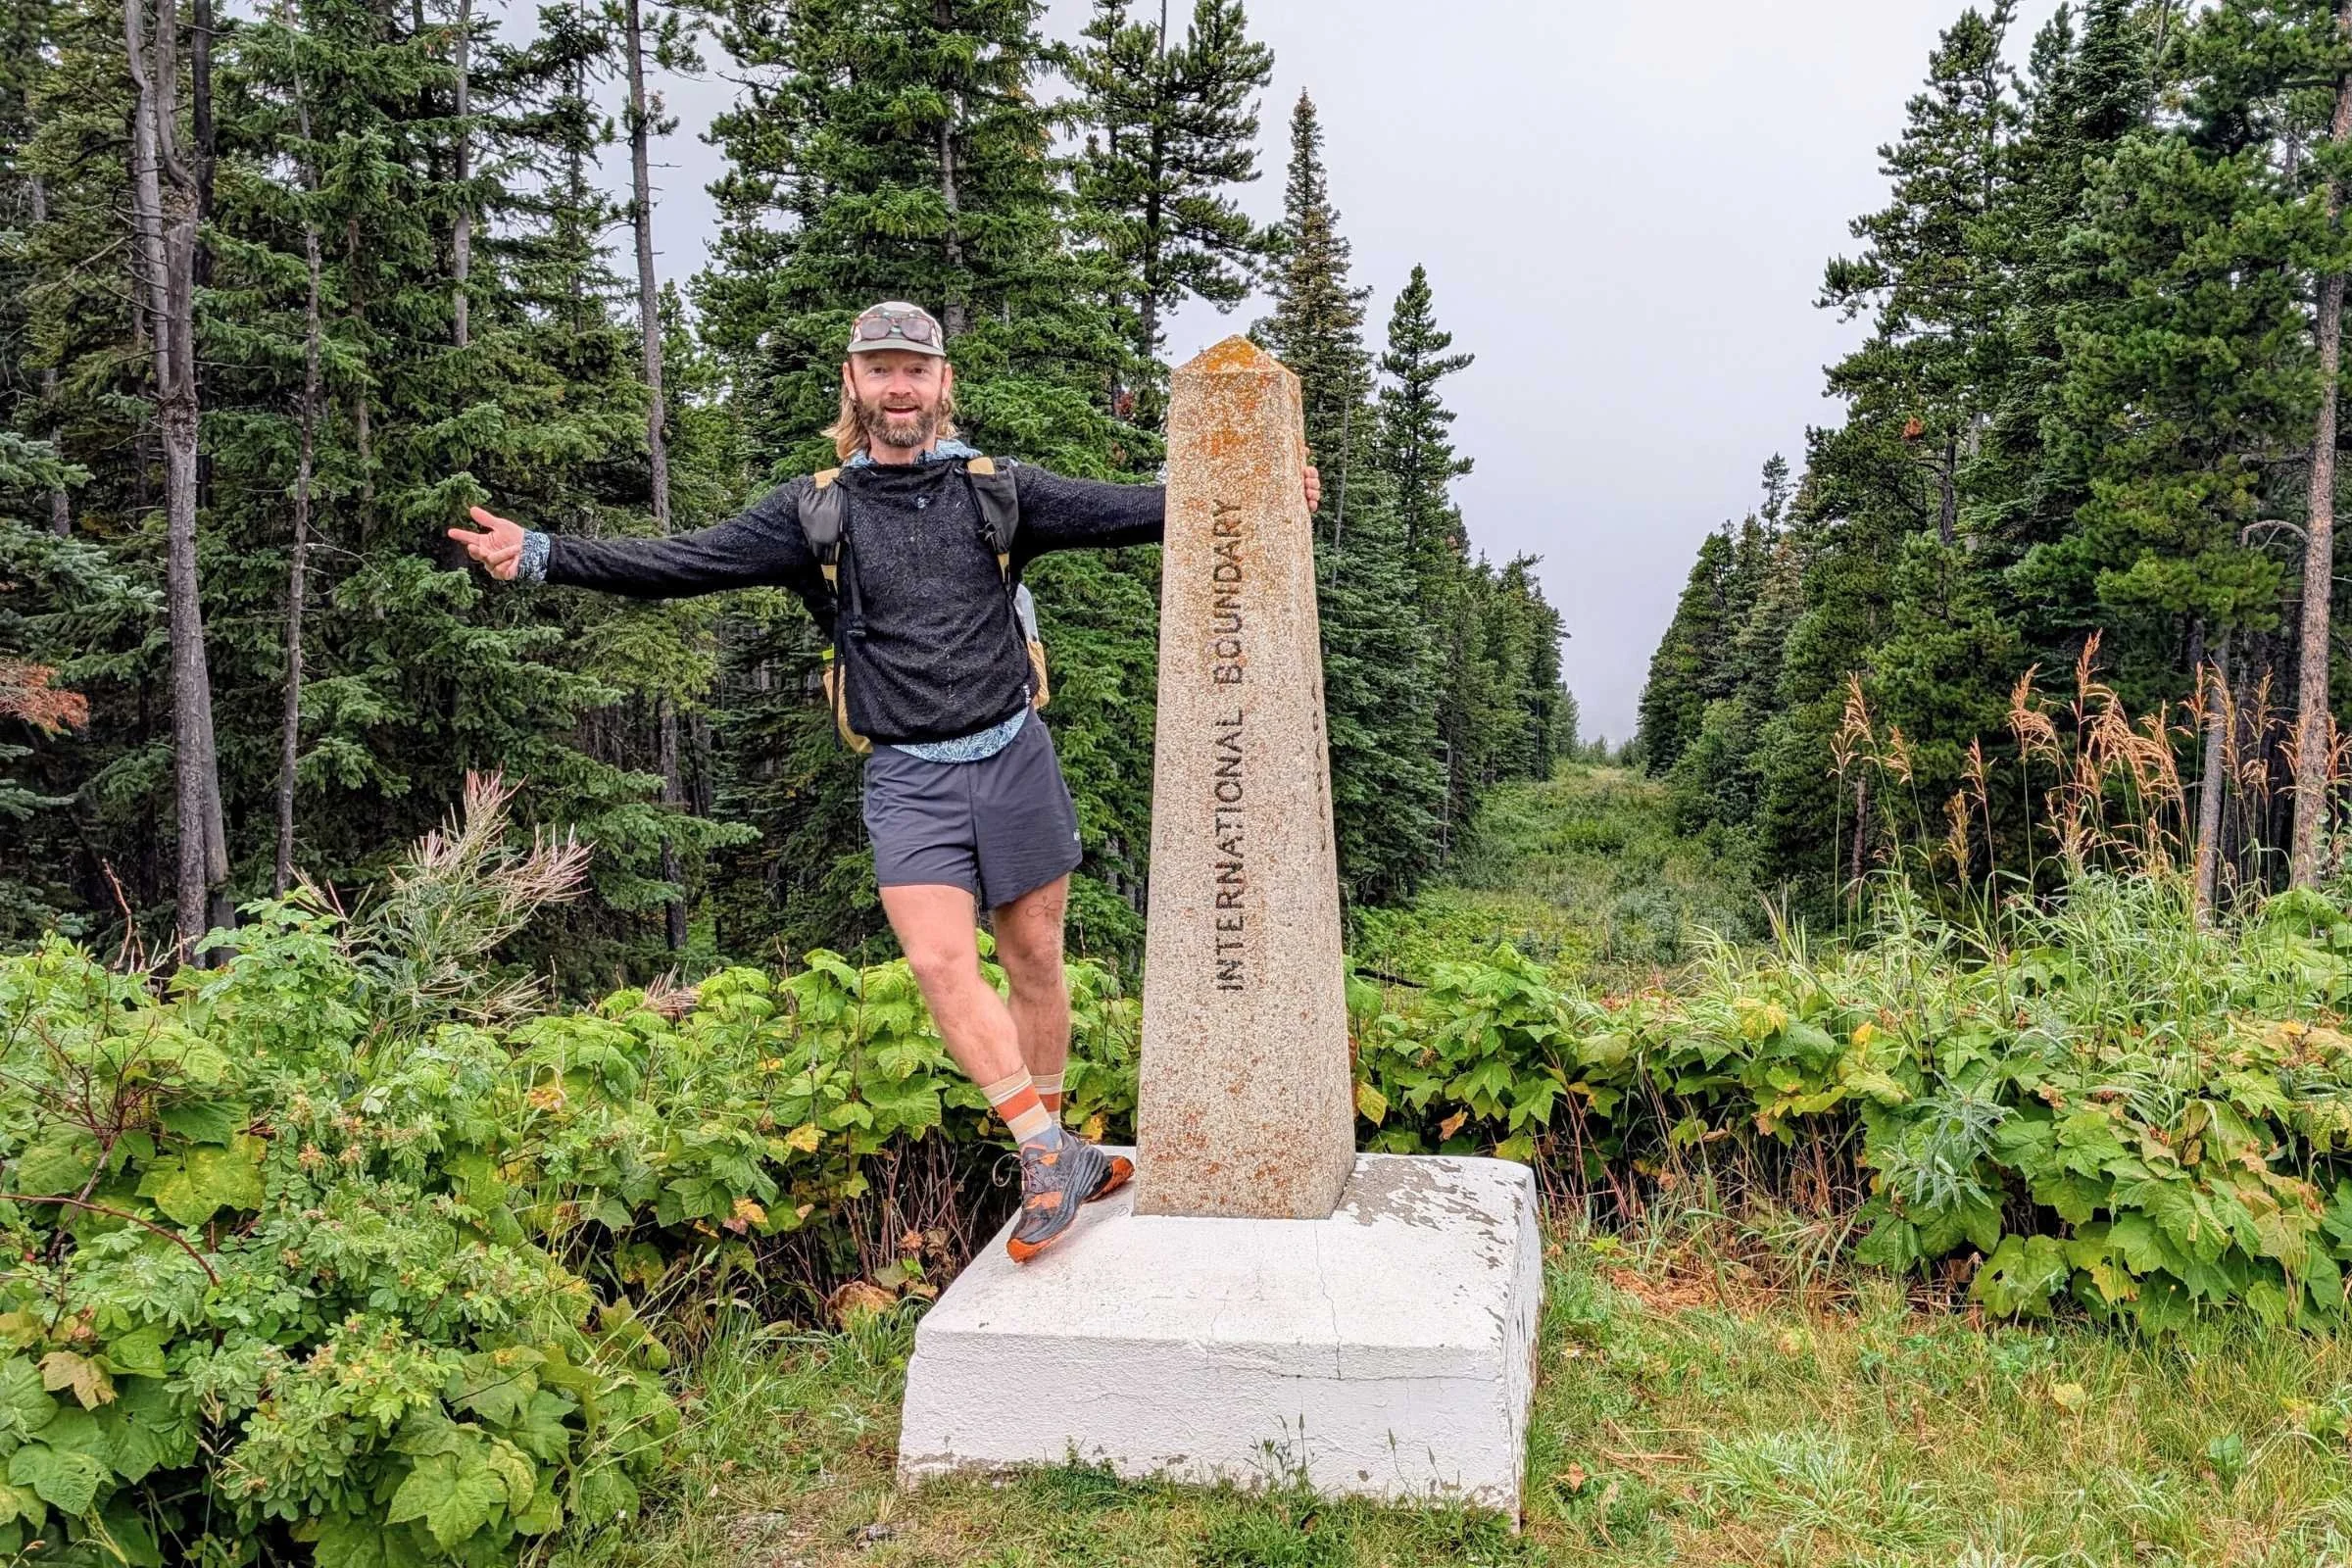
The author at the Colorado-New Mexico border on the CDT in May.
Fear-mongering vs. Assessing Risk
Fear-mongering is a phrase the hiking community has started throwing around a lot. What is the difference between fear-mongering and risk assessing? I think several things make them different.
First and foremost, I think neither risk assessment nor fear-mongering conversations should be hard to handle if you have evaluated the risks, your skills, accepted any remaining risks, and decided that you feel comfortable. Once you know the risks and have plans to mitigate or accept them, talking about them shouldn’t be as scary.
Fear-mongering, I think, often comes in the form of unsolicited warnings or advice and can come from folks who may not have any experience. It can also occur when people make up risks that are not present or when they overemphasize risks that are present.
Occasionally, it can come in the form of someone who doesn’t have the hiker’s best interest in mind, trying to fill the hiker with self-doubt. This last one most commonly occurs to hikers who do not reflect society’s image of an outdoors person and can be annoying and insulting.
There are many discussions of risks that may be uncomfortable or disappointing that are not fear-mongering, though. It is important to recognize that discomfort does not automatically mean fear-mongering. For example, if someone is trying to learn about weather and trail conditions, make the best decision for themselves, make a well-thought-through group decision, or express concern for someone they care about, those are not cases of fear mongering.
I know it is sad and scary to say it, but people do die in the mountains. We are all trying to make choices that allow us to have the most fun, epic adventure possible, and keep us and those around us safe. I worry that the thru-hiking community may be starting to overuse the term fear-mongering to avoid personal discomfort.
It is important that people feel comfortable speaking up to keep themselves and those around them safe. If a conversation makes you uncomfortable, check in with yourself—is it fear-mongering? Or do you need to spend some time sitting with your decisions? You should feel good about what you choose to do, even if it is risky!
If you need to adjust your plans because conversations about risk show you that you don’t actually feel good about your choice, that is a gift. If you are making a well-considered choice, fall back on your risk mitigation and avoidance strategies to explain your plans if people question you or politely opt out of the conversation and embrace any remaining butterflies.
Tips for Group Decision Making
As we talked about, there are many safety advantages to traveling in groups. However, one thing to be wary of is groupthink. Groupthink is the tendency to not want to disrupt group dynamics or disagree with the group; it can cause individuals to go along with decisions they disagree with and cause the group to make unsafe choices.
There are some steps you can take when assembling your group to help counteract groupthink.
Before you go
1) Number of people in your group
In avalanche courses, groups of 3 to 5 are recommended for the ideal group size. Emergency medicine research has found that the largest number of people we can effectively manage in an emergency is 5. Ideally, we’d like to have at least 3 people, so that we can benefit from their varied opinions and experiences. Having more than 2 people also helps increase the team's ability to help each other, perform rescues, or administer first aid in case of an emergency.
Though all decisions about risk in the backcountry or planning for a backcountry trip should be made by consensus, having an odd number of people for a tiebreaker can theoretically be helpful for low-stakes decisions—just be sure that the correct type of decision making is used for the right situation.

PCT hikers traveling in the snow together.
For example, how far to hike that day should be a consensus decision, whereas the far more low-stakes choices like preferred ramen flavors could be a democratic or voted decision.
2) Assembling your group
Though still being debated, many avalanche courses anecdotally share that groups without men tend to make safe choices, whereas groups composed of only men do not always show such safe decision making regarding risk. Though one would think mixed-gender groups should theoretically increase the safety of the group compared to groups of only men, the tendency for those who are not men to feel uncomfortable speaking up or not to be listened to unfortunately tends to make these groups’ decision making equally risky. There can of course be exceptions to this, but it can be helpful to be aware of these tendencies.
The most important thing no matter the gender composition of your group is that all members feel comfortable speaking up, voicing concerns and saying no. In groups of all men, be aware that machismo can lead to people to not analyze risks before going and can decrease the amount of speaking up and listening to each other, which can have extremely dangerous consequences for the whole group.
If you are in a mixed-gender group, give space for everyone’s opinions. The non-men in the group may be freer from social pressures to take risks while simultaneously may be less likely to be listened to and less likely to feel comfortable speaking up, so be sure their opinions are headed.
No matter what, the goal is for everyone to feel heard and respected, to lead to the best decision. In all groups, normalize discussions and sharing worries. Be sure everyone feels empowered to voice the desire to delay or bail.
Before you go and while you are hiking
3) MAKE A PLAN
In town, talk as a group about what possible hazards could be, the group's skills, individual strengths, the weather, and conditions. Decide whether or not you want to go based on all those things. Then, discuss examples of what would qualify as no-go situations, maybes, or definite yes situations for your group. Groups often form on the PCT around Kennedy Meadows and on CDT in Chama, NM. Have these discussions there before heading out for your next section.
Once you are in the backcountry, always listen to the most conservative choice in your group. This advice is crucial for safety, because it ensures that everyone feels comfortable with the group’s choice and no one has to go along with something potentially dangerous that they don’t agree with.
Find people whose skills complement yours, different group members can sometimes fill in different knowledge gaps or be better at assessing certain risks. Use each others’ expertise.
At the same time, remember that even someone without expertise has a valid opinion about safety during decision making. Be sure, as a group, that you all feel comfortable stating your thoughts and needs, discussing and debating, disagreeing and compromising.
Since you will be looking for consensus, if at the end of the discussion and debate, someone still says no, then it should be a no for the whole group. If you feel like the groups’ opinions differ drastically from your own during these chats before heading into the backcountry, it may not be the best group for you. You may want to see if there are other people who are a better fit.
4) Assess group fit, risk tolerance, and skills
Everyone has a different level of risk tolerance—what they think is “worth it” regarding risk to reward and how they define a risk. Everyone in the group doesn't have to have a similar level of risk tolerance or expertise. Sometimes, that can even be dangerous, so you want some variety in the group. However, if you find that you are the only one with an extremely different risk tolerance or skill level in either direction, you may want to consider if that group is right for you.
Having a good group fit is important because you do not want to have resentment build up in the backcountry, nor do you want to feel nervous to speak up or be stuck doing things you disagree with.
Discuss and agree as a group how you will make decisions and be sure that whatever your spot in the group dynamic is, the agreement to go with the most conservative choice feels ok to you and the rest of the group before you leave.
5) Gather information
When you encounter hazards on trail, it is important to combat groupthink. It can help to spend some time in town agreeing on a structure around decision making so that all group members are heard, and all dissenting opinions are voiced. Without a structure, these important thoughts or observations may go unsaid. One possible way of structuring this is having all group members take turns, with everyone getting a turn, brainstorming all possible hazards and risks to the decision. Then have everyone brainstorm the potential advantages, possible alternates, and discuss what skills and tools are present to mitigate the risk.
6) Deciding
After everyone has had a chance to share and information has been collected supporting and questioning the choice, have each group member share their ideal decision. It may be a ‘yes, let’s do it,’ a ‘no, I am not comfortable,’ or an ‘I need more time to think about it and discuss.’ The group should not proceed unless everyone is a yes. One dissenting opinion is enough to turn back or make an alternate plan.
7) If you need to break up or adjust the group
Decide before you hit the trail as a group what you will do if the group has problems and commit to an amount of time you will hike together (i.e. together until the next trail town). Then, reassess the dynamic there. If you are traveling together and the group dynamic is not going well, stick to the agreements you made in town and your structure for decision making. When you next get to town, you can break up the group and look for other folks to create groups with.
If things are really bad, hike together to your nearest exit and break up in town. Try not to break the group up in the backcountry unless it is really necessary, you run into another group who is willing to take on new members, or your group is easily divisible into smaller groups. Breaking up the group in the backcountry could leave someone alone and will likely lessen the overall safety of the resulting groups.

Understanding how to do risk assessment before you go helps make decision making smooth when you are on the trail.
Takeaways
When making decisions in the backcountry, be sure you have thought about the potential risks and that you feel comfortable with your choice. It is ok not to do something you originally planned, just as it is ok to choose to do something even if it makes you a little nervous. Once you have decided to do something, enjoy it and continue assessing risks along the way.
Using these frameworks for decision making has felt rewarding and empowering.
If I take the time to do a risk assessment and make a well thought decision, that really increases my confidence. Then I know that even if I still have nerves, I also have the skills to do what I am setting out to do. Mistakes can still happen and making decisions that change your hike drastically can still be extremely disappointing. I have, of course, also made decisions with less thought; sometimes those go ok, too, and other times, I have gotten very lucky.
Making decisions with structured forethought is what has time and time again left me feeling the most sure of myself and proud of my choices. What choice you may make in a given situation can change with time as you develop new skills. You may look back on past decisions knowing you would make a different choice now, and that can be a fun part of growth.
“Sometimes it doesn’t matter how much or what you know. Sometimes it’s just not the time to go. ”
I remember talking to a mountaineering guide friend about a scrambling route I wanted to do while the conditions were thin ice (too thin for an ice ax) on rock with a dusting of snow. I decided not to go and was thinking aloud about what skills I could learn so that I felt confident going out in conditions like that.
My friend turned to me and said, “Sometimes it doesn’t matter how much or what you know. Sometimes it’s just not the time to go.”
I hope this helps you figure out when it is and is not your time to go, because being able to make good decisions is a crucial and life-saving skill in the outdoors.

The author on the PCT in 2017.
About the author/why you should trust us
My trail name is Giggles, I am a long-distance hiker, and I work as an educator teaching Wilderness First Aid in San Francisco with my business, With The Wild Things. I am a Wilderness EMT, Leave No Trace Master Educator, Personal Trainer, California Naturalist, and I have my American Institute for Avalanche Research and Education (AIARE) I Certification.
I have hiked several routes (hikes with off-trail travel), such as the Sierra High Route (SHR) and the Wind River High Route (WRHR). I also hiked the Pacific Crest Trail in the 2017 high snow year and the Continental Divide Trail in the 2019 high snow year.