Best Backpacking Stoves of 2026
Lightweight, windproof, fast boiling stoves for backpacking and thru-hiking

May 28th, 2026, updated with 3 new stoves, including a new best hybrid stove
Home > Gear Reviews > Backpacking
A backpacking stove is one of the pieces of gear where the stakes of a bad choice become obvious fast: a stove that can't hold a flame in wind at altitude, burns through a canister in three days, or takes ten minutes to boil a liter of water is a problem you feel on every single trip. The differences between stoves are real and measurable, which makes this one of the more rewarding categories to test thoroughly.
We've spent six years testing backpacking stoves across 7,000+ miles of backpacking in nine states, testing 22 of the most popular lightweight canister, liquid fuel, wood, and tablet stoves side by side. Testing covered everything from solo boil-only trips to group cooking at altitude in wind, which is where differences between stoves become immediately obvious.
What separates a genuinely good backpacking stove from a frustrating one comes down to how it performs in wind versus calm conditions, how well the simmer control works for actual cooking rather than just boiling water, how the weight and packed size fit into a full kit, and how the fuel efficiency holds up across a full trip rather than just the first canister.
Top Pick: The Soto Windmaster with 4 Flex earns our Best Overall award. It is the lightest, most wind-resistant, and most versatile stove we tested, the one we've thru-hiked thousands of miles with and reach for most. It stood out for windproofness that outperformed every other stove in our test, an igniter that has never failed us, a modular pot stand that works equally well with solo and group-sized pots, and wide availability at a reasonable price.
Need a cookpot? See our guide to the Best Cookpot for Backpacking
We create reader-supported, objective gear reviews independently selected by our editors. This story may contain affiliate links, which help fund our website. When you click on the links to purchase gear, we may get a commission — without costing you an extra cent. Thank you for supporting our work and mission of outdoor coverage for every body! Learn more.
Comparison Table
| BACKPACKING STOVE | TREELINE AWARD | WEIGHT (OZ) | PRICE | FUEL TYPE | BOIL TIME (1L) | SIMMER? | AUTO IGNITION? | PRESSURE REGULATOR? | FUEL EFFICIENCY BOILS PER 100G FUEL | INTEGRATED POT? |
|---|---|---|---|---|---|---|---|---|---|---|
| Soto Windmaster | Best overall Read why |
2.3 | $70 | Canister | 4 min 2 sec | Yes | Yes | Yes | 8.5 L | No |
| MSR Pocket Rocket Deluxe | Best fast boil Read why |
2.9 | $85 | Canister | 3 minutes, 18 sec | Yes | Yes | Yes | 7.5 L | No |
| Jetboil Flash 1.0 L | Easiest to use Read why |
13.1 | $145 | Canister | 4 min | No | Yes | No | 10 L | Yes |
| Jetboil MiniMo | Best Integrated Read why |
14.0 | $180 | Canister | 4 min 30 sec | Yes | Yes | Yes | 12 L | Yes |
| MSR WindBurner Duo | Best for groups Read why |
21.1 | $230 | Canister | 4 min 30 sec | Marginal | No | Yes | 7.9 L | Yes |
*We note any discounts we see on our Deals page, which is updated daily.
The Best Backpacking Stoves
The Best Backpacking Stove: Soto Windmaster Stove With 4 Flex
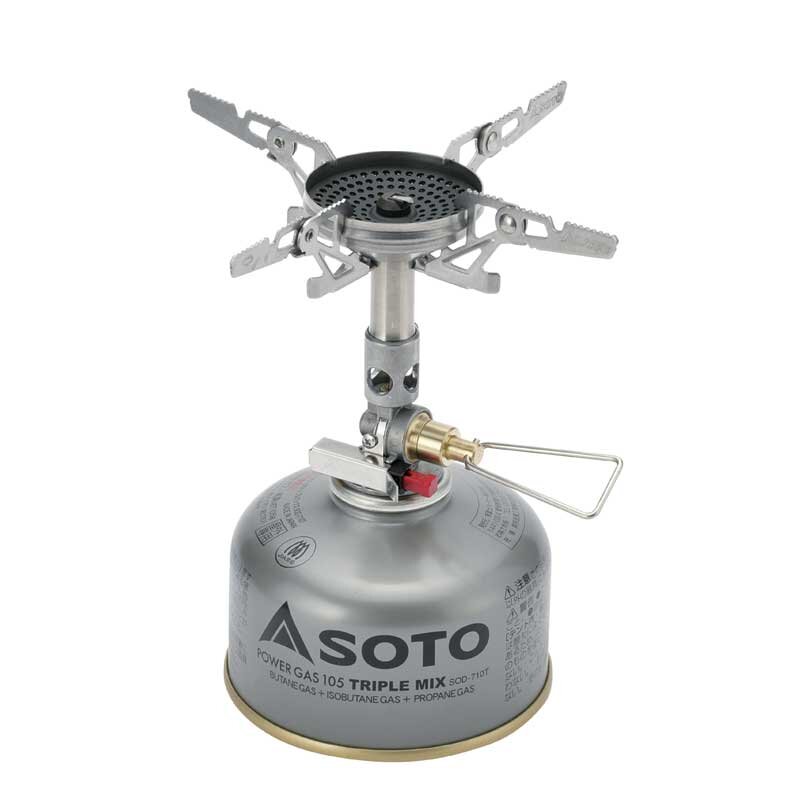
Weight: 2.3 ounces
Push start integrated ignitor button: Yes
Pressure regulator: Yes
Integrated pot: No
Fuel type: Canister
Fuel source: Isobutane-propane
Fuel efficiency: 8.5L boiled per 100 g fuel canister
BTUS: 11,000 BTU
Average boil time (1L): 4 minutes 2 seconds (1 L)
What we liked: extreme windproofness, fast boil, igniter that never dies, modularity allows for use on solo pots or big group group pots, cooks hotter and faster than other stoves, cooks the hottest of all the stoves at 11,000 BTUs
What we didn’t like: not as fuel efficient as some stoves, not as intuitive to use
We think the Soto WindMaster Stove with 4 Flex is the best backpacking stove because it is the lightest, most versatile, most wind-resistant stove we tested–and widely available at a reasonable price. We’ve thru-hiked thousands of miles with this stove and it’s the one we reach for the most.
The durable and well-made WindMaster has a sturdy, flat pot stand with teeth that grip the bottom of your cooking pot. It can accommodate solo or group-sized pots, making it be the one stove you can take on solo or group trips. And (as the name implies) it can boil in the wind when other stoves just cannot (see video on windproofness below).
Even when you’re out of the wind, there’s a lot to love about the Soto. It is among the most popular ultralight backpacking stove among Pacific Crest Trail thru-hikers and Treeline Review writers and editors.
Read our in-depth review of the Soto Windmaster for more details.
Compare Prices On The Soto Windmaster


-
While we often find that the push-button ignition (aka, the piezo) fails on upright canister stoves, Soto’s is considered the best in the industry due to its protected design (it doesn’t leave out any hanging parts that can catch, become loose, or fill with trail gunk). Of all the Treeline Review writers who own this stove and have used it for years, no one has had a piezo fail on this stove. I personally never baby my stove, doing a bunch of no-no’s like storing it in the cookpot without drying the contents out first. The piezo still works. Still, a separate ignition is one of the Ten Essentials, so we’ll keep carrying our Mini Bic Lighter.
-
The WindMasterhas a pressure regulator that's considered among the best in the industry. It is capable of cooking at 11,000 BTUs (aka 2800 kcal/h 3260w 11000 BTU). It cooks significantly hotter (and thus faster) than most of the stoves we considered.
The Soto WindMaster was the best of the stoves we tested for boiling water in 30 mph wind, managing to give us hot water in 5 minutes in 30 mile per hour winds. he way the Windmaster excels in the wind is that the burner head is recessed--it’s shaped in a concave manner that pushes heat up.
-
The WindMaster is the only stove we tested that comes with a detachable pot support. It's got a learning curve, but doesn't take long to become natural.
You can use it on small solo pots or convert it to hold 2L pots for group trips.
We’ve used the Windmaster from the Arizona Trail to Pacific Northwest Trail, in cold windy rain and summer monsoon wind.
The WindMaster, despite its learning curve, will not disappoint those willing to put in some extra time to learn how to set it up.
It’s windproof, among the fastest at boiling water, durable, and reliable and versatile enough to use solo or with groups. Plus, it’s less expensive than similar stoves like the MSR PocketRocket Deluxe (review below). For checking so many of our boxes, we award the Windmaster the highest award.
-
After extensive use for 7+ years, several Treeline Review testers have had a failure in the O-ring on the Soto Windmaster that leads to fuel leakage. We all separately reached out to Soto and had excellent customer service.
Best Fast Boil Backpacking Stove: MSR Pocketrocket Deluxe
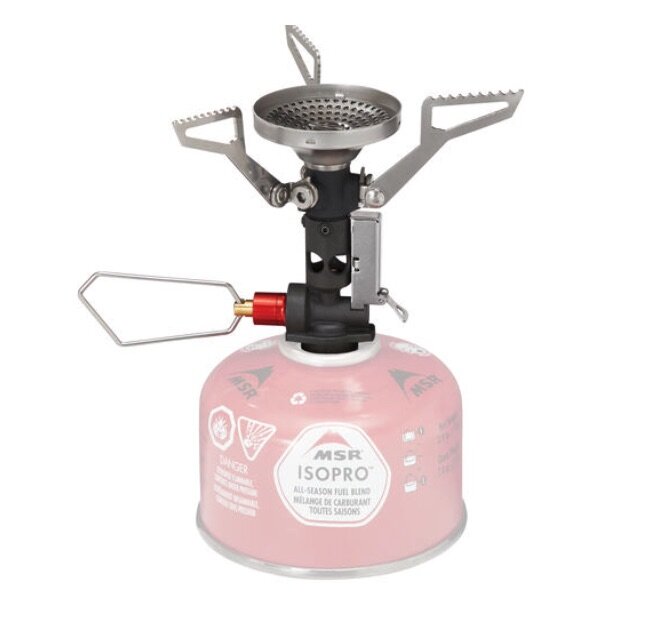
Weight: 2.9 ounces
Push start integrated piezo igniter button: Yes
Pressure regulator: Yes
Integrated pot: No
Fuel type: Canister
Fuel source: Isobutane-propane
Fuel efficiency: 7.5L boiled per 100 g fuel canister
Average boil time (1L): 3 minutes 18 seconds
BTUS: 11,000 BTU
Water boiled per 8-oz canister: 17 L
What we liked: easy to use, durable, easy puezo igniter, versatile, very fast boil
What we didn’t like: not as windproof as other stoves, not as fuel efficient as other stoves
After more than three years of testing, we believe that the MSR PocketRocket Deluxe is the best fast boiling backpacking stove f. The MSR PocketRocket Deluxe excels at all the criteria we set—from boil time to simmer mode—and is the best for ease of use and durability. A previous overall winner, it’s got a price increase in the last year, so it’s not as good as a value. Still, we think it's the best option if you want your water fast and don’t want an integrated stove.
From its igniter to its pressure regulator (which ensures a consistent flame even in the cold or when the fuel canister is low), this feature-packed stove delivers a lot in a compact package.
While technically the new Jetboil TrailCook 1.2L has a faster boil time, it is significantly heavier and more of a camping stove than a backpacking stove that lightweight backpackers would use. For that reason, we keep the MSR Pocketrocket Deluxe as the best fastest boil winner.
Read our full review of the MSR PocketRocket Deluxe for more information.
Compare Prices On The Msr Pocketrocket Deluxe


-
We found that the MSR PocketRocket Deluxe is among the most straightforward to use of the lightweight backpacking stoves to use (falling short only of the Snow Peak GigaPower).
What makes using the Deluxe (and its predecessor, the PocketRocket 2) so easy is that the pot-stand arms go in two directions: up to hold a pot and down to stow away. The arms don’t fold on themselves like the phalanges on your finger (as on the Snow Peak LiteMax). This means fewer parts to break or get stuck.
-
The MSR PocketRocket Deluxe is a durable and reliable hiking camp stove, while not feeling overbuilt. Even with a piezo ignitor, its simple design doesn’t have delicate parts that can snag, or break off. We threw it in our backpack's mesh without a protective case (not recommended by the manufacturer) for an entire thru-hike, and had no problems.
Stable arms won’t wobble if you accidentally brush against the pot or place the stove on less-than stable ground (don’t do this).
The Deluxe also features a pressure regulator. This means that in colder conditions or when the fuel canister is low, the stove will deliver a consistent flame. This means that boil times will be more consistent from boil-to-boil compared to most other minimalist camp stoves we tested. While the stoves in this guide are designed for 3-season use, a pressure regulator could stretch it into mild 4-season use.
-
The PocketRocket Deluxe design is more windproof than its predecessor, the PocketRocket 2. It has a broad burner head with a wind lip somewhat similar to our windproof overall winner, the Soto Windmaster.
The PocketRocket Deluxe is capable of cooking at 11,000 BTUs (aka 2800 kcal/h 3260w 11000 BTU). It cooks significantly hotter (and thus faster) than most of the stoves we considered, except the Soto Windmaster.
The Deluxe is a ubiquitous favorite of almost all the professional reviews we scanned and was the lightweight backpacking stove used by nearly every thru-hiker we encountered on our John Muir Trail thru-hike.
-
After 7 years of hard use and not a lot of babying, we've noticed one of the arms has become stuck on our Jetboil Deluxe and looks rusty. It is still usable. We're not too worried, though, as MSR has some of the best warranties in the industry.
Easiest to Use Backpacking Stove: Jetboil Flash 1.0 L

Weight: 13.1 ounces (includes cooking pot)
Push start integrated ignitor button: Yes
Pressure regulator: No
Integrated pot: Yes
Fuel type: Canister
Fuel source: Isobutane-propane
Fuel efficiency: 10L boiled per 100 g fuel canister
BTU: 5200 BTU
Average boil time (1 L): 4 minutes
What we liked: best ignitor of any stove, easiest to use of any stove, insulating cozy and handle, thermochromatic heat indicator, fits fuel canister inside, fast boil, all-included, colorful designs
What we didn’t like: not recommended for cooking or simmering, price, heavier than non-integrated stoves, no pressure regulator
The Jetboil Flash 1.0 L comes with a pot, piezo igniter, and stove, so if you get this system, you don’t need anything else, which makes it a convenient system for those who aren’t sure what they want.
The Jetboil Flash is not only our easiest to use backpacking stove, it's one of the best gear innovations we've seen in recent times.
The updated Flash has a new turn-and-click ignitor that makes the Flash the easiest to use stove we tested, like using a gas stove at home. Like the previous version, the Flash still has a thermochromatic heat indicator that changes color to let you know when your water is hot (a feature we long wish other stove manufacturers integrated).
The Jetboil Flash easily fits a fuel canister and the stove components inside of the included pot. Plus, its insulated handles and colorful pot cozy prevents your hands from getting burnt.
While the previous version of the Flash was not a winner in this guide, with the many improvements, we wholeheartedly recommend the new Jetboil Flash. We tested the Flash on a thru-hike of the West Coast Trail and it made our list of favorite gear items from that thru-hike.
For more info, see our in-depth review of the Jetboil Flash 1.0L backpacking and camp stove.
Compare prices of the Jetboil Flash 1.0 L


-
The main difference is the new Jetboil Flash has a twist and click ignition that is easier to use and more reliable. This one-step ignition is like on a gas stovetop at home. No lighter needed. This replaces the old push-button ignition that failed us after several years.
The twist and click ignition also gives you some flame control to simmer, but we still think the Flash is best for boiling water.
We also noticed the pot-to-burner locking mechanism runs smoother and is easier to set and unscrew than the previous version. It has three locking points now and includes some visual indicators to ensure it is locked in there.
They've also made the pour spout less leaky with a more robust lid material. There are also better measuring marks that are easier to see in the dark by headlamp.
Other than that, the cozy designs have changed and include some cool patterns. It includes a rubberized grip zone on the handle. We didn't have an issue with the old handle, but the new one is more secure.
The one downside of the new model is it is a little slower to boil. The reported boil time of the old model was 3 minutes 18 seconds. It's 4 minutes for the new one. In reality, when using these stoves in the field, it seems like every time we tested we got different results due to wind, water temperature, outside temperature, and how full our fuel can was. The Jetboil Flash is still one of the fastest stoves we tested.
-
The Jetboil Flash has some of the best insulation we've seen on any integrated stove. This means you are less likely to accidentally burn yourself. The cozy comes in pretty and colorful designs.
-
Like the previous version, the Jetboil Flash has a Fluxring that increases the surface area of the bottom of the cup. Not only does this lead to a faster boil, but it means the Flash has a high efficiency that uses less fuel than many other stoves. The Flash claims it will boil 10L per 100g Jetboil Fuel can. This, of course, is during ideal conditions (our own tests didn't show it performed quite that well).
The boil time is up more than 30 seconds than the previous version. But it is still among the fastest stoves we tested at 4 minutes per 1L boil.
-
The Flash hasn't changed in dimensions, which means it still has the challenges of its barrel shape. It's bulky for a backpacking stove and requires thinking ahead where you are going to store it in your backpack. If you prefer a more packable integrated stove, see the Jetboil MiniMo, our winner for best packable integrated.
Best integrated backpacking stove stove: Jetboil Minimo

Weight: 14 ounces (includes cooking pot)
Push start integrated ignitor button: Yes
Pressure regulator: Yes
Integrated pot: Yes
Fuel type: Canister
Fuel source: Isobutane-propane
Fuel efficiency: 12L boiled per 100 g fuel canister
BTU: 6000 BTU
Average boil time (1 L): 4 minutes 30 seconds
What we liked: fits fuel canister inside, fast boil, ease to use, space efficient, all-included, simmering, insulated rubber handles and side-body, a pressure regulator to keep fuel use consistent in the cold, includes pour spout in lid
What we didn’t like: price, heavier than non-integrated stoves, system locks to canister when hot making it harder to pour water, pour spout could be better angled, doesn't have a Thermochromatic indicator, doesn't have a twist-and-lock mechanism like the updated Flash
Like the Jetboil Flash, the Jetboil MiniMo comes with a pot, piezo igniter, and stove, making it a convenient system for those who aren’t sure what they want.
It’s a bestseller and favorite of experts and customers alike, getting praise from media like the REI Co-op journal. It’s also known for being among the best integrated cooking systems for simmering and precision cooking.
That’s why the MiniMo is one of the most common stoves on the Appalachian Trail, where thru-hikers value convenience and being able to cook up food quickly while occasionally simmering up soups or slower cooking meals.
Note: It appears as if the Jetboil Minimo will be discontinued, but we like it so much, we are keeping it in this story while it is still available.
You can read our long-term, in-depth review of the Jetboil MiniMo for more information.
COMPARE PRICES ON THE JETBOIL MINIMO


-
Treeline senior editor Brandon Lampley finds this the most exciting part of the Jetboil MiniMo system: “To me, the major benefit of carrying the stove in an outside pocket...is hot drinks or hot lunch on the go. Plus, quick hot drinks as soon as you stop to camp.” Lampley finished his PCT thru-hike in late October. When camping in cooler weather, a quick hot drink during breaks or lunch can be a morale booster and motivator to push on.
What we liked about this Jetboil is that it is compact. It fits better into the front mesh of a backpack than other integrated stoves we tested. The MiniMo is also less tippy and more stable than the Jetboil Flash, while also being easier to disassemble and clean than other camp stove systems. The main drawback of this Jetboil stove is its price and how it fares in the wind (though it performs similarly to our fast boil winner, the MSR PocketRocket Deluxe).
We also like that the Jetboil MiniMo is a small canister stove and less bulky than other integrated stove systems (with the exception of the Stash—see review below). Many stoves and cook pots are awkward sizes that don’t fit well into backpack pockets. In contrast, the Minimo conveniently fits inside the mesh or water bottle pockets in a backpacking backpack.
-
With the Jetboil MiniMo, the bottom screws off easily (although it could be easier) and fits inside the pot along with a sideways-oriented fuel canister. Unlike every other integrated canister stove we tested, the MiniMo has actual metal pot handles with rubber insulation (so they don’t feel hot — though some customers complain that the joints can burn you). The MiniMo’s system is a far more efficient use of space than any other integrated canister stove system.
-
Unlike the Jetboil Flash, the Jetboil MiniMo comes with a pressure regulator. This means that you can simmer and cook with this stove. It isn't just for boiling water. We found this feature useful when cooking Bear Creek dehydrated soups, which are a common food for thru-hikers and easy to find in most grocery stores.
The pressure regulator also helps in cold weather and at altitude. Like the Jetboil Flash, it has that same FluxRing that keeps out the wind and helps keep in the heat. But the pressure regulator allows for consistency when your fuel canister is cold or at low pressure. That pressure regulator also means that MiniMo is more fuel efficient than the Flash boiling 12 L in 100 g canister.
-
Coils underneath the MiniMo pot give it a quick boil time.The MiniMo has a relatively fuel-efficient system and speedy boil time (4:06 to boil a liter, the second-fastest of those we tested after the new Jetboil Flash).
But that short height also means it’s also quite stable. That short-sized pot also means the Jetboil MiniMo doubles nicely as a bowl — one that doesn’t require a long-handled spoon!
-
The Jetboil TrailCook 1.2 (review below) is a similar model and size that also comes with a pressure regulator and can be used for simmering. If you want the ability to use your stove with the integrated pot or your own pan, the TrailCook 1.2 L is a better choice. If you want something 5.4 oz lighter and don't need a pan but do want to simmer, the Minimo is a better choice.
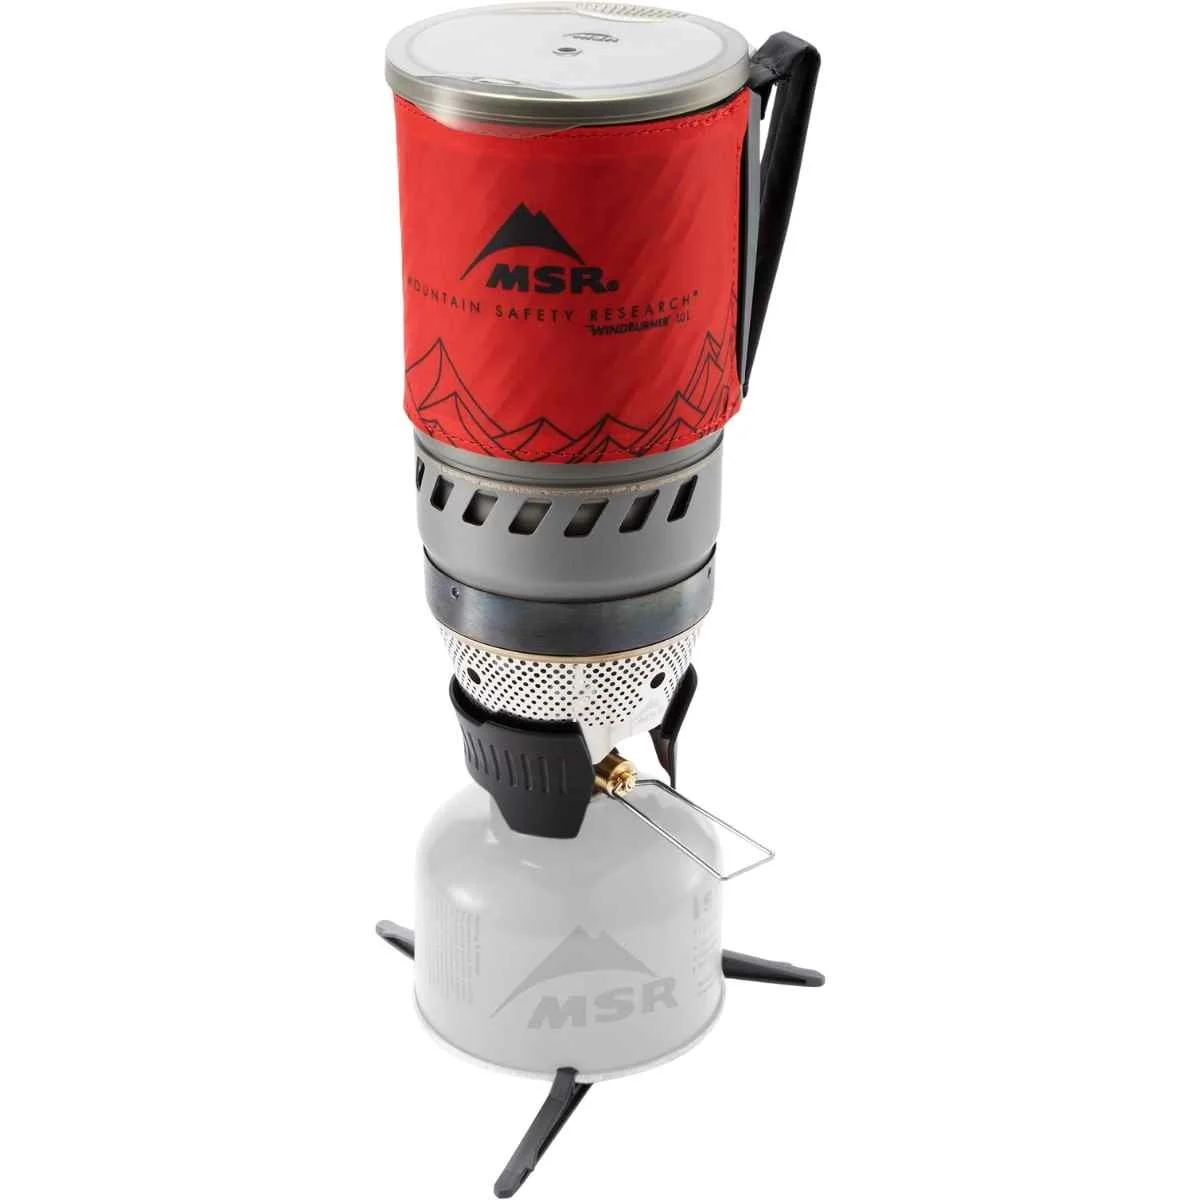
Best Backpacking Stove For Groups: MSR Windburner Duo

Weight: 21.1 ounces
Integrated pot: Yes
Ignitor: Yes
Fuel type: Canister
BTU: 7000
Fuel source: Isobutane-propane
Fuel efficiency: 7.9L boiled per 100 g fuel canister
Average boil time (1L): 4 minutes 30 seconds
What we liked: Extreme windproofness, works well in cold conditions, biggest capacity integrated stove we found, modularity allows for group and solo use without additional equipment, fast boil, stability, ease of use
What we didn’t like: weight (although it’s quite good for a group stove), slower boil (but only by a few seconds)
The MSR WindBurner Duo is great for situations when you’re in charge of group cooking for a lot of people and want a quick system that is windproof and simple to use.
The Windburner is (as you'd expect) a wind-resistant, efficient stove with high capacity. But its extra price, bulk, and weight make it best for situations where you really need a stove of this caliber: when you’re in charge of scouts, a group of friends you’re taking outdoors, clients you’re guiding, or taking family or friends out overnight.
The Windburner is one of MSR’s stoves that is made in their new Reno, Nevada facility. You can learn more in our article on Outdoor Gear Made in the US: Factory Tour story.
For more info about this stove, see our in-depth review of the MSR Windburner stove.
View The MSR Windburner Duo


-
Built around the same technology as the award-winning MSR Reactor, the WindBurner shares many similarities with that designed-for-mountaineers stove. The windproof burners on the two stoves are similar, but the WindBurner is designed to use fuel more efficiently with several features that make it more tailored to ease-of-use than the utilitarian Reactor. It’s also significantly less expensive than the Reactor.
As you can imagine from its name, the WindBurner’s major perk is that it can still function in high winds. By reducing the effect of wind, it burns more efficiently and boils faster.
-
The WindBurner Duo is a remote canister stove, which gives it better stability over the Reactor. (Note that the WindBurner Personal doesn’t have the remote canister, so isn’t quite as stable).
The WindBurner also has an insulated sleeve and handle. Although these are minor additions, they give it a much more user-friendly design than the Reactor.
The WindBurner Duo takes everything we like about the Reactor and makes it more user-friendly for those in charge of groups who are cold, hungry, and need a morale boost in the form of hot food.
The WindBurner is an intuitive system. Unfold the legs, plop the stove on the burner, and screw the canister into the end of the satellite piping system. That’s right. Unlike the other stoves we considered, the WindBurner is a remote canister stove.
-
The fuel piping system cuts down on the system’s height (it’s already the tallest we reviewed) and makes it more stable. While some reviewers complained that the pot doesn’t screw in securely to the base, we liked that feature. It made it much easier than the MiniMo to handle while hot (though it still must be done with care).
-
One of the places we tested was during a winter group hike in Central Oregon where we stopped trail-side to make everyone hot coffee. It made the trip even more delightful and pumped out large quantities of water quickly so no one had to wait their turn to get served.
Another huge advantage of the WindBurner 1.8 L is its modularity. You can use the same stove base for the 1 L WindBurner cooking pot. The 1 L cooking pot plops onto the WindBurner’s base just as well as the giant 1.8 L pot. This means you can convert your group system to a solo or couple’s system without having to buy a whole new integrated canister system.
Best budget backpacking stove: BRS 3000T
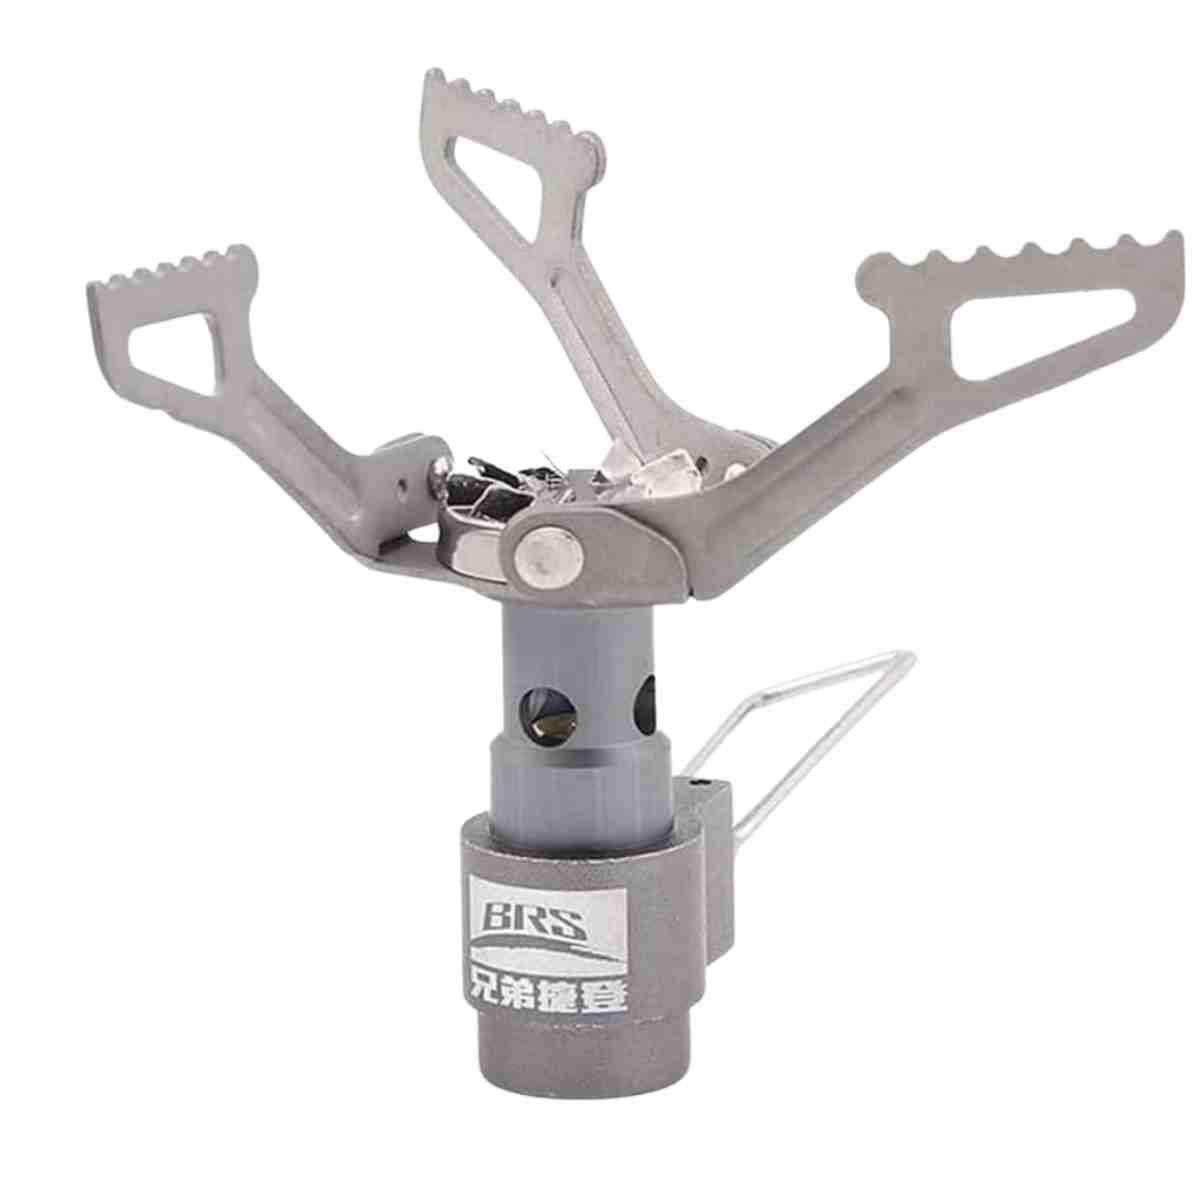
Weight: 0.9 oz
Integrated pot: No
Ignitor: No
Pressure regulator: No
Fuel type: Canister
BTU: 9213
Fuel source: Isobutane-propane
Fuel efficiency: 3.5L boiled per 100 g fuel canister
Average boil time (1L): 4 minutes 45 seconds
What we liked: Price, lightweight
What we didn’t like: Slow boil time, learning curve, cannot handle high heat
For a fraction of the cost of the other stoves, the BRS 3000T ultralight backpacking stove is among the most loved stoves among customer reviewers and professionals.
It's not the most fuel efficient by any means. It's not great in the wind. And we've heard more than a few stories about getting stoves that were duds. But if you're on a budget or just want to play around with a really ultralight stove, the BRS 3000T may be for you.
Several Treeline Review writers and editors have bought and used this stove for thousands of miles and have found it a good bang for the buck—if you learn how to use it correctly.
Compare prices of the BRS 3000T

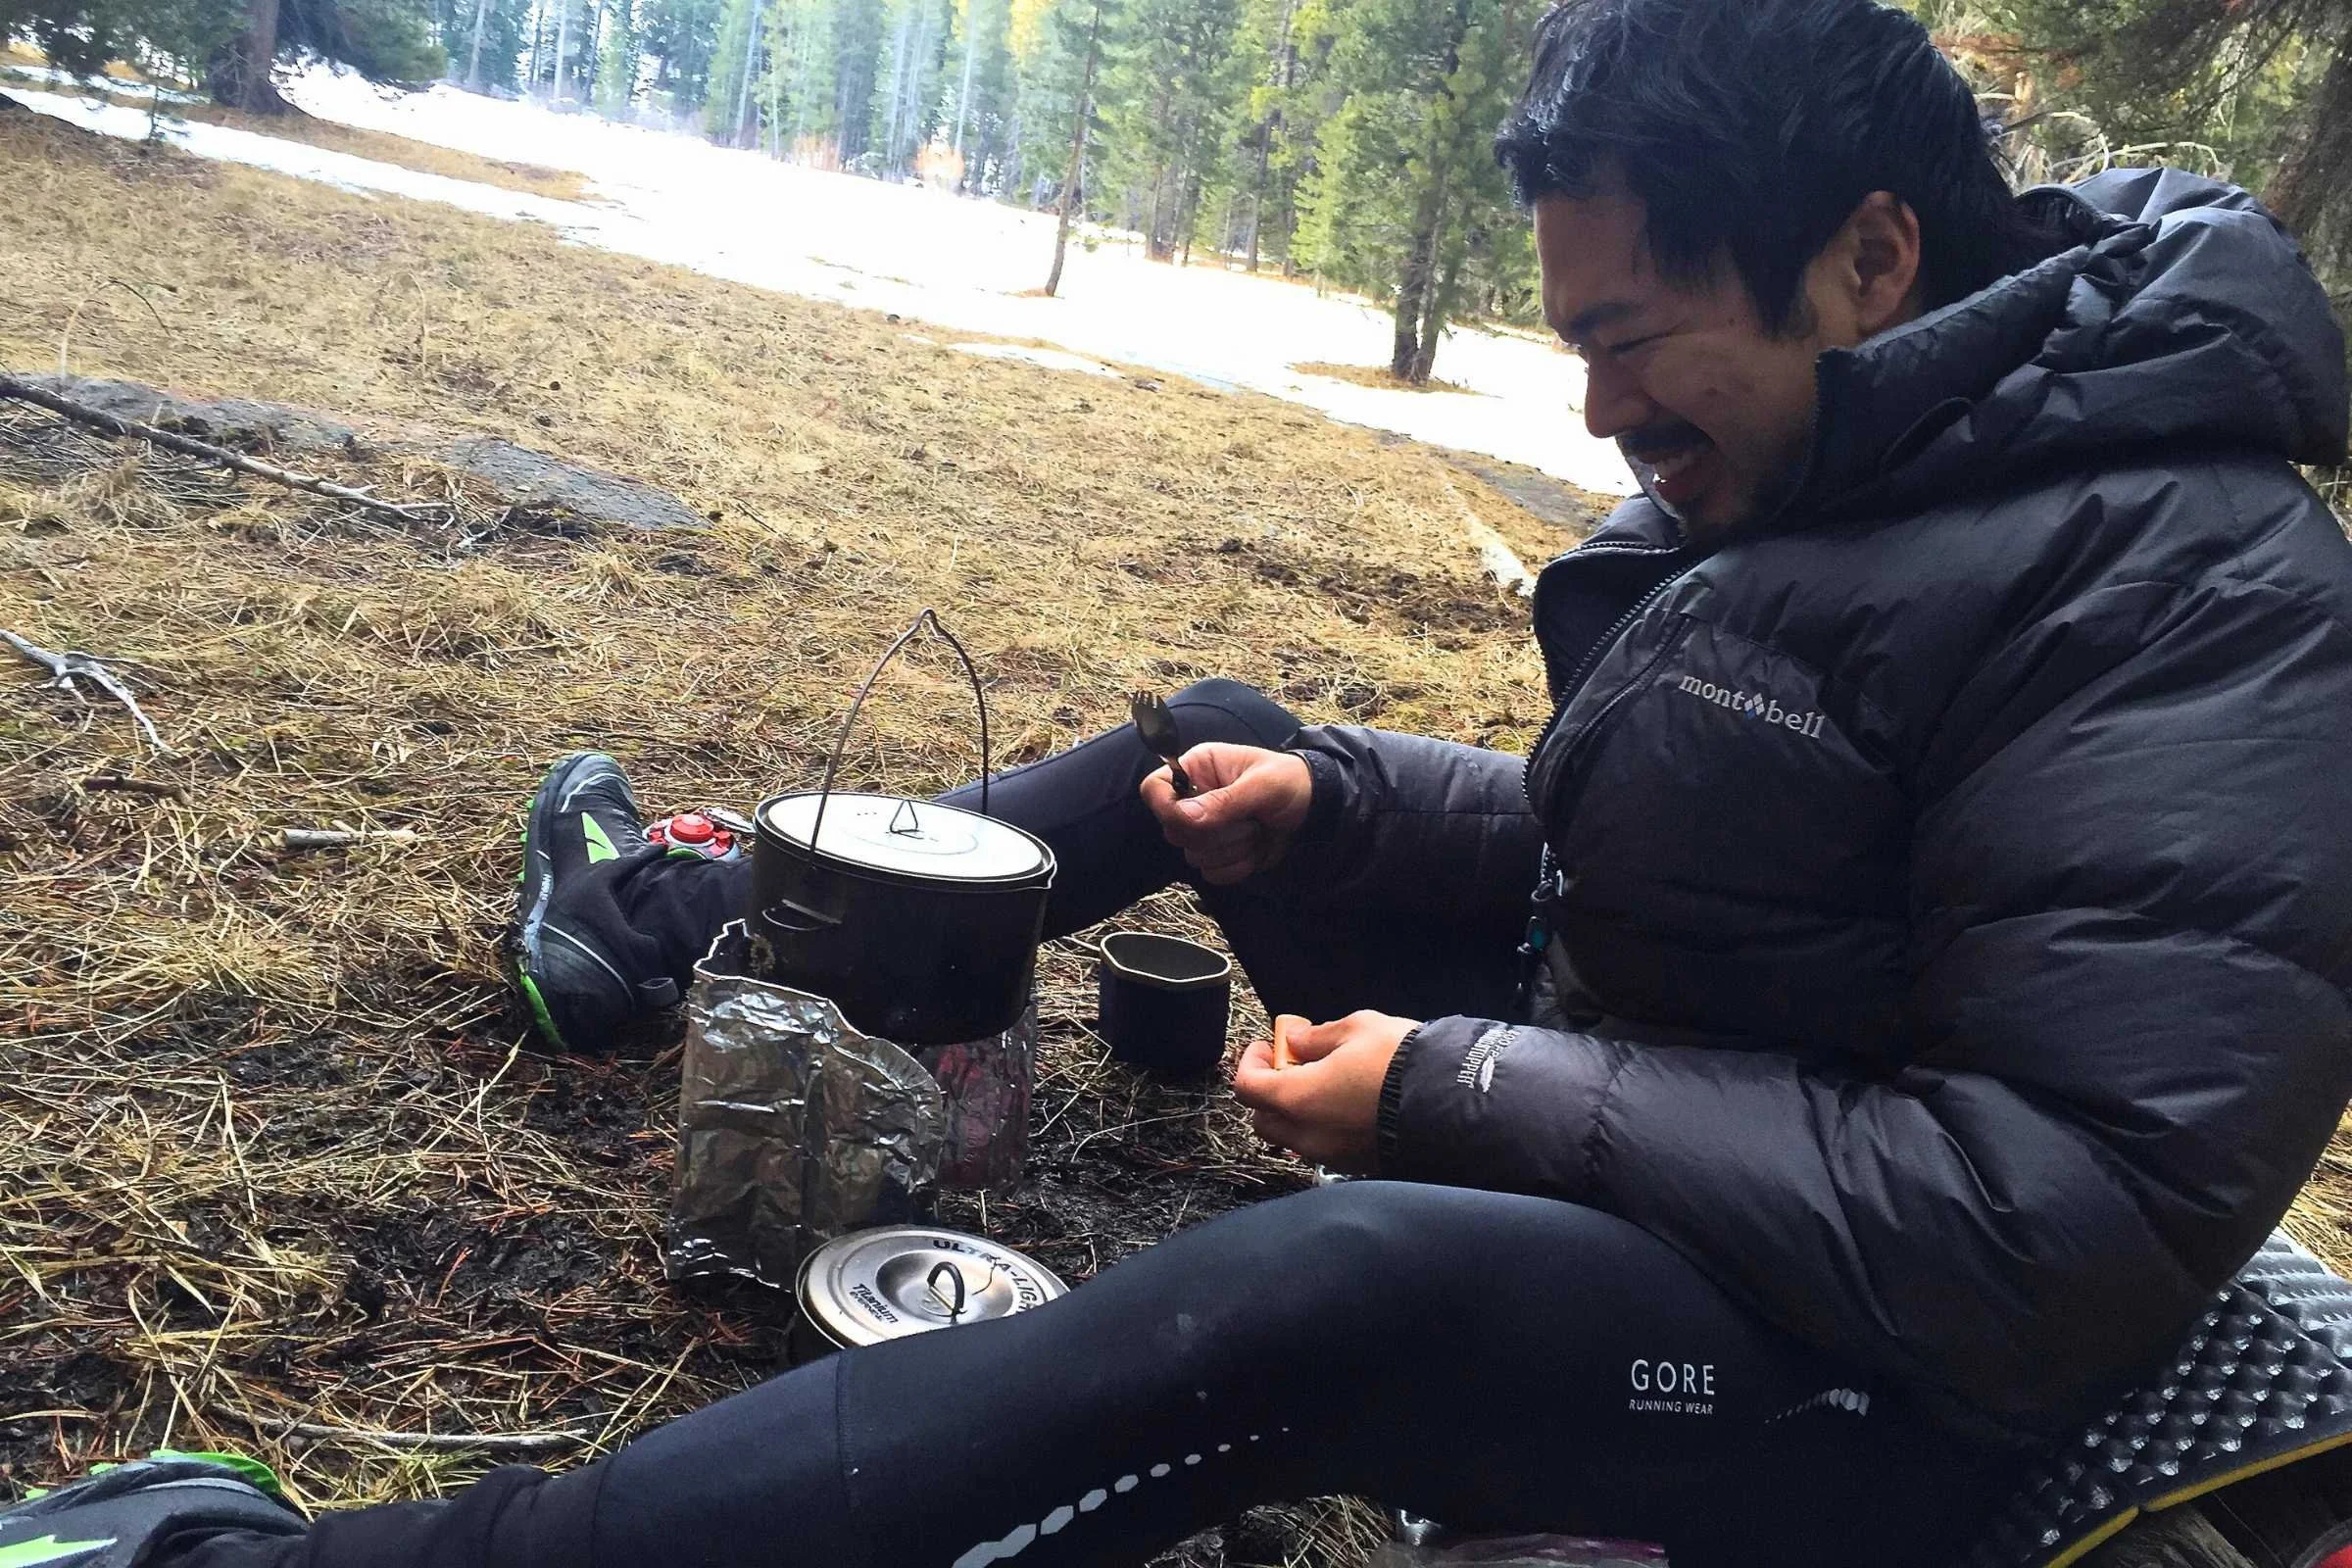
The BRS 3000T is an ultralight backpacking stove with many positive reviews including from our friend Scott “Shroomer” Williams, whose set-up is shown here. It has traveled thousands of miles with him on numerous backpacking trips domestically and internationally. Photo courtesy Scott Williams.
For anyone interested in the BRS, it’s essential to learn its flaw: it can’t operate at full power lest it melt the arms of the stove. Several BRS devotees that we interviewed say that flaw is more-or-less an open secret that they knew going into the purchase. They said they’re ok using a stove that they know can only operate at 75% power.
We found operating the BRS at 75% to be plenty powerful to boil water and simmer food. It’s slower to boil than almost any other stove we considered. But the BRS is a lightweight stove that is easy to use and inexpensive.
While there’s a lot to like about this stove, consider the safety hazards and ALWAYS READ AND FOLLOW THE INSTRUCTIONS.
It's also worth adding that this stove has the worst fuel efficiency of any stove we considered. It's especially not effective in wind, so be sure to get behind a rock when using this one. If you've read all these warnings and still think you'd prefer the budget stove over something more reliable, maybe it really is for you.
Best backpacking stove for cooking: Jetboil TrailCook 1.2L

Weight: 19.4
Integrated pot: Yes
Ignitor: Yes
Fuel type: Canister
BTU: 6000
Fuel source: Canister
Fuel efficiency: 10 L
Average boil time (1L): 4 min 30 sec
What we liked: ability to regulate and control temperatures, very easy, can use with your own cookware pots
What we didn’t like: heavier and bulkier than other backpacking stoves, higher cost than basic stove + pot combos
The Jetboil TrailCook 1.2L is the best backpacking stove if you want to do some actual cooking while on the trail or want a backpacking stove that will also work well on camping trips. Unlike other backpacking stoves, it has a regulator and an integrated pot. This ensures a fast boil for just making water and the flexibility to use it with your own camping cookware.
The TrailCook 1.2L works as a fast boil pot that integrates with the burner or it can work with your own pan, pots, or skillets. For boiling water, it is nearly as good as the Jetboil Flash 1.0L. The ability to use that system with a skillet or bigger pot was a game changer.
Jetboil TrailCook 1.2L


-
The Jetboil Trail Cook 1.2L has the fastest boil of all the stoves we tested at 2 min 10 seconds. While it looks similar to the Jetboil Flash 1.0L, it has a wider base, allowing more surface area for heat transfer to the pot. This results in a faster boil time.
-
We found the Jetboil Trail Cook 1.2L worked well for frying up eggs, vegetables, or sausages in our own pan. In fact, we liked using the Trail Cook 1.2L stove so much, we often found we'd use it instead of frying and simmering food on our heavier camping stove.
-
In addition to boiling water easily in the Jetboil Trail Cook 1.2L, we used it with a pan not made by Jetboil. However, we suspect it would be more stable and flexible with Jetboil's own skillet and cookware.
-
As with the Jetboil Flash 1.0L, the Trail Cook 1.2L has a turn-and-click ignitor that makes the Flash the easiest to use stove we tested, like using a gas stove at home.
Similarly, the Jetboil Trail Cook 1.2L has insulated handles and a colorful pot cozy prevents your hands from getting burnt.
-
We love that the Flash 1.0L has a thermochromatic heat indicator that changes color to let you know when your water is hot (a feature we long wish other stove manufacturers integrated). Come on, Jetboil! Let's get that on the Trail Cook, too!

We tested the Jetboil Flash (older model shown here) while camping in Joshua Tree National Park. Photo courtesy Liz Thomas.
Other backpacking stoves we tested
Here are some of the other stoves we tested that we think are worth being on your radar. Even if they aren’t necessarily the best stoves for most people, they may meet your needs better than our winners.
See the Comparison Table to see how all the stoves measure up side-by-side.
Toaks Titanium Backpacking Stove
Weight: 1.6
Integrated pot: No
Ignitor: No
Fuel type: Canister
BTU: 9000
Fuel source: Canister
Fuel efficiency: n/a
Average boil time (1L): 3 minutes 45 seconds
We tested the Toaks Titanium backpacking stoves, a new affordable and lightweight backpacking stoves option. The Toaks Titanium is a good option if you are on a budget and want something more reliable that the BTS-3000.
In side-by-side testing with the Soto Windmaster and MSR Pocket Rocket, we found the Toaks took the longest time to boil 500 mL at 4:58. It also used the most fuel at 13 g (vs. the MSR Pocket Rocket, which used 12 g and the Windmaster Pro, which used 9 g). Budget stoves tend to be less fuel efficient and take longer to boil. However, considering that Toaks Titanium only used 1 g of fuel more than the MSR Pocket Rocket, it performs quite well, especially for a stove that costs less than half the price.
Toaks Titanium Backpacking Stove
Weight: 19.47
Integrated pot: Yes
Ignitor: Yes
Fuel type: Canister
BTU: 5300
Fuel source: Canister
Fuel efficiency: 10 L
Average boil time (1L): 4 minutes
We tested the new Java Flash Java 1.8L stove as a contender for best group backpacking stove. It uses the same platform as the Jetboil Flash 1.0L with an easy-to-use switch system.
It comes with a pot, piezo igniter, and stove, and a French Press integration piece. We also liked that it had the color-coded temperature gauge like on the Jetboil Flash 1.0L.
Since the base is the same size as the Jetboil Flash 1.0L but it boils 1.8L, we found the boil to be slower than if we had boiled a similar volume of water on the Flash 1.0L. As with many French Presses, we got coffee grounds in our coffee when using it to make coffee.
Jetboil Flash Java 1.8 L

Weight: 13.8 oz
Integrated pot: Yes
Ignitor: Yes
Fuel type: Canister
BTU: 7000
Fuel source: Isobutane-propane
Fuel efficiency: 6.5L boiled per 100 g fuel canister
Average boil time (1L): 5 minutes
What we liked: versatility, pressure regulator, pot easily removable, cork pot cozy
What we didn’t like: slower boil, weight, price
The new MSR Switch stove is designed to be the best of both worlds–a canister stove system that can handle and pot and an integrated system. It comes with a barrel-shaped tall pot with a hemispherical pot bottom designed to optimize boil time and fuel efficiency. Yet with a literal switch of the pot arm positioning, it can accommodate any size pot or even skillet. It comes with a Piezo ignitor and while this stove hasn't been out for long, we've been impressed by the quality of the MSR Piezo on other stoves.
Notably, the main differentiator with the MSR Switch and the Jetboils is that it has an internal pressure regulator that allows for consistency in colder temperatures and at altitude or when your fuel can is pretty low. The pressure regulator also means you have control over your temperature better, allowing for simmering and cooking more complicated meals than just boiling water.
As a result, the MSR Switch feels like an integrated stove for backpackers headed to higher altitude and more extreme conditions than they would take their other integrated stoves.
One thing we like is instead of having an insulated cozy made of plastics, it comes with a renewable cork cozy. We also like that it is removable to save weight.
As with almost all the integrated stoves we tested, the stove, fuel canister, and canister stand (if you're carrying) all fit inside. It also comes with an included cup.
The MSR Switch is a little bit heavier and a bit slower than other stoves at boiling water. It also is less fuel efficient getting around 8 L of boiling water per 4 oz canister.
The Switch is a good choice if you are on the fence between whether to get an integrated stove or a traditional canister stove.
MSR Switch Stove

Weight: 2.6 oz
Integrated pot: No
Ignitor: No
Pressure regulator: No
Fuel type: Canister
BTU: 8200
Fuel source: Isobutane-propane
Fuel efficiency: 7L boiled per 100 g fuel canister
Average boil time (1L): 3 minutes, 30 seconds
We’ve carried the MSR PocketRocket 2 for more than 100 days of dinners and morning coffee and continue to pack it on most of our trips.
Almost every person who writes or edits for Treeline has purchased and continued to use this backpacking stove.
Adventures in Stoving calls it “dead simple,” “beefy,” with a design where there is “nothing to go wrong with it” as well as “simple, strong, and reliable.” The PocketRocket 2 is a hassle-free, intuitive backpacking stove that doesn’t require babying, but still performs better than its competitors in most conditions.
Compare Prices On The Msr Pocketrocket 2
However, after a year of testing the PocketRocket 2 against the PocketRocket Deluxe (see review above), we find ourselves continually reaching for the Deluxe instead.
The PocketRocket 2 has been a handy standby for years, like a trusty pair of socks that never lets you down.
I still keep my old one in my camping kit as a back-up. But the Deluxe’s features are more convenient. We think if you’re only going to buy one stove, the Deluxe’s features are worth it.

Weight: 3.2 oz
Integrated pot: No
Ignitor: Yes
Pressure regulator: No
Fuel type: Canister
BTU: 10000
Fuel source: Isobutane-propane
Fuel efficiency: 5.8L boiled per 100 g fuel canister
Average boil time (1L): 4 minutes 48 seconds
The Snow Peak GigaPower 2.0 Auto is arguably the easiest to use stove and is the best stove for temperature control for those who want to do gourmet cooking in the backcountry. Its design is like a work of art, and it is much loved by professional reviewers. The GigaPower is also incredibly durable.
Compare prices on the Snow Peak Gigapower 2.0 Auto
But compared to the MSR PocketRocket Deluxe, it has extra weight, bulk, and slower boil time. Because it doesn’t have a pressure regulator, boil times are less consistent when in cold temperatures or when the fuel canister is low. We think most backpackers wouldn't be bothered if one of those stats were true, but all four pushed it down in rankings for us.
For those looking to save a little more, the GigaPower 2.0 is also available in a manual version. This version does not have an igniter.

Weight: 7.1 oz (includes pot)
Pot included: Yes
Ignition: No
Fuel source: Isobutane-propane
BTU: 4500
Fuel efficiency: 12L boiled per 100 g fuel canister
Power: 4500 BTU/h / 1.32 kW
Pressure Regulator: No
Boil Time: 5 minutes (1 L)
In 2021, Jetboil released one of the most anticipated stoves on the market, the Jetboil Stash. The Stash is part minimalist canister stove, part integrated stove. As a result, the Jetboil Stash takes the best parts of both kinds of stoves. It’s lighter and more compact than any other integrated stove on the market, including our winner for integrated stove, the Jetboil Minimo. Yet, the Stash has the fuel efficiency of an integrated system. That’s one reason it almost immediately sold out after its release.
Compare Prices On The Jetboil Stash

The Jetboil Stash’s is a compact stove system. It includes the pot and the fuel canister and stove both fit inside for easy carrying in a backpack. Photo by Liz Thomas
The base of the Stash has a similar design to the MSR PocketRocket or other non-integrated canister stoves. However, the cooking pot looks more like the screw-on pot of the Jetboil Flash or Jetboil MiniMo. It uses Fluxring technology for a heavier but more fuel-efficient heat transfer. Where the Fluxring technology really shines is in fuel efficiency-getting 12 L of boil out of a single 100 g fuel canister.
The pot also doesn’t screw on like the Flash or MiniMo meaning it’s easy to remove — a benefit compared to true integrated systems. At 7.1 oz, the .8L Stash is 40% lighter than Jetboil’s lightest stove, the 0.8L Jetboil Zip. In weight, it’s pretty comparable to carrying a lightweight canister stove and a titanium cookpot.
Another aspect where the Jetboil Stash excels is the ability to fit both the fuel canister and the stove base into the pot. This was a feature we liked with the Jetboil MiniMo, but it works much better on the Stash. In fact, when you buy the Stash, it comes with an empty fuel can-shaped trinket case just to show off how well everything fits together in the pot.
The downfall of the Stash is that it doesn’t have an ignitor, a common complaint in customer reviews. All Jetboils up until now have had ignitors, so the departure hit some backpackers hard.
Additionally, many customers complained that the Stash doesn’t function well in the wind. As with the ignitors, all Jetboils so far have been known for their windproofness. We hope that in future design updates, the Stash integrates a more windproof lip or concave system that protects the flame from wind better.
Looking for Jetboil quality for more of a camping setup? Check out our in-depth review of the overall winner in our Best Camping Stoves guide, the Jetboil Genesis Basecamp System.

Weight: 1.9 oz
Integrated pot: No
Ignitor: No
Fuel type: Canister
BTU: 11200
Fuel source: Isobutane-propane
Fuel efficiency: 5L boiled per 100 g fuel canister
Average boil time (1L): 4 minutes 25 seconds
The Snow Peak LiteMax Titanium is a well-designed, ultralightweight, and very compact stove with arms that unfold like a piece of Origami. However, we don’t think that a stove that requires that much folding is a good choice for a first stove.
The Snow Peak LiteMax is great for those who like to nerd out about stove specs. But if you’re simply looking for something easy and simple to cook your food on, we think the LiteMax’s bulkier brother, the Snow Peak GigaPower 2.0, will serve you better.
Compare Prices On The Snow Peak Litemax Titanium

Weight: 2.9 oz
Integrated pot: No
Ignitor: No
Pressure Regulator: No
Fuel type: Canister
BTU: 10200
Fuel source: Isobutane-propane
Fuel efficiency: 13L boiled per 100 g fuel canister
Average boil time (1L): 3 minutes
We took the compact Optimus Crux camping stove for 1,200 miles of backpacking on the Pacific Northwest Trail. Rated at 10,200 BTUs, it’s notably quicker at cooking than the MSR PocketRocket 2 but is less fuel-efficient. In our tests, its concave design also makes it less wind-resistant than our upgrade pick, the Soto WindMaster (and even less wind-friendly stoves like the Snow Peak LiteMax).
We also found that the large burner and lack of pressure regulator make it especially sensitive to changes in fuel canister pressure. Even in mild ambient temperatures, the flame sometimes goes out as the pressure of the fuel canister changes.
View The Optimus Crux
Additionally, in a series of stability tests by Adventures in Stovin’, the Crux didn’t fare as well as the PocketRocket. That’s consistent with our experience in the field. The joints on the Crux’s pot support arms perpetually feel stuck, requiring yoinking to get open (and pushing to close). The Optimus Crux Lite is a solid choice and has been trusted for many years, and while we don’t think you can go wrong with it, the PocketRocket meets our criteria better.
One thing we absolutely loved about this stove: the unique folding design of the burner head. It folds down and, with its storage bag, will fit in the bottom of your fuel canister. Hands down one of the better innovations we’ve seen in stoves.
The slightly lighter and non-folding Optimus Crux Lite is often sold as part of a kit with the Terra Solo Backpacking System. It’s one of the better packing compact stove+pot systems we’ve seen.
Weight: 15.5 oz
Integrated pot: Yes
Ignitor: Yes
Pressure regulator: Yes
Fuel type: canister
BTU: 7000
Fuel source: Isobutane-propane
Fuel efficiency: 9L boiled per 100 g fuel canister
Average boil time (1L): 4 minutes 30 seconds
The MSR WindBurner Personal 1 L is an excellent stove with almost all the benefits of our best stove for groups, the WindBurner Duo. While we were happy to take on the WindBurner’s bulk and weight when we cook for a group, we dismissed the 1 L WindBurner as being too heavy and bulky for a solo integrated canister system.
Compare Prices On The MSR Windburner Personal
Aside from pot size differences (1 L vs. the 1.8 L in the Duo that we recommend), our concern with the WindBurner is the tall design. The WindBurner 1.8 L uses a remote canister for stability. The WindBurner personal has a 7.1-inch pot above the 2.5-inch canister. This beer stein-shaped pot is similar to the Jetboil Flash in that it is not as compact as packable for fitting in a backpack.
However, if you already own the WindBurner Duo anyway, we highly recommend the MSR WindBurner 1 L accessory add-on cookpot. Why? Because you can use the same stove base as the group-sized WindBurner, effectively two stoves in one!
Plus, MSR also makes a French Press conversion for the 1 L WindBurner cookpot (sadly, not available for the 1.8 L cookpot...but that would be a really big cup of coffee).

Weight: 10.9 0z
Integrated pot: No
Ignitor: No
Pressure regulator: More strokes creates more pressure
Fuel type: Liquid (requires weight of fuel bottle)
BTU: 9500
Fuel source: White gas, auto, kerosene, isobutane (for the International model)
Average boil time (1L): 3 minutes 30 seconds (white gas), 3 minutes 45 seconds (isobutane)
The liquid fuel burning MSR WhisperLite has been a gold standard for backpacking stoves for decades, but we think that newer stove technology has surpassed the need for the WhisperLite for most backpacking situations.
Compare Prices On The Msr Whisperlite
Liquid fuel stoves have advantages: the international version can burn kerosene, unleaded gasoline, and white gas. We also like the liquid fuel stoves reuse the same fuel bottle, reducing the waste of pressurized fuel canisters required of the other stoves in this guide (see the Can I recycle used fuel canisters? section).
Additionally, guides often appreciate how simple the WhisperLite is to fix, clean, and maintain in the field. However, we would argue that because the WhisperLite can run on high carbon liquid fuel (which creates more buildup), this stove may require more cleaning and maintenance than other stoves.
Compared to more modern stoves on the market, the WhisperLite is heavy (10.9 oz without the fuel bottle). It also requires priming liquid fuel before use. This requires a large surface and practice. We’ve heard too many stories from Appalachian Trail Ridge Runners having to put out WhisperLite fires started on picnic tables. Canister fuel stoves are much more intuitive and safe for all levels of backpackers to use. The learning curve on the WhisperLite is something that once was a rite of passage. Now, we don’t think that skill set is necessary.

Treeline writer and mountain guide Duncan Cheung leads students in comparing the efficiency of various backpacking stoves in cold conditions. Photo courtesy Duncan Cheung.
What to look for in a backpacking stove
Backpacking stoves may look similar at a glance, but the best one for you depends on where you’re going, what you’re cooking, and how much weight you’re willing to carry. After years of testing gear on thousands of trail miles, here are the key factors we think matter most when choosing a stove. For more on this, see our article on How to Choose a Backpacking Stove.
Do you want a canister stove or integrated stove?
Ease of Use
We think a backpacking stove should be intuitive to set up and put away without a steep learning curve. Some stoves are intuitive right out of the box. Others take a bit of a learning curve—especially those with fold-out pot supports or unusual ignition systems. If you’re new to backpacking or don’t want to fuss with setup, prioritize simplicity and fast deployment.
Stability
Having a backpacking stove that is stable is not only important for your safety (avoiding skin burns should that stove topple) but also to protect the places where we camp.
Look for wide pot supports and a low center of gravity, especially if you plan on using larger pots or cooking on uneven surfaces. Remote canister stoves generally offer more stability than upright styles, though they’re often heavier.
Reliability/Durability
Will the backpacking stove continue to work even if it isn’t cared for like a baby?
Wind performance
Wind can make or break a stove’s performance. Some burners are designed to resist gusts better than others, especially those with recessed or protected flame designs. If you expect to cook in exposed areas, prioritize wind resistance. But be cautious: many manufacturers recommend not using aftermarket windscreens with canister stoves due to the risk of overheating.
Speed to Boil
Backpacking cooking stoves can generally boil 1 cup of water in four to six minutes, but some stoves are faster than others. A stove that boils water quickly can be a morale boost after a long day—but don’t forget to factor in fuel usage. The most efficient stoves balance speed and fuel consumption, keeping your pack lighter over longer trips. Look for stoves that offer consistent performance in a variety of temperatures and fuel levels.
Cold weather performance
Fuel regulators, available in about half of the stoves we considered, are making it easier for some backpacking stoves to work in 20-40 degree temperatures (likely the coldest conditions most three-season backpackers will face).
Noise
Some backpacking stoves sound like a rocket jet taking off. This can disrupt conversation and/or may detract from your wilderness experience (and maybe bother the wildlife, too).
Compactness/Bulkiness
Ultimately, you want a stove that is going to fit well with the other gear into your backpack.
One way stove design can impact this is that some integrated stoves can fit a fuel can and stove inside of the pot.
Other integrated stoves fit well into outside of backpack pockets.
Flame Control or Simmer Ability
In general, backpackers prefer to have some ability to cook more complicated backcountry meals. But more often than not, after a long day of hiking they decide it is easier to just boil water and add that to pre-made dehydrated food.
Weight
Although weight is a priority when choosing backpacking gear, we found the differences between the models we considered to be within two ounces of one another.
Price
We recommend quality backpacking stoves at a variety of prices. Less expensive stoves aren’t as fast, efficient or reliable as the more expensive ultralight camp stoves we recommend—but they’ll get the job done.
Fuel Efficiency
Gearheads love to debate stove efficiency like a bunch of Prius owners trying to outdo each other in Hyperdrive. But most users will find fuel efficiency between the backpacking stove models that we considered to be comparable. The differences between the hiking camp stoves we considered weren’t large enough to disqualify any of the models.
Ignition
Some backpacking stoves come with their own built-in push-button ignition lighter, called a piezo, that lets you press a button that creates a spark. These make cooking in the backcountry easier. We've come full circle on this. While carrying a Mini Bic lighter isn't the biggest deal, it is one more step that we appreciate not having to deal with.
Piezo are not always reliable in the long term. Even if your stove comes with one, it’s smart to carry a backup lighter. Some stoves have more protected ignition systems that are less prone to failure from dirt or moisture.
Fuel type
Most backpackers use isobutane-propane canisters because they’re lightweight, easy to use, and widely available. Liquid fuel stoves work better in freezing temperatures or remote locations where canisters may be scarce—but they’re heavier and require more maintenance. We don't cover liquid fuel stoves in this guide. Consider your destination, trip length, and expected conditions when choosing your fuel system.
These criteria were developed by scanning frequent praise and complaints in customer and professional reviews. We also relied on our own extensive experience guiding and teaching backpackers about how to use gear. For more on this, see our article on How to Choose a Backpacking Stove.
Treeline writer and mountain guide Duncan Cheung with his stove in the Sierra in early winter. Photo courtesy Duncan Cheung.
What To Know Before You Go Outdoors With Your Stove
Read The Instructions
And by instructions, we mean the ones that come with your new canister stove. Reading this story doesn’t count. Stoves can be dangerous. They can explode if used incorrectly. They can cause horrible skin burns, wildfires, or worse. This is not a gear item to mess around with or “wing it.” Treeline Review is not liable or responsible for you and your gear decisions. You are responsible for you.
In some fire-prone states, operating a canister stove requires a permit. In some forest districts, especially in the wildfire-prone summer, all stove use may be banned. Check with a ranger where you are hiking before going on your trip.
Also, before you take your canister stove outdoors, you will need a cooking pot (if the pot is not integrated into the system) and other cookware. We go into details about how to choose a cooking set in our article How to Choose a Backpacking Stove.

This photo documents the last boil of this empty fuel canister, which gave us hot water quickly and then refused to burn again. The pressure regulator means time to a full boil is consistent whether you’ve got a new fuel canister full of pressure or are whether your fuel can is near-empty. Photo by Liz Thomas.
How To Select A Cooking Spot For Your Backpacking Stove
Minimize the impact of cooking by choosing a spot with mineral soil (no leaves or duff). Level it with your hand and create at least a 5 feet buffer free of plant material on all sides around your canister stove. Ideally, use sterile, sandy soil. Avoid cooking directly on sandstone, as the heat can permanently burn and scar the rock. Always have some extra water on hand in case you need to douse a fire that escapes.
The best video I’ve seen on how to keep your campfire spot safe is the one you’re required to watch to get your California fire permit (even if you don’t live in California, we highly recommend watching it at the top of this section!).
For those using their canister stove in California, you are required to obtain a free fire permit (even for a camp stove). I wish all governmental processes were as easy as they make getting this permit: watch a 2 minute YouTube video, fill out a 5-question survey, print it out.
How To Light A Backpacking Stove
Even if your camping stove comes with a piezo igniter, you’ll want to know how to light your stove with a lighter. To save weight, we carry a Mini Bic Lighter (or two; ways to start a fire are one of the items even ultralight backpacking enthusiasts will seek redundancy). I always buy them in bright colors (harder to lose). Don’t store the Mini Bic in your pot, though. They’ll stop working when exposed to moisture.
Before lighting, screw your stove onto your gas canister all the way (read the directions). Turn your gas valve. Then use your lighter to gently and carefully hold a flame to the gas until it lights. Read the instructions that come with your camping stove before doing this.
To prevent burns when lighting, we’ve used this trick from Mike Clelland’s Ultralight Backpacking Tips for years: strike your Mini Bic with your pointer finger, not your thumb like you would for a cigarette. It gives you more dexterity when trying to get in there with all those small parts.
Watch your sleeves when lighting your stove. Thin material, especially that of wind shirts, is quite susceptible to melting if it comes anywhere close to a flame.
Windscreen: Most manufacturers will tell you never to use a windscreen when using a canister backpacking stove. Wind can impact your stove’s fuel efficiency and cook time, though. Look for natural windscreens by setting up your stove behind a rock (try not to move any natural material, though--move yourself and your unlighted stove if necessary).

The MSR Pocket Rocket was our overall best backpacking stove for 2 years running. Here, we enjoyed using it on the 1,200-mile long Pacific Northwest Trail in Idaho. Photo courtesy Liz Thomas.
How To Use Backpacking Stove Fuel Efficiently
For the most fuel-efficient cooking, run your stove at medium heat, not high heat. For maximum efficiency, always use your lid. If you don’t want to carry the extra weight of a lid, fold aluminum foil or a cut-up aluminum pie tin over the top of your pot. For integrated stove systems, make sure your lid is really snapped on there. If it is, you can pour hot water out of the spout just like a kettle or strain the contents to keep noodles.
How To Wash Dishes While Camping & Backpacking
Scrape your backpacking pot free of food as much as you can before washing. Then, collect water and rinse your dirty pot at least 200 feet away from a creek or lake. Rub the interior of your pot with fingers and the water, scattering the grey water (dirty dishwater) in multiple places so as not to attract animals to one smelly place. Sand can get burnt bits off the bottom. Check Leave No Trace to learn more.
Some backpackers, myself included, prefer to use their pot only for boiling water. Then, we dump hot water into a melt-proof bag filled with dehydrated food. It’s also possible to reuse clean mylar bags from freeze-dried meals and some hikers use melt-proof freezer bags.
When cooking with groups, avoid putting oily or cheesy things in the group pot (keep that in your personal pot). This will cut down on the dishes you’ll need to do afterward.
Can I Recycle Used Fuel Canisters And Butane Canisters?
Like you, one of our concerns about canister stoves over other fuel types is the guilt associated with throwing out metal. We were thrilled to discover that there is a gas canister recycling tool available but found some fine print.
Some municipal recycling centers can accept a crushed isobutane canister, but not a full fuel canister. This is their way of making sure that they are getting relatively clean metal instead of an exploding fuel can. Thus, it is essential to crush gas canisters before recycling.
The fine print? Many smaller and rural area municipalities aren’t able to take crushed fuel canisters. In that case, your only option is to throw that metal in the trash. However, many National Park campgrounds have fuel canister recycling collections. Many PCT thru-hikers will save their used canisters to dispose of at the campground at Mt. Lassen National Park, not far from the trail.
Even if you can’t recycle your canister, trash services prefer crushed cans to ensure that there is no remaining flammable material alongside other trash. A vented can free of fuel is preferable to a non-crushed can regardless of where it goes after you’re done with it.
To use the canister crushing tool, first, make sure that your can is empty before attempting. It can be dangerous to pierce if there’s gas still inside. Read directions before you attempt this.
The tool carefully punctures empty isobutane fuel canisters. It releases any remaining fumes into the air (make sure to do this process outside and somewhere well-ventilated). Alternatively, you could use a hammer and screwdriver, but the canister tool is easier to use.
The canister crushing tool comes with plastic to protect the point while in transit. Remove the plastic when you get home to pierce your empty can. The metal piercer makes a small puncture to release gas, not a giant pokey hole in the metal. Once you remove the plastic protective cover for use the first time, you can’t get it to stay on easily. So if you’re backpacking with the canister crusher, be careful not to let the sharp part of the tool pierce your other gear.
If you want to celebrate your mini-environmental victory, the canister crusher also doubles as a beer opener.

While alcohol stoves can be lighter than canister stoves, they are often banned in forests and mountains of the American West. Photo courtesy Liz Thomas
What is the best fuel for backpacking stoves?
Canister stoves tend to be lighter, less finicky, and have less of a learning curve than an alcohol stove, liquid fuel stove, or solid fuel stove, or wood stove. In recent years, the Forest Service and National Parks in the West have restricted the use of alcohol stoves, wood burning backpacking stoves, and solid fuel stoves due to wildfire. Their rationale is that stoves that don’t have on-off switches have a greater risk of flames escaping and starting a fire. For these reasons, we narrowed the scope of this story to only canister backpacking stoves.
Wood Stove
A wood-burning stove like the popular Solo Stove works by allowing you to collect small, dry twigs. Unlike a campfire, wood stoves protect the ground from scorched earth, funneling heat towards the bottom of your cookpot. For more on wood burning stoves, see our Best Portable Grills for Camping guide for recommendations.
Patagonia boasts that the wood-burning stove has the benefit of not creating additional trash, like empty fuel canisters. Wood burning stoves also don't rely on fossil fuels to run, instead using a sustainable abundant renewable source.
However, they can be slow to boil. Wood stoves also require constant care to stoke the fire. Having backpacked over 3,000 miles with a wood stove, I can say they are fun to use, but a lot of work. In particular, it can be difficult to get the stove going in snow or after several days of rain when all the twigs are soaked. I think the Solo Stove model works best in heavier models like the Solo Stove Bonfire Pit, which is designed for campgrounds or the backyard.
Solid Fuel Stove
Solid fuel stoves run on a fuel tablet such as Hexamine (often sold under the brand name Esbit). A fuel tablet looks like a sugar cube, weighs about 0.2 oz per 1 L of water to boil, and theoretically has a smokeless burn. Although many people use Esbit as backup fuel or emergency firestarter, I’ve backpacked with solid fuel stoves for at least 5,000 miles. I like that solid fuel tablets are compact and easy to pack compared to a fuel canister.
Esbit stoves also have arguably the lightest weight fuel requirement and most efficiency per 1 L per burn. However, an Esbit stove can be difficult to light and often have a fishy odor. There are non-fishy solid fuels, though.
Additionally, solid fuel tablets can be difficult to find and take much longer to boil water than a gas stove. For a while, solid fuel stoves were allowed on Forest Service and Park Service land even when alcohol stoves were banned. Now that the loophole has been closed, I’m less enamored with Esbit stoves. Additionally, as fuel canister stove technology has gotten more efficient in burn time and weight, there are fewer reasons to use Esbit stoves.
Alcohol Stove
While we believe certain alcohol stoves can work well for some backpackers, the Forest Service and Park Service ban them almost annually in Western states due to concerns for wildfire. Alcohol stoves have advantages like being lightweight and easy to make yourself. However, when used incorrectly, a liquid stove can cause severe skin burns and are even responsible for causing forest fires along the Pacific Crest Trail. The Pacific Crest Trail Association and thru-hikers are increasingly choosing not to use alcohol stoves, so we decided to not include them in this story.
Care and maintenance tips

The Snow Peak LiteMax tested on a section of the Boundary Trail in the Pasayten Wilderness. Photo courtesy Liz Thomas.
Keep your stove clean and dry. After each trip, wipe down the exterior with mild soap and water and make sure everything is completely dry before storing. For stubborn residue around the burner, a soft brush works well. Avoid harsh chemicals or abrasives.
Store the stove in a cool, dry place out of direct sunlight. Keep fuel canisters upright in a well-ventilated area away from heat sources. If you're storing the stove for an extended period, remove the fuel canister entirely.
Before every trip, give the stove a quick inspection. Check for loose fittings, worn O-rings, and any visible damage. Light it at home before you leave to confirm it's working. Finding out your stove has a problem at the trailhead is significantly less fun than finding out in your backyard.
For common issues: an uneven flame usually means the burner needs cleaning. A clog can often be cleared with a pin or needle, but check your manual before poking around in the fuel line. If you suspect a leak, apply soapy water to the connections and look for bubbles. Any connection that's leaking needs to be tightened or replaced before use. If you can't resolve the issue yourself, contact the manufacturer rather than guessing.
Safety tips
Backpacking stoves are one of those gear items where it is absolutely essential to prioritize safety to prevent injuries or fires getting out of control. As mentioned above, the best video I’ve seen on how to keep your campfire spot safe is the one you’re required to watch to get your California fire permit. Even if you don’t live in California, we highly recommend watching it at the top of this section!). Here are some important safety tips to keep in mind:
1. Read the instruction manual: Before using your backpacking stove, thoroughly read the instruction manual provided by the manufacturer. Familiarize yourself with the stove's features, proper usage, and safety precautions.
2. Choose a safe location: Set up your stove on a stable, level surface away from flammable materials such as dry grass, leaves, or overhanging branches. Avoid cooking inside tents or enclosed spaces, as this can lead to carbon monoxide buildup.
3. Ensure proper ventilation: Use your stove in a well-ventilated area to prevent the accumulation of carbon monoxide. Cooking in enclosed spaces can be dangerous and increase the risk of carbon monoxide poisoning.
4. Keep a water source nearby: Always have extra water or at least sand readily available in case a fire gets out of control. This will allow you to quickly extinguish any flames that get out of control.
5. Never leave the stove unattended: While your stove is lit, never leave it unattended. Accidents can happen quickly, and paying attention to your stove while cooking means that is less likely to happen.
6. Use caution when handling fuel: Handle fuel with care to prevent explosions or leaks. Store fuel canisters upright and away from heat sources or open flames. When connecting or disconnecting fuel canisters, ensure the stove is turned off, had a chance to cool down, and the area is well-ventilated.
7. Watch for windy conditions: Be cautious when cooking in windy conditions, as gusts of wind can blow flames and cause flare-ups. Most canister stove manufacturers recommend not using a wind screen as it can actually cause it to overheat. Instead, make sure you are setting your stove up at least 10 feet away from any downed material, trees, brush, or grass.
8. Allow the stove to cool before packing: I've learned this the hard way. After cooking, allow the stove to cool completely before packing it away. Hot stoves can cause burns or damage to other gear if packed too soon.
9. Regularly inspect and maintain your stove: Before each use, inspect your stove for signs of wear, damage, or malfunction. Replace any worn or damaged parts, and perform routine maintenance to prevent your stove from leaking, being less efficient, or exploding.
FAQ
-
A non-integrated stove is a burner head that screws onto a fuel canister and works with any compatible cookpot. An integrated stove is a system where the burner and a dedicated pot are designed to work together, with a heat exchanger on the pot bottom that improves fuel efficiency and boil speed. Integrated systems are heavier and more expensive but are simpler to use out of the box. Non-integrated stoves are lighter, more versatile with cookware, and the better choice for backpackers who already own a pot.
-
Most canister stoves lose performance in cold temperatures because isobutane-propane fuel vaporizes less efficiently as the canister cools. A stove with a pressure regulator, like the Soto Windmaster or Jetboil MiniMo, maintains a more consistent flame as the canister chills and empties. In temperatures below freezing, warming the fuel canister in an interior jacket pocket before use helps significantly. Liquid fuel stoves like the MSR WhisperLite International are more reliable in sustained cold and are worth considering for winter or high-altitude mountaineering trips.
-
A standard 100g canister boils roughly 7 to 12 liters of water depending on the stove, wind exposure, altitude, and water temperature. For a solo backpacker boiling water twice a day for meals and coffee, a single 100g canister typically lasts three to four days under normal conditions. For longer trips, plan on one 100g canister per person per three days as a conservative baseline. Integrated stoves with heat exchangers, like the Jetboil MiniMo, are more fuel efficient and can stretch a canister further than non-integrated stoves.
-
No. Isobutane-propane fuel canisters are prohibited on both carry-on and checked baggage by the TSA and most international aviation authorities. The stove itself can be packed in checked luggage if it has been thoroughly cleaned of fuel residue, but a new canister must be purchased at the destination. Most outdoor retailers, REI stores, and many outdoor-oriented grocery stores carry standard isobutane-propane canisters, so sourcing one after arrival is usually straightforward for domestic trips. For thru-hikers, many trail angels and shuttle drivers will pick up fuel canisters for you to have when you arrive.
-
A pressure regulator maintains a consistent gas flow from the fuel canister regardless of how full it is or how cold the temperature is. Without one, flame intensity drops noticeably as the canister empties or cools, which leads to inconsistent boil times and wasted fuel in the final third of the canister. For three-season use in mild conditions, a stove without a regulator works fine. For cold weather, high altitude, or trips where consistent performance matters, a pressure regulator truly makes a notable difference.
-
Canister stoves work at altitude but perform less efficiently as elevation increases, because lower air pressure reduces oxygen availability and affects combustion. Water boils at a lower temperature at altitude, which matters for cooking but not for simply rehydrating food. A pressure regulator helps maintain consistent flame output as the canister pressure drops. Wind is a more significant performance factor at altitude than elevation itself, so windproofness becomes especially important for mountaineering or alpine terrain (above treeline).

Treeline writer and tester Kate Hoch (left) tests stoves camping in the White Mountains. Photo courtesy Naomi Hudetz.
How we researched and tested
We took the top backpacking stoves on thousands of miles of hiking and six years of testing including on
thru-hikes of the Superior Hiking Trail
Thru-hike of the Pacific Northwest Trail (1200 miles from Glacier National Park in Montana to Olympic National Park in Washington across alpine zones, montane forests, temperate rain forests, and the rocky coast).
Thru-hikes of the John Muir Trail and High Sierra Trail
Trans San Diego County Trail (150 miles from the Salton Sea to Torrey Pines Beach)
1500 miles on the PCT
Loowit Trail (38 miles) around Mount Saint Helens, WA
800-mile thru-hike of the Arizona Trail (see our full Arizona Trail gear list)
guiding overnight backpacking trips in Big Sur, California
on a one-week winter hike in February in Central Oregon
in the Coeur d’Alene National Forest in the Idaho Panhandle
on numerous backpacking trips in the Sierra Nevada mountain range including the Emigrant Wilderness north of Yosemite, Sequoia National Park, and in the eastern Sierra Nevada mountains
on camping and backpacking trips in Joshua Tree National Park and Anza Borrego Desert State Park

The four integrated backpacking stove models we considered. Photo by Liz Thomas.
We evaluated stoves for weight, ease of use, fast boil, stability, fuel efficiency, reliability, noise, compactness and ease of packing, flame control, and price.
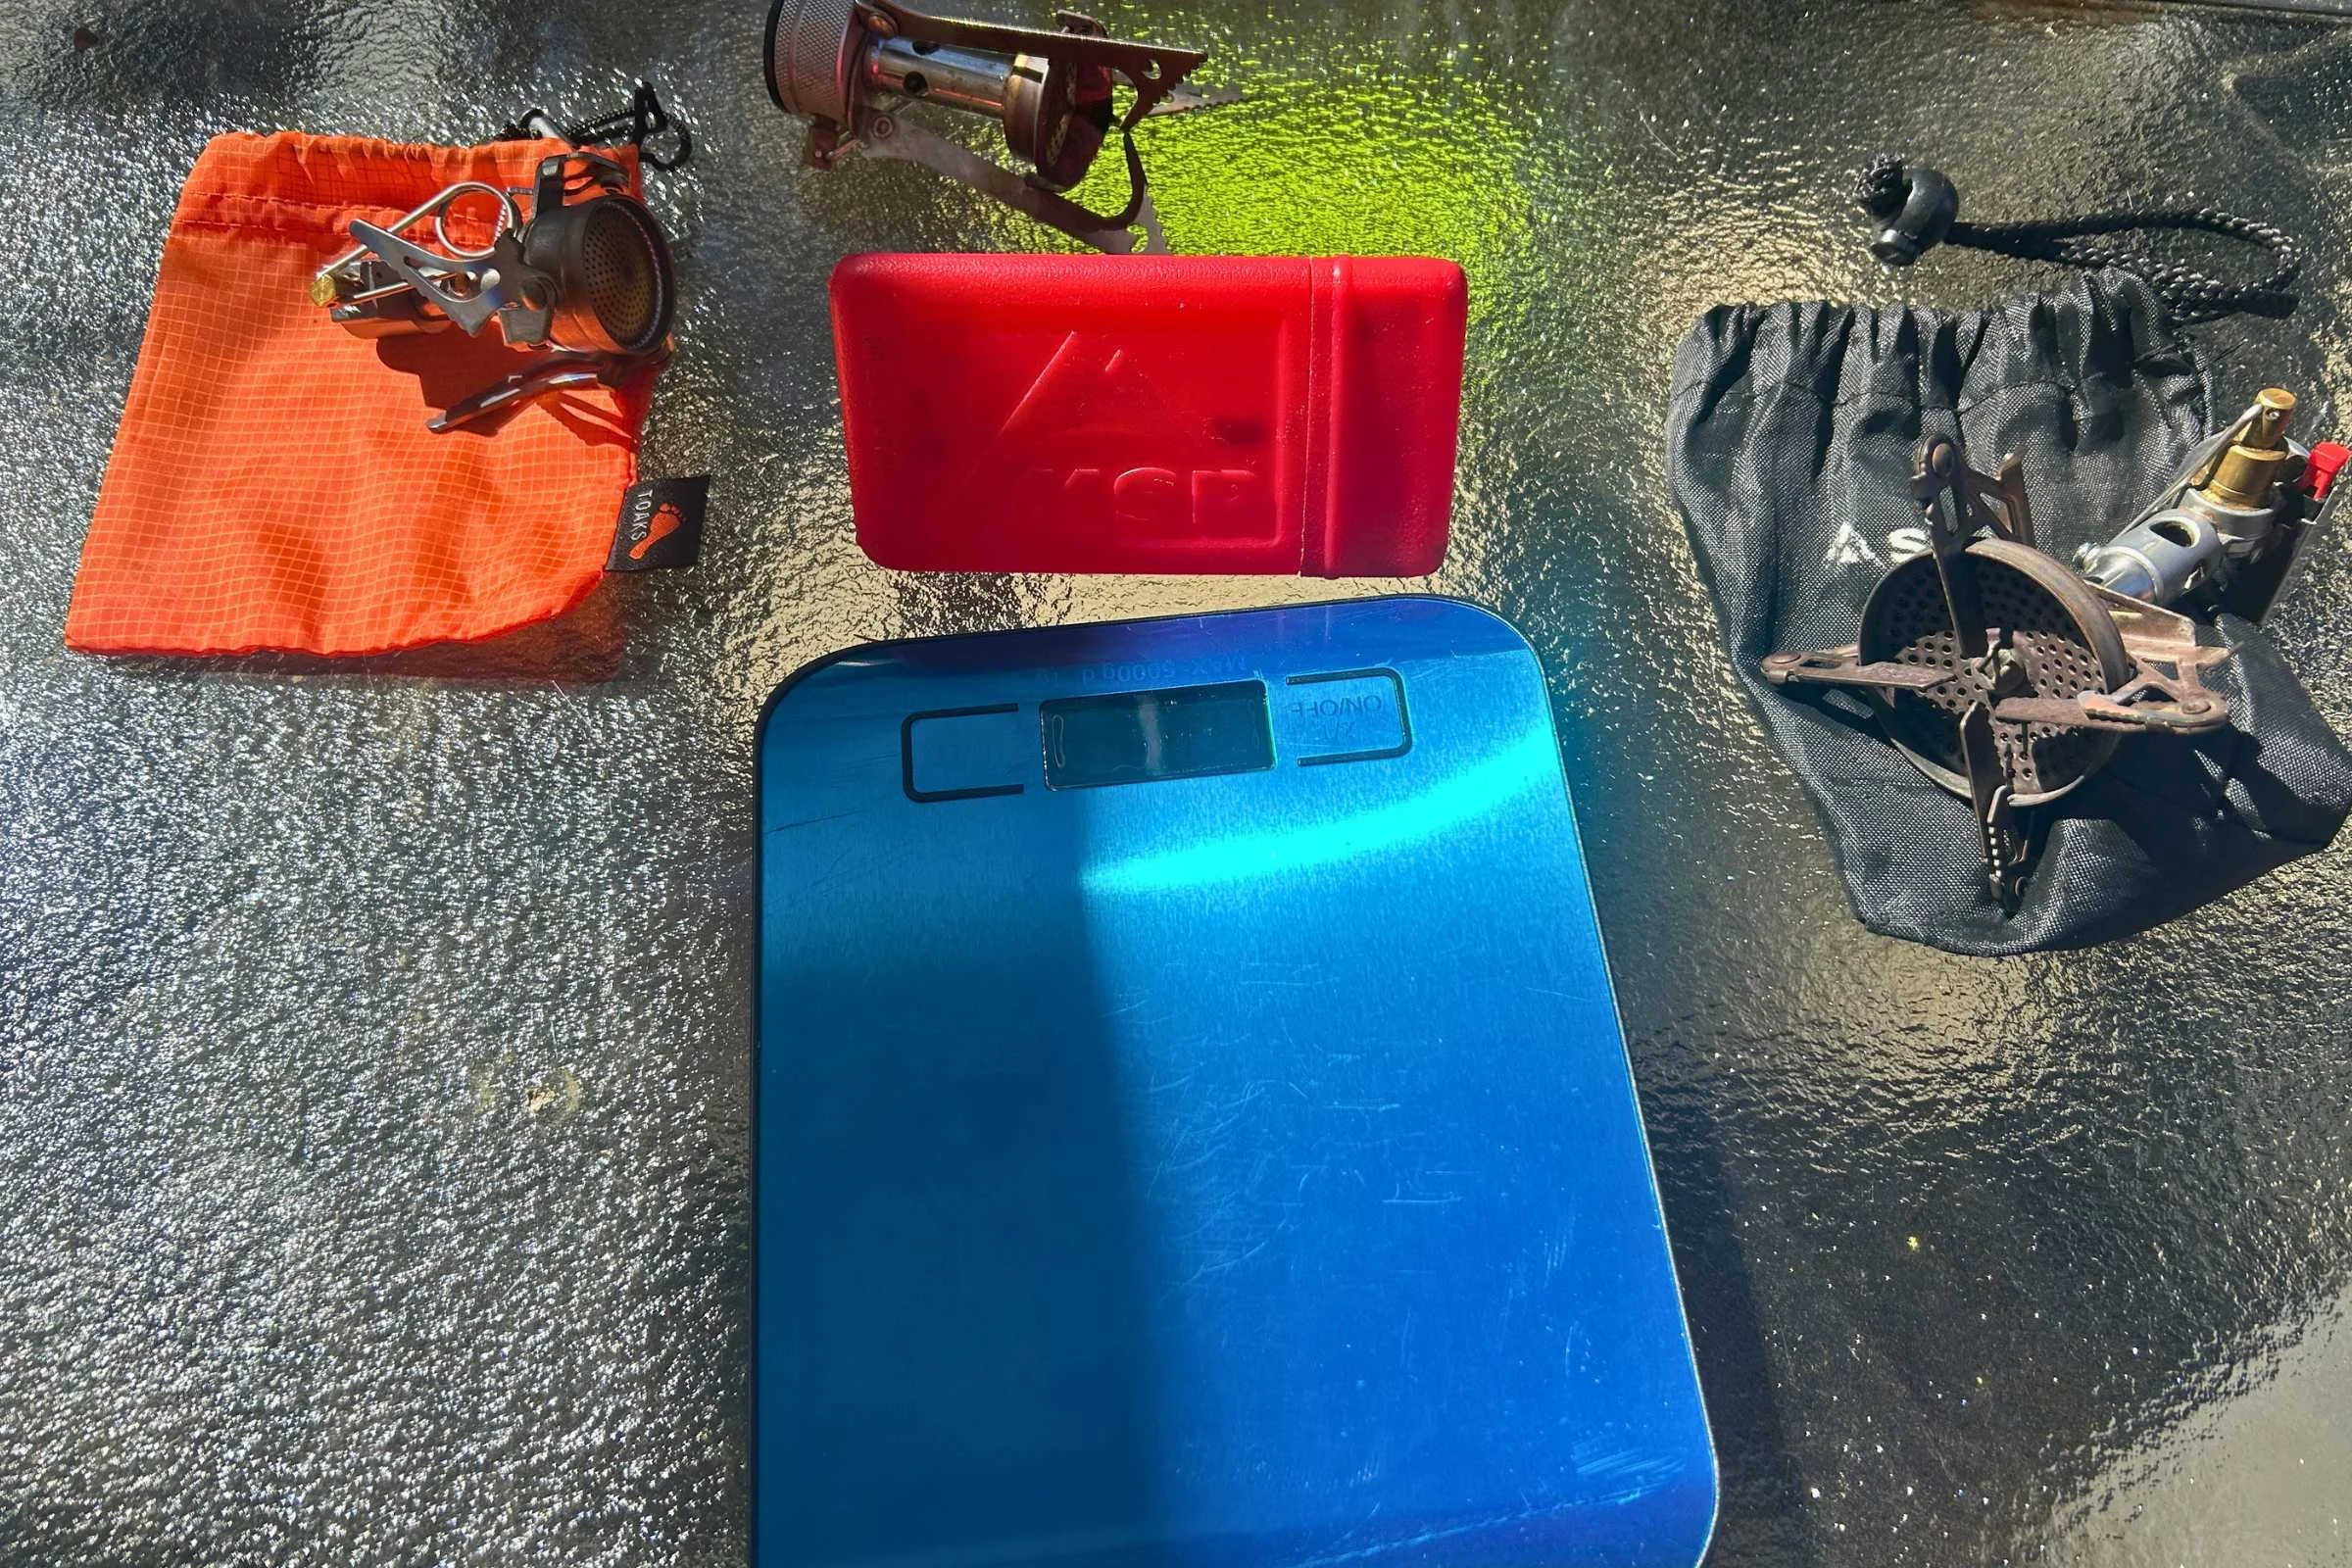
We tested stoves side-by-side to see how long it takes to boil 500 mL of water. We also used a scale to measure how much a fuel canister weighs before and after the boil to determine how much fuel it uses to boil 500 mL.
- Backpacking trips across 9 states
- Wind, cold & high-altitude conditions
- Boil time & fuel efficiency tests
- Simmer control for real cooking
- Tested with multiple pot sizes
- Wind resistance & stability
- Cold weather & altitude performance
- Fuel efficiency & canister compatibility
- Weight & packed size
- Ease of use with gloves & cold hands
Author’S Expertise & Why You Should Trust Us

The author and your trail guide for this story, Liz Thomas. Photo courtesy Liz Thomas.
I’ve backpacked over 20,000 miles and have at least 1,000 nights sleeping outdoors. On most of these overnight trips, I’ve cooked dinner on backpacking stoves. When I wake up in the morning in the backcountry, I’ll boil up some hot coffee. On chilly days, I’ll make hot lunch.
I’ve written about outdoor gear for numerous publications, including as contributing editor at Backpacker Magazine and the New York Times’ product review site, Wirecutter. I’m the author of the National Outdoor Book Award winning Long Trails Mastering the Art of the Thru-hike. My book has extensive gear and nutrition chapters--both of which address different kinds of backpacking stoves. I regularly book speaking gigs with outdoor clubs, non-profits, and colleges and universities to talk about backpacking and lead gear panels. I’m also Editor-in-Chief here at Treeline Review and oversee all of our outdoor gear stories.
You can read more about me at www.eathomas.com or at her author page.