How to Get Started Backcountry Skiing
Understanding the SKILLS AND GEAR FOR Backcountry Skiing
December 28th, 2025, updated with a gear list, newer gear, and to remove discontinued products
Home > Learn Skills
Backcountry skiing offers solitude and adventure that often can’t be found from the spinning chair lifts at a ski resort. Finding a rhythm, of climbing up and skiing down is in its own way a form of meditation, submerging the skier deep in the elements of nature. Sometimes there’s untouched powder to be found; other times you’re challenged by skiing variable snow conditions from ice to windblown crust.
The reward is often more in that form of meditation—the peacefulness and seclusion—than it is in the skiing itself, though it’s true that hunting for powder stashes and aesthetic couloir lines is one of the main reasons to put on your climbing skins and head out into the backcountry.
Backcountry touring has, especially in recent years, piqued the interest of many skiers and snowboarders. While the idea of stepping into your bindings atop an untouched powder bowl deep in the wilderness might make you teem with excitement, it’s crucial to understand that it requires specific knowledge, important decision making, and appropriate gear to safely get yourself to that spot.
We’re here to help you understand the basics of backcountry skiing: how to get educated on avalanche safety, to understand your abilities as a skier, know what avalanche safety equipment you need, and how to get the gear and skills with a budget in mind.
We create reader-supported, objective, independently-selected gear reviews. This story may contain affiliate links, which help fund our website. When you click on the links to purchase gear, we may get a commission, without costing you an extra cent. Thank you for supporting our work and mission of outdoor coverage for every body! Learn more.
Backcountry Skiing Basics

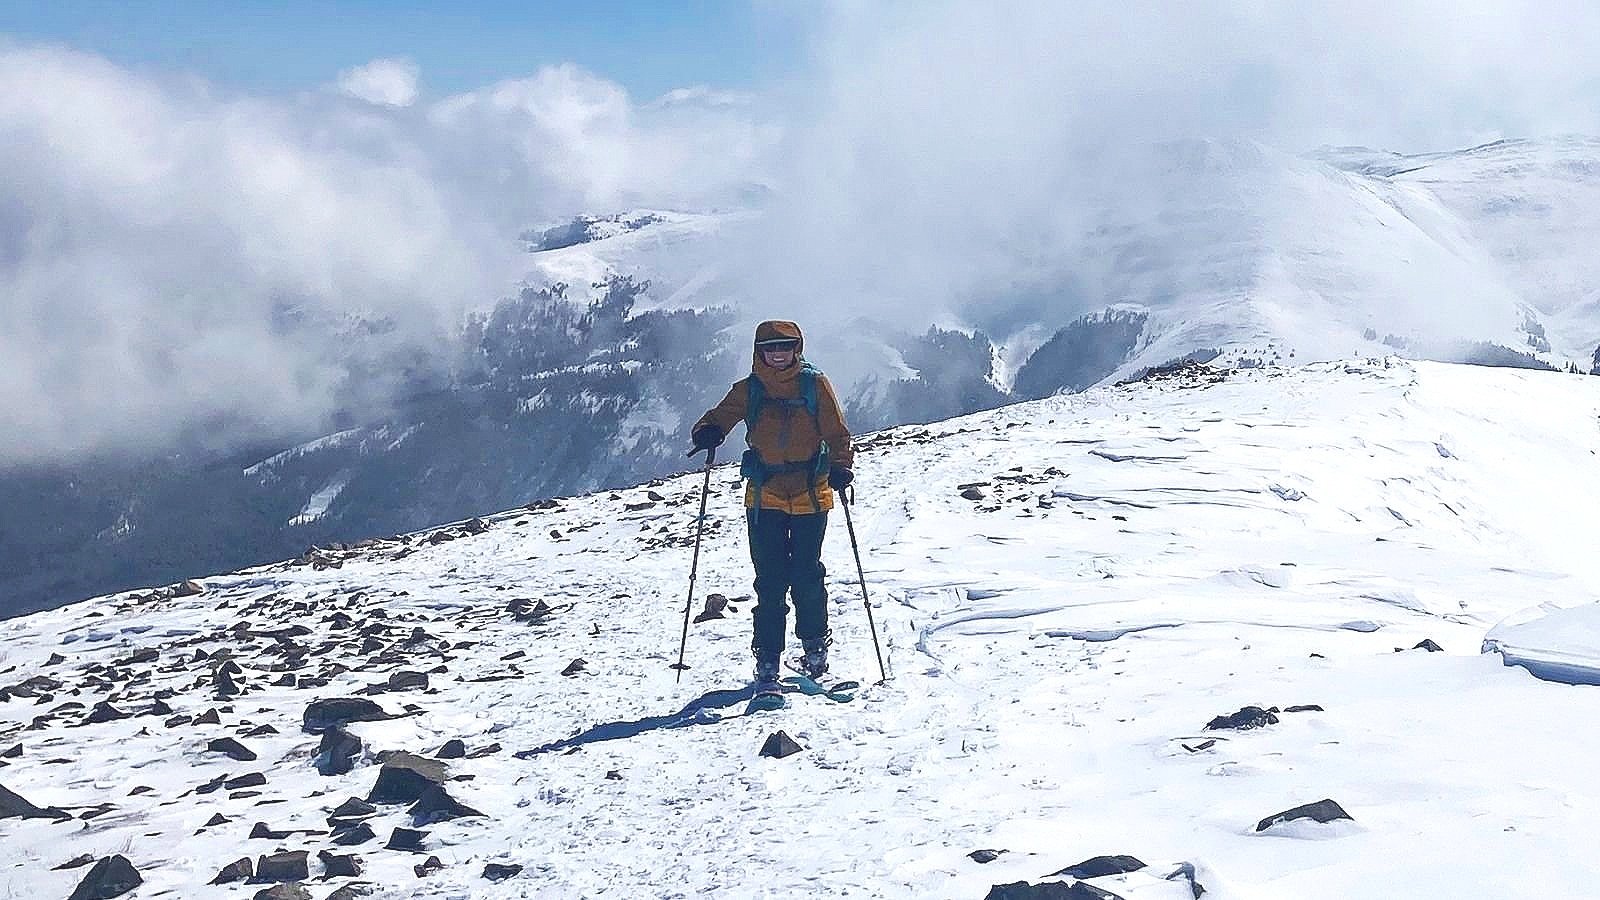
The author backcountry skiing on a beautiful day in Colorado.
It’s vitally important to understand the elevated risk that comes with backcountry skiing.
In bounds at a ski resort, avalanche hazard is mitigated by ski patrollers, meaning you don’t have to worry about whether or not what you’re skiing is susceptible to avalanching. Those same ski patrollers are also trained emergency medical professionals who will come to your aid should you sustain an injury while skiing.
Once you forego the resort and head into the backcountry, you also forgo the ski patrol, the avalanche mitigation, and the medical services that are easily at hand in the front country.
Going into the backcountry significantly elevates the danger involved in skiing, and it’s crucial that every skier who plans to head into the backcountry knows their own abilities and limits, and is educated on avalanche safety in order to keep both themselves and others safe.
Aside from the elevated risk, particularly with avalanche danger, there are a few other key differences between resort and backcountry skiing.
If you’re brand new to skiing, we’d strongly encourage you to spend a couple seasons at a ski resort to hone your skills as a downhill skier before heading into the backcountry. This is not to imply that backcountry skiing is exclusive or only for the elite, but rather that it requires an advanced level of skill as a skier in order to do it safely and have fun while you’re out there.
Within the boundaries of a ski resort, you’ll almost always be able to find your way to a groomed trail or run. In the backcountry, nothing is groomed and the snow conditions will be far more variable. Make sure that your skills as a skier are on par with the varying snow conditions, from powder to ice, chunky snow, and wind-affected snow.
Remember that you have to work a lot harder for your turns in the backcountry. You won’t get in the amount of downhill runs you would at a resort where you don't have to climb up what you ski down. But you will get the reward of seclusion and peace, and the satisfaction of skiing down what you worked hard to get up.
Step 1: Get Educated

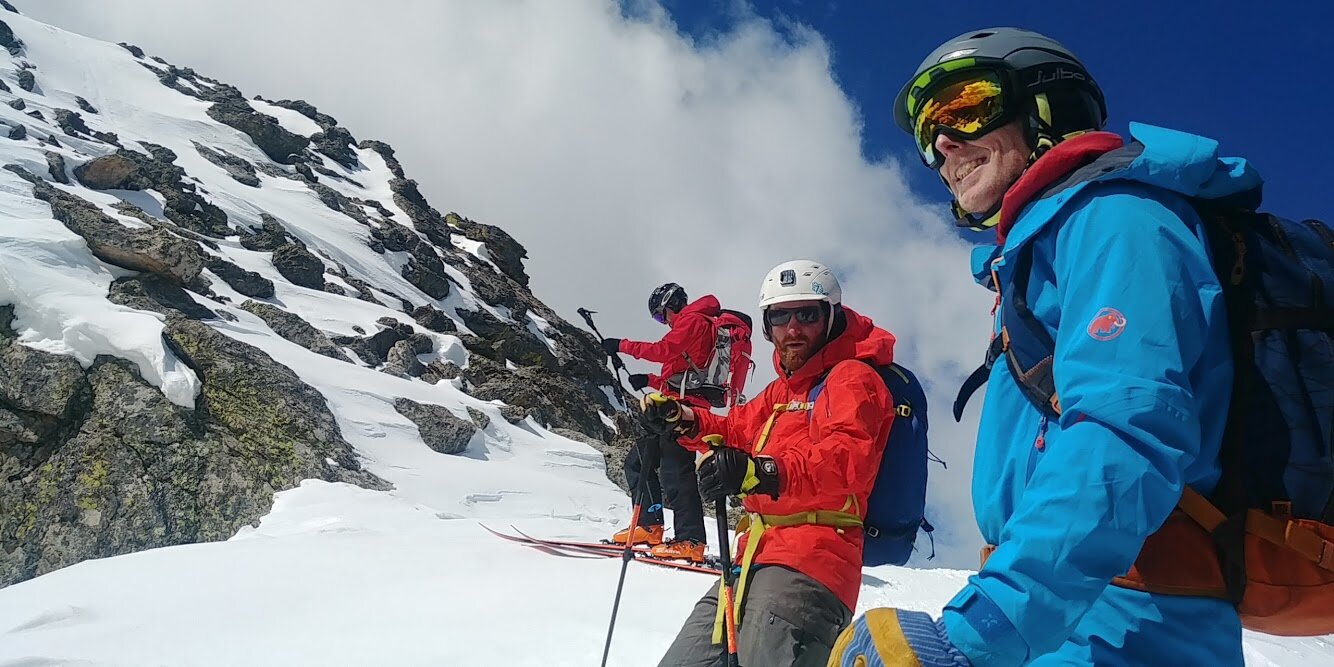
Brady McGuide, mountaineering and ski-mountaineering guide, digging avalanche-safety snow pits in White Pass, Alaska/British Columbia. Photo courtesy of Brady McGuire.
Before embarking on your first true backcountry skiing adventure, you need to get educated on avalanche safety.
The best way to do that is by taking an AIARE (American Institute for Avalanche Research and Education) Level 1 avalanche course. This weekend-long course teaches the basics of making decisions about traveling in and around avalanche terrain.
Skiing is a sport that only gets better and safer with more education. Every backcountry skier benefits by refreshing their skills and certifications often. Taking a class is the best way to learn new activities and ways of engaging in the snow.
You can search all the avalanche courses by destination by destination.
An avalanche course will help you understand what types of backcountry terrain are less prone to avalanches and which are likely to see slides; it will teach the basics of understanding snowpack; it will also cover basic companion rescue.
We cannot emphasize enough that you should not venture into the backcountry before gaining avalanche safety knowledge through taking an avalanche course.
Excited to test out your gear but not AIARE educated yet? It would be beneficial (and fun!) to take your touring gear to the resort to get a feel for it before taking the AIARE course. Many ski resorts allow people to skin uphill and ski back down before the lifts start turning. This is also a great way to bolster your skiing skills before heading into the backcountry.
We’ll go over the specifics on this gear below, but you’ll want to get a handle on your avalanche gear—avalanche beacon (avalanche transceiver), avalanche probe, and avalanche shovel—before your avalanche education course as well. While the AIARE education will help you hone these skills, you should have an understanding of how your avalanche transceiver works and how to assemble and use your probe and shovel beforehand. (An avalanche transceiver is a device worn on your person when backcountry skiing, and uses a signal to locate or be located by other avalanche transceivers in the event someone is buried in an avalanche.)
Alongside an AIARE 1 class, we’d also highly recommend taking a companion rescue course (these are often offered by AIARE as well). While the AIARE 1 course focuses on decision making in avalanche terrain, the companion rescue course will focus on just that: how to use your beacon, probe, and shovel should an avalanche occur to find a buried ski partner.
Pro tip: You can have fun practicing with your gear even in your yard at home. Grab a friend and take turns burying a beacon in the snow (or hiding it somewhere if there’s no snow) and then finding it using your own equipment.
Another key aspect of going into the backcountry safely is checking the weather and avalanche forecast, and keeping track of the snowpack. Snow is varied and dynamic, and the snowpack in any given ski area can change drastically—for better or worse—depending on the weather. Find your local avalanche forecaster and check in daily. This will help you understand the level of avalanche danger for that day and help you make decisions on where to ski based on those conditions. It doesn’t take much time to check and keeps you informed. Here in Colorado we have a website and app for the Colorado Avalanche Info Center (CAIC) that’s updated every morning in the core winter season.
Step 2: backcountry skiing gear list
In the same way that backcountry skiing requires a special set of skills and knowledge, it also requires specific gear that will be different from some of what you’d use at a ski resort. Your avalanche safety gear—beacon, probe, and shovel—are the most important, but having the right bindings, backcountry ski boots, climbing skins, and other pieces of equipment are also necessary to get you out there. See this article for a comprehensive checklist of avalanche safety gear.
| BACKCOUNTRY SKI GEAR | PRODUCTS WE LIKE | MORE OPTIONS |
|---|---|---|
| Avalanche Beacon | Arva Neo BT Pro Avalanche Beacon | Best Avalanche Beacons |
| Avalance Probe | Arva Access 240 Probe | |
| Avalanche Shovel | Black Diamond Evac 7 Shovel | |
| First Aid Kit | Adventure Medical Kits Ultralight/Watertight .7 Medical Kit | |
| Alpine Touring Bindings | G3 Ion 12 Binding | Best Backcountry Ski Bindings |
Avalanche Beacon
Also known as an avalanche transceiver, a beacon is a device that you wear on your person that transmits a signal, so that should you be buried in an avalanche, your partners or search and rescue professionals will be able to locate you by searching with their own beacons. Take a peek at this article from REI to better understand how avalanche transceivers work. This article from evo shows what the differences are between avalanche beacons and personal locator beacons (PLBs) that are often used for backpacking and other backcountry activities.
There are many avalanche beacons out there, and many of them are good quality. The primary aspects to consider when buying a beacon are ease-of-use and whether its technology is updated to current industry standards. (In other words, don’t buy an old, used beacon off a friend; get a new one and take good care of it. You never know when your life might depend on it.)
For more information, see our in-depth, comparative review of avalanche beacons.
Our Favorite Beacon: Arva Neo BT Pro
The Arva Neo BT Pro is a streamlined 3-antenna beacon with all the functionality a recreational user could need in an avalanche transceiver. Switch from send to search mode easily, without removing big mitts or fiddling with small buttons. The ample 70 meter search radius and flagging that searches for multiple victims, combined with its overall simplicity, make this beacon an excellent choice for any level of backcountry skier. A couple bonus features we also love about this beacon: An automatic setting reverts the beacon to transmit mode (taking it out of search mode) using a sensor in the instance that the rescuer is caught in a secondary avalanche, and the beacon alerts you when there’s interference from other devices, like cell phones. It’s also a winner in our Best Avalanche Beacons Guide.
Want to shop around a little more? We like the expert, in-depth avalanche beacon reviews from Wild Snow. To take a deeper dive into your beacon options, start here, but here are some criteria to look for when purchasing an avalanche beacon:
3 antennas: Most beacons now should have this, but always double-check before purchasing. Older avalanche beacons only have 2 antennas, which means they have a weaker signal than those with 3. You’ll want the best signal you can get if you need to use your beacon, so always opt for one with 3 antennas.
Ease of use: You want your beacon to be straightforward and easy to use. If someone in your party were to get buried in an avalanche, you would not want to be fussing around with unnecessary buttons or settings.
Flagging: This feature allows you to locate multiple skiers at once (instead of just one) in the event that multiple people are buried in an avalanche. We highly recommend finding a beacon with this option.
Another important piece of safety gear: your ski helmet. See the Best Ski Helmets for our recommendations for backcountry and resorts.

Avalanche Probe
An avalanche probe is a fairly straightforward piece of gear that assembles into a long stick, similar to a tent pole, so that you can probe the snow for buried avalanche victims. While weight and simplicity are factors to consider, the thing to focus on here is length. Make sure your probe is at least two meters long.
Our Favorite Avalanche Probe: Arva Access 240 Probe
Probes are fairly straightforward. This one is a standard length with an average weight. We love how quickly it assembles and have found it to be durable and reliable.

Avalanche Shovel
Another relatively simple piece of backcountry gear, standard avalanche shovels have a metal blade with a collapsible handle for easy packing. The key factors to look for in a good shovel are strength and size. You’ll want your shovel to be light enough to carry on long ski tours, but make sure it’s good quality and large enough for serious digging.
Our Favorite Avalanche Shovel: Black Diamond Evac 7 Shovel
The Black Diamond Evac 7 avalanche shovel packs light while packing in useful features for digging pits and through avalanche debris. The shovel handle is comfortable, and the shaft breaks down easily.
Plus, the shaft has the option to be set at an angle for performing snow stability tests while digging pits (things you learn in an AIARE Level 1 course!)—something you should be doing far more often than digging through avalanche debris.
But when it comes to a rescue, this durable shovel has ample size and sturdiness to breach the toughest snow chunks.
First aid
Just like any venture into the backcountry, winter or summer, you’ll want to have a tailored first aid kit on hand. Items like antiseptic, gauze, a SAM splint, and hand warmers are essentials to include. We like keeping one like the Adventure Medical Kits on hand for basic first aid needs.
As with any outdoor or backcountry adventure, it’s not enough to simply carry the right first aid gear. It’s a good idea to have a current Wilderness First Responder (WFR—pronounced “woofer”) certification, like these offered through NOLS. If a WFR is prohibitive due to cost and time investment, REI offers a 2-day Wilderness First Aid (WFA) courses. Often offered on weekends, they are more time and cost accessible.
If it’s been a while since your last WFR class, it always helps to take a re-certification class as a refresher. They also are more time and cost-accessible than a WFR.
First Aid Kit
Wilderness First Responder Course List
Alpine Touring (AT) Bindings

A close up on the G3 Ion 12 Bindings on the toe piece, which is different for alpine touring bindings.
Unless you want to post-hole your way up the mountain, you’ll need specific bindings, known as AT bindings, for your backcountry ski adventures. These bindings have two modes: uphill and downhill. In the uphill mode, the bindings allow your heel to lift from the ski so that you can tour freely. (For those new to the idea, picture the movement of cross country skiing for the uphill mode, with a free heel and locked in toe.) When it’s time for the fun, the bindings transition to lock your heel in so that you can make alpine turns on the downhill.
There are currently two major types of AT bindings on the market: pin (or “tech”) bindings and frame bindings. As opposed to typical downhill ski bindings, pin tech bindings use metal pins that are compatible with tech-specific boots to hold your toe and heel in place. This allows your heel to lift freely when in tour mode, and lets your toe pivot on the pins for skinning uphill.
Frame bindings are essentially downhill ski bindings built on a frame that allows the entire unit to lift from the ski for touring mode.
Frame bindings are much heavier, bulkier, and far less efficient for ski touring than pin bindings. And because pin bindings have come so far in technology in the past few years, making them more stable and better on the downhill, frame bindings are all but obsolete. Pin bindings are a far better option for ski touring all around, and there are multiple options available, from superlight race bindings to heavier ones that are built with a pin tech design but keep downhill skiing as the priority.
Our Favorite AT Bindings: G3 Ion 12 Bindings

The G3 Ion 12 Bindings are our favorite bindings set up for backcountry skiing.
The G3 Ion 12 pin bindings have proven to stand the test of time with a functional design that’s durable and simple to use. They’re fairly light (though not the lightest in their category), reliable on both the up and downhill, and durable for multiple seasons and hundreds of days of use.
One quirk of pin tech bindings is that they can be trickier to step into than downhill ski bindings because you have to align your boots with the small pins just right to get in correctly. The G3 Ion is built with small guides at the toe that make this binding likely the easiest to get into of all tech bindings, saving you time and frustration at the start of your day and in your transitions.
Another reason we love the Ion binding is for the forward pressure. Downhill ski bindings have this—forward pressure is a feature that makes them more responsive and better overall on the downhill. Not all pin tech bindings have this, but the G3 Ion does, making them better at skiing downhill than similar bindings without forward pressure.
Tech bindings do have a propensity to ice over on the pin components, and these are no different in that regard. What is different is that the Ion bindings are some of the easiest to clear ice from, thanks to the design.
Our writer has skied almost exclusively on these bindings for 4 seasons and has never had any major issues. They’re plenty light enough for almost any backcountry mission and ski well on the downhill for all but the most aggressive (read: big-cliff-hucking) skiers. These bindings are best suited for skiers who plan to use them primarily in the backcountry, though they can handle the resort for a handful of days each season.
If you plan to ski more than half of your days at the resort, it’s best to have a secondary setup with downhill bindings or get a pin binding that’s more geared toward the downhill. It’ll give you a better downhill experience overall and avoid unnecessary wear on bindings that are built primarily for touring.
Related: read our in-depth review of the Best Ski Bindings for the backcountry.
Climbing Skins

Close up of what climbing skins look like on ski bases.
Climbing skins are a specialized piece of gear that allow you to glide uphill on your skis. Here’s how they work: Skins are made from either a synthetic material, natural fiber, or blend of the two, and have an adhesive (skin glue) on the bottom that sticks to the base of your skis. You put these on for the uphill, and the fibers allow you to glide forward but grip the snow, stopping you from sliding backward.
Once you get a pair of skins, you’ll trim them to your exact ski shape, giving them the most functionality. Each brand of skins is set up slightly differently and will come with instructions on how to get them sized to your skis.
Fun fact: Skins are called skins because they were historically made from animal pelts, like seal skin, that gave the same result of gliding in forward motion but gripping in backward motion. In modern times, skins are made out of mohair or even vegan materials.
Our Favorite Climbing Skins: G3 Alpinist+ Universal and Pomoca Climb Pro S-Glide
Both the Pomoca Climb Pro S-Glide and G3 Alpinist+ Universal climbing skins offer an ideal combo of glide and grip, with glue that lasts from season to season when taken care of. The Pomoca skins are slightly more customizable to different ski sizes, while the G3 skins are easier to set up initially.
View the Pomoca Climb Pro S-Glide Climbing Skins
View the G3 Alpinist+ Universal Climbing Skins
Alpine Touring (AT) Ski Boots
Alpine touring ski boots come in a wide range of models, from superlight and uphill-oriented to heavier, downhill-performing boots that can go up. The main difference you’ll find between downhill alpine ski boots and alpine touring boots is a more generous walk mode and applications for pin tech bindings in the toes and heels.
In the category of alpine touring boots there are two main designs: overlap boots (that look much like a downhill alpine ski boot) and tongue boots (resembling a sort of hybrid between a plastic ski boot and a hiking boot). Overlap boots are designed with the downhill performance as a priority, while tongue boots prioritize weight savings and efficiency for the uphill.
There are now dozens of options of each type on the market, ranging from ultralight race boots that excel on the up and barely suffice on the down to heavier boots that ski almost as well as your resort boots on the down, but weigh you down on the climb.
There are also some great boot options that fall right in the middle of that range, and we think those boots suit most backcountry travelers well. Deciding whether you prioritize saving weight for the uphill or having the best possible performance on the downhill will help you select the right boots for backcountry skiing.
Our Favorite Alpine Touring Boots: Atomic Hawx Ultra XTD and Tecnica Zero G Tour Pro

Backcountry ski boots have much greater range of motion in walk mode than downhill alpine boots
Both of these boots make great crossover boots that can be used for days spent riding the chairlift or cruising in the skin track.
The Atomic Hawx Ultra XTD boots are built for skiing downhill aggressively, but they’re light enough and have a good enough range of motion for all but the longest missions into the backcountry. They’re a few ounces heavier than most other boots in their category (though still much lighter than most resort boots), but they also ski better than most touring boots and have a liner that performs and insulates well.
The author of this story skis in the Atomic Hawx Ultra XTD 115. After too many long ski tours in heavy boots built for the resort outfitted with pin tech toes and heels, and one season with ultralight tongue boots that did no justice to the downhill, she found a very happy compromise in the Hawx. While she’s always game for big, long tours in the backcountry, Stasia is willing to lug the extra ounces for the downhill performance—and to keep her toes warm.
Still, It’s tough to beat the combo of lightweight touring capabilities and downhill performance that the Tecnica Zero G Tour Pro boots offer. Compared to the Atomic boots, these will go uphill a little better, where the Atomics will give a bit more performance on the downhill. The Zero G is lighter than the Hawx, but lacks the insulation that the downhill-oriented liner of the Hawx has.
A fellow Treeline writer, Josette Deschambeault, skis in the Tecnica Zero G. After spending a few seasons in boots that were lighter and more geared toward the uphill, she swapped out for the Zero G and never turned back. The stiffness and responsiveness feels much closer to that of an alpine downhill boot, yet she can still sprint across the trailhead parking lot in them. She runs warm, so the thin insulation in these boots is just enough for her.
View the Atomic Hawx Ultra XTD Ski Boots
View the Tecnica Zero G Tour Pro Ski Boots
Backcountry Skis
Realistically, you can turn any pair of downhill skis into backcountry skis with the right boots and bindings. Depending on your style of skiing, you can buy touring skis, or simply mount alpine touring bindings on your favorite downhill skis. Choosing skis for backcountry touring largely comes down to personal preference and what you want to get out of your experience. If you plan to go on long excursions in the backcountry where you’ll spend hours climbing, opting for a lightweight skis will be your best option. If your goal is powder laps in the backcountry, then weight may not be as much of a priority as downhill performance.
In general, it is good to remember that when backcountry skiing, more than half of your time (sometimes most of it) is spent going up using your own legs. So saving weight wherever possible makes sense. The lighter skis get, the more you sacrifice in downhill performance, but there are plenty of skis on the market now that balance both well. Decide what your goals and style are, and look for skis that fit your preferences.
Related: The Best All-Mountain Skis
Ski Backpack

Snow tool storage room in the Osprey Kresta pack.
When skiing in the backcountry, you’ll need to carry a backpack for your essentials, like your shovel, probe, snacks, and layers.
While you can make use of any hiking backpack you might already have, it’s helpful to have a ski-specific pack if you plan to get out a lot.
Backpacks designed for backcountry skiing will have features like ski straps for carrying skis, a helmet carry system, a goggle pocket, and (importantly) a dedicated pocket that stores snow safety tools like your probe and shovel in an organized and easily accessible manner.
Some backpacks designed for backcountry skiing come equipped with avalanche air bags, like the Ortovox Litric AirBag Ski Pack. These can be valuable tools, but make sure you know how to use it properly before you go out and that your batteries are fully-charged.
Our Favorite Ski Touring Backpack: Osprey Kamber 20 and Osprey Kresta 20
This backpack has all the essential ski features—ski carry straps, goggle pocket, helmet carry, and dedicated storage for snow safety tools—and is the perfect size for both short and long day tours. It’s got enough space to carry extra layers and two spacious hip pockets for stashing snacks and essentials.
The Kresta and Kamber are winners in our article on The Best Ski Backpacks.
View the Osprey Kresta Ski Backpack (Women's)
View the Osprey Kamber Ski Backpack (Men's)
Apparel for Backcountry Skiing
Backcountry skiing is ultimately quite different from what to wear resort skiing when it comes to the gear necessary to make the best of your experience. In some cases, pieces of gear can crossover nicely from resort to backcountry, and we love gear that serves multiple purposes.
However, there are certain times when specialized gear is required. This is primarily true with the hardgoods in skiing: bindings and boots.
When it comes to apparel, there are still times when we believe it’s worth it to upgrade your gear if you plan to use it for more than just the resort.
If what you already have works, use it. But, if you’re looking for new ski outerwear anyway and plan to use it in the backcountry, consider pieces that are versatile.
Hardshell Ski Jacket and Ski Pants
Unlike resort skiing, backcountry skiing requires a significant amount of aerobic activity, meaning you’re much more likely to break a sweat than on a chairlift (even if the mercury still lingers below freezing).
Having a ski jacket and ski pants that are shells instead of insulated pieces gives you more layering options, so you can reduce sweat on the uphill and keep yourself warm for the transitions and the downhill. These pieces are also typically versatile enough to be worn in the resort, too, with an extra layer or two underneath.
We wrote an in-depth review of the Outdoor Research Cloudchaser Jacket, which is one of our favorite jackets for backcountry skiing. You can also learn more in our Best Men’s Ski Jackets and Best Women’s Ski Jackets guides.
For ski pants recommendations, check out our guides on the Best Women’s Ski Pants and Best Men’s Ski Pants.
Base Layer
If you’re a resort skier already, you likely already own a quality base layer and base layer bottoms. With backcountry skiing, you’ll likely be sweating more than at the resort. Check your base layer to make sure it is adequately sweat-wicking and quick drying. This combination will keep you from feeling too warm during aerobic activity and feeling too cold when you’re exerting less energy.
How to Get a Backcountry Ski Set up on a budget
We know first hand: Ski gear is expensive, and backcountry ski gear even moreso.
In some cases, there’s simply no getting around the price. AT ski boots and bindings, for example, are expensive because they are very specialized pieces of gear. While you might find that a frame binding and your old ski boots will do the trick—and they will get you up and down—this is one area where we recommend buying the right gear. Having pin tech bindings and boots that are meant to go uphill make all the difference on a day in the backcountry.
Also, having the appropriate avalanche equipment and training is necessary for keeping yourself and others safe when you’re out there—this especially is not to be skimped on.
How to Find a Used Backcountry Set Up
One of the best ways to get your backcountry setup started is to use a pair of skis you already have and outfit them with pin tech bindings and a pair of skins. Better yet, check your area for local gear consignment shops or shop used online at evo. Oftentimes you’ll find a whole set of skis, bindings, and skins that you can buy used. This is a great way to get started without forking over so much money.
While you can, of course, buy used ski boots, we only recommend doing so if they’re not too worn and they fit your feet well. Poor fitting ski boots are a skier’s worst nightmare. We recommend saving up and heading to a local shop that can properly fit you for a pair of boots. They can also help guide you toward the boots that would be best for you since there are so many options in the world of AT ski boots.
Choose Crossover Gear That works for Resort and Backcountry
Some final notes to keep in mind when it comes to budget: Finding a balance between weight and performance can help you when budgeting for ski touring gear. Both the lightest equipment on the market and the stuff built for the hardest-charging skiers will be more expensive, and most skiers don’t need gear that’s quite that specialized.
Opt for gear that crosses over well — boots that can be worn in both the resort and backcountry, apparel that can be layered and used in a variety of conditions.
Choose Quality Gear
Ultimately, spending money on quality gear upfront will save you both money and hassle in the long run. Our goal at Treeline is to help you buy the right things the first time, and sometimes that means spending a little more money on gear that will last through years of wear and extreme use. This is especially true with backcountry ski gear. Shop wisely!
Related: The Best Ski Goggles
Read More: The Best Ski Gloves
Step 3: Get Out and Backcountry Ski
The best way to get used to all of your backcountry skiing equipment is, of course, to use it.
Practice with your gear
Certain steps, like putting skins on your skis and transitioning your boots and bindings between uphill and downhill modes will take some practice before they become second nature. Honing your techniques on the skin track will take time, too, but will eventually become as natural as making turns on the downhill.
Work your way up to dream lines
For your first season exploring the backcountry, we don’t recommend jumping straight into big, far out steeper terrain. You’ll have plenty of fun working your way up to those dream lines by making laps in low-angle powder. Use areas that are safer in terms of avalanche danger to practice with your snow safety gear and make sure you give the information from your AIARE Level 1 avalanche course a chance to sink in before you really have to use it.
Practice Skinning at a Resort
One great way to get used to your gear is by skinning at a ski resort that allows uphill access before officially opening for the day. This will give you a chance to practice your technique on the uphill without worrying about avalanche danger. Similar to how learning to turn downhill on a groomed run helps you transition to skiing powder, learning how to skin uphill on groomed runs at the resort helps you practice before having to break trail in deep snow in the backcountry.
Read More: The Best 4-Season Tents
Step 4: Never Stop Learning
Constantly expanding your knowledge of traveling in the backcountry and through avalanche terrain will only help keep you safe, and ultimately offer up more fun on your skis in the long run. Even with just one AIARE Level 1 course under your belt, you can study the terrain and snowpack every time you go out on a backcountry ski tour. Check your local avalanche forecast regularly and take notes on your own observations in the field. Our editor likes this pocket-sized Backcountry Access Field Book with water resistant paper, but you can use any notebook.
Like many hobbies we take on in the outdoors, backcountry skiing requires patience and dedication to do safely for a lifetime. The reward is more than just fresh, untouched powder skiing—it’s the peace, solitude, views, and the meditation and rhythm of backcountry travel. Get the knowledge and appropriate gear and get out there for some fun beyond the ski resort.
Learning basic backcountry skiing techniques
The foundation of backcountry skiing lies in mastering basic ski techniques. From negotiating uphill climbs to efficiently using climbing skins, employing proper ski pole techniques, and adapting turns to different snow conditions, a well-rounded skill set enhances the overall experience and safety of backcountry skiing adventures. Continuous practice and refinement of these techniques contribute to the skier's ability to navigate backcountry challenges with skill and confidence.
Mastering downhill and uphill skiing techniques
Backcountry skiers must be adept at both downhill descents and uphill climbs. Downhill techniques involve maintaining balance, controlling speed, and navigating varied terrain with precision. Uphill skiing requires efficient use of energy – employing techniques like the herringbone and kick turns. Mastering the art of both uphill and downhill skiing ensures a well-rounded skill set for negotiating the diverse landscapes in the backcountry.
Efficient use of climbing skins
Climbing skins are indispensable tools for ascending steep slopes. Properly attaching and utilizing climbing skins enhance traction, preventing backward slips while ascending. Skiers should practice attaching and detaching climbing skins efficiently and learn to adjust skin placement according to the steepness of the terrain. Developing a seamless integration of climbing skins into the skiing routine is crucial for managing ascents effectively.
Proper ski pole techniques
Ski poles are crucial in maintaining balance, rhythm, and propulsion. Understanding the correct pole techniques is essential for both uphill and downhill skiing. While ascending, skiers can employ various techniques, such as the double pole plant or the use of poles for stability during kick turns. During descents, proper pole planting aids in turning and maintaining control. Mastery of ski pole techniques contributes to overall stability and fluidity in motion.
Turning and maneuvering in various snow conditions
Backcountry skiers encounter various snow conditions, from powder to crud and everything in between. Learning to adapt turning and maneuvering techniques to these varied conditions is crucial for maintaining control and responsiveness. Skiers should practice carving turns in powder, executing quick turns in tight spaces, and adjusting their technique for icy or variable snow. Versatility in turning and maneuvering ensures confidence and agility across diverse backcountry terrain.
Physical fitness and conditioning
Physical fitness is the bedrock of a successful and enjoyable backcountry skiing experience, demanding a comprehensive approach to conditioning. The significance of cardiovascular fitness cannot be overstated, given the aerobic nature of backcountry skiing. As enthusiasts ascend steep inclines and navigate through varied snow conditions, a robust cardiovascular system becomes a linchpin for sustaining energy levels, managing altitude challenges, and ensuring the stamina required for extended periods in the alpine environment.
Complementing cardiovascular fitness, strength training emerges as a critical component in preparing for the rigors of backcountry skiing. Negotiating ungroomed snow, breaking trail, and maneuvering through challenging terrain necessitate a finely tuned muscular system. Targeted strength training exercises – encompassing the lower body, core, and upper body – not only enhance overall strength but also foster improved stability, control, and power during descents and ascents alike.
Flexibility and agility form an integral part of a skier's arsenal. The unpredictable nature of backcountry terrain demands adaptability, which is best achieved through stretching and agility exercises. These routines enhance joint mobility, responsiveness, and proprioception, reducing the risk of injury and promoting a more fluid and controlled skiing experience.
Endurance training rounds out the trifecta of physical preparation. Backcountry skiing often involves traversing remote areas, and the ability to sustain physical effort over extended periods is paramount. Engaging in activities that build endurance, such as long-distance hiking, trail running, or cycling, fortifies the body for the demands of backcountry treks. This ensures that skiers can cover considerable distances and handle prolonged ascents with resilience.
An all-encompassing approach to physical fitness is fundamental for those venturing into the backcountry. Cardiovascular fitness, strength training, flexibility, and endurance collectively form a comprehensive regimen that not only enhances performance on the slopes but also contributes to the safety, enjoyment, and overall satisfaction of the backcountry skiing experience.
Emergency preparedness
Emergency preparedness is a non-negotiable aspect of backcountry skiing, where the remoteness and unpredictability of the environment demand a proactive approach to safety. One of the foundational elements of preparedness is including a well-equipped first aid kit. This kit should address common injuries associated with skiing and account for the unique challenges the backcountry presents. Adequate medical supplies, such as bandages, antiseptic ointments, and pain relievers, can prove invaluable in addressing injuries promptly and effectively.
Beyond medical preparedness, backcountry skiers must possess basic wilderness survival skills. Understanding how to construct emergency shelters, build a fire, and navigate with minimal tools are essential capabilities that can make a significant difference in challenging situations. These skills empower skiers to respond resourcefully to unexpected events, such as sudden changes in weather or getting off course.
Communication devices are essential in backcountry safety. Carrying a satellite communicator or a two-way radio enables skiers to stay connected in areas with limited or no cellular reception. These devices become lifelines in emergencies, allowing skiers to call for assistance or communicate with rescue teams. Regular check-ins with fellow skiers or designated contacts can provide an added layer of security, ensuring that someone knows the itinerary and can initiate help if needed.
Creating a trip plan is a proactive measure that enhances overall safety in the backcountry. Before embarking on a skiing adventure, skiers should meticulously outline their route, anticipated timeline, and potential stopping points. This information should be shared with a reliable contact not part of the expedition. In unforeseen circumstances, this designated person can be a crucial point of contact for authorities or rescue teams, facilitating a more prompt and effective response.
Emergency preparedness is an integral part of responsible backcountry skiing. Equipping oneself with a comprehensive first aid kit, cultivating wilderness survival skills, carrying communication devices, and sharing a detailed trip plan are all essential steps toward ensuring a safer and more secure experience in the dynamic and challenging landscapes of the backcountry.
Environmental awareness
Environmental awareness is a cornerstone of responsible backcountry skiing. Adhering to Leave No Trace principles, respecting wildlife and vegetation, and understanding and following local regulations collectively contribute to preserving the pristine landscapes that make backcountry skiing a unique and enriching experience. As stewards of the environment, skiers play a vital role in ensuring these natural spaces remain unspoiled for future generations.
Leave No Trace principles
Cultivating environmental awareness is imperative for backcountry skiers, fostering a sense of responsibility and stewardship toward the pristine landscapes they traverse. Adhering to the Leave No Trace principles is a fundamental tenet of responsible backcountry skiing. These principles underscore the importance of minimizing human impact on natural environments. Skiers are encouraged to pack out all waste, dispose of it properly, and tread lightly to preserve the fragile ecosystems they travel. Respecting the natural beauty of the backcountry ensures its sustainability for future generations of outdoor enthusiasts.
Respecting wildlife and vegetation
In addition to adhering to Leave No Trace principles, backcountry skiers must demonstrate a deep respect for wildlife and vegetation. The backcountry ecosystems are delicate and often home to diverse flora and fauna. Skiers should maintain a safe distance from wildlife, avoid disturbing their habitats, and take care to minimize noise pollution. A mindful and considerate approach to nature not only preserves the wilderness experience but also contributes to the ecosystem's overall health.
Understanding local regulations and guidelines
Understanding and complying with local regulations and guidelines is crucial to environmental awareness in the backcountry. Different regions may have specific rules governing access, camping, and other activities. Skiers should familiarize themselves with these regulations before embarking on a trip, ensuring they comply with local laws. By respecting these guidelines, skiers preserve natural habitats and maintain positive relationships with local communities and authorities.
Embarking on a successful backcountry skiing adventure requires careful consideration and planning when selecting the right routes. Here's a guide to finding the ideal backcountry skiing routes:
Finding backcountry skiing routes
The quest for the perfect backcountry skiing route involves a multifaceted approach. From thorough research and the use of guidebooks to seeking advice from experienced skiers and joining local communities, a combination of these strategies ensures that skiers are well-prepared and equipped to tackle the challenges of the backcountry while maximizing the enjoyment of their skiing experiences.
Researching popular routes
Before strapping on your skis, invest time in researching popular backcountry skiing routes. Online platforms, forums, and travel websites often feature detailed accounts from fellow enthusiasts who share their experiences, highlighting the challenges and attractions of specific routes. Delving into these resources can provide valuable insights into the terrain, conditions, and overall appeal of different backcountry destinations.
Utilizing guidebooks and online resources
Guidebooks tailored to backcountry skiing are invaluable resources for both novice and experienced skiers. These publications often offer comprehensive route details, including difficulty levels, elevation changes, and notable features. Additionally, online resources such as trail maps, trip reports, and weather forecasts contribute to a well-rounded understanding of potential routes. Leveraging these tools equips skiers with the knowledge to make informed decisions about their chosen path.
Seeking advice from experienced backcountry skiers
The wisdom of those who have ventured before is an invaluable asset for backcountry skiers. Seeking advice from experienced individuals through personal connections, online forums, or organized events can provide firsthand insights into route conditions, potential challenges, and recommended gear. Engaging with this experienced community fosters a supportive network that enhances the overall safety and enjoyment of backcountry skiing.
Joining local backcountry skiing communities
Local backcountry skiing communities serve as hubs of shared knowledge and camaraderie. Joining these groups provides access to a wealth of information about regional routes, conditions, and safety considerations. Moreover, participating in community events or outings offers the opportunity to learn from seasoned skiers, exchange tips, and forge connections with like-minded individuals who share a passion for exploring the backcountry.
AUTHOR’S EXPERTISE: WHY YOU SHOULD TRUST US

The author getting some well-earned turns in Hakuba, Japan. Photo by Tom Callaghan.
Stasia Stockwell is a lifelong skier who has spent an average of 50 days skiing each season since she could walk. She has taken classes on all-mountain skiing techniques and has her AIARE Level 1 avalanche safety certification. Her work in the industry spans from testing and reviewing skis for Backpacker Magazine to working on ski videos for Atomic skis.
A true mountain dweller, Stasia Stockwell feels far more at home on a high alpine ridge than a busy city street. She writes primarily in the outdoor and adventure travel realm, focusing on destination content and gear reviews that are intriguing and informative for newcomers and experts alike.
Stasia has worked as a backpacking guide in Southeast Alaska and written for BACKPACKER, REI Co-op Journal, and The Dyrt, among others. She’s a lifelong skier, mountain biker, and trail runner who’s passionate about lowering barriers to entry for outdoor sports. She hopes to inspire people to love and respect the wild natural world through her work.
You can see all of Stasia's Treeline Review stories on her author page and her other work on her website.
As a freelance writer and gear tester, Stasia and Treeline Review are not sponsored, an ambassador, or an employee of any of the companies mentioned here. This review is unbiased and we do this to help you find the best product for the best price. Treeline Review doesn’t accept sponsored content, native advertising, or paid reviews.