How to Repair a Sleeping Pad
Step by step instructions for punctures, rips, and leaks on inflatable backpacking sleeping pads and camping mattresses
August 20, 2025
Home > Learn Skills > Cleaning, Repair and Maintenance
A leaky backpacking sleeping pad or camping mattress doesn't need to ruin your trip. Whether you're on a thru-hike or an overnight car camping trip with the family, repairs on inflatable pads and mattresses are usually quick, affordable, and can be done by everyday people.
With the right materials, technique, and patience, most repairs can restore your pad to full functionality and extend its useful life. A few minutes spent on repair can save you from many uncomfortable nights on the ground and hundreds of dollars replacing your gear.
In this guide, we walk you step-by-step on how we repair our sleeping pads based on the experiences of our writers repairing leaky pads and mattresses at home and in the field. We also interviewed a professional sleeping pad repair person at the PCT Days outdoor festival to get his tips on fixing leaking sleeping pads.
We create reader-supported, mission-driven objective gear reviews that are independently selected by our editors. This story may contain affiliate links, which help fund our website. When you click on the links to purchase gear, we may get a commission — without costing you an extra cent. Thank you for supporting our work and mission of outdoor coverage for every body! Learn more.
Video of how to repair a sleeping pad
This video we made of repairing our sleeping pad during our thru-hike of the Arizona Trail demonstrates how to find a leak and fix it:
Punctures and leaks happen

It's totally normal for a sleeping pad or camping mattress to get a hole now and then. We recommend carrying a patch kit for inflatable sleeping pad repairs in the field. Most backpacking sleeping pads and camping mattresses come with adhesive tape and durable material that will cover holes and small rips in your mattresses.
When you need a more durable repair, we recommend using Gear Aid Seam Grip WP or a similar outdoor-gear-friendly glue.
Lastly, many backpacking sleeping pad and camping mattress brands have great warranties. So if your home repair process isn't working, try contacting the manufacturer.
Brands like Therm-a-Rest and EXPED provide lifetime warranties and on-site repair services, including at events like PCT Days where thru-hikers may find themselves anyway.
Field Repairs
We highly recommend carrying a repair kit for inflatable sleeping pads. Most backpackers will want a field repair kit that has all the pieces you need, with some redundancies. Usually the patch kit included with your sleeping pad should be just that.
If you're an ultralight backpacker or thru-hiker, we've found you can usually get away with just bringing a small square of repair tape, such as Tenacious Tape.
For campers, we recommend carrying the full repair kit that comes with your pad and suggest considering having a few extra tools (e.g., duct tape, alcohol wipe pads, etc.) on hand to help make prep and clean up easier.
What should be in your patch kit
Most backpacking sleeping pads and camping mattresses come with a repair kit of materials specifically recommended by the manufacturer.
A basic sleeping pad patch kit should include the following:
Cleaning prep pad (alcohol wipe)
Patch material (like the Flex Patches from Tenacious Tape)
Suitable adhesive (such as Aquaseal or Gear Aid Seam Grip).
For the prep pad, in a pinch, we've used Wet Wipes / Wilderness Wipes, hand sanitizer, or even a drop of Dr. Bronner's Soap on a wet camp towel as a way to clean the area around the puncture (like an alcohol swab or a cleaner).
For patch material, in a pinch, we've used duct tape, but generally prefer Tenacious Tape or Noso Patches.
However, we would not recommend using Krazy Glue as an alternative adhesive as it doesn't flex as much as Aquaseal or Gear Aid Seam Grip. If you don't have an adhesive on hand, the glue that is on your patch material is likely enough to hold until you can get back to civilization to deal with it.
Repairing bigger holes and rips
For more permanent repairs and for bigger rips and holes, we've found that Gear Aid Seam Grip WP or similar outdoor-specific glues work best. These adhesives can create a strong, waterproof seal, especially when combined with a patch. As mentioned above, if you don't have any in the field, you usually can rely on the adhesive that comes with your patches to hold for a few days until you get back home and can get some Seam Grip.
Warranty and Repairs

The Therm-a-Rest sleeping pad repair at PCT Days included a hose wash up off and some scrubbing with Simple Green cleaner. Notice the difference in color of the pad on the left (color after use by thru-hiker) and on the right (after a scrub).
Brands like Therm-a-Rest, NEMO, and EXPED offer lifetime warranties on their sleeping pads, which includes repairs. They also provide on-site repair services at events like PCT Days, demonstrating their commitment to product longevity and customer satisfaction.
Treeline Review writers have had great success in sending in Therm-a-Rest and EXPED pads for repair by simply filling out a form and mailing in a (clean-ish) sleeping pad.
Most pad manufacturers require you to send in a clean pad and will not repair dirty pads. The exception is if you bring your pad to PCT Days where we've seen them clear and repair some truly disgusting pads.
In particular, we've found that leaks around valves cannot be repaired at home. If you discover a leak around your valve, that is a perfect time to contact the company for a repair.
Step-by-step instructions to fix a leaking sleeping pad
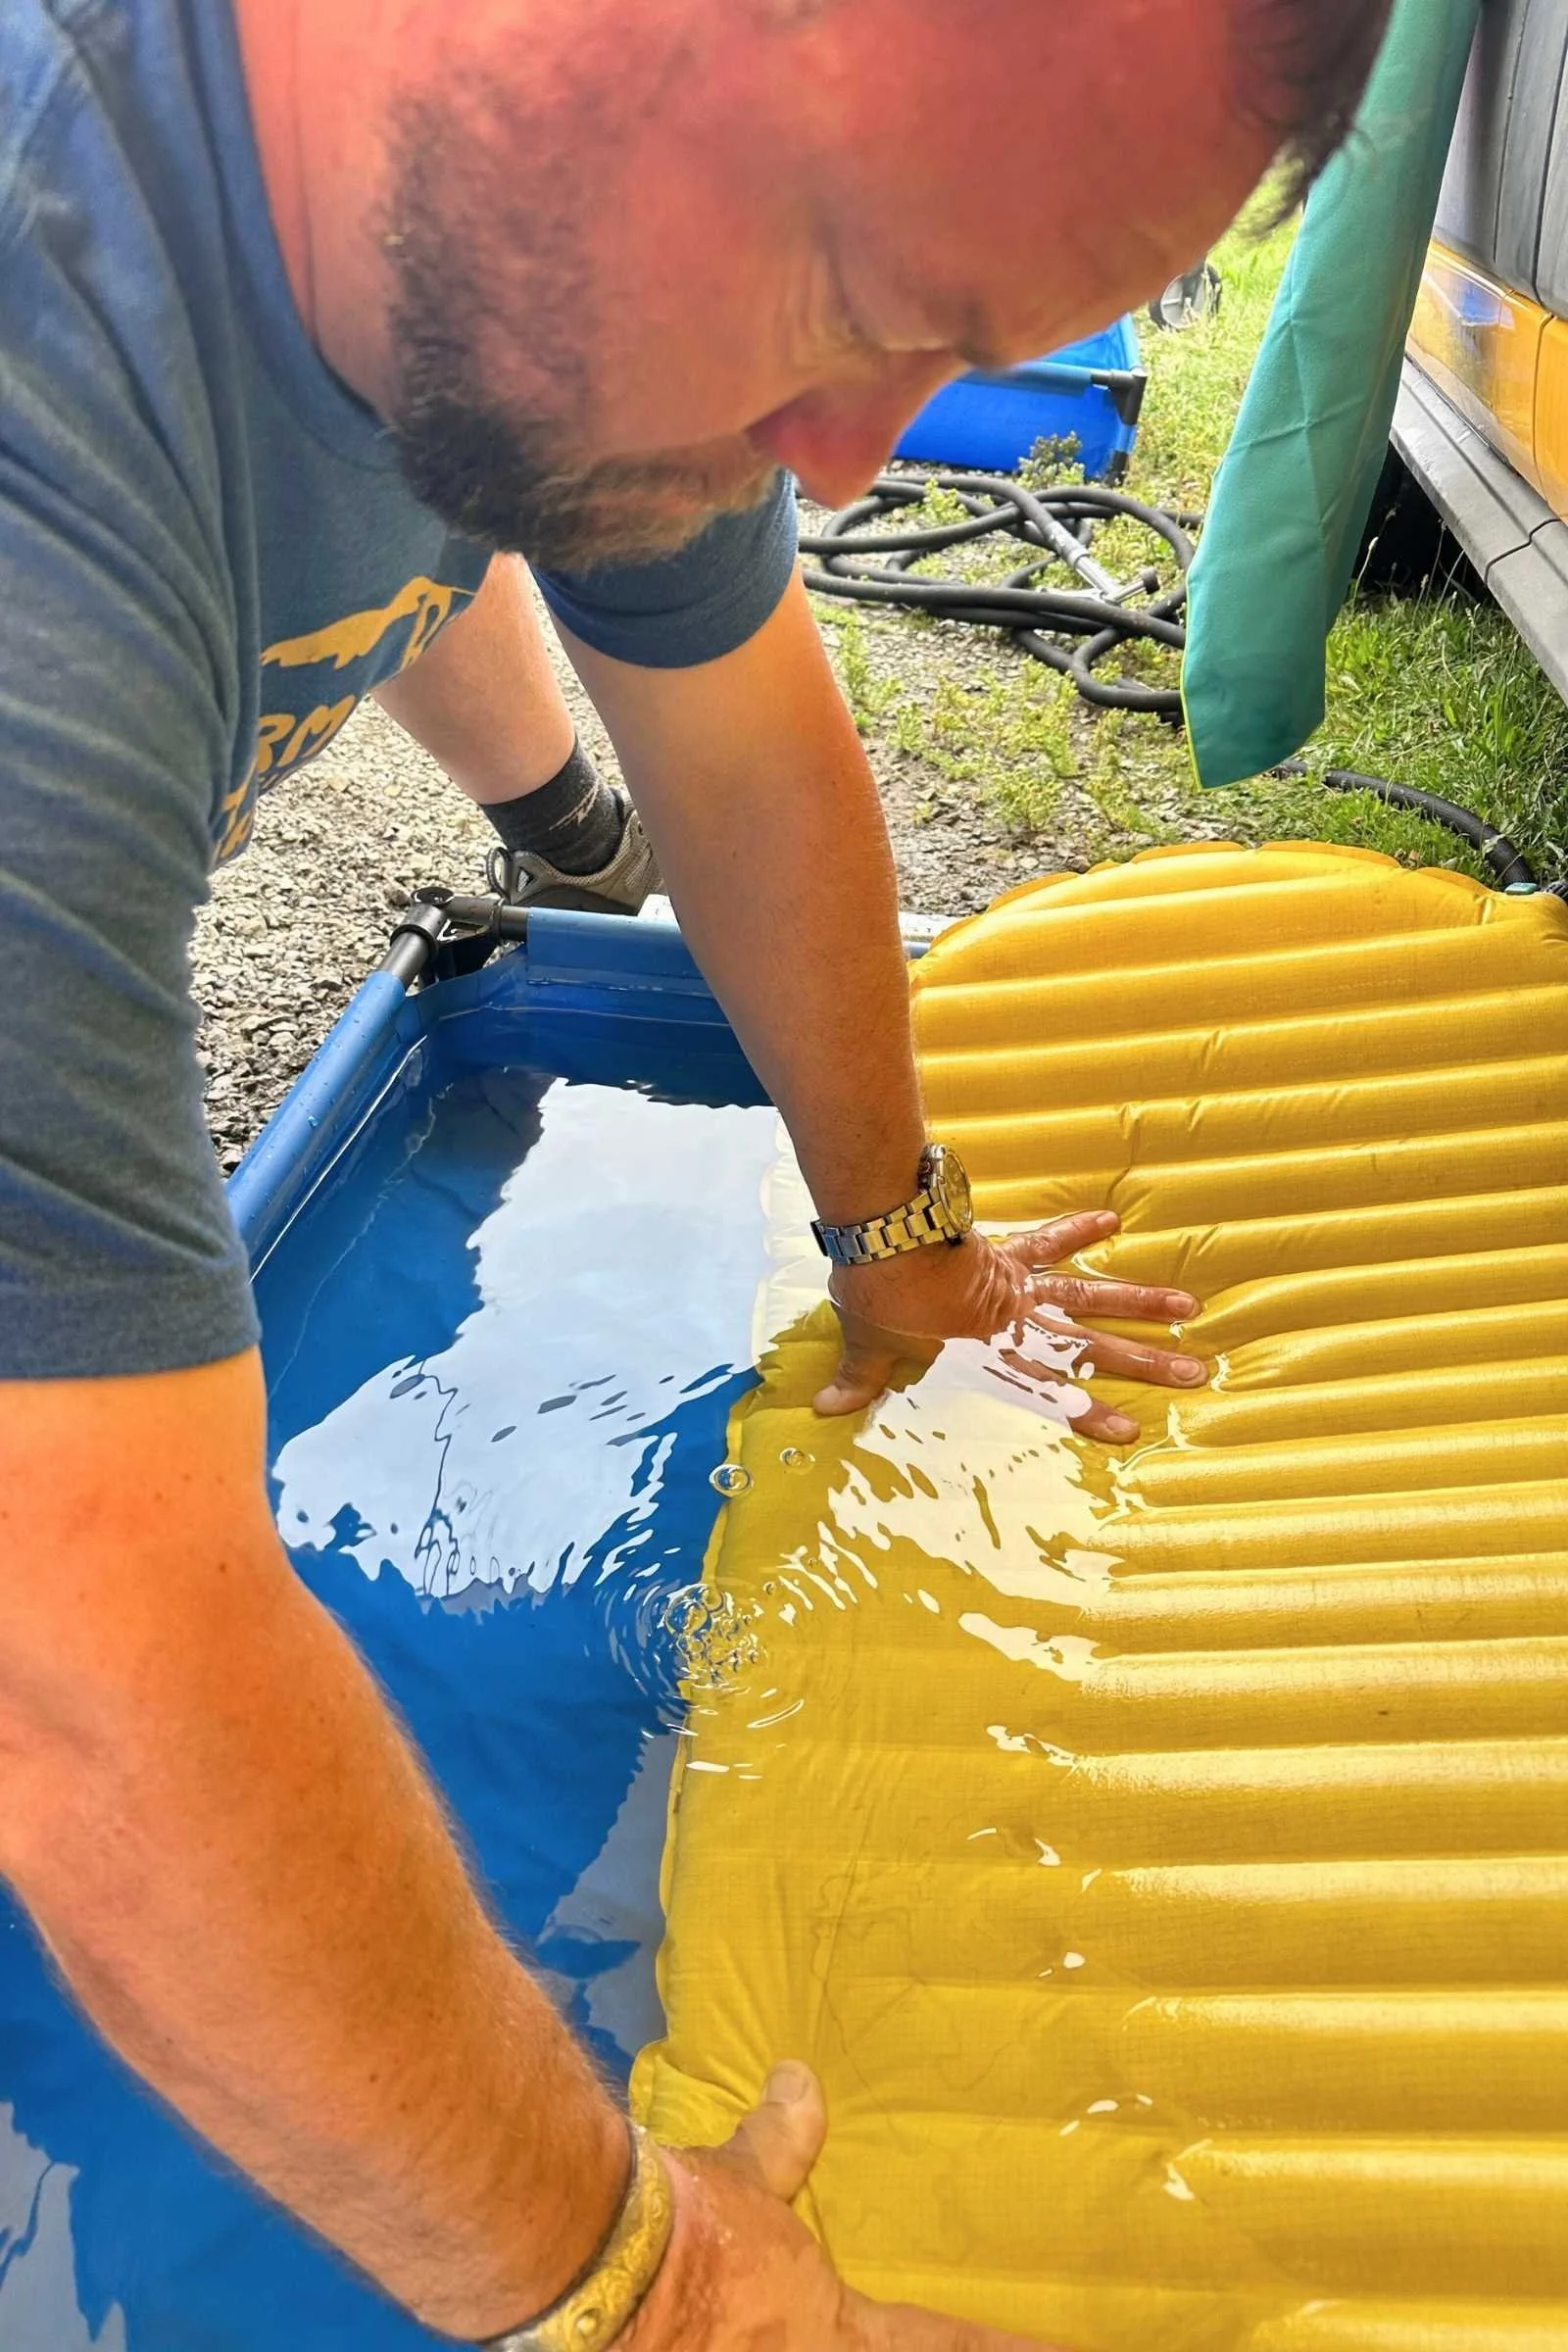
The professionals from Therm-a-Rest fixed my sleeping pad at PCT Days and let me watch them find the leak in the kiddie pool they kept out back. When the bubbles came up, it was obvious where the leak was coming from.
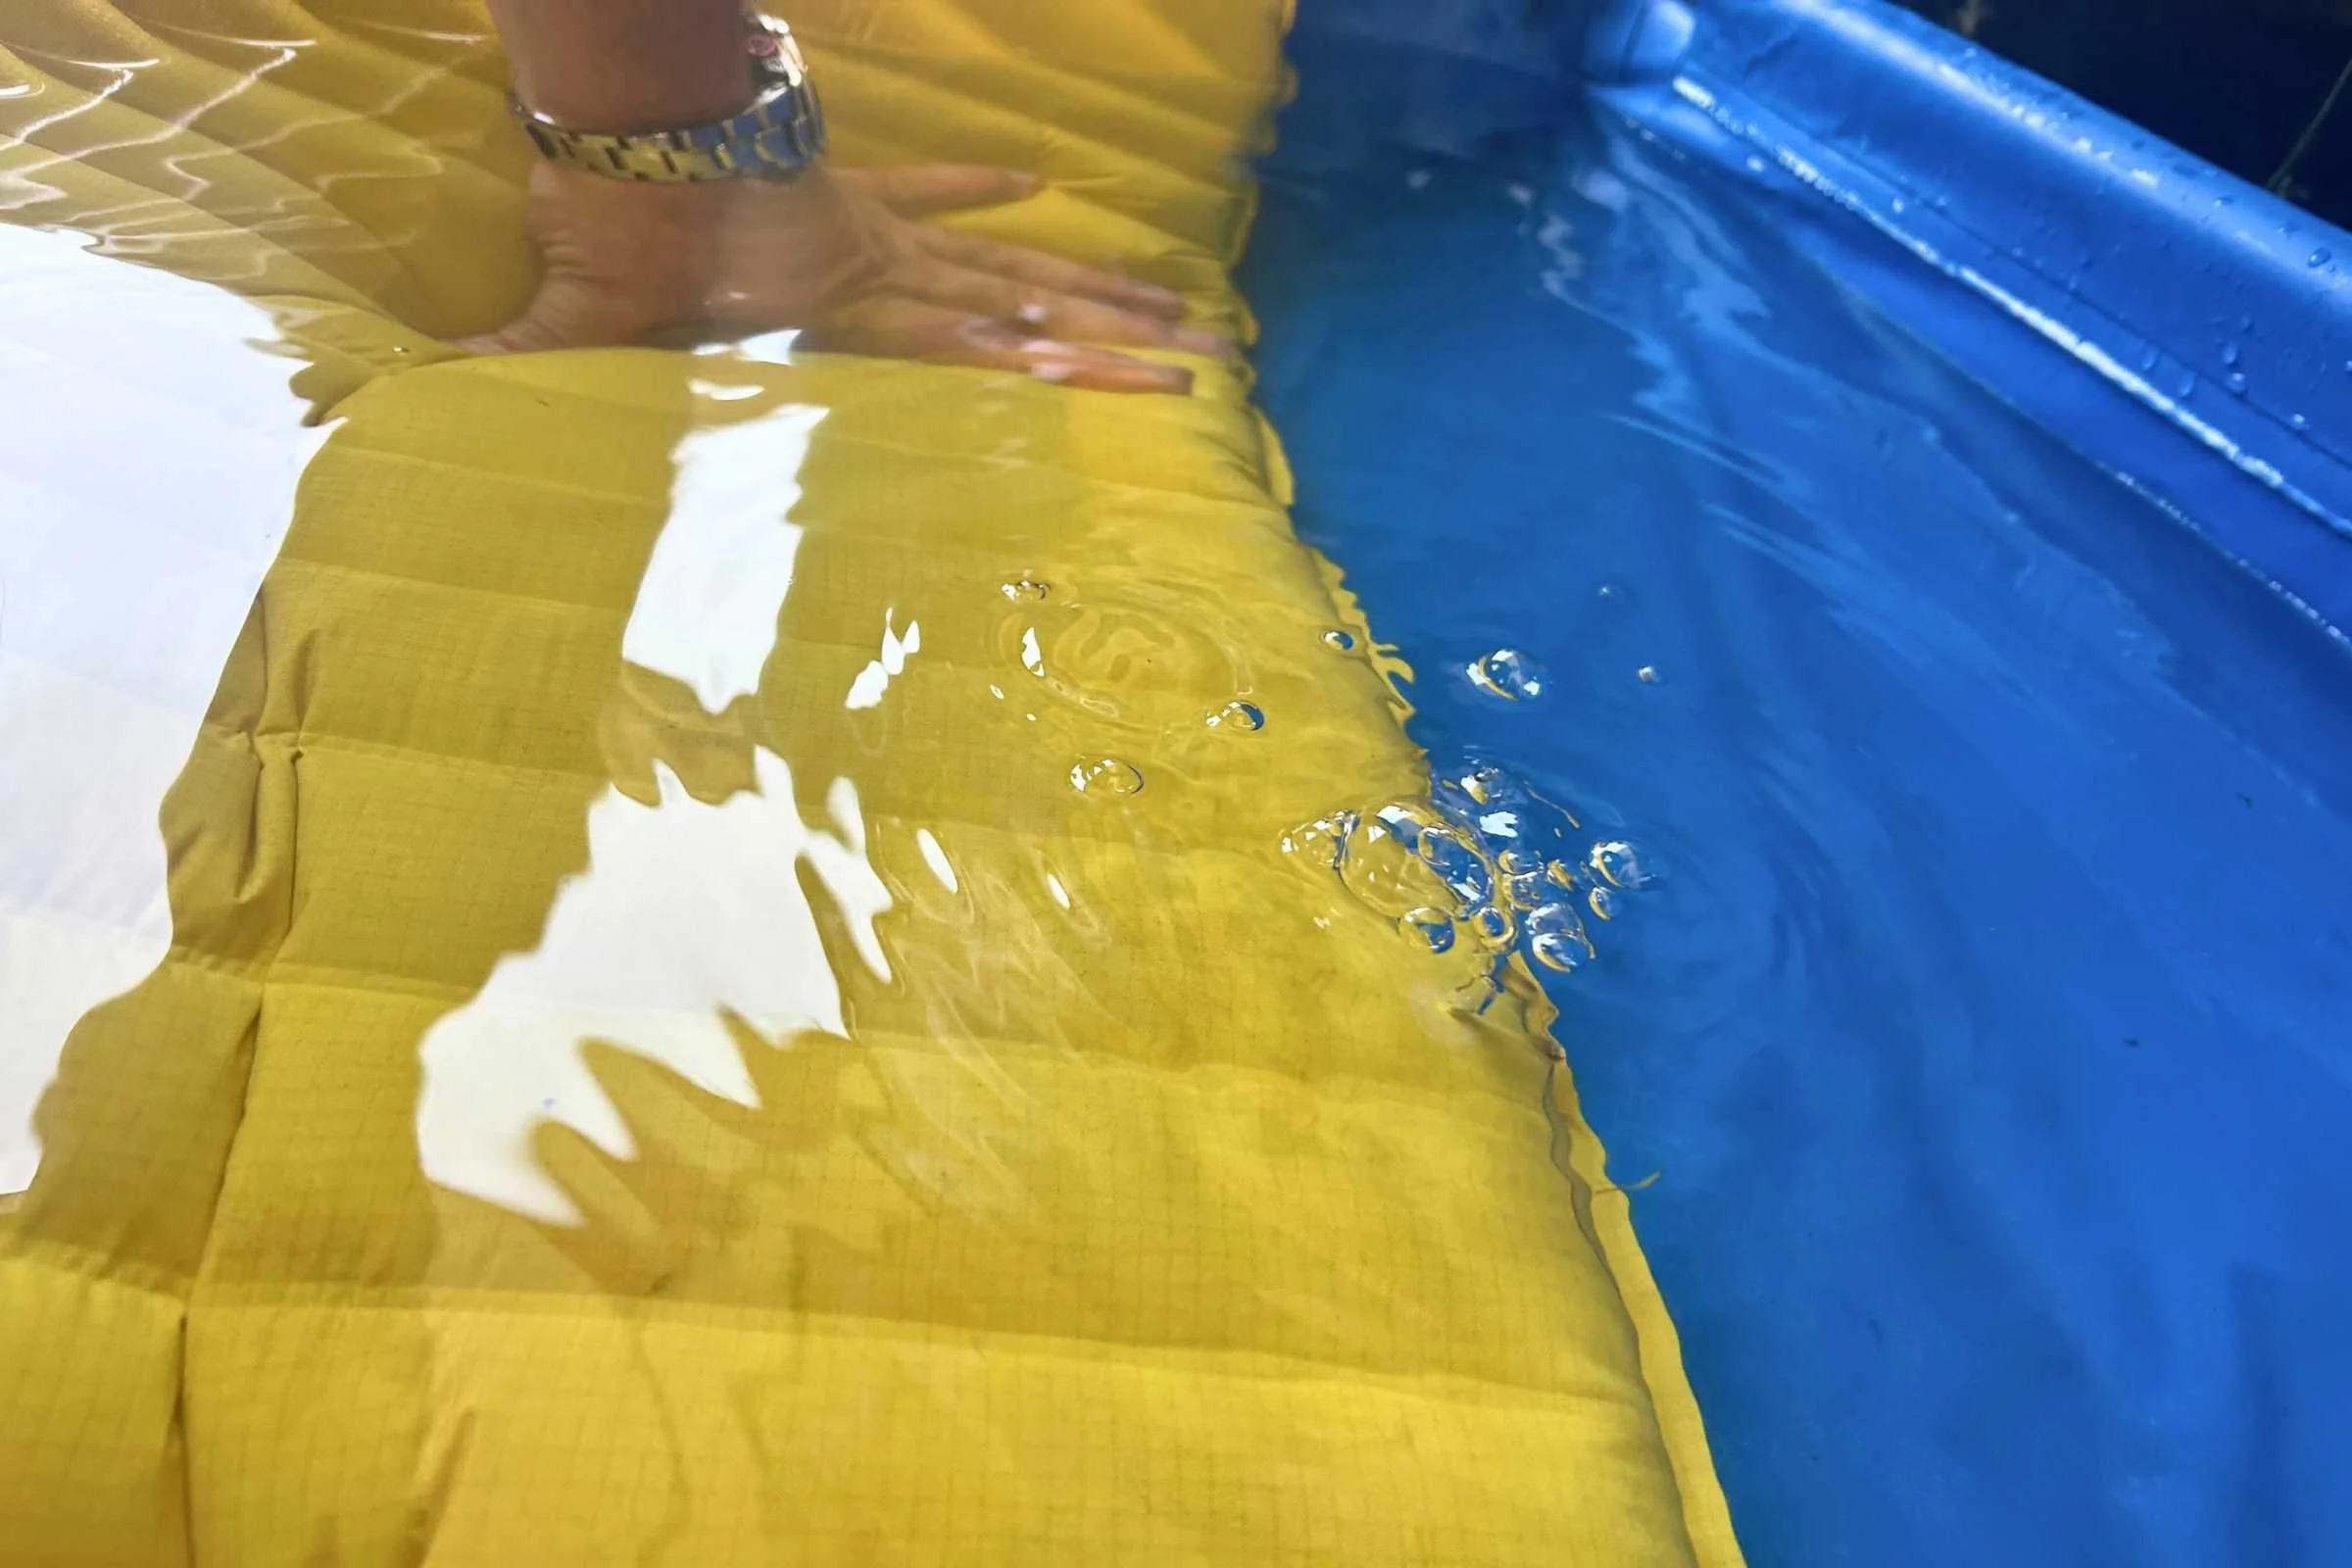
Find the Leak
If the leak is not obvious, a common method is to inflate the pad and submerge it in water, looking for bubbles to pinpoint the puncture. We've done this in bath tubs, hotel sinks, and even alpine lakes. Just be sure that if you're looking for bubbles by using soap, do not use soap in natural water sources.
In a pinch when we haven't had access to enough water to submerge a sleeping pad (like when we get a puncture on a desert hiking trip or when we're dry camping), we use a moistened wet wipe and look for bubbles. If you're not in the field, you can use a spray bottle with soapy water or rubbing alcohol to find slower leaks that don't show up when submerging the pad.
Mark the puncture

Treeline Review writer Sam Schild repaired his sleeping pad before heading out on a thru-hike, marking the spot of the leak with a Sharpie.
Once you find the hole, we recommend taking a Sharpie and circling the hole so you remember where to apply adhesive. Some punctures are difficult to see.
Prepare the Patch Area
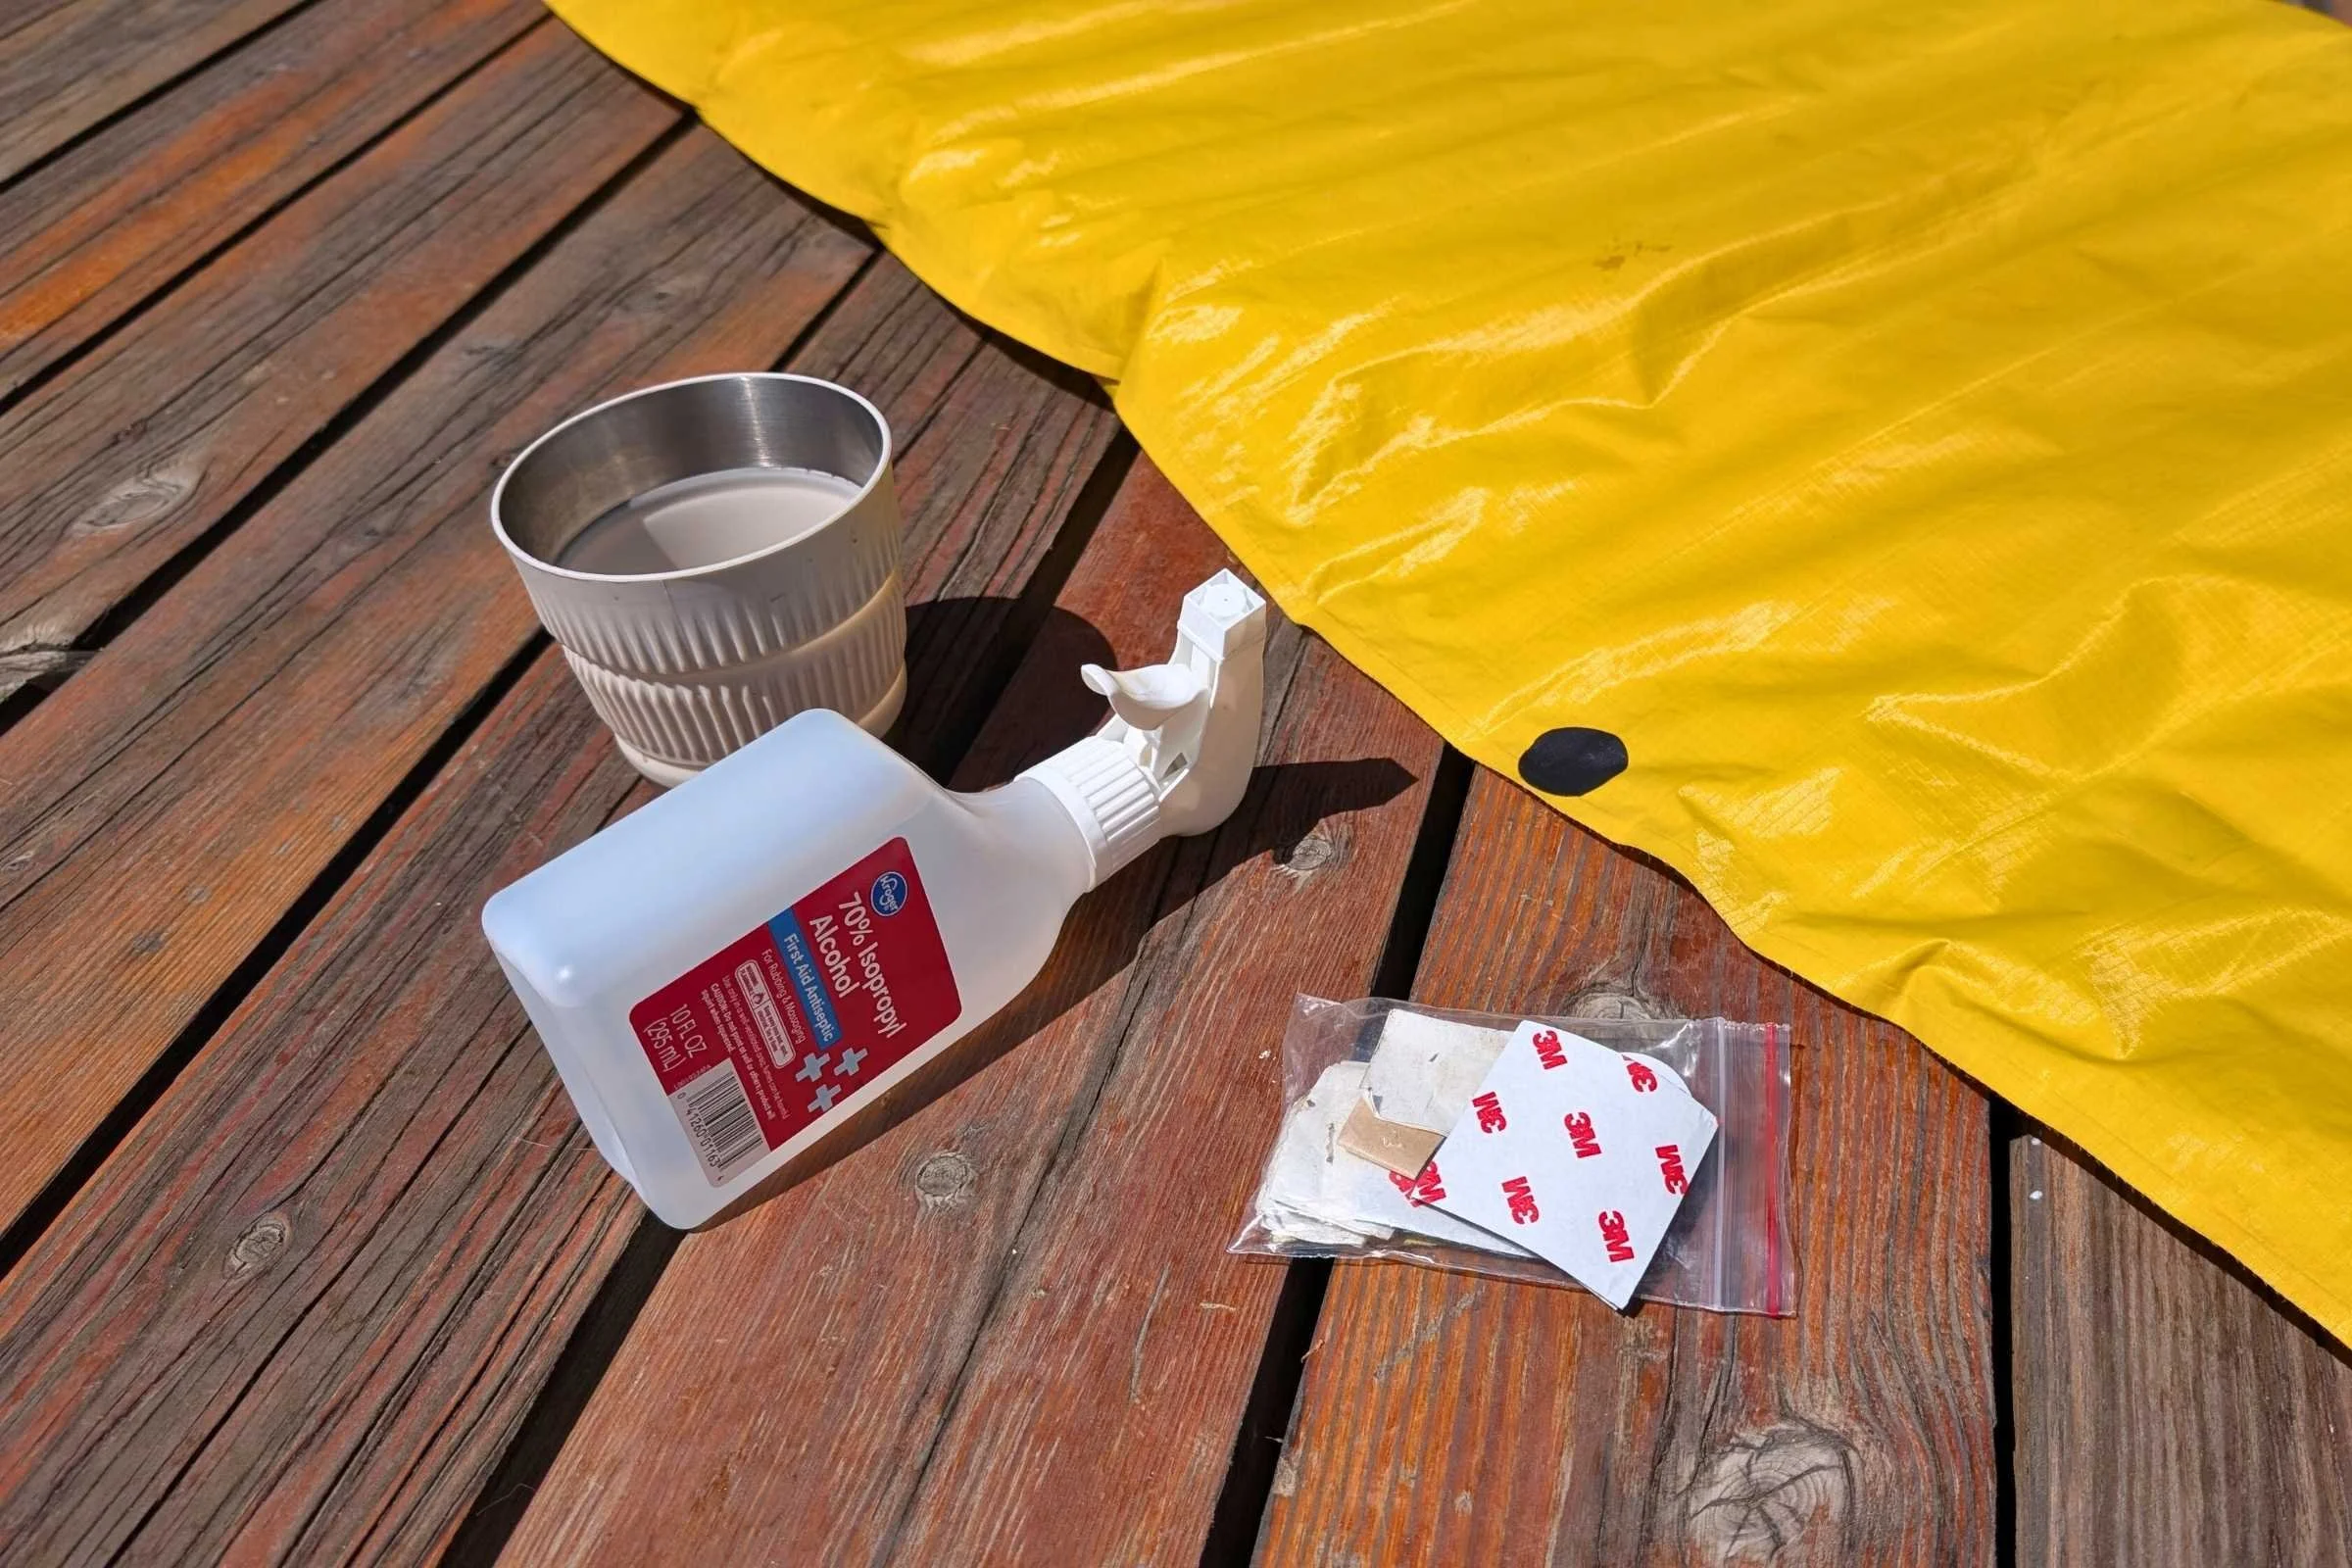
All the materials Sam used to prep his sleeping pad including alcohol sprays to wipe it and some patches from the patch kit.
Clean the area around the puncture with a suitable cleaner (like an alcohol-based one) to ensure good adhesion of the patch.
Apply the Patch

Apply the patch according to the manufacturer's instructions, ensuring it's larger than the damaged area. Press down firmly and hold it down for a while.
Curing Time
Allow the adhesive to fully cure before inflating the pad to its normal level. Different sleeping pad manufacturers have different recommendations on how long this cure needs to happen. If you're doing a field repair, sometimes you can't wait hours because you need to go to sleep (preferably, on a fully-inflated pad). We've found holding it down with pressure for as long as we can before we need to go to sleep has worked in those situations.
Re-test the leak
If you're at home and don't need to sleep on your pad immediately, inflate your pad after curing time and check to make sure the leak is gone. Inflate your pad and wait overnight to see if it leaked. This is what the crew from Therm-a-Rest did with my sleeping pad after repairing it at PCT Days and I'm glad to say the professionals knew what they were doing and the pad held all its air!
Valve Repairs
Valve problems are less common but more complex to address. If your valve is leaking air around the threads, the issue might be as simple as tightening the valve cap or replacing a worn O-ring. Many valve systems use replaceable components that can be swapped out in the field.
For valves that won't hold air due to debris, try cleaning the valve mechanism with a small brush. Dirt and fabric fibers commonly accumulate in valve systems, preventing proper sealing. As mentioned above, if you have valve issues and have tried those repairs, it may be a good time to contact the manufacturer and use the warranty program.
Seam Repairs
Seam failures require a different approach than simple punctures. These repairs involve resealing the bonded edges where fabric panels connect. Clean the failed seam area thoroughly, then apply seam sealant along the entire length of the separation. You may need to work the sealant into the seam, ensuring complete coverage.
For major seam failures, you may need to create an external patch that spans the entire damaged area. This type of repair is more involved and may require professional attention if the failure is extensive.
Why you should trust us
For this guide to repairing a sleeping pad, we asked multiple Treeline Review writers about their experiences over the years on repairing their sleeping pads. From home repairs to repairs in the field or at hotels during town days on thru-hikes, we've seen it all.
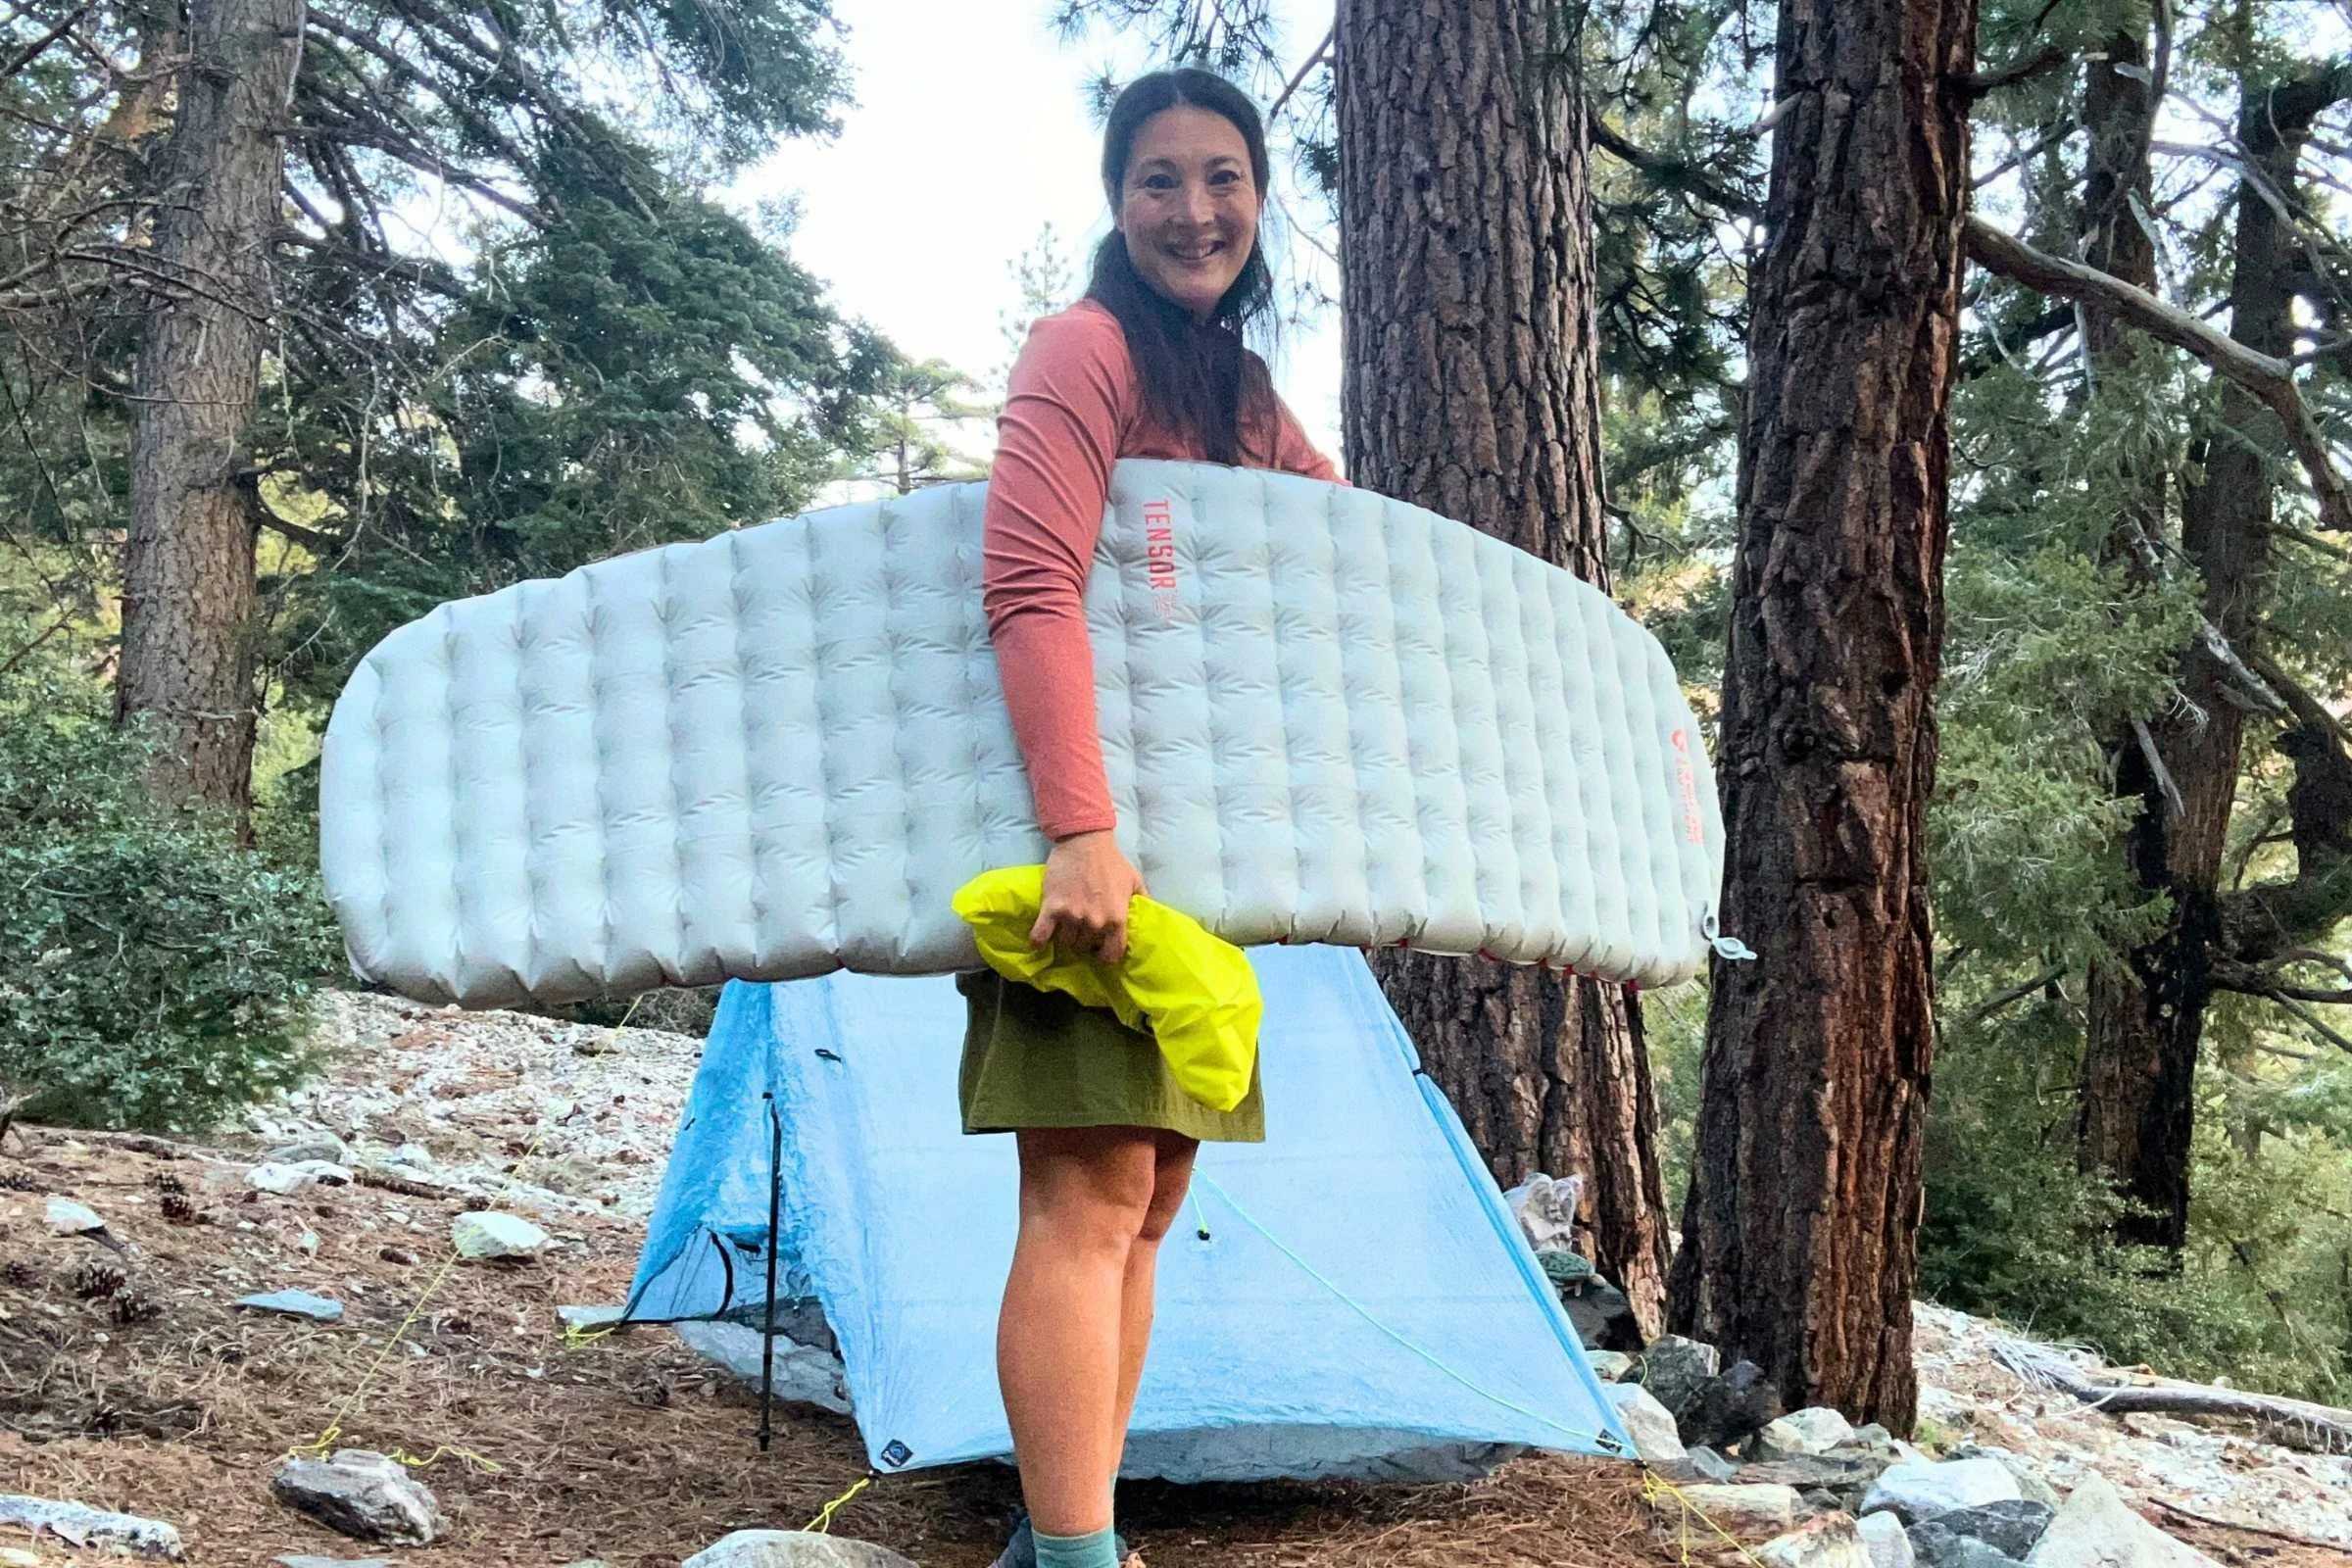
The primary author of this piece was Liz Thomas, who has had to repair a pad or two in her days. She's been writing articles on sleeping pads for ten years, first for Wirecutter / New York Times, where she tested sleeping pads on thru-hikes of the GR20 and Great Divide Trail.
Liz is committed to helping people keep gear out of landfills but showing easy repairs.
Liz is an award-winning Los Angeles-based writer and Editor-in-Chief of Treeline Review. A former Fastest Known Time (FKT) record holder on the Appalachian Trail, Liz came to Treeline Review from New York Times/Wirecutter, the New York Times’ product review site, where she was a staff writer on the outdoor team.
Liz has talked gear on Good Morning America (TV), in The Wall Street Journal, The Guardian, Buzzfeed, Men’s Journal, Women’s Health, Gizmodo, and Outside Magazine.
To test the best camping cots, she and 16 other campers tested camping cots side-by-side for two years, from Montana to the Sierra. Collectively, we've spent more than 60 nights sleeping on cots for this article.
You can read more about Liz at her Wikipedia page or on her website. See all her Treeline Review articles on her author page.