How to Get Started Bikepacking
Training, Gear, Bike Selection, and Bike Bags for the Beginner Bikepacker
October 31, 2025
Home > Learn Outdoor Skills
I have been an avid bikepacker since 2018, when I first realized I could bike 2-3 times the miles in the same amount of time compared to backpacking.
Since then, I’ve started a very small bikepacking bag company (on hiatus) and have ridden hundreds of miles and countless bikepacking routes on the East and West coasts of the United States.
Whether you are a backpacker looking to get into a new sport or a bike tourer who wants to ride rougher trails, I hope this article gives you a better idea of what bikepacking is, how to get started bikepacking, and resources to get you and your bike on the trail.
If you want to make some miles exploring some less-traveled roads and trails, then bikepacking is an awesome way to get outside.
Piecing together the gear, planning a bikepacking route, and riding the miles is more attainable than you might think!
What is bikepacking?
Bikepacking is a fun way to get outdoors and cover more miles per day than the usual backpacking trip. Photo by Graham Hodge.
Plenty of people are familiar with backpacking. You carry the necessary food, water, and equipment into the backcountry for anywhere from an overnight to an extended, multi-day journey. Bikepacking takes those same principles and applies them to riding your bike.
While bike touring primarily consists of multi-day rides on paved roadways, bikepacking pushes riders off the asphalt and onto the dirt, single-track trail, and forgotten fire service roads. While the best bikepacking bike may be the one you already own, a specific style of bike can make a world of difference when riding deeper into the wilderness.
What’s the difference between riding singletrack, gravel, and dirt, and what bikes are best for each?
Singletrack bikepacking
Singletrack routes are mostly trails that are about the width of your bike and feature rougher terrain. If you’re familiar with mountain biking or hiking trails, you’re likely familiar with singletrack trail.
If you would like for your bikepacking trips to consist mostly of single-track trails, we suggest riding a mountain bike or a bike with similar features to that of a mountain bike. These features might include suspension, clearance for wide tires, and bike geometry that is conducive for climbing steep terrain.
While some bikepacking routes may be more comfortable with a full-suspension mountain bike, we focus on hardtail or rigid mountain bikes that tend to provide more efficiency and versatility when your bikepacking trip may be long, contain significant uphill stretches, and cross several types of terrain. See our How to Get Into Mountain Biking guide for more information on the types of bikes for singletrack.

The author gravel bikepacking. Photo by Graham Hodge.
Gravel bikepacking
Gravel riding is becoming more popular as bike riders continually try to avoid busier paved roadways and seek the routes less traveled by motorized vehicles. Gravel riding may mainly involve double-track trails such as fire lanes, dirt roads, and forest service roads. A gravel bike route will usually consist of compacted down dirt and gravel compared to chunky or loose single-track or dirt routes. If you see your bikepacking adventure primarily happening on an unpaved road, either a dirt road or gravel road, a gravel bike is ideal.
Gravel bikes are predominately rigid. They often feature drop bars, which are more common on road bikes. Gravel bikes offer more hand position options. This is nice for your hands for higher mileage days, which are more common with gravel riding.
You can typically ride more miles on gravel routes because you are less likely to come across technical or challenging terrain that may lead to more bike handling and maneuvering to avoid obstacles. You also tend to ride a bit faster on compact ground with less resistance. See our Best Bikepacking Bikes guide for more on gravel riding and choosing a gravel bike.
Dirt Touring
Dirt Touring is similar to a traditional bike tour, though you’re riding on dirt, not pavement. You might cover hundreds of miles over several days, weeks, months, or even years. The route and terrain could vary greatly from pavement to gravel to rocky trails. It’s the bikepacking version of a thru-hike and includes routes like Tour-Divide, Baja Divide, or Western Wildlands Route.
The bikes you want for this style of riding will ideally handle every type of terrain and carry heavier loads more efficiently. A dirt touring bike is like the Swiss army knife of bikes and can be a great all-around choice, especially if you plan to ride off-road routes internationally.
We get into more detail on bikes and different types of riding in our Best Bikepacking Bikes guide. That story has more information to help you choose which bike is best for what you want to do — as well as plenty of information on affordability, durability, and capabilities. Once you’re done there, come back to this piece to learn how to gear up.
What gear do I need for a bikepacking trip?
Essentials Checklist
| BIKEPACKING ESSENTIAL GEAR | OUR PICK(S) | MORE OPTIONS |
|---|---|---|
| Bicycle and Parts | ||
| Bike | Your choice | Best Bikepacking Bikes |
| Pedals | Your choice | Best Mountain Bike Pedals |
| Packing | ||
| Frame bag | Revelate Designs Ranger Frame Bag | Best Bike Frame Bags |

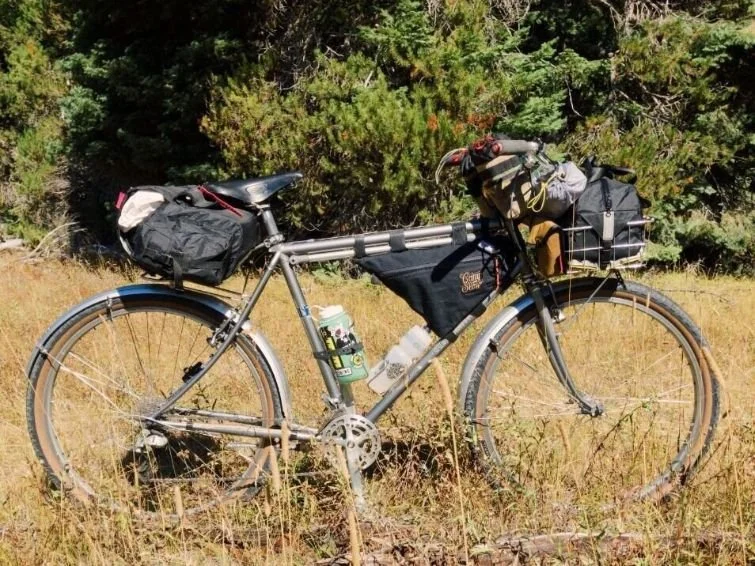
Treeline Review writer bikepacking with a fully-loaded set-up. Photo by Graham Hodge
Bikepacking Bike
The first piece of gear you’ll need for bikepacking is a bicycle. What type of bicycle you get depends on your bikepacking goals. If you’re getting into the sport, you may want to first rent, check out a demo bike, or borrow from a friend. When you’re ready to buy and become a bikepacking enthusiast, see my Best Bikepacking Bikes guide for my recommendations and why we recommend those bikes for bikepacking.
bikepacking Bags
Aside from the bicycle, you’ll need bike bags to carry all your stuff. What’s nice is that a lot of bikepacking-specific bike bags can be used on any kind of bike: they’ll fit on mountain bikes, gravel bikes, and dirt touring bikes interchangeably. There are several things to think about when choosing bikepacking bags. We’ll get into capacity as well as the types of bags below. We also have comparative reviews of bike frame bags, saddle bags, and handlebar bags.
Bicycle Accessories
Bikepacking may require outfitting your bicycle with specialized tires, as well as water bottle holders and gear repair. See our section below for what this looks like.
Camping Gear
Unlike backpacking camping gear, you’ll have to find ways to fit your bikepacking camping gear into smaller volume bags. Often, you can use the same camping or backpacking gear you would use for other trips. However, you’ll have to be creative about how to carry it. Below, we include a discussion of the gear and how we pack it on the bike. Here is a quick checklist:
| BIKEPACKING CAMPING GEAR | OUR PICK(S) | MORE OPTIONS |
|---|---|---|
| Packing | ||
| Handlebar bag | Swift Industries Catalyst Pack | Best Handlebar Bags |
| Saddle pack | Revelate Designs Terrapin System Seat Pack | Best Saddle Bags and Seat Packs |
| Panniers | Outer Shell Pico Panniers | Best Bike Panniers |
| Fanny pack | Topo Designs Mini Quick Pack | Best Mountain Bike Hip Packs |
A couple other guides that may be helpful include our Bike Touring Packing List and our Mountain Biking Gear Checklist.
What capacity bikepacking bags should I get?

Compared to backpacking—which uses one main bag to carry your gear— bikepacking volume is achieved by mixing and matching multiple smaller bags. Photo by Graham Hodge.
You can’t talk about backpacking without discussing the backpack — and you can’t talk bikepacking without discussing the bike bags. We’ll talk capacity first, before going in-depth on different types of bags you might want to bring along.
Related: How Accurate are Stated Volumes of Backpacking Backpacks?
Capacity
If you’re coming to bikepacking from backpacking or thru-hiking, you’ll notice one big difference: capacity. A typical backpacking pack can range anywhere from 30 L to 65 L in carrying capacity, with an average of about 52 L for a thru-hiker. But bikepacking bags are limited in volume by their position on a bike — you wouldn’t want a 50L bag hanging off your handlebars!
So compared to backpacking backpacks, bikepackers carry multiple bags designed to distribute weight more evenly across the bike. This might look like a 15 L bar bag, a 6 L frame bag, and a 16 L seat post bag. (We’ll get more later into the seat bag — what they are and where they sit.)
But wait, you might say! 15 L + 6 L + 16 L only gives you 37 L of carrying capacity! If you’re a backpacker coming from that 52 L backpacking backpack, you may find it a challenge to pack everything you need for bikepacking. Should I also wear a day hiking backpack?
But don’t worry! You can increase your carrying capacity for bikepacking with a combination of smaller bike bags. In fact, this collection of bike bags is so important to bikepacking, I dedicate an entire section below to choosing the right bike bags for your trip and gear.
HOW TO ADD VOLUME TO YOUR BIKEPACKING CAPACITY
Bikepacking is about using multiple smaller capacity bags to achieve the total volume you need.
For example, you can add another 4 L with fork mounts and anything cages, which are small bike rack mounts designed to carry extra water, gear, or... anything!
There are also a couple of “cockpit” options (bags that ride up front), such as top tube “tank” bags that attach to the top tube of your bike for quick-access items such as snacks, frequently used tools, or electronics.
There are also bike stem bags (more on that below). These are a personal favorite of mine and wind up on every bike I own. The bike stem bag is about a 1-2 Liter bag that attaches to the stem of your bike as well as your handlebars and is great for snacks, water, or anything else you’d like to throw in them. The stem bag is sometimes referred to as snack or feed bags as well as they generally have a drawstring closure system and look sort of like a rock climbing chalk bag.
If you’re headed out for a long while and just need more carrying capacity than you can get with more streamlined bags, panniers are the way to go (more on them below). Panniers are sort of like using an 80-liter backpack when comparing bike bags to backpacking gear. Not everyone will need or want panniers, but some folks need the extra room offered by panniers because they have bulkier gear.
Thankfully, there are bag makers out there turning out panniers designed for gravel and singletrack trail. These new, bikepacking-oriented panniers can take a beating compared to traditional, bicycle touring panniers, and they feature much more stable mounting options for rougher routes.
CAN I USE A BACKPACK WHILE BIKEPACKING?
While carrying a backpack may not be ideal for some, many of my friends threw on their 50-liter backpacks and hopped on their bagless bikes for their first bikepacking adventure. I’m happy to report that all of them remain hooked on bikepacking and have now outfitted their rides with bike bags.
You’ll use an assortment of bikebags to get the capacity you need. Photo by Graham Hodge.
types of bikepacking bags
Bike bags are an important part of bikepacking — so I’ll spend some more time here talking about the bags you may need to take a bikepacking trip.
Frame Bags for Bikepacking
Frame bags are usually what people spring for first since they can be useful for day rides and commutes around town. Since the size of your frame bag is generally determined by your frame, they don’t hold as much volume as you might think — usually, they only hold 4 L to 8 L. We have a complete comparative review of bike frame bags here.
There are two types of frame bags: full-frame bags and half-frame bags.

Full frame bag in position on the bike. Photo by Graham Hodge.
FULL FRAME BAGS VS. HALF FRAME BAGS
The differences between full frame bags and half frame bags are in the capacity and how the bag sits on the bike. A full frame bag will fill the entire empty space within the frame of the bike. A half frame bag would only fill up half of the space and will usually run along the top tube of the bike frame or can be wedged towards the front half of the bike frame. A half frame bag will often allow for one to still use traditional water bottle mounts.
When considering what type of frame bag will work best for you, think about where you intend to carry your water.
If the fork on your bike has water bottle mounts, then you may want a full-frame bag like the Revelate Designs Ranger bag. You may also consider a full-frame bag if you prefer using a water bladder hydration system. The reason is that with a full-frame bag, you can often fit food, random items, and a water bladder with a hose running out and around your handlebars.
If you like to keep water bottles mounted to your frame, then you’ll want to consider a half-frame bag — or not carry a frame bag at all.
If you decide a frame bag is in the cards, Rockgeist, Oveja Negra, Revelate Designs, and Outer Shell offer great full- and half-frame options that are ready to order. Some brands, such as Rogue Panda Designs, offer custom frame bag options — but know they’re often spendy and have long lead times to produce. Once you’ve picked a bag, each company has sizing guides to help determine what size will fit your frame.

Handlebar bags are great for items you want to access easily. Photo by Graham Hodge.
Handlebar Bag for Bikepacking
When it comes to carrying things on your handlebars, there are plenty of ways to get creative. We have a complete review of handlebar bike bags here.
The simplest option is to use webbing or Voile Straps to lash a dry bag that can hold your sleeping bag, tent, or other items to your bars.
I used a simple 20L Osprey drybag for years before I got a bikepacking-specific bag for my handlebars. If you want a more built-for-purpose version of this concept that offers more stability, you can get dry bag harness systems from brands like Revelate Designs or Salsa.
Another great option for a handlebar bag is a more traditional, long flap-style bike bag. These are great because they usually offer around 20 L of carrying capacity and can also attach to any saddle with bag mounts, like a Brooks saddle. Swift Industries makes a great version of this bag in the just-launched new version of their Zeitgeist Bag. Bags By Bird makes well-designed versions, too.

My favorite type of handlebar bag is a stem-attaching bag that holds water bottles. Photo by Graham Hodge.
But my favorite type of handlebar bag is a stem-attaching handlebar bag. The stem bags are about 1-2 L and are easy to access. They can hold water bottles, snacks, or anything else you want to put in them. I put them on every bike I own, and typically I make them myself. If you’re not feeling that ambitious, most bikepacking bag brands offer some type of this bag. Makeshifter, RandiJo, and Outer Shell have great versions on offer.
Top Tube Bags
Top tube bags, or sometimes called gas tank bags, mount between the top tube and your stem or seat post. They can be super handy for holding your phone, snacks, tools, or whatever else you may want to access quickly while on the move.

A seat post bag has enough clearance so they do not rub on the rear tire. Photo by Graham Hodge.
Seat Post Bags
Seat post bags are important to consider for a few reasons. They need to mount to your seatpost, but also have enough clearance so they do not sway too much and potentially rub on your rear tire. We have a complete comparative review of saddle bags and seat packs here.
From the long-flap traditional style to the quirkier seat-post attachment that rolls closed, you’ll be able to find a seat post bag that fits your needs.
Oveja Negra, Outer Shell, Ortlieb, Revelate, and even REI Co-op offer plenty of seat pack options.
If you are running a dropper post — a seat post that can be mechanically or hydraulically lowered quickly for better maneuverability — you may want to look at a design such as Rockgeist’s Gondola Bag.
Panniers
Panniers are most commonly seen on cycle touring bikes than bikepacking. You can load a lot more in panniers than you can in other bikepacking bags, and when riding roads or bike paths you’ve got plenty of room to manage.
But bikepacking is a little different than bike touring, and panniers can be cumbersome if you’re riding a lot of narrow single-track trails or riding more technical terrain. Even so, we think that panniers are an excellent option for long dirt-tours and just bikepacking routes that require bulkier gear in general.
The issue you could face with panniers is that the extra capacity they offer isn’t always a good thing. Extra room can allow for overpacking and overpacking can mean your bike can become heavy.
Having a heavy bike is not the end of the world, but pedaling and eventually pushing a fully loaded bike up a steep trail can be quite the slog.
Panniers can also make your bike feel cumbersome. That’s usually not a problem when riding open roads or wide fire lanes, but when riding narrow single-track trails the width of your bike, the last thing you want is to clip a bag on a tree while riding fast. .
If you choose to put panniers on your bikepacking bike, look into panniers with racks that provide more stabilization on rough terrain. The Rockgeist Microwave Panniers are waterproof and great for handling rough roads and dirt tours. Swift Industries, Revelate, and Ortlieb also offer great bikepacking pannier options.
See our Best Panniers story for specific recommendations.
What bike-related gear and accessories do I need for bikepacking?

Outfitting your bike with the right accessories can help you personalize your bike to your riding style—but are not necessary to get started bikepacking. Photo by Graham Hodge.
There are a lot of bike accessories on the market these days. One could spend close to the amount of a bike on accessories if they wanted to. Thankfully, a lot of these accessories are not necessary to start riding your bike, but are add-ons that may make bikepacking trips more efficient, comfortable, or both!
Tires for bikepacking
Tubeless tires have more advantages than disadvantages — especially when bikepacking. They allow you to run on lower tire pressure, which can result in better traction on sandy or sloshy trails, and provide more shock absorption (read: comfort) for your ride.
Tubeless tires are also more resistant to flats since the sealant is sloshing around inside of them, waiting to fill in any reasonably-sized puncture. If you do puncture a tubeless tire completely, it is often easier and faster to plug the tire and reinflate than to bother replacing a tube.
The cons to tubeless tires? Your wheel and tire combination must be tubeless-compatible, which can be costly if your bike doesn’t come with tubeless-ready wheels and tires.
If you do have a tubeless-ready setup, it is fairly easy to go tubeless yourself. If you don’t feel like going through the several steps it takes to convert your tires, local bike shops often offer this service. The sealant does dry up every few months or so, but refilling it isn’t very expensive and is easy to do at home.
Even with tubeless tires, it’s good to carry a spare tube. Tubolito tubes are a great, compact spare tube option if your bike uses disk brakes.
Water bottle holders
Water bottle holders are an important accessory. Many bikepacking bikes now have mounts (water bottle cages usually not included) on their forks for water bottles, so you can use your water bottle holders even if you’re planning on getting a full-frame bag. Read our complete guide to bike water bottle holders here.
I like King Cage water bottle holders, available in steel or titanium. The steel ones are great, but the titanium ones are lighter and have slightly more surface area for better grip.
Repair kit
While in town you may not need a repair kit as much, especially if you can catch a ride home if you get stranded. But if you are going out into the wilderness, you should put together a repair kit.
A SAFE REPAIR KIT FOR STARTING OUT SHOULD INCLUDE:
a spare tube (or two if you find yourself popping tires/tubes often)
a reliable bike tire pump such as the Lezyne Micro Floor Drive
a bike-specific multi-tool like the Crankbrother M19. A bike-specific model will have most of the hex wrench sizes you might need as well as a chain tool, spoke wrench, and even screwdrivers.
REPAIR KITS FOR LONGER TRIPS MIGHT INCLUDE:
a small bottle or two of tire sealant (if you’re running tubeless tires)
Tenacious Tape or Gorilla tape (which can be wrapped around your tire pump)
brake pads
spare bolts and nuts (m5 and m6 sizes)
ski straps or Voile Straps
a small generic multi-tool with pliers (I use the Gerber Dime, but a full-size multi-tool is fine too)
a spare chain
spare derailleur cable and hangers
and spare spokes.
If you’re carrying the last few, make sure you know how your derailleur works and how to change a spoke. While you can start with YouTube, I recommend checking in with your local bike shop to see if they host classes where you can get questions answered and learn how your specific bike and bike parts work. Most REIs also hold bike repair classes in addition to their bike how-to articles.
HOW DO I CHOOSE camping gear for bikepacking?
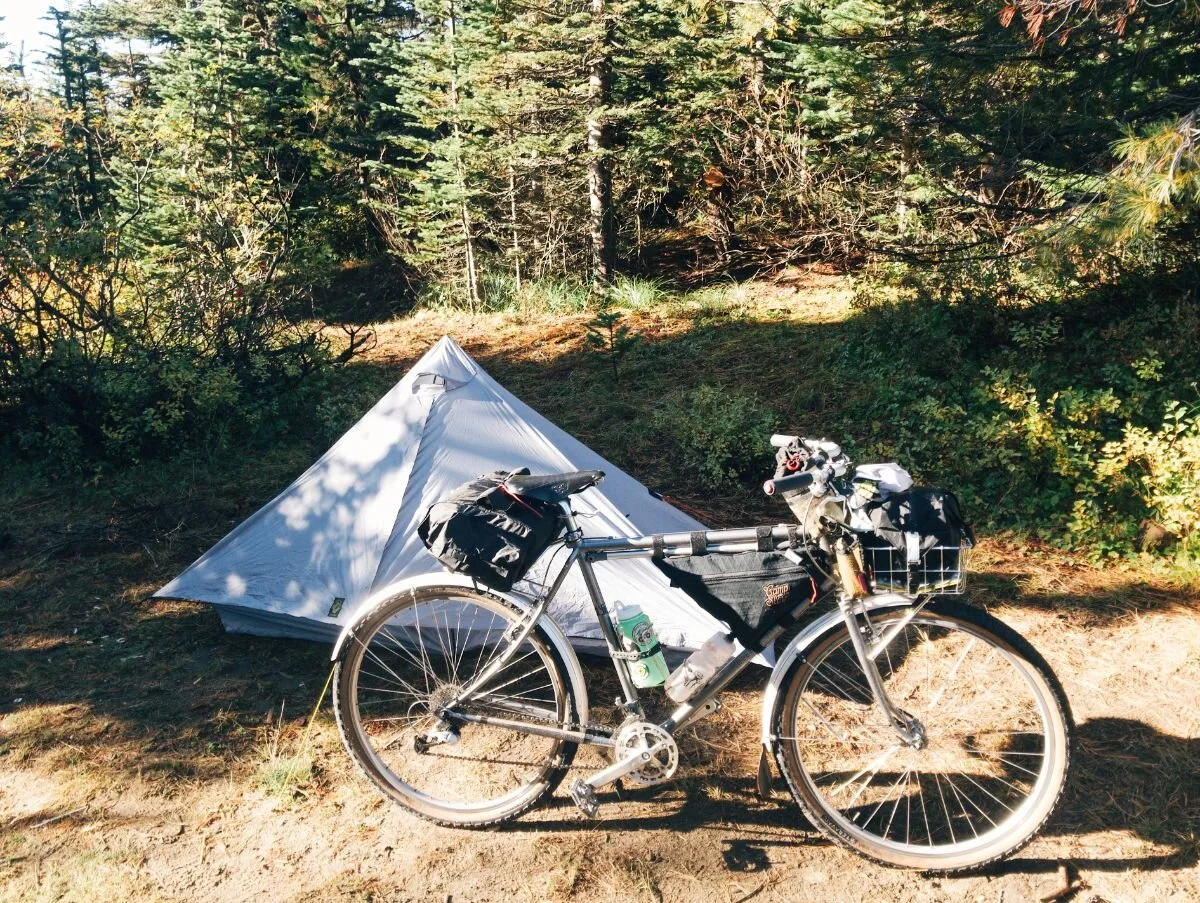
The author’s bikepacking camping set-up. Photo by Graham Hodge.
A lot of your camping setup for bikepacking can be similar to your setup for backpacking or bike touring. My typical kit covers the basics and I can usually fit them in my long flap style handlebar bag, a frame bag, and a seat post bag.
Some trips require more room for longer food and water carries, so I’ll add Anything Cages or small panniers and even wear a fanny pack.
Related: The Best Mountain Bike Hip Packs
Read More: The Best Waist Packs and Fanny Packs
Below is a discussion of my specific gear including models and brands that I use. Or, you can skip back to the quick checklist here.
For sleeping
TENT: I use a Six Moon Designs Skyscape Trekker, or single-wall shelter since they compress down small and need a minimal amount of poles to pitch. Some brands are now making bike-packing-specific tents that are designed to pack well on a bike. It’s the winner for Best Solo Bikepacking Tent in our Best Bikepacking Tents guide as well as the winner for Best Solo Backpacking Tent in our Best Backpacking Tents
TENT POLES: Choose collapsible poles designed for cyclists.
SLEEPING PAD: You can use either air or foam. See our Best Backpacking Sleeping Pads guide for our recommendations.
DOWN QUILT: Quilts take up less volume than sleeping bags, which makes them ideal for fitting into bikepacking bags. If you’d prefer a sleeping bag, see our Best Backpacking Sleeping Bags guide for our winners.
Electronics
PHONE BATTERY AND CABLES: A backup battery charger
WALL CHARGER AND CABLES: Helpful for longer trips where you stop by hostels or restaurants to recharge.
CAMERA: If you need a dustproof, shockproof, freezeproof option, see our Best Rugged Cameras guide.
HEADLAMP: For use in camp. See our Best Headlamps guide for our winners or stay tuned for our upcoming Best Mountain Biking Lights guide.
BIKE LIGHTS: I love Cygolites. See our Best Mountain Biking Lights guide for more recommendations.
EMERGENCY: I use the Garmin inReach Mini 2 two-way satellite messenger. It’s the winner in our Best Satellite Messenger and PLBs guide.
CELL PHONE: Cell phone for navigation (but a bike GPS is also wonderful)
WATCH: I use a Casio Digital Watch, but many cyclists may prefer something more technical. See our Best Hiking Watches guide, which includes GPS, Altitude, Barometer, and Compass watches for more recommendations.

Gravity filtering water off the bike. Photo by Graham Hodge.
For Hydration:
WATER BOTTLES: One or two bike-specific water bottles
WATER BOTTLE CAGES: One or two King Cage Water Bottle Holders. For longer trips I use Widefoot Liter cages and 1 Liter Nalgenes. Read our water bottle holders article for more recommendations.
WATER FILTER: I use the Sawyer Squeeze water filter. Read more in our Best Water Filters and Purifiers guide.
WATER BAGS: I use the 2L Cnoc Vecto Bladders
For Cooking:
COOKING POT: I use the Vargo Bot (pot with screw-on lid). It’s mentioned in our Best Cooking Pots guide.
STOVE: MSR PocketRocket 2 stove with canister fuel. It’s our winner in our Best Backpacking Stoves guide.
SPOON: I prefer a long-handled spoon, like this one.
Worn Clothing:
Because bikepacking can take you through a wild and wide range of conditions, my clothing kit is usually a bit more involved than my backpacking kit.
Flat, comfortable shoes that have enough grip (in case you have to hike a bike)
Merino Underwear (some choose chamois for biking all day, but when on long trips, be aware that if your chamois is soaking up too much moisture it should be dried out)
A long-sleeve, UPF rated shirt. See our upcoming Best Sunshirts guide for our recommendations.
Wind shirt. I like the Montbell Tachyon, which I wrote about as my favorite gear item of 2020.
Packed Clothing:
A change of underwear.
Two pairs of socks. I bring one for sleeping and one to change out with the other pair.
Rain jacket. See our Best Rain Jackets guide for recommendations.
Extra shirt. I usually opt for long sleeve merino at the lightest weight I can find. See our Best Baselayers guide for recommendations.
Down Jacket. See our Best Down Jackets guide for our recommendations.
Beanie.
I also pack my personal toiletries and a first aid kit!
How do I load a bikepacking bike?

When you’re loading a bikepacking bike, think about access, weight distribution, and volume distribution. Photo by Graham Hodge.
Packing all your bikepacking gear in your bags can take a little ingenuity.
Some people think of loading a bikepacking bike a lot like one would load a touring bike: Racks on the front and a rear rack with panniers. While this straightforward method can work in certain less technical situations, bikepacking sometimes requires more creativity to load for stability.
The intention of packing for bikepacking is to get most of your weight to the center of your bike while streamlining the bags in a way that allows for stable, but maneuverable riding.
I will get into how I pack my bags (see diagram below for where gear like tents, water, or my stove go) , but want to note that what works for me, might not work for you. You should experiment with packing in a way that suits you. However, there are some principles that guide the way that I pack:
1. Access
You’ll want to think of the items you may need to access frequently while riding, and consider what bags are easiest to access for you.
2. Weight Distribution
While I’ve tried mixing things up a bit, I find the weight distribution outlined below keeps the bike nimble for both stable riding and optimal shredding. My general rule is more weight in the middle with lighter items on the front and rear of the bike. Soft, malleable, and light items go in the front and back.
3. Volume Distribution
Your handlebar and seat post bag will provide the most volume. You can fit other items in a frame bag, top tube-style bag, or stem bag that attaches between your handlebars and stem.
If you’re coming to bikepacking from backpacking, you may need to think about how to pack your gear differently. For example, the body of your tent may need to be separated from the poles to make everything fit properly.
4. Use of straps
Having a mess of ski straps can come in handy for strapping down bouncing items or lashing on a last-minute addition like a camp chair or fishing rod.

Diagram that shows where the author loads gear items on his bikepacking bike. Photo and diagram by Graham Hodge.
Where do I pack my gear for bikepacking?
Food and Water
I tend to keep the bulk of the water and food weight in the center inside my frame bag as volume permits. This keeps my center of gravity lower to the trail and more central on the bike.
If you have too much weight in the front, the bike can be difficult to control. The weight over the rear tire and behind the seat is less critical. However, I prefer to keep things light as the rear of my hardtail bikes typically gets jostled hard and I like to drop behind the seat when descending steep terrain.
Clothes and Tent Body
I keep my clothes and my tent body in the seat post bag or handlebar bag. How I pack my handlebar bag and seat post bag really depends on the gear I’m bringing for the trip.
Sleeping bag
If it’s colder, my sleeping bag will be bulkier and needs to go in the handlebar bag unless I want to dedicate my entire seat post bag to it. Although they are bulky, they are lightweight so are less likely to make handling the bike more difficult.
If it’s warmer out, my sleeping bag can go in the seat post instead. There’s even room for some additional light clothing layers.
Water filter, tent poles, extra water, and items I don’t need accessible
My water filter, tent poles, and other misc items go in the handlebar bags. I can also carry extra water in a front bag when needed, but keep in mind that more weight up front can make the bike handle differently.
Small Items that I need accessible
I like to keep smaller items that I may want more accessible in the handlebar bags.
How can I train for bikepacking?

Training for bikepacking requires increasing distance and time on the bike. Photo by Graham Hodge.
Riding your bike, in general, can help get you in shape for bikepacking. When you first get your bikepacking bike, start small. Ride 10 to 15 miles at a time. Once your body has adjusted and you notice a plateau in general soreness after a ride, you can start increasing your distance and time spent riding your bike.
If you don’t necessarily enjoy “training” specifically, scope out a destination a little further out than your typical ride. Pack a lunch and think of it as a day trip. You may find it a lot easier to spend more time in the saddle when you have a destination as a goal rather than riding for riding’s sake.
Training for climbing hills
Many folks new to bikepacking have a hard time with climbing specifically. One way to get better at climbing is to find a fairly steep hill in your area. Pedal up it, ride down, and pedal back up as many times as you can. You may not ride up the hill more than two or three times at first, but after a few weeks of doing this on and off, you’ll likely find hills are a little less lung-busting. If you find yourself cruising uphill after a while, load up your bike with your bikepacking gear, and start conditioning for climbing with a loaded bike.
Train for bikepacking in the winter
Do you live in an area that shuts down in the winter or is difficult to get out in poor weather conditions? There are plenty of machines that can turn your bikepacking bike into an indoor stationary bike.
If a stationary bike setup isn’t in your budget, keeping up with general fitness can go a long way to help you get out bikepacking. You could do a full-body workout with just your body weight. A good exercise to try is to do is 10 push-ups, 10 crunches, and 10 squats. Repeat this 2 or 3 times for a good beginner workout. There are plenty of other bodyweight exercises out there, but remember to focus on your core: you use it a lot while riding.
Diet and exercise for bikepacking
The book Eat Bacon, Don’t Jog has a lot of practical ways to maintain fitness in terms of general biking. Written by long-time bike industry professional Grant Peterson, this book is full of practical exercises, diet suggestions, and Peterson’s opinions on the bike industry. While you may not be into a keto-leaning diet, there is no denying that Grant’s burpee workout will have your lungs feeling like they just climbed 1500 feet in less than a mile.
Related: How to Train for a Century Ride
Suggested First Bikepacking Experiences

A sub-24 hour route is a prime way to practice skills and have some fun. Photo by Graham Hodge.
A great way to get into bikepacking is to go on an overnight trip somewhere close to town — somewhere you can easily bail out if something goes wrong. There have been a few times where I’ve misjudged mileage or conditions and had to turn around or call my partner to come pick me up — and that was after a few years of experience!
A great first trip would be to find a route that ends with a stay in a State Park or another developed campground. This location gives you a few more amenities than the backcountry would, and allows you to test your gear and set up in a more controlled environment.
Related: How to Get Into Camping
For example, a solid, sub-24-hour route I have ridden many times goes from downtown Portland via the Banks-Vernonia Bike Trail to camp at Stub Stewart State Park. It’s an easy trip where I can grab food or necessities along the way.
I found this ride by talking to folks at my local bike shop when I first moved to the city. Not every place has a route that can be ridden from your doorstep, but for your first trip, I would recommend a route that has amenities, water, and an easy way to bail out if you need to.
Sub-24-Hour Overnights, aka “S24O”
After that, you may be ready to tackle something more remote in the backcountry. If you’re still building up your comfort level, try to stick to an overnight trip or an overnight that takes less than 24-hours, start to finish (called Sub-24-Hour Overnights, or S24O, in bikepacking slang).
Bikepacking.com lets you filter bikepacking routes based on the time it might take to complete the trip. Some of their overnighters are 70-80 miles — which may not sound too bad, but be aware that when elevation gain is involved, a route may be more difficult than you anticipated.
Once you feel more confident and comfortable with your bikepacking setup, comfortable daily riding mileage, and ease of trips, you can start to look into longer and wilder trips!
On the trail
Pace and endurance management
Find your rhythm: Set a comfortable pace that suits your fitness level and the difficulty of the trail. Avoid pushing yourself too hard in the beginning, as bikepacking is a multi-day endurance activity. Use your low gears when you're climbing – slow and steady wins the race!
Manage energy levels: Conserve energy by using efficient pedaling techniques and taking short breaks when needed. Listen to your body and rest when fatigued. Pace yourself to ensure you have enough stamina for the entire trip. We like to follow the 80% rule – keep your effort to 80% of your maximum. We've found that we can go for much longer by staying below 80%.
Navigation and trail finding
Maps, GPS, and smartphone apps: Use maps, GPS devices, or smartphone apps designed for navigation during bikepacking trips. These tools help you stay on the designated trail and provide information about landmarks, distances, and potential water sources. We like Ride with GPS for route planning and turn-by-turn directions during your ride.
Following trail markers and signs: Pay attention to trail markers, signage, and other indicators along the route. Familiarize yourself with any trail symbols or signs specific to the area you're exploring. This will help you stay on track and avoid getting lost. Pay attention at trail junctions, as this is an easy place to get lost.
Camping and overnight stays
Choosing campsites and setting up camp: Look for established campsites or designated areas for camping along your route. Choose a flat, sheltered area away from water sources to minimize environmental impact. Set up your tent, organize your gear, and secure your bike properly. In campgrounds, ask the host if there is a hiker/biker spot – it may be cheaper and you'll get to meet fellow bikepackers!
Campfire safety and Leave No Trace principles: Follow local regulations regarding campfires. If permitted, use existing fire rings and collect only dead wood for fuel. Practice Leave No Trace principles by packing out your trash, avoiding damage to flora and fauna, and minimizing your impact on the environment.
Enjoying the journey
Take time to appreciate your surroundings: Bikepacking allows you to immerse yourself in nature and explore new places. Take it all in! Savor the sunrises and sunsets, and capture memories with photos, journal entries, or a nature journal.
Embrace the adventure: Bikepacking is hard. Maintain a positive mindset, be adaptable, and embrace the adventure as it unfolds. When it's really hard, tell yourself that the current situation is only temporary.
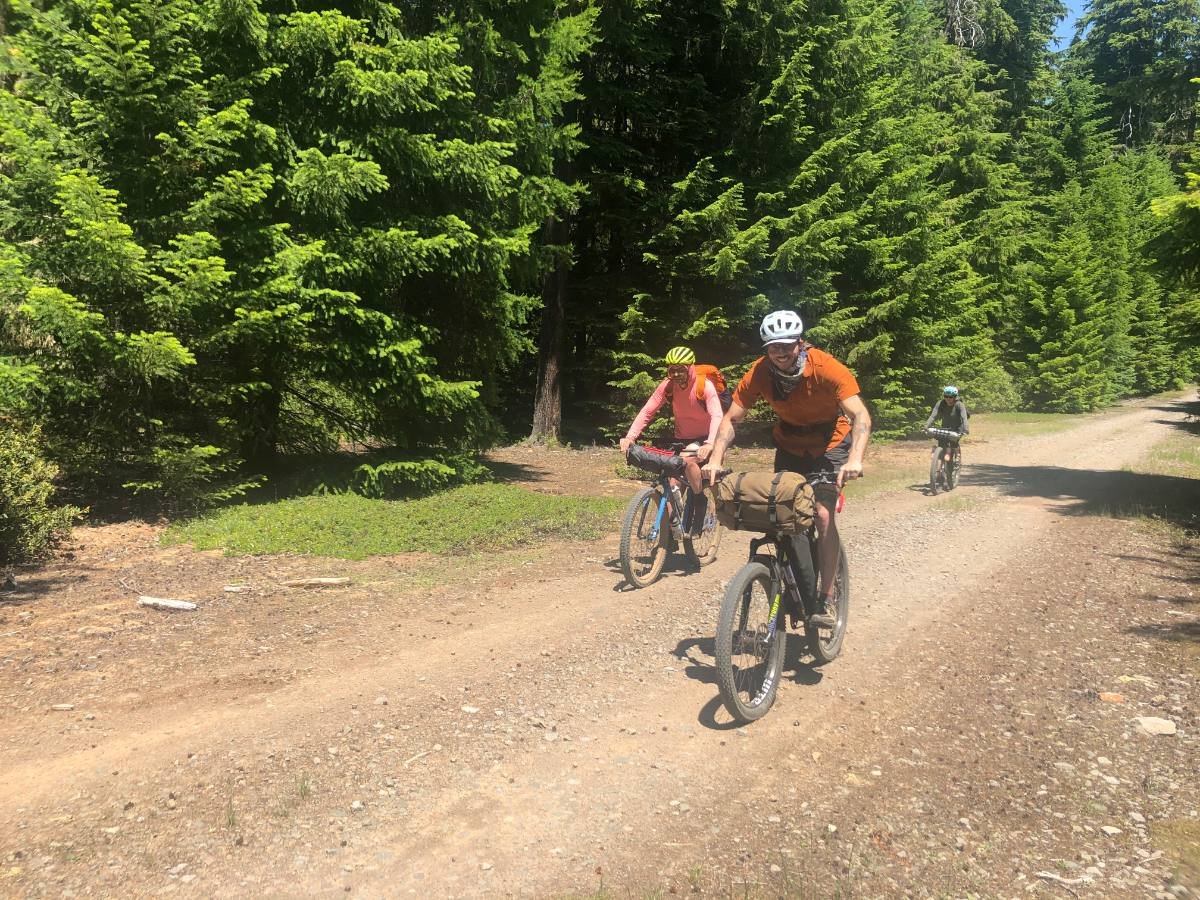
The author smiling wide on a bikepacking trip.
Bikepacking Challenges and solutions
Dealing with fatigue and discomfort
Proper nutrition and hydration: Stay well-nourished and hydrated throughout your trip. Consume a balanced diet of carbohydrates, proteins, and healthy fats. Carry snacks that provide quick energy boosts. Drink plenty of water with electrolytes.
Rest and recovery techniques: Allow yourself enough rest and recovery time each day. Listen to your body's signals for fatigue or discomfort. Incorporate stretching and cork massage balls to alleviate muscle soreness and tension.
Troubleshooting mechanical issues on the trail
Basic bike repairs and troubleshooting: Familiarize yourself with basic bike repairs and maintenance before your trip – watch YouTube videos or take a hands-on class. Learn how to fix a flat tire, adjust brakes and gears, and address common issues.
Carrying essential tools and spare parts: Always carry a bike repair kit that includes items like a multi-tool, tire levers, spare tubes, pump, and a patch kit. If you'll be out for a long time in remote terrain, also consider bringing a chain link tool, derailleur hanger, or brake pads specific to your bike.
Adapting to changing weather conditions
Check weather forecasts: Stay informed about the weather conditions along your route. Check weather forecasts regularly before and during your trip. Prepare accordingly by carrying appropriate clothing layers, rain gear, and cold-weather accessories.
Adjust your plan if necessary: If faced with severe weather conditions, such as heavy rain, thunderstorms, or extreme temperatures, consider altering your route, seeking shelter, or delaying your trip until conditions improve.
Coping with navigation challenges
Map reading and GPS skills: Modern GPS technology is fantastic, but you need to know how to use it. Before your trip, practice reading maps and using GPS devices or smartphone apps. Familiarize yourself with different map symbols, coordinates, and navigation features.
Backup navigation methods: Always carry physical maps or guidebooks as a backup in case electronic devices fail or lose battery power (we have stories). Learn how to use a compass and understand basic orienteering techniques to navigate in case of technological issues.
Overcoming mental and emotional challenges
Stay positive and motivated: Maintain a positive mindset and remind yourself of the reasons why you chose to embark on a bikepacking trip. Focus on the sense of adventure, the beauty of nature, and the personal growth opportunities that come with the journey.
Break challenges into manageable steps: When faced with difficult trail sections or daunting climbs, break them down into smaller, achievable milestones. This technique works equally well in your job, on a thru hike, and on a bikepacking trip. When you're feeling overwhelmed, don't focus on the long term. Rather, focus on what's immediately in front of you and just get through that.
Seek support from fellow bikepackers: Connect with local bikepacking communities, online forums, or social media groups. Share experiences, seek advice, and find encouragement from like-minded individuals who understand the challenges you're facing. See our further resources section below.
Finding local and national bikepacking organizations and informal groups can be a great way to get into the sport. Photo by Graham Hodge.
Recommended Further Resources
National Resources
Bikepacking.com has become one of the world’s leading resources for pretty much all things bikepacking. The website is free to browse, but a membership gets you a copy of their bi-annual Bikepacking Journal, discounts on bikepacking products, and more. Their extensive catalog of bikepacking routes is an invaluable resource for finding wonderful bikepacking routes near you, from quick overnighters to multi-month trips.
If you’re looking for a more communal way to learn about bikepacking or get involved in the bikepacking community, there are large organizations you can join, such as the Adventure Cycling Association, that provide routes, cycling resources, and ways to connect with the adventure cycling community!
Some of the longer and more popular bikepacking routes also have advocacy and conservation organizations that help maintain and support the longer routes. A great example is Bikepacking Roots, an organization that creates and supports routes such as the Western Wildlands Route.

When you’re loading a bikepacking bike, think about access, weight distribution, and volume distribution. Photo by Graham Hodge.
Local resources
If you’re primarily bikepacking closer to home, be sure to check out what’s near you — even if it’s not bikepacking-specific. Most towns near mountain bike trails have some sort of advocacy group that provides opportunities to get out and ride, works to maintain trails, and fights for your rights to ride trails.
I live in Portland, Oregon, and am a member of our local mountain biking advocacy group, the Northwest Trail Alliance.
Mountain biking organizations can be a great place to start, as they are likely very familiar with bikepacking and can point you in the direction of a more niche bikepacking advocacy group if one exists in your area. These organizations are likely maintaining and supporting trails you would be bikepacking on anyways, so I would recommend joining or volunteering if you’re interested!
Inclusive bicycle groups
Another group that I love is the Radical Adventure Riders. Their mission? “[M]oving towards enhancing gender inclusivity and racial equity in the bicycle and outdoor adventure scene [...] by providing connection, education, resources, and support for the community.”
They have helpful resources for bikepacking as well as cycling in general, and in 2020, they promoted a Cycling Industry Pledge to move bike industry companies towards equity in the cycling community.
If you identify as BIPOC (Black, Indigenous, or a person of color) and/or FTWN-B (femme, transgender, woman, non-binary, RAR has a list of bikepacking and cycling grants for races and other cycling-related activities that you can apply for.
Bikepacking Group Trips
If you’re looking for other people to take bikepacking trips with, there are annual bikepacking trips like the Swift Campout, where bikepackers all over the world meet up for an overnight bikepacking trip to bring in the Summer Solstice.
Looking for something a little more local? Don’t forget your local bike shop! They might host bikepacking trips, classes, or informational meetings about local routes and could be your best resource for learning more about local trails, trips, and your bike.
Informal Bikepacking groups
And if you’re okay with events that are a little more informal, “Coffee outside” groups that meet once a week to ride bikes and make camp coffee are growing in number! When I lived in Chattanooga, Tennessee, I was in a group called the Stank City Ramblers. Through the group, I met a wide network of friends who were all interested in bikepacking. Bikepacking YouTubers Laura and Russ, aka “Pathless Pedaled”, have put together a great resource for finding a group in your town — or starting your own!
ABOUT THE AUTHOR/WHY YOU SHOULD TRUST US

The author bikepacking. Photo courtesy Graham Hodge.
I’ve worked as a photojournalist for publications such as Rock and Ice and Roots Rated. In 2017, I started bikepacking, when I first realized I could bike 2-3 times the miles into the same amount of time compared to backpacking.
After riding my first hundreds of miles and several bikepacking routes, I began sewing my own bikepacking bags. After a lot of positive feedback, I started a small operation sewing custom bike bags for local customers in Chattanooga, TN. While my operation is small, it has allowed me to work with multiple styles and brands of bikes.
Since then, I’ve gone on to bikepacking routes around the country and am passionate to teach others about bikepacking.