Bikepacking the Lower Deschutes River Trail
Deschutes River Railbed Trail From Columbia River to Harris Island and BeyoND

August 31st, 2024
If you are fond of sweeping landscapes of the American West, then look no further than bikepacking the Deschutes River Trail. While the Deschutes River is very much developed, one still can’t help but feel grandiose emotions as the wind pushes around you and the sun sets behind the rolling, grass covered hills. I even found the rhythm of the train rolling through the valley at night a comforting reminder of simpler modes of transportation as I drifted off to sleep.
The Deschutes River Trail is unique compared to other bikepacking routes in that it offers different lengths of trail depending on your experience level — including a beginner-friendly 22-mile route, and intermediate 38-mile, or more advanced 50-mile overnight routes. If all of this sounds enticing to you, then I would highly recommend mountain biking through this beautiful stretch of country.
Distance: 22 miles out and back (beginner-friendly), 38 miles out and back intermediate, 50-mile advanced route
Days: 1-2
Elevation gain/loss: 1483 feet gain/loss
Best season: Fall and Spring are the most enjoyable, but the trail is typically accessible year-round
Permits: None required for camping, $7 overnight parking fee, and no charge for day-use. However, I usually use a Northwest Forest Pass and park in the gravel lot on the left when pulling into the park; I’ve never had any issues when doing this.
Difficulty: Easy to Moderate depending on the distance you choose.
We create reader-supported, objective, independently-selected gear reviews. This story may contain affiliate links, which help fund our website. When you click on the links to purchase gear, we may get a commission, without costing you an extra cent. Thank you for supporting our work and mission of outdoor coverage for every body! Learn more.

Quick Facts
Bikepacking the Lower Deschutes River Trail is a gentle and fun way to get out on your bicycle for an overnight trip and even sneak in some fishing! The gradient is mild, and there are little to no long and steep climbs along the entire trail, which makes for a relaxing time where one can just enjoy riding their bike amongst the rolling hillsides that flank the beautiful Deschutes River canyon.
The old roadbed on the East side of the river makes for a great gravel trail that’s wide enough to ride side-by-side with your buddies. It travels through the Lower Deschutes River Wildlife Area.
The terrain can be rough in some sections, and the local flora and fauna leave a lot of puncture-prone “goat head” seeds that can pop a tire quicker than a thumbtack. If you have 42 mm wide or wider tires and have converted to tubeless, the trail will flow fast and fun as you roll through the high desert countryside. The most significant difficulty for any trip in this area may be the heat during the summer and lack of water, which can be easily overcome with a bit of preparation. The fall and spring make for a much more enjoyable time along the trail if trying to avoid the heat.
I often find myself on the Deschutes River Trail when there is too much snow for a casual bikepacking trip at higher elevations or if the weather is too wet closer to the coast. Due to its central Oregon location, the Deschutes River canyon often remains snow-free and drier than western Oregon!
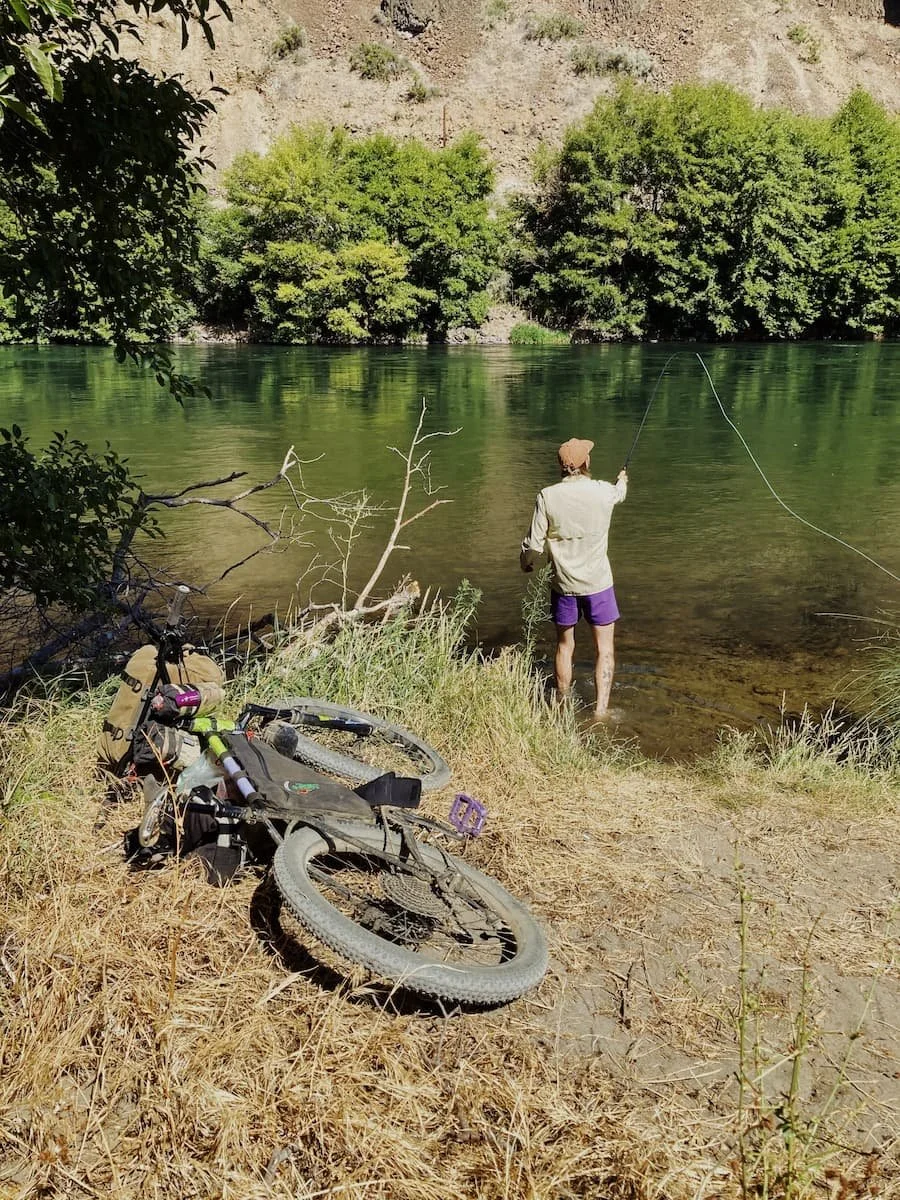
Bikepackers can add some fishing into a trip along the Lower Deschutes River Trail in Oregon.
Highlights
Sweeping landscapes
Snow-free trail and less wet than coastal trails, so a good option for fall, winter, and spring
Fly fishing along the Deschutes River in the Lower Deschutes River Wildlife Area
The Lower Deschutes River Wildlife area is home to bighorn sheep, mule deer, river otter, coyote, golden eagle, hawk, and falcon
Beginner-friendly riding for first-time bikepackers and easy riding for intermediate and advanced mountain bikers
Can tailor the length and difficulty of the route to your experience level
Challenges
Can be excessively hot during the summer months
Water is scarce and requires you to carry 3+ liters depending on needs
Potentially high winds
Spiky seeds called goat heads that can cause flat tires
See our most popular mountain bike guides in our Bike gear section:
The lower Deschutes River Trail Route Summary

Bikepacking camp set up on the Lower Deschutes River Trail in Oregon.
The Deschutes River Trail has a rich and harrowing history of aggressive competition between two railroad companies attempting to connect central Oregon with the Columbia River Gorge.
The rail-trail we enjoy today results from the losing company’s attempt to develop the east side of the river, leaving a rail-trail roadbed that extends about 19 miles until it becomes challenging to navigate the terrain.
The Deschutes River Trail, also referred to as the Lower Deschutes River Trail or Deschutes River Railbed Trail, is an excellent bikepacking trail because it offers many different distances depending on what you are looking for!

Bikepacking camp set up on the Lower Deschutes River Trail in Oregon. There’s opportunities to set up hammocks, fish, and hang out along the river.
Beginner-friendly and First-Time Bikepacker Route
The best route for beginners or first-time bikepackers is about 20-22 miles total (depending on where you choose to camp). This route takes you roughly 11 miles on a casual ride from the Deschutes River State Recreation Area to the old Harris Ranch area (where homestead remnants are now burned up from the 2018 Long Hollow fires).
Due to the fairly gentle terrain, this portion of the trail is manageable on most bikes with decently wide tires. Be sure to stay on the trail as much as possible to avoid what is commonly referred to as goat heads. “Goat heads” or the seeds of the Acanthospermum hispidum, a weed common in high desert regions, are spike seeds with thorny points. The seeds sometimes resemble a goat’s head with horns. I have ridden this section on a bike with tubes, though, and went through two tubes on my way out; so, I would recommend bringing a spare tube and tube patch kit if you have not converted your bike to a tubeless setup.
There are ample primitive campsites within these first 11 miles and several pit toilets along the way. No reservations or permits are required for these sites, but they are occupied on a first-come, first-served basis. I will note that rafters can sometimes take over these campsites during the warmer seasons, so make sure to be flexible when finding a campsite!

After the first 11 miles from the trailhead, the route along the Lower Deschutes River Trail becomes singletrack and is better suited for intermediate bikepackers.
Intermediate bikepacking route
If you choose to ride beyond the 11-mile mark, be prepared for sections of rougher riding for the next 7.5 miles or so. While the route may get rocky, the trail features fun spurts of riding and a much more secluded section of trail. Around the 19 mile mark, the Lower Deschutes River Trail essentially disappears to overgrown singletrack trails that resemble game trails more than anything. If you were to turn around here, you’d have a 38-mile out-and-back overnighter.
More advanced bikepacking route
Those that enjoy a mental and somewhat physical challenge can take the rugged trail past the 19-mile mark and try to link it to the BLM Forest Road into Macks Canyon. While the missing section of groomed bike trails is only about 5 miles, this section can require a bit of “hike-and-bike” sections of boulders and dry, rotting railroad ties.
There are also about 6 canyons in this section that require some descending/ascending out of each washout. If all of this does not sound too disheartening, one can link this section with the BLM dirt roads and eventually with a connection right into the southern town of Maupin for a 50-mile, one-way trip. The advanced route could be a fun option for a remote and rugged overnight trip with a shuttle setup. Also, be aware of the lack of water in this area when planning for a trip this long.

Best Season
The fall and spring are my favorite times to visit the Deschutes River Trail as it is not as frigid during the winter months, and you can avoid the 100+ degree days in the summer. I have had luck with starting at 5 pm and doing a quick overnighter to avoid the heat in warmer months, though. If fly fishing, wet wading is more comfortable in summer, too!

Spring brings beautiful lupine wildflowers and fields of green.
Difficulty and Skills Required
The area is straightforward to navigate, as the only trail for bikes is a very wide gravel roadbed. There is a spur trail that’s not really worth exploring just past the Harris Ranch, but the trail is obvious as well, and it would be difficult to get lost.
The navigation might get a bit dicey if you were to continue past the 19-mile mark to link to the town of Maupin, which is near Warm Springs. But with that being said, the trail follows the river, so it's easy to determine which direction you would need to go in. The area does not have any distinct mile markers, and bikers can easily miss the Harris Ranch area since the landmarks have now burned. I try to keep a map downloaded on my phone of the area just to keep up with mileage. That being said, the trail comes to an obvious stopping point around mile 19, where the abandoned road turns into a ribboning singletrack trail.
Rough Terrain/ Scrambling/ Rock Climbing/ Technical Skills
You may encounter chunky sections of trail along the trail, and goat heads can turn your trip from fun and easy to time-consuming and sour if not prepared. There are only a few sections within the first 11 miles that get a bit bumpy from the rocks but are still easy to pedal through.
I would recommend a tubeless tire to soften the rough sections and avoid numerous punctures. Make sure you have just added some sealant to the tires as well. One time, I pulled 13 goat heads out of 1 tire alone. While the number was unlucky, my sealant kept me rolling by sealing every one of the punctures. If you do not have a tubeless setup, come prepared with an extra tube or two and a tube patch kit just in case you encounter more goatheads than expected!
Elevation Gain/Loss
The elevation may be the biggest draw to this route for beginner bikepackers or those looking for a gentle and fun overnighter. The beginner-friendly 22-mile route features 798 ft of elevation gain and 805 ft of elevation loss, making for a reasonably flat and enjoyable ride! The intermediate 38-mile route features more gradual climbing and descending with an average elevation gain of 1,216 feet and 1,223 feet of elevation loss.
If riding from the Deschutes River Campground trailhead to Maupin, you will likely encounter the most elevation gain of 2,135 feet with an elevation loss of 1,298 feet. That being said, the elevation gain and loss for each length of the route is spread out over the miles and is gradual because of this. There are a few fast and fun sections where you may find yourself cruising along, while the rest of the route may require a steady but leisurely pedaling pace!
If riding the moderate and intermediate routes, there is one moderate descent and ascent out of a gorge about 4 miles in or so worth noting, but the ascent is an easy 5-minute walk uphill if one needs to hike a bike at this section of the trail.

Permits
There is a $7 overnight parking fee; there is no charge for day-use, but I have never had any issues using an NW Forest Pass and parking in the gravel lot on the left when pulling into the park.
The campsites are occupied on a first-come, first-served basis near the pit toilets, but since it is a public recreation area, you can set up wherever there is a comfortable, flat spot.
The last great camping area with a pit toilet is at about the 10-mile mark. There are some flat areas past the 11-mile mark where you might be able to squeeze a tent or two. They show up as named sites on maps but actual tentsites are limited: Lockit Campground, Mack Canyon BLM campsite, Jones Canyon Camp, and Twin Springs Campground.
Maps
Maps for all three route options can be found on the Ride With GPS website:
See our most popular mountain bike guides in our Bike gear section:

The Lower Deschutes River Trail is an old railbed that is well-graded. Across the river, a train travels on a functioning railbed.
Getting There
By Car
From The Dalles, head east on Interstate 84/US 30 to Exit 97. Take a right and then an immediate left. Follow State Route 206/Celilo-Wasco Highway for 3 miles to the Deschutes River State Recreation Area, on your right, just past the Deschutes River Bridge.
If you're heading west on I-84/US 30, take Exit 104. Turn left, and then make an immediate right onto Biggs-Rufus Hwy. Continue for 4.4 miles, and turn left into the Deschutes River State Recreation Area.
The gravel parking area is to your left when pulling into the recreation area. Follow a sign up a steep, narrow path to the Railbed Trail.
Related: Best Bike Racks for Your Car
By Plane
While The Dalles is home to a small airport, the Portland International Airport (PDX) will likely be the closest airport to fly into. Depending on traffic, it is about an hour and forty-minute drive to the Deschutes River State Park trailhead from the airport. Many major cities have direct flights to PDX. Check flight availability to Portland from your location.
Alternately, the Bend-Redmond (RDM) airport that serves Bend, Oregon, is a small regional airport. It's about 2 hours and a twenty-minute drive from the Redmond airport to the trailhead. One advantage of coming up from the Bend area is that you have the option of passing Maupin (the finish point) on the way if you are setting up a car shuttle with friends. The Redmond airport has a few direct flights a day from some major airport. Check flight availability to RDM from your location.
Shuttle Services
If attempting the Maupin overnight route alone or without an extra car, you may be able to get a ride from one of the many river shuttle services in Maupin, depending on the time of year. I would recommend giving them a call. They may not be able to accommodate the bikes but might help give you a ride to either point you end so you can go back and retrieve your bike.

Gathering with friends at the Deschutes River State Recreation Area trailhead for a bikepacking trip along the Lower Deschutes River Trail.
Trailheads
Deschutes River State Recreation Area--the same starting point for all of the trips
21-mile overnighter -- turn around at mile 11 near Harris Ranch
38-mile overnighter -- turn around for an out-and-back when the trail starts to become rougher
50-mile round trip -- end in the town of Maupin.
Post-Trip Favorite Restaurant and Brewery
Taqueria Mi Pueblito is one of my favorite spots to eat in the Dalles. It is a quaint taco shack with a closed-in patio to eat in during the colder months! I’ve enjoyed just about everything on their menu, but their tortas and burritos are worth packing out if you stop on your way to the trail.
Freebridge Brewing is an excellent spot for a post-trip beer and pizza! My favorite is their Dragon pizza since it has a spicy kick! I think it pairs well with their Scandalous Pale Ale if their rotating, seasonal brew specials don’t catch your eye.

The relatively flat well-graded trail tread of the bikepacking route along the Lower Deschutes River Trail.
Regulations
Included in every story: Follow Leave No Trace Ethics, including camping and pooping far from water.
Don’t leave your trash/litter.
Several pit toilets along the route can mitigate a toilet paper mess, but if you are not near a pit toilet and need to go, make sure to bring a zip lock bag to pack your TP out with. Always bury your mess 6” or deeper!
I do not personally bring my dogs bikepacking; while your dogs may enjoy hiking in this area, make sure to beware of rattlesnakes!
I have not seen any group size limits since it’s all public Bureau of Land Management (BLM) land. That being said, the more friends you bring, the more limited the sites may be if you arrive too late to snag a spot close to the pit toilet.

A bike repair station on the Deschutes River Trail.
Resupply and Bike Repair
Resupply
One can pick up food and overnight goods in The Dalles. They have many options, including a Fred Meyers, Safeway, and Grocery Outlet. There is a Big 5 Outdoor Store for any last-minute camping items like stove fuel and the Fly Fishing Strategies fly shop if you want to pick up any bait or advice for fishing!
Bike Shop Options
Hood River is about 30-40 minutes away (closer to Portland) if you need any specific gear or goods. Shortt Supply is an excellent outdoor gear shop, and Mountain View Cycles or Fat Tire Farm - Hood River Cycles will be able to help with any bike-related needs!

Spiky seeds called goat heads can present a challenge to bikepackers who are riding on tires with tubes when riding the on the Lower Deschutes River Trail.

Water planning can be a challenge along the Lower Deschutes River Trail because the river that it follows for its length is contaminated and not recommended for drinking.
Water Planning
Despite riding along the Deschutes River, water is scarce, if not non-existent, along this trail. I try to bring a minimum of 4 liters every time I ride out there. Depending on your expected mileage, you may want up to 8 liters if going during the summer months. Water planning is why this route, which may appeal to hikers, is more popular as a bike route.
I do not recommend filtering from the Deschutes River itself since it has a lot of chemical and fertilizer runoff from the farms further up the river.
Side Trips
There is a spur trail up Harris Canyon along the old Harris Ranch Road about 11 miles in. If you got to camp earlier than expected or just want to kill some time, it may be worth exploring, but it is not a very rewarding side trip if you prefer to just stick to the route.
Gear Rentals
If you do not own a bike or road bike and want to try bikepacking in this area, Evo offers mountain bike rentals out of Portland, OR. A gravel bike can handle this area, but due to the rougher sections of the trail, one might have a more enjoyable time on a mountain bike here.

A loaded bikepacking set-up for riding along the Lower Deschutes River Trail.
Gear List
| GEAR | PRODUCT |
|---|---|
| Tent | Six Moon Designs Skyscape Trekker Tent |
| Seat bag | Oveja Negra Gearjammer Seat Bag |
| Handlebar bag | Swift Industries Catalyst Pack |
| Sleeping bag | Katabatic Gear Flex 22F Quilt |
| Sleeping pads | Therm-a-Rest ZLite Sol Sleeping Pad |
TENT
I use the Six Moon Designs Skyscape Trekker every time I head out to the Deschutes River. The wind can gust out of nowhere, and I find that the pointed nose of the shelter cuts right through it and provides quite the comfy reprieve no matter how blustery it gets. For other tent recommendations, see our review of the Best Backpacking Tents. If you want something lighter, see our Best Ultralight Tents guide.
Helmet
I have worn a helmet on this trail and have also gone without one during the summer when I prefer a sun hat. I think there are ways to combine the two now. The trail does not allow any motor traffic, so I feel more comfortable not wearing one on this route in particular. I feel silly every time I do not wear a helmet, though, since you never know what could happen, and a helmet may save your life. Some argue that wearing a helmet encourages one to ride more recklessly, but anyone can feel in control until they don’t. Maybe it’s best just to wear a helmet and ride cautiously!
Repair Kit
My repair kit varies depending on the length of the trip, but here are a few repair items I would deem essential for this trail:
a spare tube (or two if you find yourself popping tires/tubes often)
tire levers (having two can help get the tire on and off the rim and speed up changing a flat)
a tube patch kit (these can help if you find yourself blowing out tubes but not wanting to carry more than one or two spares)
a reliable pump such as the Lezyne Micro Floor Drive
A bike-specific multi-tool like the crankbrothers M-19. A bike-specific model will have most of the hex wrench sizes you might need as well as a chain tool, spoke wrench, and even screwdrivers.
To learn more about additional repair items you might need, check out my other article: How to Get Started Bikepacking.
Bike Bags
While one can use a variety of bike bags on this route as well as a trailer, I typically just use a seatpost bag such as the Oveja Negra Seatpost Gearjammer, a home-made frame bag, and Long Flap bag on the handlebars such as the Swift Industries Catalyst bag or the Bags by Bird Goldback. I tend to carry a hip pack as well for camera gear and other items I like to access quickly!
Read More: Best Bike Handlebar Bags
Related: Best Mountain Bike Hip Packs
SLEEPING BAG: Katabatic Flex 22
I use the Katabatic Flex 22 on the Deschutes River Trail. I can vent it out as a blanket during the warm months and tuck it under me using the nifty cord system during the colder months. We’re working on a guide to the best sleeping quilts, but the Katabatic Quilts receive high marks in our PCT Gear List and Strategy. In the meantime, see our review of the Best Sleeping Bags.
SLEEPING PAD: Therm-a-Rest Z-Rest
I keep an eye out for goat heads, but I always bring an air pad and have never had any trouble. I like to bring a Therm-a-Rest Z-Rest for added comfort when possible! You can read more from us about this Z-Rest and other great sleeping pads here!
STOVE: Soto Windmaster
I am terrified of catching all of that beautiful grass on fire, so I typically go stoveless or bring a gas burner stove with a windscreen, the Soto WindMaster, if I do bring a stove. On the trail, it’s easy to bring along a burrito or meal from The Dalles, and you can swing back through town the next day for your caffeien fix if you decide to go stoveless! For more great stoves, check out our Best Backpacking Stoves guide! And if you’re good with cold instant coffee in the morning or want an easy and clean way to have hot coffee in camp, see my Best Instant Coffee for Camping Guide guide.
BIKE LIGHTS AND HEADLAMP: CYGOLITE AND PETZL
I carry Cygolite bike lights and a Petzl Swift RL headlamp for camp and night riding — should I get a whim for that! See our Best Mountain Bike Lights guide for more recommendations or our Best (and Brightest) Headlamps guide for headlamp suggestions.
FOOD STORAGE: Odor Proof Sack
I bring just a stuff sack for food out here. I do not believe there is a bad rodent problem along the trail due to the snakes and birds in the area. Still, an odor-proof bag and/or a critter sack may not be such a bad idea, especially during the warmer rafting season months where there is an influx of families and groups camping along the primitive sites.
See REI’s guide to How to Choose and How to Use Bear Canisters for more on weight, volume, and ease-of-use considerations.
WATER PURIFIER
While I have heard of some filtering water from the Deschutes, I have never done so due to the cocktail of chemical and fertilizer runoff from the farms further up the river. This one is relatively easy to ride among mountain bike trails with up to 4+ liters of water on, though, and I have done that plenty of times in the hotter months! It’s worth bringing something light like a Platypus Quickdraw water filter as a backup in absolute emergencies. Still, I don’t recommend drinking water from the Deschutes River unless you need to. See our Best Water Filters and Purifiers guide for more recommendations.
In addition to the above, you may find our Mountain Bike Gear Checklist a helpful resource.

A campsite with bikepacking friends along the Lower Deschutes River Trail. This route stays snow-free and warm and dry enough to ride in the cooler months, but you’ll want to bring some layers to stay warm, especially in the evenings and early mornings.
What to wear
SHOES OR BOOTS: Bedrock Sandals
I usually bike in a pair of Bedrock Sandals on this trail if it's above 60 degrees out! Anything colder, and I wear a pair of flat shoes to grip my pedals well. I just make sure they are a pair I wouldn’t mind hiking in just in case something catastrophically fails on my bike. The Bedrocks are a winner in our guide to The Best Hiking Sandals.
If you are planning on fishing, be sure to bring a pair of waders with boots or wading shoes! I have found that a pair of Neoprene booties work for wet wading when fishing in the middle of the summer months.
If you’d feel more comfortable in boots, check out our Best Hiking Boots story or our Best Lightweight Hiking Boots story.
A nice footwear compromise is hiking shoes designed to feel like a trail runner but have stability similar to a boot. For more, see our Best Hiking Shoes stories (men’s and women’s) for footwear that has more durability and stability than trail runners.
RAIN JACKET
A rain jacket can provide a lot of wind and rain protection during the shoulder season. The wind is no joke out there. A wind shell typically suffices, but there have been a couple of times where I felt a rain jacket would be even warmer. See our Best Lightweight Rain Jackets article for more recommendations.
DOWN JACKET
When the sun goes down in the high desert, so does the temperature. I always bring some insulation. I bring a down jacket for the fall, winter, and spring. For the summer, I bring a warm fleece. See our Best Down jackets guide for more recommendations.
FLEECE JACKET
I tend to carry a warm fleece and wind layer to take the edge off during the summer months. For more, read about our favorite fleece jackets.
PANTS
If I have enough room in my bag, I like to bring some fleece pants for this area since it’s typically an overnight trip, and the added weight is not a big deal. Otherwise, I recommend wind pants in this area. They can add a lot of comfort when hanging out in camp!
SHORTS
I typically ride in shorts for comfort year-round out here. I just ride in a comfortable pair with Merino Boxers. Some prefer bike shorts, but I’ve never really enjoyed tight spandex and padding that absorbs moisture. If you prefer a traditional bike short, our guide to the Best Mountain Bike Shorts for Women or men.
If it's really cold, a pair of softshell pants will work to shed wind and dispel any light rain.
MISCELLANEOUS GEAR
MAP AND COMPASS
It would be difficult to get lost along this trail. Regardless, I bring a backup battery and save trail maps in two places on my phone for this trail. I typically use Ride With GPS and Gaia GPS apps for maps.
FIRST AID KIT
The high desert is home to a wide variety of spiky plants and rough terrain. I like to bring a small first aid kit, just in case. I once smacked my hand on a thistle going fast and lodged some of the thistle’s thin needles deep in my hand. Thankfully I had my multi-tool and some ointment, so I wasn’t too uncomfortable for the remainder of the trip!
SUN PROTECTION
The Deschutes River Trail is extremely exposed. I always bring sunscreen, sunglasses and even use a neck covering or sun hoody in the summer. A sun hat can be nice, too!
Related: The Best Sun Shirts
POCKET KNIFE
I try to carry a multi-tool in this area! The needle nose pliers are great for fishing, and I have used just about everything on it from field repairs, to first aid, and opening a bottle as well!
FISHING GEAR
The Deschutes River — especially the Lower Deschutes River Wildlife Area — is famous for its trout and steelhead salmon fishing. Make sure you have the appropriate Oregon Fishing License and bring your gear! I use a Reyr Fly Fishing rod and mainly fish for trout, but there have been multiple times during the shoulder seasons when I wish I had brought a spin caster so I could zing the bait out further from the banks!
For more recommendations, see our guide to The Best Beginner Fly Fishing Combos.
About the Author
Graham has been working in the outdoor industry for the past eight years. He got his start climbing competitively in college and backpacking for fun. He section hiked the PCT in 2016—his first foray into long-distance backpacking—while working with brands such as Leki, Osprey, and Nemo Equipment.
Graham has also worked as a photojournalist for publications such as Rock and Ice and Roots Rated. He started bikepacking in 2017, and has continued to work with many outdoor companies since then.
Having worked as a barista at several specialty coffee shops between outdoor industry assignments, fresh coffee has become a part of Graham’s backcountry adventures in many different forms.
Graham also started bikepacking in 2017; after riding hundreds of miles and several bikepacking routes, he began sewing his own bikepacking bags. After a lot of positive feedback, he started a small operation sewing custom bike bags for local customers in Chattanooga, TN. While his operation is small, it has allowed him to work with multiple styles and brands of bikes.


