Winter Camping Tips: A Guide to Cold-Weather Comfort
A Beginner's Guide to Your First Winter camping Trip
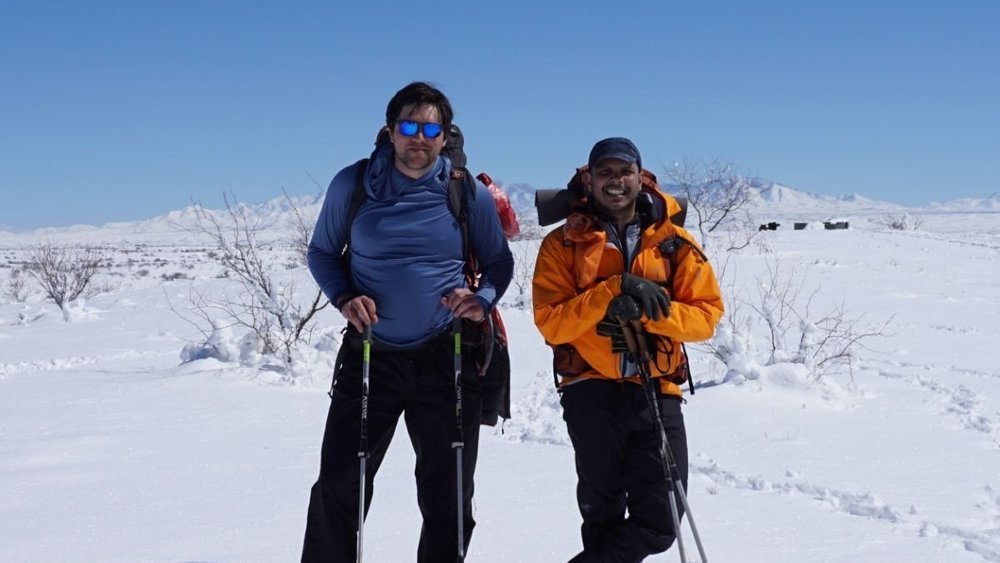
The author, Amiththan Sebarajah (right), was born in Sri Lanka and learned to winter camp in his 20’s in the middle of Canadian Winter with the Royal Canadian Airforce. He now works to reduce barriers to entry for outdoor activities like winter camping. Photo courtesy Amiththan Sebarajah.
December 6th, 2023
I was thirteen when I first saw snow; excited and barefoot, I ran outside to catch the flurries. As it happens, a snowshoe hare was out in our yard. I had no idea how it got there, but chased after her until I noticed a numbness in my toes and fingers. Even then, my face was flushed with an exhilarating heat.
You see, I had grown up in a place where the midday sun would melt the tar off the only paved road out of town — a place far away from the neat asphalt driveways and concrete sidewalks of Toronto.
And over the years, I have learned to love winter — but this wasn’t always the case.
I wasn’t always comfortable with being outside in the winter. In fact, there are many aspects of winter recreating that were beyond me! But, now having the knowledge needed to complete (and enjoy!) a winter camping trip, I’ll be sharing with you some tips on gear, expenses, skill sets, etc.
In this guide, I will provide you the opportunity to learn some camping tips and tricks without nearly as much trial and error!
We create reader-supported, objective, independently-selected gear reviews. This story may contain affiliate links, which help fund our website. When you click on the links to purchase gear, we may get a commission, without costing you an extra cent. Thank you for supporting our work and mission of outdoor coverage for every body! Learn more.
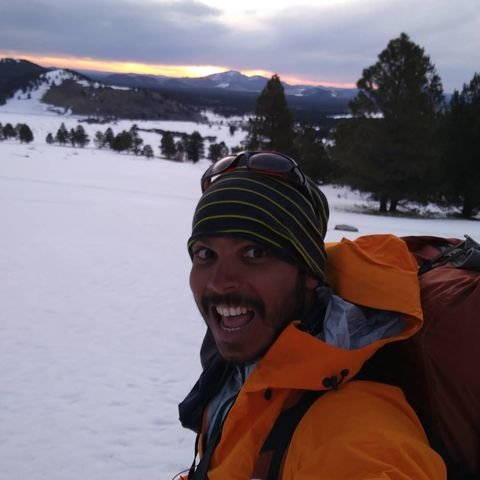
The author lives in a remote part of British Columbia in the Selkirk mountains where winter and snow sports are part of the region’s identity. This photo is from a February trip in the US. Photo courtesy Amiththan Sebarajah.
About the Author
Why I Wrote This Guide
I was born under the tropical sun, and I didn’t see my first snowflake until I was in my teens. I didn’t go on my first overnight backpacking trip until well into my twenties. My first overnight camping trip was in the middle of a Canadian winter. I didn’t know much about camping; I knew even less about gear basics such as sleeping pads or layering and next to nothing about winter in the Canadian Shield.
Though I didn’t lose any toes that weekend, I spent my nights mostly awake, trying to keep warm. I learned several valuable lessons on that trip: the importance of a cozy night’s sleep, the incomparable value of a good pair of dry woolen socks, and the simple joy of hot soup.
That trip was nearly two decades ago, as part of a Bush Weekend outing with the Royal Canadian Air Cadets. I had begged my parents to let me join the cadets. I thought it was the only way to access a place and activities that felt so alien and expensive while growing up in a big city.
How I got Into Winter Camping
I currently live in a remote part of British Columbia, where engaging with snow is a way of life. Cat-skiing was invented here. Winter and snow sports are more than just recreation in the Selkirk mountains where I live. They’re part of our identity.
On clear days, I can spot at least two massive glacial icefields from my backyard. Even shoulder season hiking and camping here means inevitably encountering snow above the treeline. These mountains and their rapidly changing conditions have shown me the importance of basic snow camping and hiking skills time and again.
On my first winter camping trip, I didn't sleep a wink. And that wasn’t out of excitement; it was because I didn't know how to tackle the cold. Not only was there nobody to ask, but I didn't even know what questions I had! In any case, I didn't want to risk asking silly questions about things I felt I should have known.
I didn't go winter camping again until I was well into my twenties, but over the years, I am glad to have learned the practical lessons that snow teaches — sometimes the hard way. But once I warmed up to the cold, I started to appreciate the outdoors even more: the slow and steady rhythm of your footsteps matching your heartbeat, bug-free vistas, packing out food and water, and the true solitude that a clear winter night can bring. I wrote this guide to winter camping tips so more people can experience that feeling.
You can learn more about Amiththan in his interview with CBC Radio One or Mountain Culture Group or at his Instagram, @timeplacedrift.

Remember we all start somewhere. This guide to winter camping is here to walk you step by step to safely starting your journey in cooler months. Photo by Tyrone Burke @via.ergo.sum
How do I get started winter camping?
If you haven’t yet been bitten by the backpacking and camping bug and are looking to get started, here are some links to a Beginner’s Guide to Hiking and Beginner’s Guide to Camping — they are great catalogues of useful information, and a good base of knowledge for winter camping as well.
This introductory winter camping guide assumes a few basic things:
You are comfortable camping in warmer seasons
You possess some basic camping gear
You know how to layer clothing for warmth
You know how important hydration is
You know how to spot the signs of hypothermia.
If you’re not sure, don’t get discouraged! Check out our guides on perfecting camping skills, take classes, and practice.
Please remember that our goal here is, first and foremost, to get you out for some camping in the cold safely and enjoyably. We will set you up with valuable tips to help make the most of Autumn and Spring camping in the snow and form the foundational skills to endure true winter overnights.
This is NOT a highly technical guide for the more advanced skills you will need to learn for serious winter backcountry adventures. You’ll get there in time. Practice first.
Instead, this article is about enjoying a steamy mug of decadent hot chocolate or hearty soup while warming your bones inside your tent under a pile of blankets on a cold night. It’s about telling stories around a blazing campfire, dancing in the snow, and staying warm. After all, with a lot more dark time during the cold part of the year, there's much more time to enjoy the comfort of your camp!
Think of this guide as the snow camping equivalent of your first glamping trip: a dress rehearsal until you feel comfortable with yourself, your gear, and your skills. We want you to get out there safely and in a way that brings you a new kind of joy.
Related: Shoulder Season Gear for Hiking and Backpacking in the Fall
Read More: How to Run in the Winter

As you get more into winter travel and winter camping, you may want to invest in equipment like snowshoes. But for your first trip, you can make do with many gear items that you already have from summer outdoor activities. Photo courtesy Amiththan Sebarajah.
Will I need specialized winter camping equipment?
The short answer is yes, but it depends on your (eventual) goals. The longer answer is that you probably own most of the things you need already, and you can either borrow, rent, or improvise the rest.
As with any sport, the deeper you get into winter camping, the more specialized your gear and skill sets become. That’s part of the fun of learning to be in the outdoors, and winter camping is no exception.
Again, we assume new winter campers are geared up for warm-weather overnights. This guide is about how to put that 3-season gear to good use in a different setting.
Related:

Your first camping trip in the snow doesn’t have to be some place remote or wild. Here, the author and friends camp in a flat area under a powerline. Photo courtesy Amiththan Sebarajah.
Where do I go winter camping?
I advise against looking for Narnia for your first night of winter camping. If you must seek out the most quixotic winter setting for your first trip, don’t do it alone, and always have an exit plan!
An ideal location is one you can bail out from safely if something doesn’t work out as planned.
Also, be sure to minimize risk factors that are increased in winter conditions.
And (it bears repeating) — always have an exit plan.
Do you have the luxury of access to a backyard in snowy cold weather? If so, that’s a great place to spend your first night in the snow. If you live away from snowy weather, provincial or state parks, private campgrounds, and public lands can all be great options. Make sure you check to see if parks and campgrounds are open in winter and follow all rules and regulations for the particular area you choose, whether it’s winter or not.
Depending on your skills, desires, and access to equipment, we recommend three great ways to get started. They represent an increasing separation from the safety and refuge of home and the need for more careful planning.

You can practice cold weather camping or snow camping at an area not far from a road. Treeline testers took this photo while backyard winter camping. Keep in mind bail out points and exit strategies should the weather change and/or if you ever feel unsafe. Photo courtesy Lawton Grinter.
Recommendations for first-time winter camping sites
1. Camp in your backyard in cold weather and snow.
2. Winter car camping: Practice cold weather camping or snow camping at an Established Campground or Dispersed Campsite with your tent not far from your vehicle.
3. Winter 'near' backcountry camping, with a modest hike, snowshoe, or ski in.
I wouldn’t head out on a multi-day hike for your first attempt at camping during the height of winter. While I have definitely made some unexpected yet successful camps on snow during spring, summer, and fall thru-hikes, I recommend learning some basic snow camping skills before those thru-hikes to avoid exposing yourself to undue risk.
If you ever plan, for example, to thru-hike any of the long trails, camping on snow in kinder temperatures will help prepare you in advance for when you unexpectedly face the cold white on a thru-hike.

It’s more difficult to travel in the snow, so if you plan to include a modest hike to your campsite, remember to account for slower travel times. Photo by Tyrone Burke @via.ergo.sum
Challenges of Winter Camping
Putting aside camping during a storm for now (check the weather forecast to avoid that!), winter camping poses four main risks and challenges compared to your warm-weather camping.
1) Colder temperatures
This is obvious and goes without saying, but temperatures will be colder during the day and at night. You must adjust your gear accordingly.
2) Snow that can get you and your gear wet
Once your gear gets wet in the winter, it is very, very difficult to dry out. Take every precaution to keep your gear dry.
3) Many more hours of darkness
With so much time in the tent, you’ll need to be warm, and you’ll need to be comfortable. You’ll also need a way to occupy yourself (with books, games, etc.) because you won’t be asleep the entire time the sun is down. Bring a good headlamp and camping lantern.
4) It’s more challenging to travel in the snow
The distance you can cover in the snow will be less than you’re used to, and you may sweat more than you expect to. Practice winter camping in a backyard or campground before engaging in overnight winter snow travel on foot, ski, or snowshoe.

The author in the Selkirk mountains, the unceded Ktunaxa territory in British Columbia. Whether hiking or backpacking, understanding the signs of hypothermia is an essential cold weather hiking skill. Photo courtesy Amiththan Sebarajah.
Know the Signs of Hypothermia
One thing to note: you must develop an understanding of the early signs of hypothermia. According to the CDC, the warning signs are:
Shivering
Exhaustion or feeling very tired
Confusion
Fumbling hands
Memory loss
Slurred speech
Drowsiness
If you develop any of these while in the cold, take immediate action to get warm. Remove all wet clothing, and have a group dance-off while making some hot drinks! Hyperthermia is a serious issue, but there are many ways to respond to it once you notice the signs. As a friend of mine likes to say: the difference between a miserable time and an adventure is attitude, but the right gear and knowledge go a long way, too.
Above, we recommend some venues for your first winter camping experiences (e.g., backyards or campgrounds). Avalanches, frostbite, and icy rivers are all potential risks of winter camping, but fortunately, you can avoid them by staying in more forgiving camping spots.
Safety considerations
Avalanches and snow conditions
Winter camping in mountainous regions introduces the risk of avalanches, a potentially life-threatening hazard. Understanding snow conditions and recognizing avalanche-prone areas is crucial for your safety.
Educate yourself: Familiarize yourself with avalanche terrain, snowpack stability, and weather patterns. Take an avalanche safety course to learn how to assess and mitigate risks.
Consider taking an avalanche course or other snow travel and navigation courses before winter backpacking. You should also read up on Basic Avalanche safety.
Take an avalanche class to know your terrain. Know how to use your own gear safely and confidently. Take a few practice runs alone to make sure you know how to skin, transition, and ski confidently or snowshoe confidently before you camp. (Our intro guide on Backcountry Skiing speaks more to this.) Don’t do it alone—it’s more fun with more people, especially well-versed in winter camping and the area.
Disclaimer: Having the right winter gear are not enough for a frontcountry or backcountry skier or snowshoer or winter hiker to safely travel in avalanche terrain. Learn the risks, invest in education, practice safe decision-making, and take a Level 1 avalanche course approved by the American Institute for Avalanche Research and Education prior to partaking in risky activities.
Check avalanche forecasts: Before embarking on your winter camping trip, consult local avalanche forecasts and bulletins. These resources provide valuable information about current snow conditions and potential avalanche danger. Learn How to Read an Avalanche Forecast.
Carry safety gear: Always carry essential avalanche safety gear, including a beacon, probe, and shovel. Learn how to use this equipment and practice with it before heading into the backcountry. See our avalanche safety gear checklist.
Travel in groups: If possible, travel with experienced companions. Maintain proper spacing between members when navigating avalanche-prone areas to reduce the risk of multiple people being caught in a slide. Although you won't be thru-hiking, this guide on Risk Assessment and Decision Making is a good primer for understanding group dynamics.
Choose safe routes: Plan your route carefully, avoiding steep slopes, cornices, and areas with recent avalanche activity. Stick to ridgelines and safer terrain whenever possible.
Wildlife considerations
Winter brings unique challenges when it comes to interacting with wildlife. While some animals hibernate, others are still active or may wake up occasionally. Many of these practices are the same as in summer.
Research local wildlife: Know which animals are active in the area during winter. Familiarize yourself with their habits, feeding patterns, and potential encounters.
Store food properly: Wildlife may be more active in search of food during the winter months. Store food securely to prevent attracting animals to your campsite. Use bear canisters or hang food from a tree at a safe distance.
Be wildlife aware: In regions with winter-active bears, be vigilant. Make noise while hiking to alert bears to your presence. Where it is legal, carry bear spray and know how to use it. In winter, mammals may be more desperate for food. Keep a clean camp to avoid attracting bears or other wildlife.
Respect wildlife: As in summer, observe wildlife from a distance. Do not approach or feed them. Keep a respectful distance to avoid disturbing their natural behaviors.
Prepare for encounters: Have a plan for wildlife encounters, especially with larger animals like moose or wolves. Stay calm, make yourself known, and slowly back away. Avoid running, as it may trigger a chase response.
Carrying a comprehensive first aid kit
Accidents and injuries can happen in any outdoor setting, and winter camping is no exception. A well-prepared first aid kit is a vital component of your safety gear.
Items to include:
Wound care supplies: Sterile dressings, bandages, adhesive tape, and antiseptic wipes for cleaning and dressing wounds.
Thermometer: A thermometer can help assess the severity of cold-related injuries, such as frostbite.
Pain relievers: Non-prescription pain relievers like ibuprofen or acetaminophen for managing pain and reducing inflammation.
Medical tools: Tweezers, scissors, and a multipurpose tool for various medical and non-medical tasks.
Prescription medications: If you have any pre-existing medical conditions, ensure you have an adequate supply of necessary medications.
Emergency blanket: Compact and lightweight, emergency blankets provide crucial warmth in case of exposure.
Communication device: A fully charged cellphone, radio, or satellite communicator to call for help in case of an emergency.
Personal information: Include essential personal and emergency contact information, as well as any relevant medical history.
First aid manual: A compact first aid manual can be invaluable for providing guidance in emergency situations.
Regularly check and replenish your first aid kit, ensuring that it remains up-to-date and tailored to your specific needs and the challenges of winter camping.
PERSONAL COLLAPSIBLE WOOD BURNING STOVES
Alternatively, there are several compact and collapsible personal wood-burning stoves available. See our guide to Best Portable Camping Grills for the portable versions we like.
The easiest solution is to carry dog poop bags and pack out your waste (and the waste of any pets). Purpose-built Waste Alleviation Bags (“WAG bags”) are another option and are sometimes necessary under certain permit guidance. I prefer the doggy bag approach coupled with a cheap screw-top plastic container and sawdust (oatmeal works too, in a pinch). We review multiple options in our Best Human Waste Bags and WAG Bags guide.

How does winter camping work?
Appropriate gear, knowledge, enthusiasm, and an open mind are typically the difference between an uncomfortable time and a challenging adventure. Just remember, it’ll be colder and darker than you're accustomed to, and that snow poses several challenges.
The great thing about winter camping is that you do not need to be overly concerned with carrying the most ultralight gear. In fact, I’ve found that the opposite is true. Winter camping gear is all about having the additional little things — the comforts that sometimes get sacrificed in the name of racking up miles in the summer season. Winter is a time for slowing down, for hot beverages and food, and deep reflection.

Even before you leave home, preparing your gear and planning how you dress is an important part of the process of winter camping. Photo by Tyrone Burke @via.ergo.sum
How to Dress Before You Go
Comfort in the cold is all about layering. Check out the videos below from Duncan Cheung for a starting point if you're new. Once you've layered on clothing for warmth, moisture management usually lets you have a safe and toasty adventure rather than a miserable shiver fest.
Keeping all your layers dry and functioning is the key to staying warm. See our guide on How to Dress for Winter Hiking for layer-by-layer recommendations.
Related: The Best Baselayers

GLOVES
Moisture generally originates from snow (which can wet you from the outside) and sweat (which can build from the inside). Since your extremities — toes, fingers, ears, nose, lips — are more prone to losing heat, protect them. Use wool or fleece accessories wherever possible, including winter gloves or mittens, scarves or neck gaiters, or even a balaclava.
If you do not have waterproof gloves, a plastic bag over your gloves will work well to keep water, wind, and cold air out. However, keep in mind that plastic does not breathe. Remove or ventilate your outermost protective layer when necessary to keep sweat from causing issues. Cold hands can be a serious issue so consider bringing a hand warmer to keep functionality in your extremities.
SUNGLASSES AND SUNSCREEN
Other considerations are all about protecting from sunburn and windburn. Carry chapstick for your lips. Vaseline is a great multi-use item for this. Likewise, do not forget sunscreen and sunglasses; even in low-light conditions, this is important. There is nothing fun about being sunburnt in the winter. Snow blindness is a real risk; even in cloudy conditions, UV light can affect your eyes. Many winter recreationists carry both snow goggles and sunglasses and cover all exposed skin with sunscreen.

Blown down trees from past snowstorms may obscure your path during winter travel. Photo courtesy Amiththan Sebarajah.
What to do when you arrive at camp
These tips apply to all of our three camping destinations. The further you plan to camp from your indoor living space or car, the more planning and packing is required. Consider borrowing or renting winter camping gear to complete your kit.
CHECK THE WEATHER FORECAST
Plan your initial experiences when there’s mild weather and little to no chance of storms. Weather can quickly turn treacherous in the winter. Make sure you have a clear idea of the weather so that you encounter no unnecessary or unanticipated risks. If cellular or GPS signals allow, check the forecast after you arrive as well. A Garmin Inreach Mini, for example, allows you to do a Spot forecast for your exact location.
PLAN TO GET TO YOUR SITE EARLY
Days are shorter during winter, but it’s much easier to pick a site and set up your gear in the daytime. You’ll spend a lot more time in camp in winter, but maximizing camp time is one of the unique joys of winter camping.
WITH ALL THE DARKNESS, LIGHTING WILL BE KEY
A lantern can be handy, especially for cooking in the dark, but a good headlamp is indispensable. Check your batteries before you go, carry your headlamp and phone in a warm pocket, and carry extra batteries. See our Best (and Brightest) Headlamps guide for our recommendations. You may even consider planning your first adventure for a full moon to maximize natural light.
BRING A TARP OR BEDSHEET
Use it to keep gear dry while you unpack and organize. If you’re camping near your car or home, consider bringing a broom and shovel to clear snow from tables or tent camping platforms. There are even specialty brooms and shovels made to remove snow, although a home version will do. If it isn’t practical to bring those items, you can use branches, twigs, or even trekking poles to remove snow.

A doublewall freestanding 3-season tent can work for your first winter camping trip. As you get more into winter camping, you may want a dedicated winter tent. Photo courtesy Amiththan Sebarajah.
Setting Up Camp: Shelter
HAVE A GOOD TENT
For winter camping, a free-standing tent — a tent that maintains some of its shape on its own — is the best choice, as it provides better protection than most tarps and requires less setup time.
A four-season, also called a winter tent, isn't necessary since you are studiously avoiding storms. But a winter tent is what you’ll eventually want if winter camping becomes a passion. With that being said, tarp shelters can work if you have the skillset. Use what you have, and always have a backup plan (like the easy ability to go indoors or into a heated vehicle).
SELECT A FLAT SITE
All the usual site selection camping tips apply here — pay attention to the wind direction, watch out for dead trees (since they are more likely to collapse under heavy snow), and avoid low areas where cold settles.
Pack down the snow under your sleeping area to create a flat spot for the base of your shelter and your anchor points. If you have a shovel and deep enough snow, dig out your sleeping area. In your yard or open area, you might clear right down to the ground.
Pro tip: if you didn’t pack a shovel and have snowshoed or skied to access your spot, then put on some tunes and stomp around to pack down the snow. Boots work well, too! I suggest walking around as I did in the video below when caught in a huge snowstorm on the Arizona Trail in February 2019.
BUILD A WINDBREAK
Take time to build up a windbreak around your shelter — a shovel is helpful for this, too.
Make sure to pack down this wall, so that wind can’t slip through. If the snow is deep enough, you can dig a flat spot with a firm base. Use the excavated snow to build a wall around the tent site so your tent doesn't drift into the packed-down hole of snow. That’s easier if you’ve got a shovel or snow saw, especially if you need to build snow blocks with consolidated snow. However, with a bit of water, you can build rudimentary walls with snow as easily as building sand castles at the beach.
USE SNOW ANCHORS OR BUILD THEM
Whether you are using a free-standing tent or a staked-out tarp, you do not need to purchase specialized snow anchors yet for your first winter camping trip. Indeed, they are a very recent invention. Your tent stakes, sticks, or stuff sacks full of snow work great as a Deadman Anchor. Above is a video that shows how to do that.

Two sleeping pads and additional sleeping bags or a sleeping bag liner can go a long way to being more comfortable during winter camping. Photo courtesy Amiththan Sebarajah.
Settling In: Winter Camping Sleep System
Now that you have set up and anchored your shelter, it’s time to move in and create your cozy sleeping space.
The point is to think about your sleep gear as a system that works together: pad, bag, and clothing. No individual piece will make the difference; each contributes to your warmth and comfort.
Contact with the ground is a significant source of heat loss when sleeping and even more significant with snow. In fact, most of our heat loss happens through contact with the ground. To prevent this, you will need:
TWO SLEEPING PADS
The typical Backpacking Sleeping Pad is one closed-cell foam and one insulated inflatable pad or air mattress, with the foam being closest to the ground.
The pads’ R-values — the rating of how much heat loss a sleeping pad prevents — combine. You can read more about R-values and insulation here. Camping Sleeping Mattresses tend to be heavier and less portable but may provide some more R-value, depending on the model.
While I’ve certainly managed a night on a single pad placed directly on packed snow, most people won’t find that comfortable regardless of the weather. But you don’t need to break the bank over another fancy sleeping pad just yet.
Yoga mats, a few folded blankets, even layers of bubble wrap would suffice. Heck, three couch cushions are super comfy if you’re camping quite close to home or the car. Just get a good amount of insulation between you and the frozen below.
ONE OR MORE SLEEPING BAGS OR QUILTS AND SYNTHETIC OR SILK SLEEPING BAG LINER
While your sleeping bags or quilt can be synthetic or down, it must be rated cold enough to keep you warm. If the expected low is about 30F, a 20-degree sleeping bag will work. For lows closer to 0F, you’ll need a winter sleeping bag. You can also improvise by layering two bags. Synthetic or Silk sleeping bag liners increase the overall R-value of your sleep system.
Need extra warmth, or more than a summer sleeping bag can provide? Add the down comforter from your bed, a few fleece blankets, a synthetic or silk sleeping bag liner, or all three if you’ve got them. Use a bulkier Camping Sleeping Bag over the top of your down sleeping bag. Synthetic as the outer layer is a best practice to keep your down sleeping bag drier.
Just remember that winter nights are long, so it’s better to be safe than sorry. (You can read more about the different advantages of synthetic insulation and down here.)
Pro tip: Be sure to sleep with your electronics and water filters to prevent them from freezing!
Pro tip: A hot water bottle at the foot of your sleeping bag is an inexpensive way to stay warm! Plus, you have at least that much water in the morning that won’t be frozen. You’ll want a Lexan Nalgene 1 or 1.5 L, which won’t melt with hot water and has a secure cap.
A LIGHT PILLOW
You can fashion a pillow using spare clothes and a stuff sack, or bring along a pillow from home. Inflatable pillows can also be great for winter camping. I typically wrap my neck gaiter around the inflatable pillow to insulate it.
MERINO WOOL OR SYNTHETIC FLEECE CLOTHING
Yes, dry, warm clothing is part of your sleep insulation system. Merino wool, which is finer than your run-of-the-mill wool and less likely to irritate your skin, works great for as an against the skin base layers.
Avoid cotton; it gets cold and stays cold when damp. Wool and synthetic fleece, however, will retain much of their temperature regulating properties, even if damp. Most experienced winter campers regularly sleep in long underwear bottoms and a top base layer. Some even sleep in a fleece top and puffy jacket—synthetic insulated jackets tend to stay warm when wet. Wear whatever it takes to stay warm!
THICK, WARM WOOL SOCKS
Take extra dry socks and double up if you got ’em — they also work well as mittens when in a pinch. Change into completely dry and clean socks just before bedtime. Down booties are great, too, if you can afford them. Warm feet are crucial to feeling warm overall while winter camping. See our guide to The Best Hiking Socks and The Best Ski Socks for more recommendations,
WARM HEADWEAR
Covering your head, whether it’s a toque, balaclava, neck gaiter, face mask, beanie, or knitted wool cap — or most of the above — is crucial to staying warm. Make sure you have a clean and dry option to wear to bed. It’s always better to have too much head protection than too little.

Have a plan for safely and comfortably hanging out in winter camp. Photo by Tyrone Burke @via.ergo.sum
How to Move Around camp and Hang Out:
If you’re hiking to your site, exploring before bed, or spending time outside by the fire, you’ll need more insulation to make sure you stay warm and dry.
SNOW SHEDDING LAYERS
These outer layers are wind and water-resistant and keep your insulating inner layers dry. Your backpacking lightweight rain jackets and pants should work well, assuming they are roomy enough for your inner layers.
A ski jacket and pants will work even better. Use what you've got. See The Best Men’s Ski Jackets and Best Women’s Ski Jackets and Best Women's Ski Pants and Best Men's Ski Pants for our recommendations.
If you’re expecting deep snow, snow gaiters will keep the snow out of your shoes. Don't be afraid to improvise and tape your pants’ cuff to your shoes to keep the snow out.
SYNTHETIC INSULATION OR DOWN MID-LAYERS
When it comes to winter clothing, think of it as an onion. Layers of clothing work together to create an ideal moisture and heat management system. Remember that your body produces all the heat you’ll have. Your clothing should help retain and release your heat so that you neither stew in your layers nor experience sudden and dramatic temperature fluctuations.
Protip: if you must sleep with your mid-layers, wear them backward, as if you are giving yourself a hug, zip side to the floor, arms tucked in, especially if your mid-layer is a down-filled garment. This way, you maintain maximum loft to prevent heat loss.
DOWN JACKETS OR PARKAS
Down jackets are ideal when you need to conserve heat and are settled in camp, cooking, or relaxing. Synthetic insulated jackets or wool layers are excellent when you are on the move or setting up a winter camp. Your layers should work such that you should not lose a significant amount of precious body heat simply by removing a single layer. You can read more on how to stay warm and layer during winter here.
CHAIRS AND PICNIC TABLES
Camping chairs are awesome for getting up off the cold ground — and uninsulated. One easy solution to this is to line the chair with your sleeping pad. Put pads on the picnic table benches. Use your sleeping bag or blankets for a cover when sitting; just be sure to keep your sleeping bag dry.
HEADLAMP AND LANTERNS
Headlamps and camping lanterns are nice for wandering about. There’s a lot of darkness during winter, and night falls more quickly than you might expect. Make sure you've got a headlamp with you at all times, as well as a way to navigate back to camp. Your tracks in the snow should not be your only guidance back to camp! Remove layers before you are too warm, and enjoy the quiet that winter nights bring.

How to Head to Bed
Always head to bed warm, well-fed, and hydrated, and in dry clothing. Winter nights are long, so plan ahead.
1. Once you’ve gotten all your outside tasks complete, head in.
Have your books, board games, and everything else you’ll need with you. Change into your clean and dry sleeping clothes for added warmth.
2. Food is fuel to keep you warm.
Treat yourself to a yummy snack just before bed — your body produces the heat, so give it ample fuel. Your gear will do the rest. If you're settling in at five because it's cold and dark and you've finished dinner, take a snack and hot drinks for later. An insulated thermos is awesome for keeping hot drinks at hand.
3. Remember to pee before bed
If ou’re in bed already and find that you need to go, resist the urge to hold your pee all night. Your body will need to work harder to keep your pee warm, and it’ll pull the warmth from other parts of your body to do it. Trust us: get up, go pee, stay dry, and the rest of the night will be more comfortable.
Protip: Many find a pee bottle indispensable in the winter; with one, you won't have to go out into the cold once you’re already warm and cozy. While this is straightforward for some, others will usually find that a urination device like the Lady J or Freshette helps. We recommend practicing in the shower before your first trip to prevent any messes.

A camp stove can help you melt snow for drinking water and make it easier to experience the comfort of hot food in camp. Photo by Tyrone Burke @via.ergo.sum
What can I eat on a winter camping trip?
The conventional wisdom is to bring simpler food items for your winter expeditions — the just-add-boiling-water type meals that only require a pot, stove, and spoon to prepare. We get it: they’re practical and require minimal effort and cleanup. This is a tried and true weight minimization tactic, especially for backpackers and the like. However, if you’re just getting started, I suggest bringing everything and the kitchen sink, because you can!
Cold temperatures mean you can carry certain food items without fear of spoilage: eggs and cheese, for example, or fresh meat and veggies for dinner. While you may eventually want light and fast meals at the end of a long day in the backcountry, practicing closer to conveniences means you can indulge. Plus, a few hours of cooking helps fill the dark hours.
I strongly believe that your nutrition should reflect more of your personality and preferences than any strict adherence to an expected norm. Food is a huge aspect of enjoying our time in the backcountry, regardless of the season. Your camp kitchen setup should reflect your personality and preferences.
There is simply no substitute for the comfort that eating hot food brings on a cold night in winter. My winter pantry typically includes everything I need to make hearty, fresh meat- and vegetable-filled soups and plenty of options for various hot beverages like tea and hot chocolate. I am particularly partial to mulled wine (disclaimer: exercise moderation with alcohol as the risk of issues like dehydration, hyperthermia, falling, or getting lost only increases during winter camping).
If camping in your yard, you might choose to cook inside or try out your camp stove outside; do as you see fit.
Campground trips can be amazing from a food point of view. You can have a cooler full of yummy food and a table to make the camp kitchen set up convenient. (Coolers aren’t necessary, but ironically, they can help keep food or beverages from freezing solid. A box lined with some insulation can work in a pinch.) You can also experiment with cooking styles. Bring all the camping stove systems you have, and see what works for you. Got a truck? Load up the gas grill and take it along for barbecue time!
Setting up a winter kitchen in the actual backcountry looks nearly the same as setting up camp: it is a good idea to dig a separate space for cooking and create a wall around your kitchen area, just as you do your sleep area.
Note: If it’s below freezing and you’re camping near a car or in the backyard, a Best Camping Cooler can prevent your food from freezing. Instead of keeping your food cold, it will keep your food from getting too cold.

Fires and Stoves for your Camp Kitchen
Wood fire
Where appropriate and legal, winter is a perfect time to have small cook fires. That said, while fire can feel elemental and intimate, building a fire in winter is an advanced skill that requires some care, knowledge, and skills that you should acquire beforehand. Firewood will have to be packed in, or you will first have to learn to identify deadfall vs. rotten wood.
There are also rules about not moving branches in certain places or only using designated firewood to prevent the spread of invasive species. If you plan on having a fire, make sure they’re legal in the area you’re camping in, and always refer to Leave No Trace (LNT) principles for best practices.
Personal Collapsible Wood Burning Stoves
Alternatively, there are several compact and collapsible personal wood-burning stoves available. Some of them can cook entire meals using a single piece of firewood and some basic know-how in building and maintaining efficient fires. While this is a topic of its own, this approach adds an extra layer of ruggedness and satisfaction to your winter camping experience. See our guide on The Best Backpacking Stoves for more ideas, or consider a dedicated winter stove system.
Gas stoves
If you’d rather not take responsibility for a small fire, you’ll likely have to use a gas stove for your cooking and perhaps melt some snow for water. If you already own a summer Backpacking Stoves or camping stove, chances are it should suffice (if you don’t, here’s a great discussion on how to choose the backpacking stove for you). I prefer to use a canister stove so that I can adjust the flame.
Regardless of which stove you carry, be sure to carry more fuel than you need for the trip — a cold night isn’t a good time to run out of it.
Protip: Always carry backup lighters, and remove the childproof lock to make them easier to work with cold fingers.
Conventional wisdom from a decade or two ago was that winter is the time for liquid fuel stoves like the MSR Whisperlite — and they do work well in the cold.
Above 20F (-7C), a stove with a pressure regulator should work much the same as they do in summer if you keep the canister warm until use. When it is colder, consider sticking the canister inside the foot of your sleeping bag, just as you would do to keep your electronics batteries from getting too cold to operate. A small bit of body heat will warm up the stoves. You can also carry a piece of foam or bubble wrap to place underneath the canister for insulation between the canister and the snow. Alternately, giving your canister a dip in a pan of hot water will warm a canister that's struggling because of the cold.
The point here is to remember to pack items that will let you enjoy the experience on your own terms. If you are using a canister stove, be sure to carry more fuel than you need for the trip.
The Winter Toilet: Poop
In the backyard and in some campgrounds, winter nature calls are simple. While urinating is always pretty straightforward, time away from a toilet in the winter poses some additional challenges.
If you have visited a dog-friendly park in the spring, you know that just digging a cathole in the snow as you would in the summer simply does not work — when the snow melts, the poop is just lying on the ground, contaminating nearby water sources and generally just being a gross violation of LNT. But digging down to the soil in the winter is often neither practical nor environmentally sound, as it exposes sensitive vegetation under the snowpack to the elements again.
The easiest solution is to carry dog poop bags and pack out your waste (and the waste of any pets). Purpose-built Waste Alleviation Bags (“WAG bags”) are another option and are sometimes necessary under certain permit guidance. I prefer the doggy bag approach coupled with a cheap screw-top plastic container and sawdust (oatmeal works too, in a pinch).
Remember, it’s winter: things freeze, and frozen things do not smell as strongly.
Related: Backpacking Essential Accessories
Get out there!
Growing up in Ontario, we had endless flat fields of white gold to access on snowshoes. Over the years, friends and I have pulled sleds out into the backcountry that were loaded with fresh bread, produce, cheese, meat, a small keg of beer, and even a cast iron stove. We’ve built small bonfires on the open tundra. We’ve gazed up towards a sky so brilliantly lit by starlight and the dancing aurora that the ice crystals on the snowy fields shimmered. Winter is a magical time where your surroundings, for a time, become timeless.
With these tips, you have what you need to eat, drink, sleep, and be merry while camping in winter. We hope this guide helps you enjoy the outdoors year-round!


