Chelan Lakeshore Trail Hiking & Backpacking Guide
With a maximum elevation of 1,700’, the Chelan Lakeshore Trail is an excellent option for your first backpacking trip of the season
August 26th, 2021
Update as of September 15, 2024: Please check with the Forest Service to verify if the trail is open after the 2024 Pioneer fire.
With its lower elevations, the Chelan Lakeshore Trail makes for an excellent first trip of the season where you won’t run into snow. With access to the trailhead only by ferry, you can decide to start the trail at various points, making it shorter or longer. The Chelan Lakeshore Trail is beginner-friendly and ends at one of the most remote towns in the United States where you can get your “glamping” on.
Distance: 18 miles one way from Prince Creek Ferry Terminal to Stehekin
Days: 2-4 days
Elevation gain: 4,030 ft
Highest point: 1,700’ (518 meters)
Lowest point: 1,100’ (335 meters)
Best season: Spring (as early as April) Summer and Fall
Permits: None
Difficulty: Easy to Moderate
We participate in affiliate programs and may receive a commission on qualifying purchases. Learn more.

The Chelan Lakeshore Trail is a unique trail that leads to the town of Stehekin, only accessible by foot or ferry. Photo courtesy Gianna Starble.
background
Over ten thousand years ago, before Washington state was even a concept, a valley glacier branching from the heart of the north Cascade Mountains dug its way across the earth until it kissed the Columbia River- leaving in its wake a long, narrow, and deep cut resembling a writhing snake. Before white settlers rolled through, the Chelan river, lake, and surrounding Cascade mountains were and continue to be home to the Chelan, an Interior Salish people speaking the Wenatchi dialect.
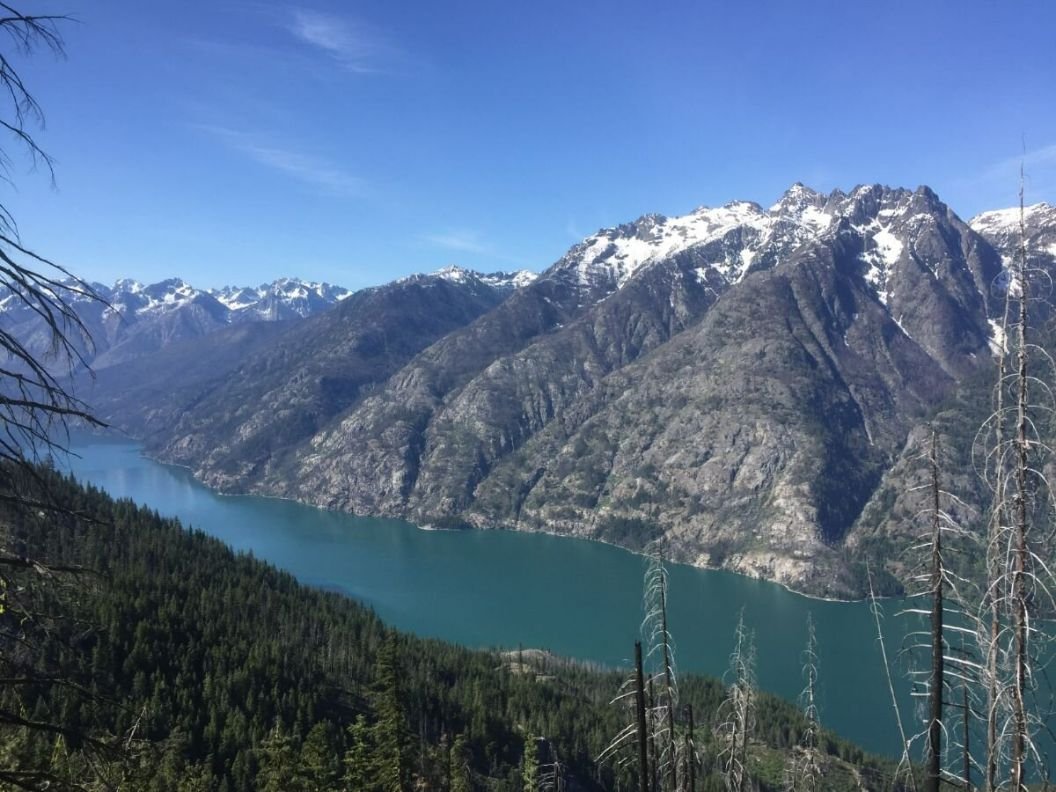
Today, it is known as Lake Chelan. Stretching 50 miles southeast to the northwest, its widest point is no more than 2 miles. Despite its thin width, the deepest point of the lake is just shy of 1,500 feet, making it the deepest lake in Washington and the third deepest in America. The Chelan Lakeshore Trail takes you along the curves of Lake Chelan, with undeniably striking views of the North Cascade region that stand like towering guardians above the water.
The trail ends in Stehekin, a remote town with about 75 year-round residents. Not only are there amenities and re-supply options here, but many fun activities for visitors to enjoy (a little glamping anyone?). Catch the Lady of the Lake Ferry from downtown Chelan or Field’s Point past Chelan State Park. You’ll be dropped off at one of two starts: at either Prince Creek (the full 18 miles to Stehekin) or Moore Pointe (only 7.4 miles from Stehekin).
Quick Facts
The Chelan Lakeshore Trail skirts along Chelan Lake, the third deepest lake in America.
The Chelan Lakeshore Trail is on the lands of the Chelan people, members of the Confederated Tribes of the Colville Reservation, a sovereign nation that currently includes over 9,000 descendents of 12 tribes. Learn more about their past, present, and future, including on issues of land rights, here.
Access to the trailhead is only by ferry.
The trail goes through the Lake Chelan and Sawtooth Wilderness and takes you to the Lake Chelan National Recreation Area, a gateway to North Cascades National Park!
The trail ends in Stehekin, a PCT trail town, only accessible by ferry or on foot! Make sure to bring cash, as certain businesses only do cash transactions.

A view of the North Cascade mountains from an overlook above Stehekin. Photo courtesy Gianna Starble.
Highlights
There’s more than one option
With multiple trailheads to start from, you could choose to hike as little as 7 miles or 36! It truly can be catered to what you want to do.
Views of the lake and mountains at all times
The first time I hiked this trail, I felt like I was in the Alps given how dramatic the Chelan mountains were against the glimmering water.
Ending in Stehekin, the ultimate trail town and a true hiker favorite!
You can be indulgent and get a meal from the lodge while staying at one of the campgrounds, or buy some beer from the general store to take with you by the water. Aside from the restaurant and general store, you can also rent bikes (a fun rest day activity), visit the organic farm, and treat yourself to a sweet or savory treat from the famous Stehekin Bakery. It’s highly recommended that you schedule a full day to enjoy this gem of a town nestled in the Cascades.
Access to other trails, like the PCT!
Once in Stehekin, there are many other potential day trips or overnight backpacking. For instance, you could hop along the Pacific Crest Trail and do an overnight. Just be aware that you will need a permit for any backpacking in the North Cascades National Recreation Area. This can be obtained at the ranger station and is given on a first come first serve basis. Currently, they are not doing backcountry reservations in advance.
Challenges
Parking Logistics
Figuring out parking at the boat launch and working with the ferry schedule requires some advance planning. This trip takes more than just spur-of-the-moment initiative. You have to coordinate ahead of time to figure out the ferry logistics.
Ferry tickets
For those of you who are balling on a budget and try to spend as little money as possible when going to recreate (we get it, everything else in life is so expensive!) this might be a deciding factor. One-way ticket costs for the ferry are $25. If you want to take the Express ferry back, that’s $43 one-way. Then there’s the fee for leaving your car parked at the ferry terminal: $7 for one night, $30 for 5-7 days. Also once you arrive in Stehekin, there’s no free camping (since this is technically a part of the North Cascades National Park). With that in mind, maybe this trip is one you save up for or take as a special outing to celebrate a birthday, anniversary, or another occasion.
Rattlesnakes and Ticks
These are pretty standard critters to be aware of when going outside but still warrants mentioning here. Depending on the year and season, this trail is known to be a hot spot for rattlesnakes. The Western Rattlesnake that is home to this area is known to be less aggressive than others. And ticks, well...just do the standard tick check before getting into your tent!

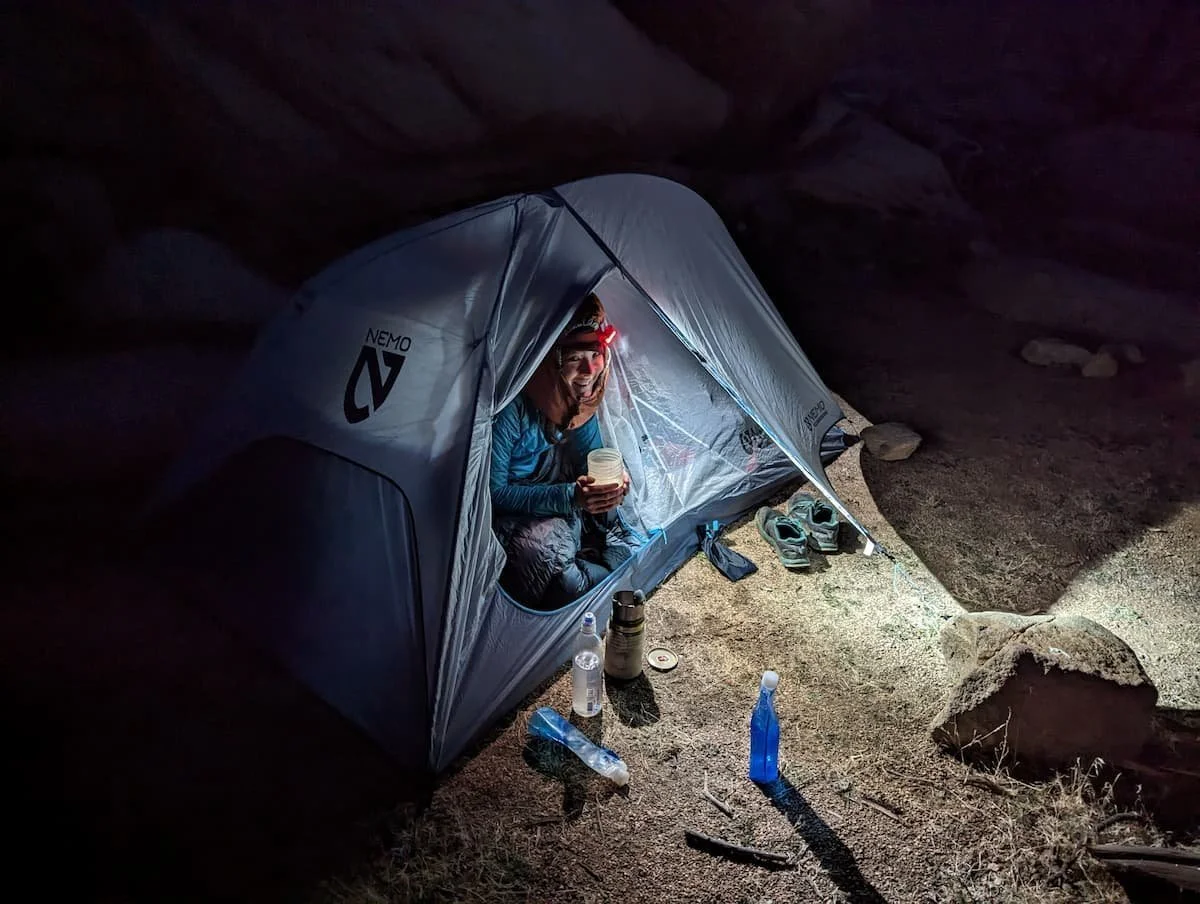
Hikers may encounter snow early in the hiking season. Photo courtesy Gianna Starble.
Best Season
The best season for hiking the Chelan Lakeshore Trail is spring, summer, and fall.
Many hikers and backpackers enjoy the Chelan Lakeshore trail in the Spring, due to its low elevation. This makes it one of the first feasible backpacking trips you can do without running into snow! The other added benefit to spring is the wildflowers. In this part of central Washington, you’ll see tons of Balsam Root, Lupine, and Indian Paintbrush to name a few.
While summer is a good option, just be aware that due to low elevation it can be hot, highs in the 80’s. There are stretches of the trail with little shade cover, so if you don’t do well with heat, maybe consider visiting in Spring or Fall. With that being said, there’s nothing like a hot hike to pepper you up to hop into a glacial-fed lake!
Hiking in the fall provides cooler temperatures and a preview of the changing colors of the larch, vine maple, and aspen trees.

The trailhead in the Stehekin Valley. Photo courtesy Gianna Starble.
Difficulty and Skills
Navigation
Very straightforward. The trail is clearly marked with lots of signs along the way.
Rough Terrain/Scrambling/Rock Climbing
There is no scrambling or treacherous terrain along the Lakeshore Trail, although once you get to the end of the hike in Stehekin, you can seek out other trails with more technical skills required.
Elevation Gain
4,030 ft Gain
permits
There are no permits needed for hiking the Chelan Lakeshore Trail. However, you do need to make reservations for camping in the Stehekin Valley, since you’re in the National Recreation area. Campsite reservations can be made through www.recreation.gov.
Any overnight trips you plan to take outside of the town of Stehekin within the North Cascades National Park Service complex require a permit to do so. If you have the time to go into the backcountry while you’re in Stehekin Valley, you’ll be rewarded with gorgeous scenery in the heart of the North Cascades! Currently, permits are only acquired in person at the Stehekin Ranger Station on a first-come-first-serve basis.

Moore Point Campground is right on Lake Chelan. Photo courtesy Gianna Starble.
Route Summary
Day 1: Starting at Prince Creek
For those wanting to do the full 18 miles, you’ll exit the ferry at the Prince Creek dock. Do a quick check to make sure you have all your things before getting off!
While you could stay at the Prince Creek Campground, you’ll most likely be dropped off by the ferry at 11a.m., giving you an ample amount of time for hiking. This first section of trail on Hunts Bluff is fairly exposed, so make sure to lather up on sunscreen before embarking!
About a quarter of a mile in, you’ll arrive at the junction for the Lakeshore Trail and the Prince Creek Trail. Follow signs for the Lakeshore Trail through the Lake Chelan Sawtooth Wilderness.
You’ll pass several creeks before reaching Moore’s Point such as Rattlesnake, Rex, Pioneer, and Cascade Creek. Any of these make a great stopping point to eat lunch and refill water. These are all seasonal streams, something to consider when hiking later in the season.
Meadow Creek Shelter - Option 1 for camping 7.6 miles from Prince Creek
7.6 miles after Prince Creek is the Meadow Creek Shelter Campground with toilets, fire grates, and picnic tables, making it a great option for a first-night destination.
Camp at Moore Point (or start your backpacking trip here!) - Option 2 for camping 10.6 miles from Prince Creek
If you’re still energized and have enough daylight, consider hiking an extra 3 miles to Moore Point Campground. There are the same camp amenities here and lots of great spots to access the lake for a rinse at the end of the day.
If you’re not wanting to hike the full 18 miles to Stehekin, Moore Point is a great place to start! Backpackers have the option to exit the ferry at Moore point and hike the remaining 7.4 miles into Stehekin.
Day 2: Arrive in Stehekin
On your second day, take your time absorbing the rest of the beautiful hiking trail leading into Stehekin! Make sure to make your reservations ahead of time for camping at www.recreation.gov
Maps and Guidebooks
Gaia
The Gaia GPS app is a great resource for all trails! You can download maps of the hiking trail broken up into the different sections from portal to portal as well as GPX lines of the trail, campsite, and water locations.
Maps
While you could totally do this trail without a map (since the trail is so well marked and there will likely be a decent amount of Lakeshore Trail hikers going the same way as you), we always recommend carrying a paper map!
You can acquire maps that cover the Chelan Lakeshore trail by stopping at either Wenatchee, Entiat, or Chelan Forest Service Ranger Stations in downtown Chelan. You could also purchase our favorite map, the Green Trails North Cascades Lake Chelan, at REI.

Riding the Lady of the Lake ferry can be a fun experience! Photo courtesy Gianna Starble.
Getting There
This can be the tricky part, but with the right information (listed below), you can get to the trailhead with ease.
Book your Lady of the Lake tickets in advance!
One way ticket - $25
One way “express” ticket - $43
This is super important! You don’t want to arrive at the ferry without having booked your tickets. You can view the schedule and the rates by visiting The Lady of the Lake website.
You’ll need two tickets total, since the trips are sold as one-way tickets instead of round trips. You can also opt to take the “Lady Express” on your ride back, which has no stops.
When you purchase both tickets online at the same time, you also receive a discount!
Driving to the Field’s Point
You’ll drive to the Field’s Point Dock to climb aboard the Lady of the Lake ferry. If you’re coming from the West, you’ll most likely take highway 97 to WA-971 N. You’ll be able to pay for overnight parking at the kiosk where they also sell ferry tickets.
Driving to the downtown Chelan
Alternately, you can get to the downtown Lake Chelan ferry dock. Take highway 97 to WA0971 N. Take the US-97 Alt N exit toward Entiat/Chelan.
Riding the ferry!
The fun part! As of 2020, the Lady of the Lake requires all their passengers to wear masks (unless they have a health condition). You can see their website for more information about Covid safety precautions.
Depending on where you choose to camp on your first night, you’ll want to get off at Prince Creek or Moore Point. The boat docks at Prince Creek at 11 a.m; to be dropped off at Moore Point, you must make this request with the ferry staff when you board.
If flying into Washington...
There are a couple of options:
1. Fly into the Wenatchee, WA Airport, otherwise known as the Pangborn Memorial Airport (EAT). All flights into Wenatchee have a layover in Seattle (it’s a small airport, so the flight to and from Seattle is the only flight they offer!) From there, you’re able to rent a car through either Hertz or Enterprise. There are also two shuttle services in the area that would be able to pick you up and take you to Field’s Point; Reqwest Tours and Transport and Leavenworth Shuttle and Taxi.
2. Fly into Seattle. Depending on where you’re flying in from, often flights are cheaper flying into SeaTac versus Wenatchee. There are a plethora of car rental options. Instead of renting a car in Seattle, you could catch the Wenatchee Valley Shuttle from Seatac to Wenatchee and then rent a car from there. While the Wenatchee area does have an amazing public transportation system, unfortunately it doesn’t go to Field’s Point! So alternative transportation arrangements have to be made to get there.
Trailheads
Prince Creek
This is where you’ll start your hike! The Prince Creek Trail leading to the Lakeshore Trailhead is a hike all on it’s own. Some reports online say it is hard to follow and not well-maintained (you may want to have the Gaia GPS app with the maps downloaded for this section). Make sure to switch to the Lakeshore trail after the first junction!
Moore Point
The other portal option where you can start your hike! This sends you right to the Lakeshore Trail.

You can get Stehekin wine at the Stehekin Lodge! Photo courtesy Gianna Starble.
Post Trip Favorite Restaurant
North Cascades Lodge at Stehekin
Your standard American grill fare and some fancy entree items too! A perfect place to celebrate your first night arriving in Stehekin.
Stehekin Pastry Company
An absolute MUST. Don’t like sweets? Oh, they have so much more than just cupcakes and cookies! Their quiche and pizza are out of this world. Prepare to be overwhelmed with the number of delicious options.
The Garden
Even if you don’t buy any honey, maple syrup, or goat cheese from the farm, it is a treat to the senses to walk through the rows of flowers and vegetables. Of course, there are goats to pet, too. And then there’s Karl, a salt-of-the-earth kind of guy who fell in love with the Stehekin River Valley after hiking the PCT in 1975. You’ll know Karl by his calloused bare feet and his contagious smile that he’ll greet you with as he asks if you’d like to sample some goat cheese. If you’re lucky, he might even tell you a story.
Resupply
If you want/need to resupply when you’re in Stehekin, basic food items can be found at the general store.
Water Planning
Depending on when you go, water should be very easy to access. With 10 seasonal springs that flow into the lake over the course of the 18 mile stretch to Stehekin, finding water to filter should be no problem (gotta love Washington!).
Depending on when you go, water should be fairly easy to access with a wealth of seasonal springs that flow into the lake.
Here’s a list of seasonal streams along the trail:
Rattlesnake creek
Rex Creek
Pioneer Creek
Cascade Creek
Meadow Creek
Fish Creek
Hunts Creek
Fick Creek
And of course, there’s always the lake.
If you are curious about water availability, contact the Chelan Ranger Station for current water reports!
Be sure to filter or purify any water source before drinking. See our Best Water Filters and Water Purifiers for Backpacking guide for our recommendations.
Bears and Food Storage
For campsites before Stehekin, you provide your own food storage. A bear canister or Ursack is appropriate. Once camping in Stehekin, a food storage box is provided at every campsite.
See REI’s guide to How to Choose and How to Use Bear Canisters for more on weight, volume, and ease-of-use considerations.

The town of Stehekin has some quirky fun features, like this Bike Through gumball machine! When you finish your hike, we highly recommend renting bikes and exploring the town! Photo courtesy Gianna Starble.
Side Trips
Here are a few suggestions for side trips, although there are so many potential trails out of Stehekin River Valley! We recommend looking at resources on the North Cascades National Park website for more ideas and info.
Purple Creek Trail
This is a fun day hike! Depending on what time of year you go, you can take it 8 miles all the way up to Lake Juanita where you get spectacular views of Lake Chelan area and surrounding mountains.
Rainbow Falls Trail
A great day hike; it’s only 1/4 mile long to a 312-foot tall waterfall! You can walk or ride bikes to the Rainbow Falls trail once you’re in Stehekin and get some excellent waterfall action!
Stehekin School House
Have you ever thought about what it would be like to go to school in a remote mountain town in the 1920s? The original Stehekin schoolhouse is like a time portal where you can just feel the history oozing out of the log walls.
Buckner Orchard
This short loop trail to Buckner Orchard is great for history buffs. The 1/4 mile trail is just after the bus stop for the Stehekin School House.
Pacific Crest National Scenic Trail
Why not hop on the PCT? Even if only for a short while! To access the portal from Stehekin, there’s a shuttle that goes to and from the Lodge at Stehekin. A one-way ticket is $10 cash only.
Variations
Moore Point to Stehekin
This option is only 7.4 miles long! A great choice for a beginning backpacker.
Do a yo-yo and hike back from Stehekin to Prince Creek!
If you’re really wanting to get in the miles, you can arrange your timing with the ferry schedule to hike back from Stehekin to be picked up at Prince Creek for your return, for a total of 36 miles.
Gear Rental
Renting Bikes
A super fun rest day activity. Stroll a quarter mile up from the Lodge and you’ll find Discovery Bike Rentals. For $5 an hour, it makes a delightful and affordable way to get around the small town of Stehekin.
GEAR LIST
| GEAR | PRODUCT |
|---|---|
| Tent | MSR Hubba Hubba 2 Tent |
| Backpack | Superior Wilderness Designs 40 |
| Sleeping bag | Montbell Seamless Down Hugger 800 #1 |
| Sleeping pad | Therm-a-Rest NeoAir XLite Sleeping Pad |
| Stove | MSR PocketRocket Stove |

The Stehekin bakery is a worthy way to celebrate the end of your backpacking trip. Photo courtesy Gianna Starble.
TENT
We used the MSR Hubba Hubba. Not only is the Hubba Hubba a lightweight tent, but it’s also incredibly spacious for a two-person tent with roomy vestibules. For lighter options, check out the Best Ultralight Tents guide.
BACKPACK
I used a Superior Wilderness Designs Long Haul 40L, which is my go-to backpack for all trips currently, big or small! It’s a lightweight backpack without feeling like you lose the sturdy support from a more industrious pack. I also love that the material that the pack is made from is waterproof! I’ve never had any issues with items getting wet in my pack. You can learn more about how to choose the right size and style of backpacking backpack for you in our How to Choose a Backpacking Backpack guide. For a full review of the current models, take a look at the Best Lightweight Packs story.
SLEEPING BAG
The Montbell Down Hugger (15-degree) is the one and only sleeping bag that I use. I sleep cold, so being super warm and cozy is a must for me. Even when summer camping, I love the full-on fluff factor of my Montbell sleeping bag that I know will keep me warm. The Montbell Down Hugger is especially great for side sleepers, winning an award in our Best Backpacking Sleeping Bags guide.
SLEEPING PAD
I used the Therm-a-Rest NeoAir XLite sleeping pad. I always sleep so well on this pad! I can’t imagine using anything else. The high R-value (4.5) also helps for a warmer sleeping experience. It’s our overall winner in our Best Sleeping Pads guide.
COOKING SYSTEM
We used the MSR PocketRocket, which is a classic model. We love it for its simplicity and no-fuss design. It’s been the long-time overall winner in in our Best Backpacking Stoves guide, only recently getting edged out by the newer model, the MSR PocketRocket Deluxe.
WATER FILTER
We used the Sawyer Squeeze as our main source of water filtration. The Sawyer Squeeze has never failed me when filtering water. Paired with my 2 liter Platypus water bladder, I attach the Squeeze and fill my water bottles from there. Having a bladder that remains “dirty” makes gathering the water from a creek or stream super convenient. It’s the overall winner in our Best Backpacking Water Filters and Purifiers guide.
What to wear
SHOES OR BOOTS
This trail should be totally doable in trail runners. I rocked the Hoka Stinsons, which are so cushy and roomy they make long hikes and trail runs much easier on my feet. Treeline did a review of both Men’s and Women’s Trail Running Shoes if you want to find the right shoe for you.
Many backpackers may choose boots for this trip. If you’d feel more comfortable in boots, check out our Best Hiking Boots story.
A nice footwear compromise for this trip could be hiking shoes, which are designed to feel like a trail runner but have stability more like a boot. See our Best Hiking Shoes story for footwear that has more durability and stability than trail runners.
WHAT CLOTHES TO PACK
For clothing we brought:
1 athletic tee-shirt. See our Best Men’s Hiking Shirts and Best Women’s Hiking Shirts guides for recommendations.
1 pair of athletic shorts. See our Best Shorts for Thru-hiking or Best Women’s Trail Running Shorts guide for our recommendations.
1 Patagonia down jacket. For more recommendations, see our Best Down Jackets guide.
1 thermal top layer. See our Best Baselayers guide for our recommendations.
1 thermal bottom layer·
2 pairs of hiking underwear. Find the best Women’s or Men’s Hiking Underwear here.
2 pairs of Darn Tough merino hiking socks, always a winner in our Best Hiking Socks guides.
1 baseball cap
1 beanie