Best Dehydrators for Backpacking Meals of 2026
Dehydrators for Backpacking DINNERS, DRIED Fruit, and Jerky for Hiking
February 19th, 2026
Home > Gear Reviews > Electronics
A good food dehydrator opens up a lot of possibilities, from making lightweight backpacking meals to preserving fruit, vegetables, and jerky at home. The best food dehydrators dry evenly, hold consistent temperatures, and are easy to use—so you can focus on prepping food rather than babysitting the machine. Whether you’re building meals for long trips or reducing food waste in everyday life, reliability matters.
To put this guide together, we compared a range of popular food dehydrators designed for both home kitchens and outdoor-focused meal prep. We looked at how each model performs with common dehydrating tasks like drying fruit, vegetables, herbs, and proteins, paying close attention to consistency across trays and ease of setup.
Our evaluation focused on temperature control and accuracy, airflow design, drying efficiency, capacity, noise level, and overall ease of use. We also considered footprint and storage, expandability, and how intuitive the controls are for beginners, along with long-term durability for people who dehydrate food regularly.
Top Pick: The Nesco Gardenmaster Digital Pro earns our Best Overall award. It stood out for its consistent airflow, reliable temperature control, generous capacity, and durable build—making it a dependable choice for anyone serious about dehydrating food for backpacking, camping, or everyday use.
Prefer pre-bought dehydrated backpacking food or want to see what flavors are possible? Check out our Best Dehydrated and Freeze Dried Backpacking Meals guide.
We create reader-supported, objective gear reviews independently selected by our editors. This story may contain affiliate links, which help fund our website. When you click on the links to purchase gear, we may get a commission, without costing you an extra cent. Thank you for supporting our work and mission of outdoor coverage for every body! Learn more.
Comparison Table
| FOOD DEHYDRATOR | TREELINE AWARD | STYLE | WATTS | FAN? | TIMER? | ELEMENT LOCATION | TEMP RANGE (F) | SHAPE | SIZE (SQ. FT) | TRAYS | MAX TRAYS |
|---|---|---|---|---|---|---|---|---|---|---|---|
| Nesco FD-1040 Gardenmaster Pro | Best Overall Read why |
Stacking | 1000 | Y | Y | Top | 90-160 | Circle | 5.2 | 4 | 20 |
| Excalibur 3926T | Best Upgrade Read why |
Drawer | 600 | Y | Y | Back | 105-165 | Square | 15 | 9 | n/a |
| Nesco FD-75 Snackmaster Pro | Best Budget Read why |
Stacking | 600 | Y | N | Top | 95-160 | Circle | 5 | 5 | 12 |
| Nesco FD-1018A Gardenmaster | Stacking | 1000 | Y | N | Top | 95-160 | Circle | 5 | 8 | 30 | |
| Aroma Housewares Professional | Drawer | 400 | Y | N | Top | 95-155 | Square | 5.5 | 6 | n/a |
* See our Deals Page for discounts and sales on products that win our awards.
The Best Food Dehydrators
Best Food Dehydrator For Most Backpackers:
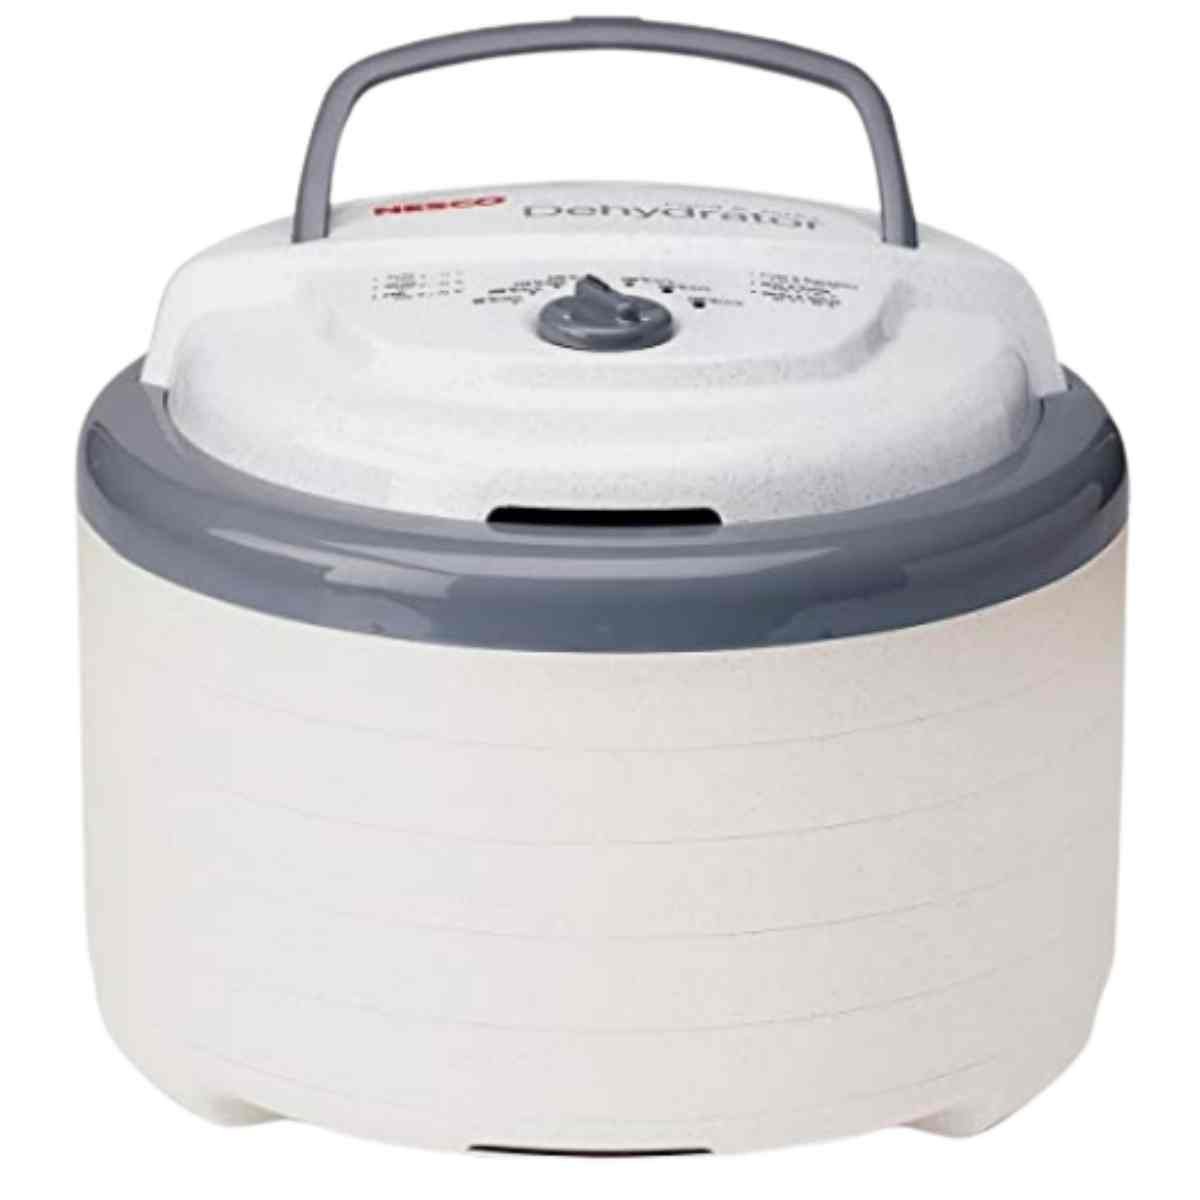
Nesco FD-1040 Gardenmaster Digital Pro

Style: Stacking
Watts: 1,000
Temperature range: 90-160 F
Size (sq. feet): 5.2 square feet
Trays: 4-20
What we liked: larger motor dries quickly, adjustable temperature range can do everything from cheese to meat, airflow, dishwasher safe
What we didn’t like: loud, only comes with one screen and one fruit-roll up tray
The Nesco FD-1040 Gardenmaster Digital Pro models have been on the market for years and have consistently been considered the best dehydrator by multiple reviewers. We think the Gardenmaster Pro FD-1040 is the best dehydrator for most backpackers who want to make their own food. This Made in the US dehydrator machine excels in balancing features and middle price point.
The Gardenmaster’s vertically-stacked trays can be expanded up to 20 trays—more than double the capacity of most dehydrators on the market. The ability to handle that many trays at once is due to 1,000 watts of drying power for optimal air flow.
The only dehydrator we noted that has a larger motor is the STX International Dehydra 1200, a dehydrator that costs twice as much as the Gardenmaster. While 20 trays is probably overkill for most backpackers, we like the ability to expand our tray number when planning food for a long trip or a big group. Also, a larger motor dries even small amounts of food more quickly, saving you time and money (on your power bill).
Nesco FD-1040 Gardenmaster Digital Pro


-
The Gardenmaster’s wide, adjustable temperature range of 90 - 160F allows users to dehydrate a variety of foods. The low end of 90F allows you to dehydrate shredded cheese without melting or changing flavor by cooking it. And 150F+ protects against bacterial growth when drying up some taco meat.
Both the experts we interviewed, backpackers Melissa Erkel and Whitney LaRuffa, agreed that an adjustable thermostat with a wide temperature range is especially important for backpackers due to the variety of foods they may want to dehydrate. This is especially true for meats and other proteins, which require a higher temperature.
Related: Best Protein Powder
-
We liked that with the Nesco dehydrator, they don’t have to fuss over rotating trays to allow for even drying. Nesco‘s proprietary airflow system does the job for you by circulating the air evenly throughout. Having owned other brands of dehydrators in the past that dry the food closest to the fan quicker, I can appreciate the saved effort of good airflow.
-
We also like that the Gardenmaster has dishwasher safe trays. It makes it easy to clean up sticky foods that backpackers might make like sauces or fruit leather (though that’s easier done with a fruit roll-up tray than the trays that come with the dehydrator). Our research showed that not all dehydrators’ trays can be put in the dishwasher.
-
One major perk of the Gardenmaster is the digital timer, which is usually only found on more expensive models of dehydrators. This feature allows you to set the timer and go to work or bed and not worry about over-drying your food.
Erkel and LaRuffa thought this was a nice feature, but consider it non-essential because they often dry several things at a time, necessitating checking on them every couple of hours anyway.
Nesco also addressed a common complaint of dehydrator users and moved the new Gardenmaster’s heating element/fan to the top. That means you won’t burn out the fan’s motor when a little salsa slips between the cracks.
All the dehydrators with fans located at the bottom have customer complaints about motor failure when food falls or drips into it.
-
I’ve also had a personal experience with a dehydrator heating element failing from dripped food. For this reason, we disqualified any dehydrator models that didn't place the motor on the top or back of the device. A heating element on the top also makes cleanup easier, having a cleanable pan at the bottom instead of a non-submersible motor.
-
The Gardenmaster comes with one screen (for dehydrating smaller items) and one no-spill fruit roll sheet. In our experience, it is worth purchasing a couple more of each for dehydrating chopped veggies or sauces.
Even though it is expandable, the Gardenmaster only comes with four trays out of the box (with a total drying area of 5.2 square feet).
In our experience, four trays would not even be enough to do a long weekend backpack for two people in one dehydrating session. This means that even though the Gardenmaster’s large motor can accommodate dehydrating a huge batch, you’ll have to buy the extra trays.
So while the 4-tray version of the Gardenmaster is a deal compared to our upgrade pick, the Excalibur, if you want all 20 trays, their prices start to look similar. But, as we said above, 20 trays are likely more than you’ll need unless you’re making meals for the entire scout troop.
Related: Best Water Filters and Purifiers
-
Due to its large fan motor, some reviewers complain that the Gardenmaster is loud. We suggest dehydrating your food in a laundry room or far corner where the noise won’t bother you. But if you live in a smaller space, like an apartment, you may want to consider a quieter model.
Best Upgrade Food Dehydrator: Excalibur 3926T

Style: Drawer
Watts: 600 W
Temperature range: 105-165 F
Size (sq. feet): square feet
Trays: 1-9
What we liked: 5 year warranty, durability, large capacity, comes with trays, drawer system means can check on each tray separately, ease of use
What we didn’t like: smaller motor, price
The Excalibur 3926T is an excellent dehydrator for amateur chefs, people who have graduated to the next level of dehydrating, or those who know they want a well-made unit that promises to last a long time. If you think you will really get into dehydrating or you want to upgrade your current model, we think it is worth the extra money to invest in this Made in the US dehydrator that sports a ten-year warranty.
Foodal.com rated the Excalibur 3926T the “Best dehydrator on the market” and it earns a rating of 4.5/5 stars on both Google and Amazon with 5-star ratings making up 82% of the reviews.
But it’s also almost twice the price of our top pick, the Nesco FD-1040 Gardenmaster Digital Pro (review above), making it a great choice only if you’re willing to spend more for extra features.
The Excalibur 3926T is among the most beloved dehydrators on the market and is our Upgrade Pick. It’s a favorite due to its large list of features, which really allow you to dial in your timing and temperature setting, and make checking on food simple.
Excalibur 3926T


-
Among the features of the Excalibur 3926T are a rear-mounted heating element with nine drawer-style trays. This configuration makes it the easiest of our three picks to check on all four courses while they are drying. Since this is something that you will need to do with any dehydrator, it’s nice that the Excalibur makes this process easier.
-
Having the heating element in the rear means that errant drips and crumbs will not fall into it, causing the motor to burn out. This is one of the more common causes of dehydrator failure.
-
The maximum temperature is 165F, which is great for inhibiting bacterial growth while drying meat jerky.
-
Reviewers frequently comment about the Excalibur dehydrator’s well-made trays, which have a tighter mesh than most dehydrators. This means you don’t have to buy special liners or add parchment (which reduces airflow) to keep your mushrooms out of your chocolate mousse. They also like the Excalibur’s quiet motor, meaning you can have it out on the counter without it being a distraction.
-
I agree with reviewers and really like that Excalibur plastic trays are square and lack the center hole found in other dehydrator models we considered. Food dehydrators are all bulky. The Excalibur’s design maximizes the drying area while minimizing counter and closet space.
-
The stand-out feature on the Excalibur is that it has the industry’s longest warranty: 5 years. This is in stark contrast to the one-year industry norm.
-
While nine trays is a smaller capacity than the other dehydrators we considered, we don’t see it as a downside on the Excalibur 3926T. Why? Because nine trays is a lot of food. Chances are that when you are drying nine trays worth of food, it is several different kinds of meals. Because flavors blend when dehydrating, we would rather have fewer trays in our dehydrators as to only dehydrate one type of food at once. This keeps our macaroni from tasting like apples.
We were disappointed that for the extra price, the Excalibur 3926T does not come with any fruit roll trays. They do sell silicone mats that can be used to make your own fruit leather, but some reviewers, such as Self Reliant School, preferred the Nesco accessory trays to the ones sold by Excalibur.
Because the Nesco’s accessory trays have a lip around the edge, they can accommodate liquids like salsa and spaghetti sauce better than Excalibur’s accessory trays.
But we don’t think the accessory trays should sway your decision. Self Reliant School noted that the Nesco fruit roll trays do fit in the Excalibur.
-
Although the Excalibur 3926T has many great design features, it does have some drawbacks. First, the difference in price between this model and the Gardenmaster is enough to buy yourself a new backpacking backpack. Prospective buyers will have to consider how often they will be using it and how much money they will save in the long run making their own meals.
-
We were disappointed that for the additional price, the Excalibur 3926T uses a 600W motor compared to the Gardenmaster’s 1000W motor. Lower-powered motors can draw out the drying process. However, many reviewers thought the Excalibur was efficient and had decent air flow, so this was not enough to take it off of our short list.
-
Although “drawer-style” models like the Excalibur 3926T increase ease of use, you can’t increase the number of trays to accommodate larger projects. If you want more drying space, you will have to buy a whole new dehydrator.
-
The Excalibur 3926T comes in three variants, which only differ in the finish. The function of these units is identical, but the prices vary considerably:
Excalibur 3926TB, where the B means black
Excalibur 3926TW, where the W means white (this model has been discontinued, but you’ll still see its name show up on some Best Of lists)atures and a slick design. If you think you will really get into dehydrating or you want to upgrade your current model, we think our Upgrade Pick is worth the extra money to invest in this Made in the US dehydrator that sports a ten-year warranty.
-
The Excalibur 3926T is a great dehydrator with nice features and a slick design. If youthink you will really get into dehydrating or you want to upgrade your current model,we think our Upgrade Pick is worth the extra money to invest in this Made in the US dehydrator that sports a ten-year warranty.
Best Budget Food Dehydrator: Nesco FD-75A Snackmaster Pro
Style: Stacking
Watts: 600 W
Temperature range: 95-160 F
What we liked: value for price, comes with features found in more expensive dehydrators like thermostat, comes with two mesh screens and two fruit roll up trays
What we didn’t like: hard to peek at trays mid-dehydration, no digital timer, fan isn’t as powerful
The Nesco FD-75A Snackmaster Pro is a solid budget pick that has all the must-have features and none of the bells and whistles that add to the price of the other dehydrators.
This dehydrator machine stands out as one of the least expensive dehydrators on the market that has both a top heating element, a maximum temperature of 160F, and an ample 600W motor. At only about $90, you’ll make back your investment after a couple of trips.
Despite being the budget pick, the Snackmaster Pro has all the features that our experts agreed were crucial. Among these, it has a wide temperature range: from 95 to 160 degrees.
While there are budget dehydrators on the market that don’t have an adjustable thermostat (like the Presto Dehydro 06300), after ten years working as a food health inspector, I think that a thermostat is important for both the quality and safety of the food.
Nesco FD-75A Snackmaster Pro

-
We like that the Snackmaster can be set below 100 degrees to dehydrate things like hummus and herbs without cooking them and changing their flavor. The Snackmaster’s wide temperature range is within 5 degrees of our other, more expensive picks. Temperatures above 150 are important when drying meats to prevent bacterial growth.
-
As if this budget dehydrator didn’t offer enough value, the Nesco Snackmaster Pro comes with two mesh screens and two fruit roll sheets—more than both of our other winners
In my experience, both of these accessories are key for adding to the variety of foods you can dehydrate, and you will want at least two of each for most jobs.
-
One of the most common complaints about dehydrators is motor failure due to crumbs or liquids falling into the fan motor. In other dehydrators of this price, the fan is usually on the bottom, leaving it vulnerable.
But like all our winners, the Snackmaster’s heating element and fan are mounted out of harm's way (in this case, stacked on top of the food trays).
-
The bottom of the dehydrator, which all of the dehydrating trays stack on, is a removable drip tray. With no moving parts or electronics, this bottom piece is easily cleanable.
-
The only downside of the Nesco FD-75A Snackmaster Pro, as with all units with stacking trays, is that it is harder to peek in on individual trays while it is running than dehydrators with sliding trays like the Excalibur.
The user has to unstack all the trays that are above the one they want to look at. While this isn’t a huge deal for people who use a dehydrator only occasionally, this could get annoying for people dehydrating regularly.
-
Amazon reviewers agree, making this Made in the US dehydrator their #1 best seller with a rating of 4.4/5 stars out of 5 among nearly 2000 reviews.
-
With the Nesco FD-75A Snackmaster Pro, you won’t get a digital timer or the most powerful fan, but you will get a well-made dehydrator capable of drying variety of food with a great range of temperature at a budget price.
Looking for a Jerky Dehydrator?
All of our picks will function well as a jerky dehydrator. Just be sure to get the internal temperature to 160 F to kill bacteria.

Other dehydrators we considered
We identified nine other dehydrator models that looked promising and were highly rated by customers and professional reviewers.
To get to our top 3 models, we stacked the 12 models side-by-side in a comparison table laying out the criteria that we considered important like watts, size, number of trays, and temperature range. We also noted when other professional reviews had positive things to say about a particular model.
Based on that analysis, we eliminated these models from our best dehydrators list because of the following reasons:
Nesco FD-1018 Gardenmaster

Style: Stacking
Watts: 1000
Temperature range: 95-160
Size (sq. feet): square feet
Trays: 8
The Nesco FD-1018 is an older model of the 10-series Nesco FD-1040 Gardenmaster Digital Pro (review above) that we recommend. Although this is a much-beloved dehydrator machine, it lacks the digital thermometer that is found in the FD-1040. We think most people will prefer the digital version, even if it costs a little more.

Style: Drawer
Watts: 400
Temperature range: 95-155
Size (sq. feet): square feet
Trays: 6
The Aroma Housewares Professional dehydrator has neat functionality but has an underpowered motor compared to others we considered.

Style: Drawer
Watts: 1200
Temperature range: 97-165
Size (sq. feet): square feet
Trays: 10
The STX International Dehydra 1200 is made of stainless steel and weighs twice as much as many of the other dehydrators we considered. It’s also almost twice the price. We don't think the premium for stainless steel is worth it.

Style: Stacking
Watts: 700
Temperature range: 95-160
Size (sq. feet): square feet
Trays: 4
The Nesco FD-80 is the square version of the Snackmaster that we recommend as a Budget winner. Although it is more compact than our Budget Pick, it costs more, and reviewers noted that it has minimal additional drying space.

Style: Stacking
Watts: 600
Temperature range: 165-165
Size (sq. feet): square feet
Trays: 4
Although the Presto Dehydro 06300 is the #2 dehydrator on Amazon and is relatively inexpensive, reviewers complain a lot that it doesn’t come with an adjustable thermostat. We think it’s worth paying a little bit more to control your temperature setting reliably.

Style: Drawer
Watts: 400
Temperature range: 95-158
Size (sq. feet): square feet
Trays: 6
Although reviewers found the Samon Silent dehydrator to be (as advertised) quiet, they also complained that it is hard to use and clean.

Treeline Review editor Liz Thomas backpacked the Pacific Northwest Trail eating a mix of dehydrated food topped with fresh vegetables.
what to look for in food dehydrators
When shopping for a food dehydrator, it helps to think about how often you’ll use it, what kinds of food you plan to dehydrate, and how much space you have at home. While most dehydrators work on the same basic principle, the details make a big difference in performance, safety, and long-term satisfaction.
Value
A food dehydrator is an upfront investment, but its value depends on how much you use it. If you regularly make your own backpacking meals, snacks, or jerky, a dehydrator can quickly pay for itself compared to buying pre-made dehydrated or freeze-dried foods. Occasional users may be better served by a simpler or more affordable model, while frequent users will benefit from spending more on durability, capacity, and features.
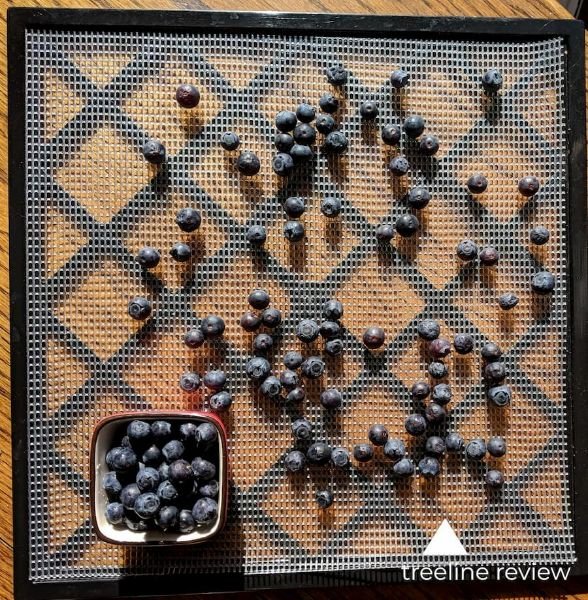
Prepping blueberries for dehydration. Photo by Liz Thomas
Durability and build quality
Dehydrators are designed to run for long periods, often overnight, so durability matters. Look for models with sturdy trays, solid housing, and a reputation for reliable motors. Broken trays are one of the most common failure points, so it’s worth checking whether replacements are easy to find. Longer warranties can also be a good indicator of overall build quality.
Fan placement and airflow
Fan placement has a major impact on even drying and long-term reliability. Dehydrators with rear- or top-mounted fans tend to provide more consistent airflow and reduce the risk of food debris falling into the motor. Bottom-mounted fans are more prone to messes and uneven drying, especially when dehydrating small or crumbly foods.
Temperature range and control
Adjustable temperature control is important, particularly if you plan to dehydrate a wide range of foods. Lower temperatures are ideal for herbs and delicate fruits, while higher temperatures are necessary for food safety when making jerky or dehydrating meals that contain meat. Look for a dehydrator that offers a broad, clearly marked temperature range and a reliable thermostat.
Expandability means the ability to dehydrate more or less trays of food as needed. Photo by Liz Thomas
Tray capacity and expandability
Consider how much food you want to dehydrate at once. Stackable dehydrators allow you to add or remove trays as needed, which is useful if your batch sizes vary. Sliding-tray models usually have a fixed capacity, which can be limiting for larger projects. Keep in mind that expandability also depends on motor strength—more trays require more power to maintain even drying.
Size, shape, and storage
Food dehydrators are bulky by nature, but their shape affects how efficiently they use counter space. Square or rectangular models tend to offer more usable drying area than round designs. If storage space is limited, look for models with nesting trays or a smaller footprint. Stainless steel units are durable and attractive, but they are heavier and usually take up more space.
Timer function
A built-in timer can be convenient, especially for long, single-item batches like jerky. However, it’s not essential for everyone. When dehydrating multiple foods at once—each with different drying times—a timer may be less useful. This is a nice-to-have feature rather than a must-have for most users.
Noise level
Dehydrators run for hours at a time, so noise can matter depending on your living space. While most models aren’t excessively loud, some are noticeably quieter than others. If you live in a small space or plan to run your dehydrator overnight, quieter operation may be worth prioritizing.
Accessories and replacement parts
Accessories like fruit leather trays, mesh screens, and extra racks add versatility. It’s also helpful if replacement parts—especially trays—are easy to find. Dehydrators with widely available accessories make it easier to expand what you can dehydrate over time.
Country of manufacture
For some buyers, where a dehydrator is made is an important consideration. While not a requirement for good performance, models made in the USA or with transparent manufacturing standards may appeal to users who prioritize domestic production or long-term parts availability.
FAQ
-
Most home food dehydrators can handle fruits, vegetables, herbs, mushrooms, cooked grains, jerky, and even full meals like chili or pasta sauce when spread thinly. Foods with higher fat content, such as cheese or fatty meats, are generally not recommended because fat does not dehydrate well and can spoil faster.
-
Some foods benefit from simple pre-treatment. Fruits like apples, bananas, and pears often brown unless treated with lemon juice or ascorbic acid. Vegetables typically dehydrate better after blanching, which helps preserve color, texture, and flavor. Meats should always be properly sliced and, in the case of jerky, seasoned and handled with food safety in mind.
-
Dehydrating time varies widely depending on the food type, thickness, moisture content, and temperature settings. Herbs may take just a few hours, while fruits and vegetables often take 6–12 hours. Full meals or thick cuts of food can take 12–24 hours or longer. Even drying is more important than speed. often run hotter than ideal for dehydration and can be less energy-efficient. Dehydrators are also designed to run safely for long periods without constant monitoring.
-
A food dehydrator is generally better than an oven because it provides consistent low temperatures and proper airflow for even drying. Ovens often run hotter than ideal for dehydration and can be less energy-efficient. Dehydrators are also designed to run safely for long periods without constant monitoring.
-
Most food dehydrators are relatively energy-efficient, typically using between 300 and 1,000 watts depending on size and temperature. Because they run for long periods, total energy use depends more on drying time than wattage, but they still tend to be cheaper to run than an oven.
-
The right size depends on how much food you plan to dehydrate at once. Occasional users or small households may be fine with compact models, while hikers, gardeners, and people who prep large batches of food benefit from larger units with more trays and higher capacity.
-
Yes, adjustable temperature control is important. Different foods require different drying temperatures to preserve nutrients, texture, and safety. Models with a wide temperature range offer more flexibility for dehydrating everything from delicate herbs to jerky.
-
High-quality dehydrators use food-safe, BPA-free plastic trays that are designed to handle long periods of low heat. Stainless steel trays are another durable option and are often preferred for ease of cleaning and long-term durability, though they usually cost more.
-
Properly dehydrated food should be dry throughout with no remaining moisture pockets. Fruits should be leathery but not sticky, vegetables should snap or be very brittle, and jerky should bend and crack slightly without breaking. When in doubt, let food cool before testing, as warm food can feel softer than it actually is.
-
Shelf life depends on the food, how dry it is, and how it’s stored. When properly dehydrated and stored in airtight containers in a cool, dark place, many foods last several months to over a year. Vacuum sealing or refrigeration can extend storage life even further.
-
Yes, food dehydrators are especially useful for backpackers and campers. They allow you to make lightweight, compact, and customized meals that rehydrate easily on the trail. Over time, dehydrating your own meals can also be more cost-effective than buying pre-packaged options.
-
Most modern food dehydrators are designed to run safely for extended periods, including overnight. As long as you’re following manufacturer guidelines and using the dehydrator on a stable, well-ventilated surface, overnight drying is common and expected.
Care and maintenance
Food dehydrators are relatively low-maintenance, but a little care goes a long way toward extending their lifespan and keeping them working efficiently. After each use, remove the trays and wash them with warm, soapy water. Sticky foods like sauces, fruit leather, or jerky marinades are much easier to clean if you soak the trays shortly after use. Some trays are dishwasher-safe, but hand washing is generally gentler and helps prevent warping or cracking over time.
Wipe down the interior and exterior of the dehydrator with a damp cloth as needed, making sure the unit is unplugged and fully cooled first. Pay special attention to the area around the fan and vents—keeping these clear of food particles and grease helps maintain proper airflow and reduces strain on the motor.
Before storing your dehydrator, make sure all parts are completely dry to prevent odors or mold. Stack or store trays flat to avoid bending, and keep the unit in a cool, dry place. With basic cleaning and proper storage, a quality dehydrator should last for many seasons of meal prep and jerky making.

Comparing freeze-dried vs. dehydrated blueberries. Freeze-dried blueberries are (on the left) retain much of the original size and shape of a fresh blueberry. Dehydrated blueberries are on the right. Photo by Liz Thomas
freeze dryer vs dehydrator
In this article, we mention some of the benefits of dehydrating your food for outdoor pursuits. But what about freeze drying? The reason we gloss over freeze-drying is that most backpackers opt not to go that route. It is far more expensive and complex than dehydrating.
Freeze-drying is a process for removing the moisture from foods that involves quickly freezing food in a vacuum, lowering air pressure, and reintroducing heat to get the water vapor out. If you want to read more about the physics of freeze-drying vs. dehydrating, click here.

The author uses a hybrid method of combining pre-bought freeze-dried ingredients with home-dehydrated ingredients to make a complex and rich meal. Photo courtesy Melissa Spencer
Freeze-dried food is, in many ways, superior to dehydrated food. The process results in a food that retains its structure, unlike dehydrating--which causes food to shrink. It better retains its color, shape, and many of its nutrients. More water vapor is removed in the freeze-drying process, so freeze-dried foods can often last longer than dehydrated food. And, freeze-dried food also rehydrates quicker.
The problem is that freeze dryers cost over $2000 (up to $100,000!) to buy. They are also very large, maintenance is extensive and expensive, they are loud, and they create nasty fumes. It is far more cost-effective for a solo or even family of backpackers to buy, pre-made freeze-dried meals from the store than to invest in a freeze-drier.
Related: Best Electrolyte Powder
making a meal from freeze-dried and dehydrated ingredients
Another option, which is what I do, is a hybrid of dehydrating and freeze-drying. I have not had great luck dehydrating certain things, such as cooked potatoes, corn, bell peppers, or sour cream. This method is actually how many freeze-dried meal companies make their dinners—with a combination of affordable dehydrated ingredients and more expensive ingredients that are best freeze dried.
For recipes with that are better served by freeze-dried ingredients, I buy them in bulk online at sites such:
You can also find freeze-dried bulk items like:
Outdoor meal companies that offer single ingredients freeze-dried are:
Karen’s Naturals (fruits and vegetables)
Mountain House (beef, chicken)
Then, I dehydrate the rest of the ingredients myself to make an affordable meal with the ingredients that I want.

Treeline Review writer Duncan Cheung cooking up a dehydrated meal on a snowy backpacking trip in the Sierra. Photo courtesy Duncan Cheung.
How to choose a backpacking meal dehydrator
What’s your budget?
All the dehydrators we recommend meet minimum standards for a temperature range that can accomodate meats and vegetables, rear or back-mounted fans that are less likely to burn out, and temperature control, which helps with food safety. If you have less than $100, the Nesco FD-75 A is a good option. If you want something easier to clean and load and have a larger budget, the Nesco Gardenmaster or Excalibur are great options.
How long are your backpacking trips?
In our experience, four trays would not even be enough to do a long weekend backpack for two people in one dehydrating session. If you are are thru-hiking, you will need many meals and may want to consider a higher capacity dehydrator like the Excalibur. For tips on supplying a thru-hike, check out our Thru-hiking Resupply and Nutrition Tips guide.
How many people are you cooking for?
If you’re making food for the entire scouting group or multiple families, you may want a higher capacity dehydrator.
Will you dehydrate leftovers? Do you plan to batch cook?
If you plan to dehydrate leftovers from dinners, your portions will be be small enough to run in one of the Nesco winners. If you plan to buy a #10 can of beans to dehydrate or a Costco-sized container of vegetables to tackle in one dehydration, you may want a larger capacity dehydrator like the Excalibur.
How to dehydrate meals for backpacking
We write above why we like dehydrating our own backpacking meals: it allows for customizable, lightweight, affordable and nutritious food options for eating on the trail. These are steps that have worked for us to prepare, dehydrate, and store your meals properly.
Be sure to check with the manufacturer of your dehydrator and USDA and other government recommendations for ensuring food safety when making in your home kitchen.
1. Choose and prepare your ingredients
Select ingredients that dehydrate well, such as lean meats, vegetables, fruits, grains, and pasta.
Cut food into small, uniform pieces to ensure even drying.
Pre-cook meats, beans, and starchy foods (like rice or quinoa) to make them safe and easy to rehydrate.
Season foods to enhance flavor. Remember taste buds change at altitude and after a day of hiking, so write down and test different iterations of your recipes before making a big batch.
2. Arrange food on dehydrator trays
Spread ingredients evenly in a single layer on dehydrator trays.
Avoid overlapping pieces to allow proper airflow.
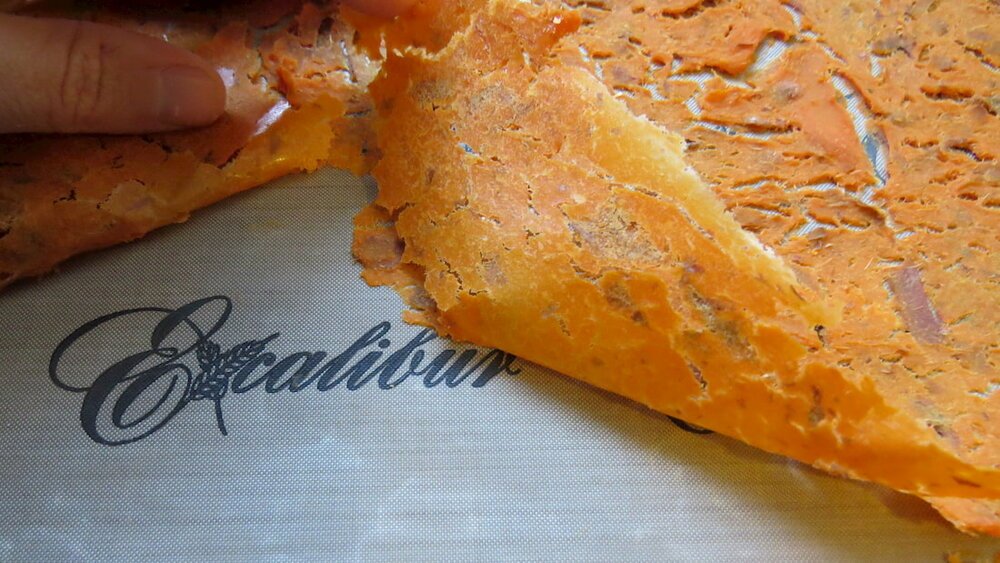
Use parchment paper or silicone mats for liquid-heavy foods like sauces, salsa, soups, or refried beans.
3. Set the correct temperature
Fruits & vegetables: 125°F (52°C)
Meats & poultry: 145°F (63°C)
Grains & pasta: 135°F (57°C)
Soups & sauces (leather method): 130°F (54°C)
4. Monitor dehydration progress
Drying times vary from 4 to 12 hours depending on food type, thickness, and humidity.
Rotate trays periodically for even drying.
Check for doneness: Food should be brittle (vegetables & grains) or leathery (meats & fruit leathers). It is possible to "overcook" your dehydrated food, which can increase rehydration time or even require simmering your food in order to rehydrate it.
5. Store dehydrated meals properly
Let food cool completely before packaging to avoid condensation.
Store in airtight containers for temporary storage
For longer-term storage, store in vacuum-sealed bags used in conjunction with a vacuum sealer
For even longer-term storage, use Mylar bags with oxygen absorbers.
Label each bag with the meal name and date of dehydration.
Keep in a cool, dark place for maximum shelf life (up to 6 months for best freshness).
6. Rehydrating on the trail
We highly recommend making a test meal at home before you go on trail.
Add hot water (usually boiling) to your meal
The water ratio varies by meal type, usually 1:1 or 1:2 food-to-water.
Let it sit for 10-15 minutes or until fully rehydrated.
Hydration time can up to double when you are at higher elevations.
Consider using a pot koozie or cook pot insulator to keep in some heat
Stir occasionally to ensure even absorption. A long handled spoon can help reach the bottom of a mylar bag.
By following these steps, you can enjoy delicious and nutritious homemade backpacking meals while keeping your pack weight low and your energy high.
How we researched and tested
To build this guide, we focused on dehydrators commonly used for backpacking meals and long-term food prep. We started by researching popular models frequently recommended by outdoor-focused publications and widely used by backpackers and home food preservers. From there, we narrowed the field to dehydrators that met key requirements for backpacking use, including adjustable temperature control, reliable airflow, and the ability to run safely for long drying sessions.
Our hands-on testing centered on real foods backpackers actually dehydrate. We used the dehydrators to dry full meals, fruits, and ingredients commonly prepared for trips, paying close attention to how evenly each model dried across trays, how well it handled mixed loads, and how consistent temperatures remained during long run times. We also evaluated how easy each dehydrator was to load, unload, and clean, especially when working with sticky or crumbly foods.
Over the course of testing, we noted practical differences that matter in day-to-day use: noise levels during overnight runs, tray durability, ease of expanding capacity, and how well each unit handled repeated use without overheating or slowing airflow. Combined with long-term user feedback and durability concerns surfaced in reviews, this hands-on testing helped us identify dehydrators that are reliable, efficient, and well-suited for making backpacking meals at home.
Lastly, we used our own experience thru-hiking trails and routes like the Pacific Crest Trail and Arizona Trail—testing the success of each dehydrator and how well it tackled dehydrating vegetables and trickier foods like meats and cheese.
OUR TESTING PROCESS
We compared popular food dehydrators designed for kitchen and backpacking use, focusing on performance with everyday dehydrating tasks.
How we tested
- Compared a range of popular dehydrators designed for home and backpacking uses
- Dried fruits, vegetables, herbs, and proteins to assess versatility
- Examined airflow design and temperature stability across trays
- Used both digital and manual models to gauge ease of setup
What we evaluated
- Temperature control and accuracy
- Consistency of drying across multiple trays
- Ease of use and intuitive controls
- Noise level and overall performance

Backpacker Whitney “Allgood” LaRuffa dehydrated his meals for a hike of the Continental Divide Trail (seen here). Photo courtesy Whitney LaRuffa.
Other backpacking meal Experts we Consulted
While preparing this article, we interviewed a few veteran backpackers about their use of dehydrators and the art of food dehydration. One question we asked was why they chose to incorporate an electric food dehydrator into their repertoire for backcountry food. We discovered many reasons why people get into it.
Melissa “Go-Go” Erkel created every meal for her and her husband in advance of her 2600-mile hike of the Pacific Crest Trail. She did it because she is vegan, and it was hard to find vegan options in every town along the trail where she would want to resupply. Favorite dehydrator: 15-year old Nesco Snackmaster Pro. Her favorite food to dehydrate is tofu jerky.
Whitney “Allgood” LaRuffa, an experienced long distance backpacker with trails like the Appalachian Trail, Oregon Desert Trail, and Blue Mountains Trail under his feet, as well as shorter trips like the John Muir Trail, San Diego Trans County Trail, and Corvallis to Sea Trail.
As a a foodie he said, “When I first started dehydrating it was because there was limited commercially available food... [By] dehydrating, I was able to create meals I preferred to eat, save money, and add more variety into my trail diet.” His favorite food to dehydrate is black bean and quinoa salad, which he carried on his thru-hike of the Continental Divide Trail.

Author Melissa “Treehugger” Spencer and her hiking dog, Sage. Photo courtesy Melissa Spencer.
Author’s expertise & Why You Should Trust Us
In addition to information from professional reviews, I drew on over a decade of experience dehydrating my own backcountry food. I have made hundreds of dehydrated meals for over 13 multi-week backpacking trips and run a blog where I share dehydrated food recipes with backcountry adventurers.
I’ve spoken at meetings organized by national organizations about topics including dehydrating backpacking food at REI stores, and for the Pacific Crest Trail Association, and American Long Distance Hiking Association-West.
I have a Bachelor’s degree in Public Health, and I previously worked for eight years as a health inspector, six of which were spent inspecting restaurants for compliance with state and county health codes. I’ve used what I learned from that job to inform how to prepare food in my home dehydrator safely.
I originally started dehydrating my own backpacking food after my first hike of the 2,600+-mile long Pacific Crest Trail from Mexico to Canada. I got sick of eating the same boxed pastas every night and, as a result, wasn’t eating enough food to sustain the amount of exercise I was doing.
After that, I started dehydrating my own meats, cheeses, beans, and veggies to add enough variety and flavor into my meals that I could get excited enough to eat.
You can read more about Melissa at The Hiking Tree Blog.
Estimated number of backcountry meals enhanced by my own home-dried ingredients: 1,116
My favorite meal to dehydrate: tamales with green sauce.


