The Long Trail in Vermont Backpacking Guide
272-mile thru-hike across vermont’s green mountains national forest

Home > Trip Reports > Thru Hikes for Working People
January 12th, 2026
Distance: 272 miles + 5.1 miles of approach trails
Days: 25 days average
Elevation gain/loss: 66,000ft (68,000 ft according to FarOut guides)
Best season: Late summer to early fall, pending mud and snow
Permits: None
Difficulty: Physically difficult. Technically and logistically simple
I thru-hiked The Long Trail 272 miles across Vermont from north to south in the fall, from late September into early October in 17 days. I encountered fall foliage, fun summits, rain, a moose, well-kept shelters, and welcoming towns for respite from the elements.
Despite the Appalachian Trail’s popularity, I saw few other hikers north of the junction of the LT and AT. It’s the oldest sanctioned “long trail” in the United States, and the woods feel among the oldest I’ve walked through. It’s rugged but never too remote; I recommend it to anyone as a first thru-hike or to anyone looking for a shorter thru hike that may not require quitting a job or putting other responsibilities on hold long-term.
We create reader-supported, objective gear reviews independently selected by our editors. This story may contain affiliate links, which help fund our website. When you click on the links to purchase gear, we may get a commission — without costing you an extra cent. Thank you for supporting our work and mission of outdoor coverage for every body! Learn more.


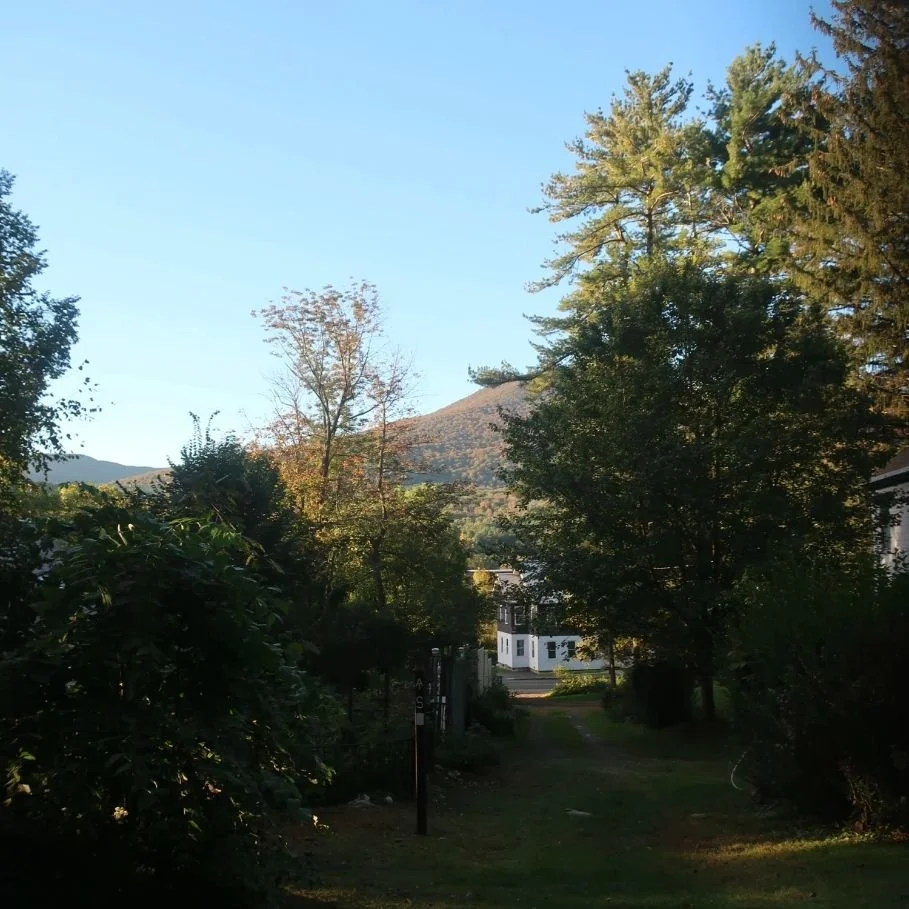

Magic sunshine on the Long Trail. Photo by Trey French
Completed in 1930, The Long Trail is the oldest long-distance trail in the United States. Its southern terminus is marked at the border of Vermont and Massachusetts outside of Williamstown, MA, up to the more remote northern terminus in the Jay State Forest in Vermont on the border of Canada. The trail runs roughly along the spine of the Green Mountains, with its highest elevation summits reaching over 4,000ft.
I started at the northern terminus and hiked southbound to Massachusetts over 17 days.
Sharing the southern 105 miles with the Appalachian Trail, that section sees more traffic and is more popular than the more remote and difficult central Vermont and Northeast Kingdom section. Prime hiking season begins when the trails are fully open after Memorial Day, but to avoid black flies, the worst mud, and hot temperatures, later summer into early fall is often more enjoyable.
The Long Trail is typically hiked in 20-30 days or an average of roughly 9 to 13.5 miles daily. With roughly 68,000 feet of climbing, that means 3,400 feet to 2,266 feet of climbing per day. This climb is mostly on rocky, rooty terrain, sometimes with mud, so the pace can be difficult to forecast against an average mile walking time down the street at home. Plan conservatively, start the trail with humility, and the miles can be spectacular.
The Abenaki indigenous people have walked and stewarded the Green Mountains long before hikers of The Vermont Long Trail considered hiking it from one end to the other. Their stories highlight not just the grand vistas of the mountains from afar, but also the animals and small flora that you’re sure to encounter along your hike. Melody Walker, citizen of the Elnu Abenaki Band of Ndakinna tells us “to walk as if all things mattered,” and that the Abenaki people have “loved and looked after this place for ten thousand years and will continue to do so for another ten thousand.”
Highs
Wildlife (moose!)
Lush moss
Fall foliage
Sound of rain over shelters
Some terrific trail towns
Challenges
Rain and mud
Possibly black flies and mosquitos, depending on the season
Few opportunities to really “cruise”
Lack of flat camp spots (but abundant shelters)
GEAR LIST
Here is a summary of the gear I used on the Long Trail. See the discussion below for details on my gear choices.
| LONG TRAIL GEAR | OUR PICK(S) | MORE OPTIONS |
|---|---|---|
| Pack System | ||
| Backpack | Pa'lante V2 Pack | Best Lightweight Backpacks |
| Pack liner | Trash Compactor Bag | |
| Shelter System | ||
| Tarp | Mountain Laurel Designs Grace Tarp | Best Ultralight Tents |

A moose! Zoomed in. I had to take more steps back and wait for her to finish dinner before I could move on and have mine at camp. Photo by Trey French
Best Season
Hike in the fall for fewer bugs and potentially more stable weather, but late summer for longer days and warmer nighttime temperatures. Spring is mud season, and some of the trail is closed during this time to preserve the trail from widening and other erosion issues. Temperatures and snowfall can make winter travel difficult and dangerous.
Difficulty and Required Skills
Navigation
Navigation is straightforward on the Long Trail. It’s a well-defined path, well-marked with white blazes like the Appalachian Trail. That said, there are many side trails to take accidentally. Though paper maps are always a smart choice for primary or secondary maps, we like using Gaia, Caltopo, and the FarOut apps for navigation on trails like the Long Trail.
Gaia and Caltopo are excellent for downloading comprehensive maps of the trail and surrounding trails. Far Out is full of helpful information about water on the trail, elevation gain and loss, town information, and other helpful crowd-sourced comments made by hikers that might be just a day or two ahead of you. The Long Trail is not known for being particularly dry of water sources, but not all streams are perennial, and some sources can dry up by late summer each year.
The Green Mountain Club recommends a compass as well. While we would never advise against bringing a compass on a hike, navigation with a compass beyond a general north and south bearing to know which direction on the trail you’re headed after a deep sleep and a disorienting morning (it happens) is challenging. Navigation with a compass and correctly scaled maps at 1:24 scale in dense forests require a high level of skill and attentiveness. Ensure you have a working compass on your phone, and be redundant with your online maps.

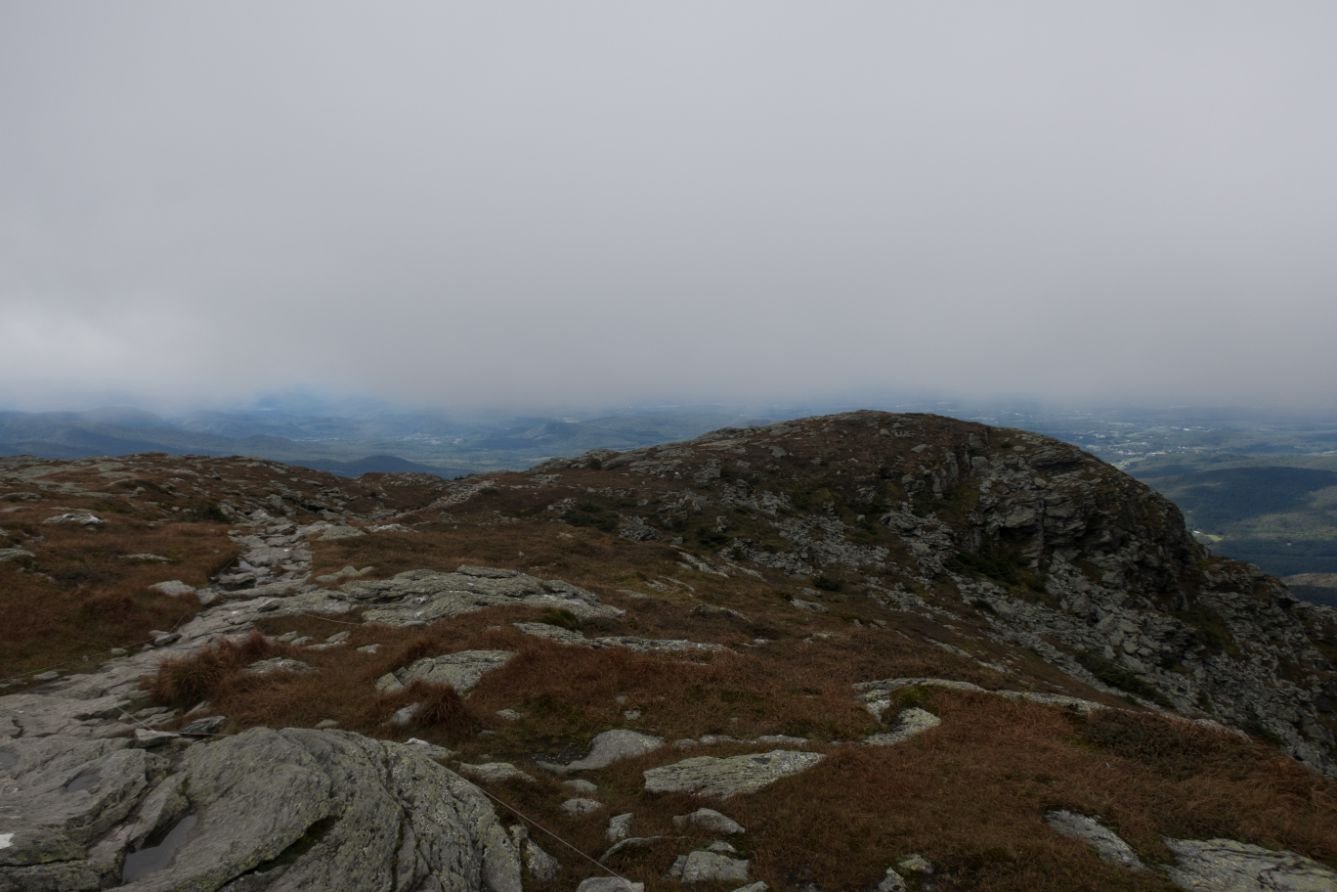
As seen here, the trail is not always a footpath! Photo by Trey French
Rough Terrain/Scrambling/Rock Climbing
Though rocky, rooty, and sometimes borderline scrambly, no technical skills or gear are needed to hike the Long Trail. It’s a footpath in the truest sense, though we recommend starting the trail with humility regardless of your skill level and fitness.
Elevation Gain/Elevation Loss
There are about 68,000 ft of climbing over the 273 miles on the Long Trail in both directions. The more rugged and steeper climbing (per mile) is in the northern section beyond the Appalachian Trail, but steep climbing is a part of the entire trail.
Permits
There are no permits required to hike The Long Trail for a day hike, backpacking trip, or thru-hike. Shelters managed by the Green Mountain Club used to charge a small fee to stay at them during prime season but no longer do. Alternatively, consider donating to the Green Mountain Club, which is largely responsible for this hiking trail and shelter upkeep in partnership with the Forest Service.

The junction of The Long Trail and the Appalachian Trail. The southern LT shares roughly 100 miles with the AT. Photo by Trey French
Route Summary
The Long Trail begins and (or) ends at the border of Vermont and Massachusetts outside of Williamstown, MA, and near Journey’s End Trailhead at the border of Vermont and Canada. It stays roughly along the spine of the Green Mountains and crosses many road crossings for easy access to trail towns along the way.
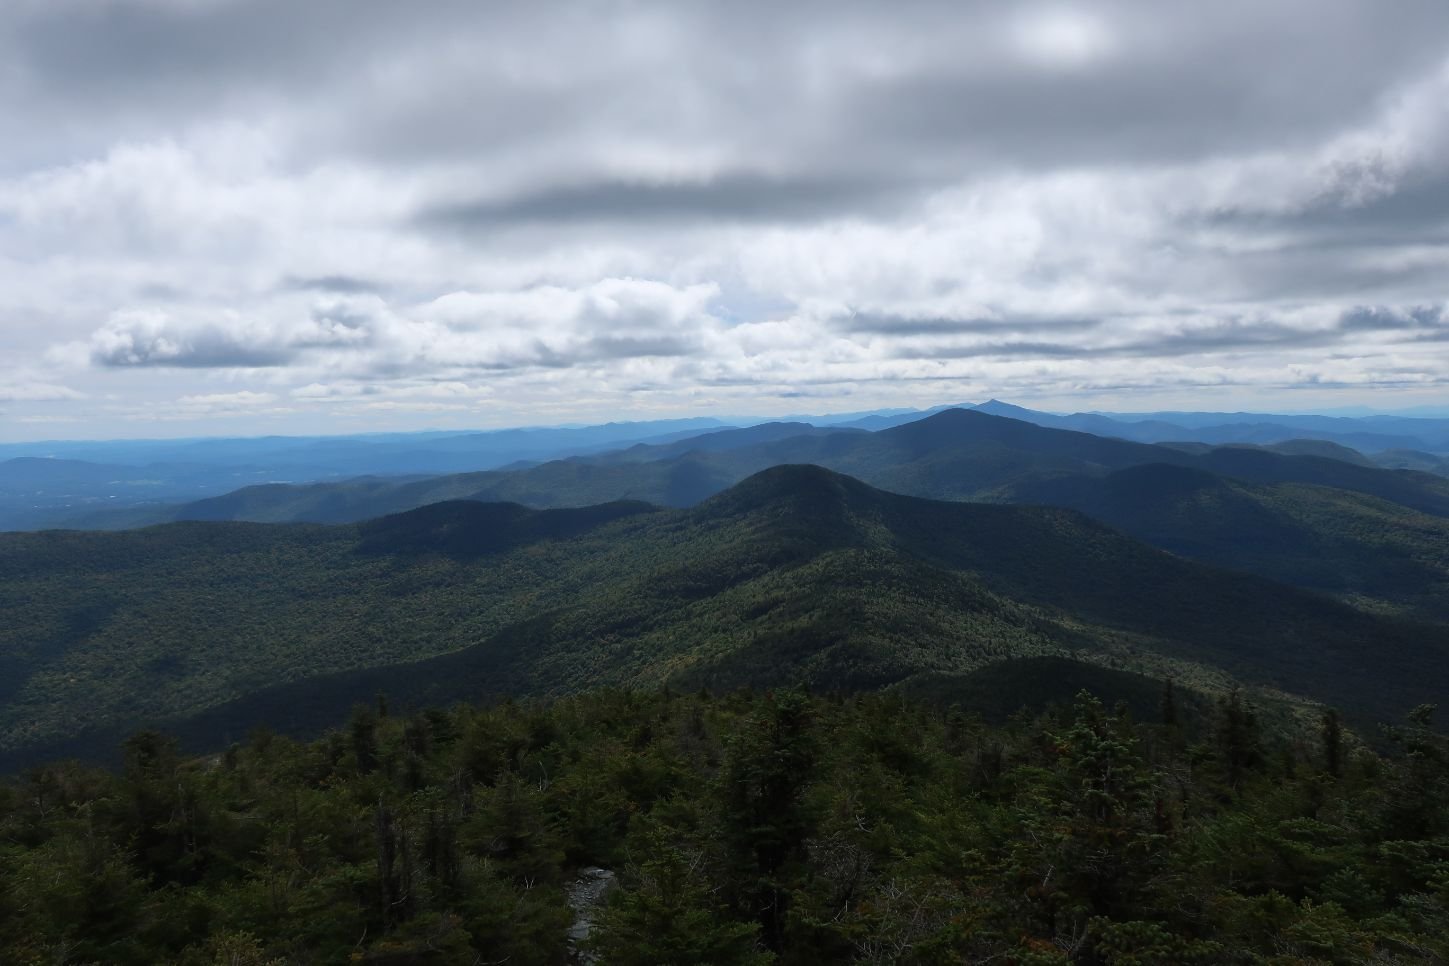
Some highlight peaks are Jay Peak up north and the alpine mountains of Mt. Mansfield (Vermont's highest peak) and Camel’s Hump toward the middle. It also shares the southern 105 miles with the Appalachian Trail and offers many of the same terrain styles as one might encounter in the New England portion of the AT, notably New Hampshire and Maine.
There are five 4000 footer peaks in Vermont. All of them are on The Long Trail:
Killington Peak - 4,236ft
Mount Abraham - 4,016ft
Mount Ellen - 4,081ft
Camel’s Hump - 4,081ft
Mount Mansfield - 4,393ft
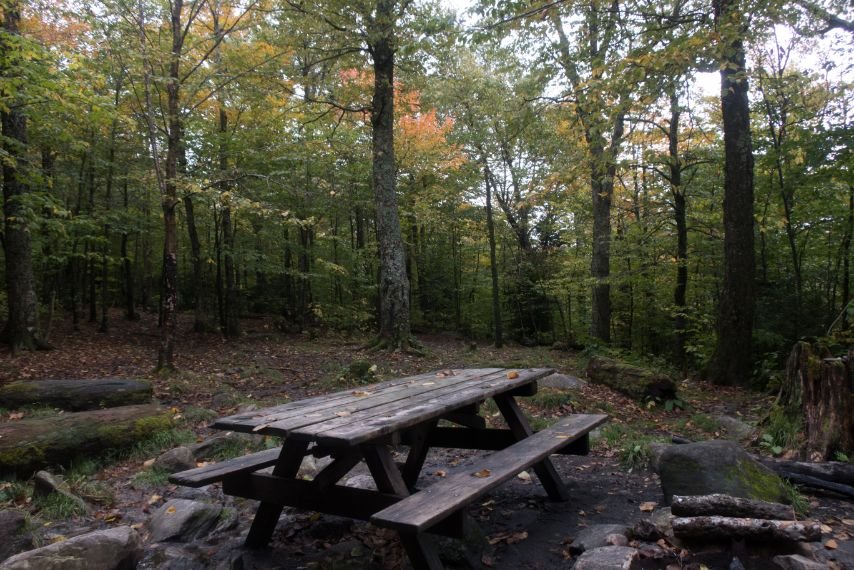
There are over 70 shelters on The LT, but my favorite evening and morning views were from the Puffer lean-to shelter, a chilly night spent along out of the wind between two 3,000ft peaks, Bolton Mountain and Mount Mayo. Though I didn’t stay there, I also thought the Stratton shelter looked nice. It has capacity for 20 and a picnic table under a porch. It’s also near Stratton Pond for swimming, and close to the Stratton Mountain fire tower, which I highly suggest going up if the weather is inviting enough.
Taft Lodge is the oldest shelter on the trail, originally built in 1920 and reconstructed in 1996. “Lodge” and “Camp” typically denote a little more coverage in a shelter than is typical of the lean-to style, usually having either a fully enclosed construction with a door, or close to four full sides.
Despite Taft being a lodge, it’s still a first-come, first-serve style. I actually did no prior research on the particulars of the shelters on the LT, knowing only that were many unique, comfortable options to discover. I found the discovery to be a part of the charm of the experience.
Maps and Guidebooks
FarOut

FarOut is the most popular thru-hiking app available and has made available a lot of current hiker-updated data for an increasing amount of trails each year. It shows your position relative to shelters, water sources, viewpoints, and towns as well as elevation gain between points. Be careful, though, as using this app can prompt you to simply “follow the red line” and remove a sense of place and conscious navigation. Also, familiarize yourself with bail-out points and “stay found” by using this app with other mapping resources in case you need to leave the trail during an emergency via a non-traditional exit point.
Gaia GPS
Gaia GPS is a mapping app and software filled with trail map layers that offer useful information for hiking The Long Trail. You can download the sections you need to your phone and often view campgrounds, road crossings, trail junctions, elevation profiles, and other helpful tools for a safe, efficient hike. It has one of the best interfaces for real-world use in planning on your desktop and real-time hiking using your phone.
Maps
The Green Mountain Club offers maps for The Long Trail in paper and digital form. The Long Trail map set can help plan ahead of your hike or your hiking day to help preserve your phone battery, and the paper maps are a great backup reference in case your phone fails.
You can also make maps with Gaia to have printed for map and compass use. If you’d like to carry paper maps using Gaia, we suggest printing full-size maps for this at an 11 x 17” page size in a 1:24 map scale.

Sunset shades from camp. Photo by Trey French
Guidebooks
Not as current as updates directly from the GMC’s website, there is a Long Trail guide that includes information about side trails and trail history that isn’t readily available from apps and other online resources. You won’t need to bring this on the trail, but it’s an excellent resource for getting your bearings ahead of time.
Getting There
The southern terminus is not the most logistically challenging to access, with regular bus lines from major airports. The northern terminus at Canada's border is best planned with a private shuttle driver from Burlington, VT. Both the north and south terminus have approach trails, a little over a mile for the north and four miles for the south along the Appalachian Trail.
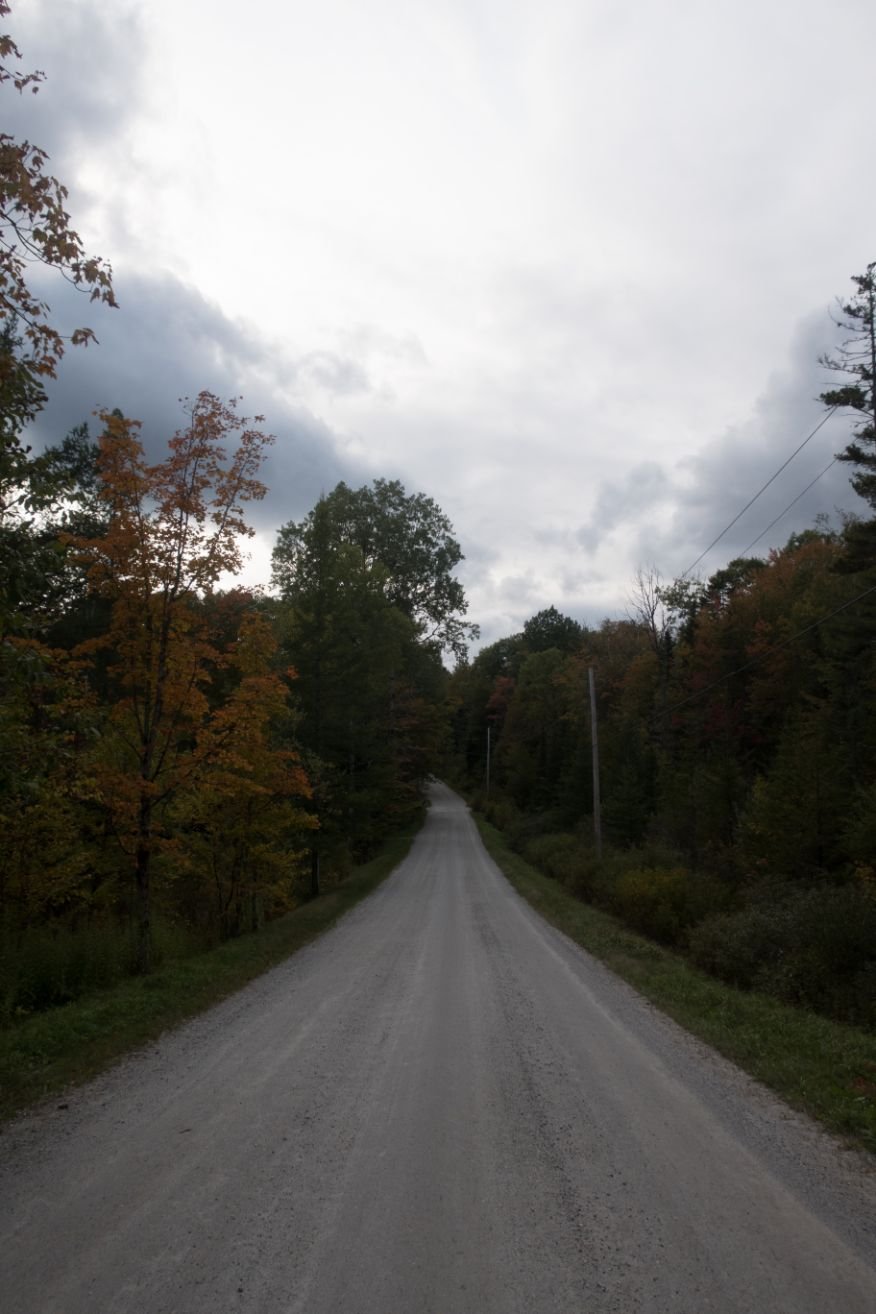
The approach trail on the north end may be extended depending on what type of vehicle you or your shuttle tries it in. It’s rough and gets rougher. After a short drive on Journey’s End Rd before the proper approach trail, my shuttle stopped and said that it was the end of the line for them. No problem, you’re there to walk!
By Plane and Bus
Living in NYC and hiking southbound, I flew from NYC to Burlington, VT, then took a private shuttle to the northern Long Trail end point. Upon finishing, I took the Peter Pan bus line roughly 5 hours from Williamstown, MA back to NYC.
Starting from the northern terminus as a non-local, the most straightforward way to get there is to fly to Burlington, VT, then take a private shuttle (listed below). Hitching from Burlington to the trailhead at Journey’s End would be convoluted and likely require multiple hitches from obscure places where people might not be familiar with the trail.
Getting to the southern terminus, you can fly into Boston or NYC, then take a bus or train to North Adams or Williamstown, MA, where many buses pass. From there, hitching to the trail is easy as many AT thru-hikers will do this hitch.
This To & From the Trail guide is invaluable for Long Trail travel.
Trailheads

Approaching the road to the south of The Long Trail southern terminus to hitch into Williamstown, MA, after a southbound hike. This is on the Appalachian Trail. Photo by Trey French
The northern terminus is about 5 miles outside North Troy, VT, with a 1.3-mile approach trail from the Journey’s End trailhead parking lot. It can be a tough hitch, and hiring a shuttle may ease the stress of going or leaving from there.
The southern terminus is 3.8 miles north of an unassuming road junction at Massachusetts Avenue outside of Williamstown, MA, where the Appalachian Trail hikers walk through. An alternative option for starting, especially if you are starting or finishing in Williamstown instead of North Adams, is the Pine Cobble Trail, a walkable distance from Williamstown, instead of the short hitch from nearby Massachusetts Avenue. Note that the Pine Cobble Trail is shorter than the standard AT approach by about a quarter of a mile, but it’s also a little bit stepper.

Shelter from a cold, rainy spell on the Long Trail. Photo by Trey French
Favorite Restaurant
Many people make a pilgrimage to the Ben & Jerry’s ice cream factory in Waterbury, Vermont, which you can hitch to from the intersection of Notch Rd. and HWY US 2 after summiting Bolton Mountain from the north or Camel’s Hump from the south, two peaks around the 4,000ft mark.
I have celiac disease, so my restaurant options were limited as they are on any trail. That said, the trail towns along The Long Trail are mostly well above average when it comes to hiker hospitality and food options for those with dietary restrictions, and a quick look at current food options suggests that it’s even better than when I was there.
My best experience was in Stowe, Vermont, a small ski town near Mt. Mansfield. I spent a couple of hours the morning after getting to town drinking coffee and eating soup at Cafe on Main, and the friendly shop was shelter from the cold rain at the time.
As with views on the trail, sometimes it’s not the food itself but the context of why you’re in a place that helps form fond memories—feeling full, warm, fit, without stress, and with a sense of being exactly where you want to be.

The Green Mountain National Forest now requires the use of bear canisters, a food hang, or the use of campground bear boxes. What I remember from this section are tree blowdowns! Photo by Trey French
Regulations
As always, follow Leave No Trace Ethics. There is some alpine tundra on Mt Mansfield, lots of sensitive flora, and lots of foot traffic along the Long Trail Corridor.
Dogs are allowed on The Long Trail. I encountered two thru-hikers with dogs, one well-behaved and one not so much, encouraging me to continue hiking past the shelter I had planned to stay at. There are some ladders and scrambling on The Long Trail, so be prepared to carry your dog for short distances if you bring them along. For more information, check out what The Green Mountain Club has to say about your canine trail buddies.
The shelters are mostly well-kept, updated, and clean, with the odd mouse that comes with the territory. For those going in the summer, shelters can get crowded. When planning to camp on the ground, aim for near shelters on impacted sites when possible.
Group size must be limited to 10 people or less for overnight hikes. Check out more information about groups on the trail here.
BEARS AND FOOD STORAGE
I slept with my food in an OPsak for this trip. Do not do this. There are too many black bears and other “mini bears” like rodents and other small animals that it’s better practice for you and the animals to use an Ursack or hard-sided bear container. In the Green Mountain National Forest, which is much of the middle of The Long Trail, per a 2019 regulation, there are a few options:
Use a bear storage locker
It’s best not to depend on these. Check out the list of campsites with bear storage lockers here. They may also be full of other hiker’s food. Lastly, when using them, they are often not entirely mouse-proof (I learned this the hard way in the Sierra in California), so consider putting your food in something resistant to mice.
Hang your food
The Long Trail landscape makes this already difficult practice even trickier with its dense hardwood forest and ubiquitous slopes. While effective when done properly, this is an often time-consuming and tiring task at the end of a long hiking day when you are more likely to be careless and perhaps hit yourself in the head with your throwing sack (ask me how easy this is to do).
Use a hard-sided bear canister
Though bulky and heavy, this is the most fail-proof food storage method.
Check with the Green Mountain Club for the most updated regulations on food storage along The Long Trail. For other bear canister recommendations, see REI’s Food Storage story or REI’s Bear Canister story. You can read our in-depth review of the BearVault BV Bear Canister, which collapses and becomes smaller as you eat more food the more days you are out.
Resupply
Here’s is my exact resupply. Note that your calorie needs may differ from mine, and your food carries do not need to be this long. Also, I stopped in more towns beyond what’s listed here, for fun. Because I have a dietary restriction, I sent myself boxes, but those without restrictions may choose to buy food on the way for more variety and to avoid dealing with the hassle of mail.
The Long Trail Vermont website, run by experienced thru-hikers of The Long Trail and beyond, has graciously provided several resupply itineraries for varied paces and hike styles for both northbound and southbound hikers.
Common resupply points include Manchester Center, Rutland, and Jonesville.
One standout resupply (and lodging and restaurant) is The Inn at Long Trail where many hikers get their Long Trail Ale for the trip. Admittedly, because I have celiac, I didn’t stop here for a meal, or spend the night, but this is a Long Trail staple located a short hike off of the trail near Killington. Plus, there’s a bus that runs hourly to Killington and Rutland, so you have options.

The LT has abundant shelters across the trail, roughly every 5 miles, some more comfortable than others, but most are built in this lean-to design above. Photo by Trey French
Camping and shelters
Most hikers use one of the 70+ the lean-to shelters on The Long Trail, spaced around every 5 miles. Some of these used to cost $5 a night with no reservation. As of 2019, this is no longer the case. There is still no permit system, so while unlikely (except on the AT section during prime thru-hiker season in the summer), shelters can fill up, especially if you hike until the end of the day. I found only one full shelter on a rainy day early in the evening.
The shelters typically have camping and water nearby, many with water coming from a spigot. As mentioned, most shelters are 3-sided lean-to’s, but those with “camp” or “lodge” in the name may suggest a 4-sided structure with a door and traditional roof. You may even find yourself staying in a ski lodge.
Hammock campers do well on The Long Trail, with its plentiful trees and few flat camp spots.
Water Planning
Water is pretty abundant on The Long Trail. Even hiking after a hot summer, I don’t recall going more than 10 miles without a water source; the norm is more like every 5 miles. Some shelters have water spigots, but I recommend treating everything just to be sure.
Side Trips
In addition to the Stratton Mountain fire tower on trail, consider also hiking 0.2 of a mile off of the trail to the Belvidere fire tower. You may hear about the Glastenbury Mountain fire tower as well, but it’s currently closed to the public.
If you want a more significant landmark for a southern terminus, consider using Mt. Greylock, by taking the Appalachian Trail south a few miles south of the official Long Trail terminus. It’s the highest peak in Massachusetts and has a huge lighthouse at the top. You can even drive up there, so a hitch to or from might be possible. I finished a section hike of the Appalachian Trail there a year after my Long Trail hike, from the Hudson River in New York state to Mt. Greylock.
LONG TRAIL SPECIFIC Gear
Here’s my (Trey’s) gear list for a late September start with lots of rain and long, cool nights. We also have a separate lightweight and ultralight gear list for the Appalachian Trail example here that would transfer well.
If hiking in the summer or fall with no plans of extensive night hiking, a lightweight headlamp will do. If hiking late into the evening after dark, you might want something with a brighter beam.
The weather may also dictate whether you want to bring a rain skirt or rain pants. At a minimum, we recommend a trusted rain jacket. With the humidity and potential for extensive storms, typical lightweight 2.5L rain jackets may be overwhelmed. Umbrellas can help, but there are many low-hanging branches to snag it on.
TENT
I used a tarp and bivy, specifically the Mountain Laurel Designs Grace Solo .75 DCF tarp with a sil-nylon Superlite Bivy with the larger of the two face net openings. I used a poly cryo groundsheet under the bivy to pack the bivy away dry in the mornings. I do not recommend this shelter system to most people, but if you plan on sleeping in shelters mostly and want something to carry just in case you get caught between them, a tarp may work for you.
With the potential for hard rains and somewhat challenging shelter pitch options, using a tarp requires some forethought regarding tarp pitch direction and height to stay dry. Any pyramid-style tarp or tent would be a better lightweight guarantee against getting wet at night, and the lighter-weight options with plenty of living space from our Best Backpacking Tents guide would be even better, as you may find that you want to rest and relax in your shelter out of the elements on some days.

Some gear hanging up inside a ski hut, drying from a storm. Photo by Trey French
BACKPACK
I used the Pa’lante Packs V2 because it was lightweight, fit me well, fit my gear, had a bottom pocket (which I love), and was made with a low-absorbancy and quick-drying fabric. Most importantly, I was familiar with using it on the Pacific Crest Trail before getting on The Long Trail. Others may prefer a framed pack with a hipbelt for a more comfortable carry when the pack is heavier.
That said, when considering the pack for you, there are many opportunities for water, and towns are moderately close to one another, so you can strategically keep a light pack by keeping your food carries short. Your pack size will depend on your daily mileage and how much water you like to keep on hand.
Given the amount of climbing on The Long Trail, you’ll benefit from working hard to lighten your backpacking base weight. No need for minimalism, but The Long Trail will definitely remind you often how much stuff is resting on your shoulders.
See our Best Backpacking Backpacks guide for some more recommendations.
SLEEPING BAG
I used the Katabatic Palisade 30° quilt because it’s incredibly warm for its weight, compact, and is comfortable. I had already tested it down to the conditions I expected on The Long Trail before I set off. I refer to this quilt as one of my true loves and continue to use the Palisade in the wilderness.
Suppose you sleep on the colder side or prefer something with more insurance against cold weather. In that case, Katabatic offers a 22° and 15° comfort-rated quilts, plus models that open up fully like a blanket. Some hikers will find 30°F sufficient for summer, given The Long Trail’s mild nighttime summer temperatures. If hiking into the fall, you may encounter sub-freezing temperatures. For more recommendations, see our Best Sleeping Bags or Best Backpacking Quilts stories.

Inviting, soft moss on flat ground, but too fragile for sleeping on. Photo by Trey French
SLEEPING PAD
Though I sometimes like to use a short foam pad, I brought an inflatable Therm-a-Rest NeoAir in the tapered 6’ size. Nights were on the chilly side, down into the low 30’s on some nights up to the mid 40’s, so the R-value was a plus, but the main reason to consider a comfortable inflatable for this trail is because you are likely to be sleeping on hardwood shelters. See our Best Backpacking Sleeping Pads story for more recommendations.
TREKKING POLES
I used a single Black Diamond Alpine Carbon Cork trekking pole for this trip, which was mainly to aid me in pitching my tarp. I’d recommend this pole, but two of them. There are a lot of steep ups and downs on the trail, and having two additional points of contact to distribute the gravitational wear and tear onto those rocks and roots is helpful. I think these poles are an ideal blend of aluminum and carbon with a comfortable grip, but they are pricey. For more recommendations, see our Best Trekking Poles story.
COOKING SYSTEM
I went stoveless on this trip, sticking with my usual Ziploc Twist n’ Seal method where I eat my “dinner” and keep walking for another hour or so before setting up camp. I purchased a new one recently, and it leaked, so I’d look elsewhere if cold-soaking. If you want to cook, which is a nice activity at the shelters on a rainy day, I recommend your favorite canister stove and pot on this one, big enough for what you’d like to cook.
Consider that if you hike in the fall, you’ll likely have plenty of downtime in the dark to cook something hot. After a day of rain and cool weather, you won’t regret planning a restorative meal with your cook pot. See our Best Cooking Pot and Best Backpacking Stoves guides for our recommendations.
WATER PURIFIER
I used Aquamira drops, repackaged into smaller “A” and “B” bottles, plus a third bottle for pre-mixing the solution in the morning to avoid waiting for the solution to cure at water sources. I use this system because it’s light, compact, and fast. Pre-mixing is not recommended by the manufacturer, so do it at your own risk. I’m also a fan of the venerable Sawyer Squeeze. Just collect water and drink!
Check out our guide to the Best Water Filters and Purifiers for Backpacking.
Map and Compass
For a user-friendly, lightweight, and capable compass for any trail, see the Suunto M-3.
First Aid Kit
Everyone’s needs vary, but some core items to keep in your first aid kit might be tweezers just in case you get an earlier season tick. Leukotape, gauze, and Neosporin are also worth considering for preventative and blister foot care treatment. Ibuprofen is good to keep on hand, too.
Sun Protection
The Long Trail isn’t the sunniest trail, but UV rays still call for sunscreen and/or sun clothing. Consider a small tube along with some UPF lip balm. See our guide to the Best Body Sunscreen and Best Sun Hoodies for more recommendations or pursue our entire Sun Protection Gear section.
Pocket Knife
Maybe necessary if you are cutting food like cheese, also consider a small pair of scissors as an alternative.

Moody weather on top of Mt. Mansfield. It’s worth testing your rain jacket in advance of your trip. Photo by Trey French
What to wear
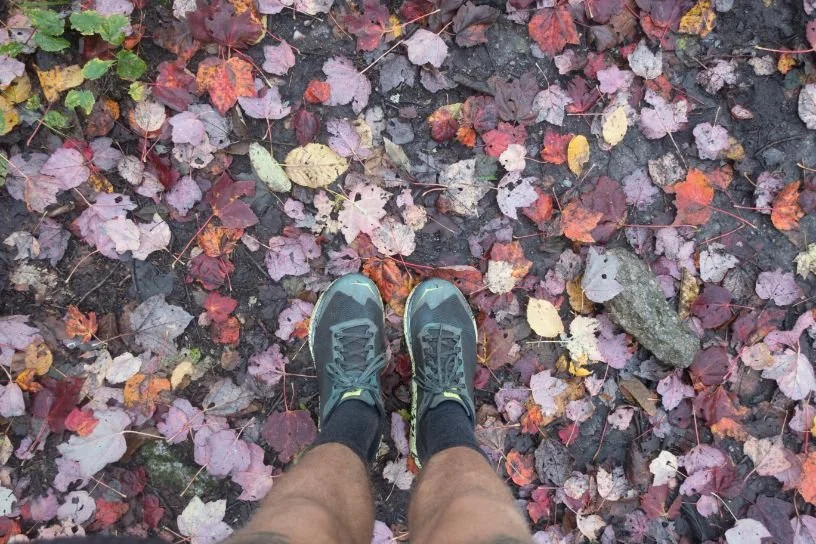
SHOES OR BOOTS
Unless you have a medical condition requiring you to hike in boots, I strongly suggest trail runners. I used HOKA Challengers (men's and women's) for The Long Trail. You can read our in-depth review of the HOKA Challengers or see how they stack up in our Best Men's Trail Running Shoes and Best Women's Trail Running Shoes.
Though they were sufficient, something with a little more mud performance, like the Topo Ultraventures (men's and women's) or La Sportiva Akashas (men's and women's), would work well for a trail this rugged.
Most importantly, get the trail runners that fit your feet. The Long Trail can be wet with a lot of abrasive mud, and along with proactive foot care like washing and pretaping, wearing trail runners will help keep foot skin problems at bay. If you choose boots, aim for non-waterproof breathable ones to give them a chance to dry out fully once they eventually get wet.
If you’d feel more comfortable in boots, check out our Best Hiking Boots story or Best Lightweight Hiking Boots story.
An alternative footwear compromise for this trip would’ve been hiking shoes, designed to feel like a trail runner but have stability more like a boot. See our Best Hiking Shoes story for footwear that is more durable and stable than trail runners.

A dependable headlamp is crucial for hiking into the evening and night, especially in the fall when daylight hours are fewer. Photo by Trey French
HEADLAMP
I carried an older model Black Diamond Spot. At the time, it was all I had aside from a small handheld LD02 that I used on the Pacific Crest Trail prior.
A great option for most outings on The Long Trail would be the Nitecore NU25, as highlighted in our Best Headlamps story. It’s USB-C rechargeable, extremely light, has sufficient brightness, and packs away small, especially if purchasing one with an aftermarket headband (or making your own).
I chose to use the BD Spot that I had because I planned to do a lot of night hiking in foggy conditions each night and wanted to be able to instantly swap my batteries despite the added weight rather than worrying about having to recharge the NU25. The modern version is rated IXP8, rated for moderate submersion, so rain shouldn’t be a problem. I have used the NU25 on every hike since. It’s IP66, rated to withstand rain, but I always keep mine under my hat brim when it was raining just for extra protection.

The Long Trail cows were getting by just fine without clothes, but you’ll want to carry some. Photo by Trey French
CLOTHING
RAIN JACKET
I used the Outdoor Research Helium jacket (men's and women's) for The Long Trail, but it was old and did not stand up well to the frequent rain storms I encountered. If your hike forecast is exceptionally wet, a 3-layer jacket for better waterproofing without “wetting out” is worth considering. Ponchos, though more breathable as loose-fitting garments, may tend to catch on the branches on the trail, and the same goes for an umbrella, given all of the low overhead branches.
For more recommendations, see our Best Rain Jackets article.
RAIN PANTS
I carried a Zpacks DCF rain kilt. It’s exceptionally breathable by design, avoiding that clammy feeling that can come with wearing rain pants. Sure, your lower legs still get wet, but in typically mild temperatures during the prime Long Trail hiking seasons, this kilt is plenty sufficient. The fabric is waterproof and doesn’t rely on a DWR application. If you're not pitching a tent, it packs up pretty small and works well as a small ground cloth for your belongings at night. I carry this gear on every wet hike, even if it’s just for walking through cold, wet brush in the mornings after rainy nights. See our Best Rain Pants guide for more recommendations.
DOWN OR SYNTHETIC JACKET
I used the discontinued Borah Gear down jacket, weighing in at just over 5oz in a men’s medium. As an alternative, consider a jacket like the Katabatic Tarn, a lightweight down jacket with exceptional warmth for its weight. Pair it with other clothing layers for many hikers. For colder trips or if you sleep cold in general, look to Katabatic’s Tincup. Both the Tarn and Tincup use RDS-certified and hydrophobic down. While the down isn’t waterproof, it does have a DWR treatment on the down plumes that will help combat any loss of loft from the humidity. Of course, like any down jacket, it’s not meant to be hiked in in rainy conditions. See our review of the Katabatic Tarn jacket for more info.
If you routinely hike in your insulation layer, consider getting a synthetic jacket, given its higher resistance to loss of loft and insulation when wet. I didn’t encounter any weather that had me hiking in my puffy, but it’s possible in the fall that you might want to.
See our recommendations in our Best Synthetic Jackets article. If you prefer down for its better warmth-to-weight ratio, check out our Best Down Jackets guide.
FLEECE OR MIDLAYER
I carried a now discontinued quarter-zip, hoodless 100wt fleece from REI. Consider the lightweight, packable Patagonia R1 Jacket as an alternative. It’s just enough fleece to bring comfort through light insulation and breathability worn over your base layer and under a rain jacket when it’s coming down, but you’re still working hard. I own and use the hoodless version for my hikes now, but many hikers may find the added hood worth the weight for its comfort.
Other fleece suggestions can be found in our Best Fleece Jackets story.
SUN SHIRT
I used the Patagonia Sun Stretch short sleeve shirt, given its breathability and durability (I had just finished wearing it for half of the Pacific Crest Trail) and its functional chest pockets. Those pockets let me keep my phone and water treatments dry and close to me during rainy spells. I chose to wear the short sleeve version over my long sleeve one, given the relatively low sun exposure on The Long Trail due to its dense forest and overcast days. UV exposure should still be taken seriously, so wear a long sleeve or apply plenty of sunscreen. To that point, it appears that Patagonia no longer offers the Sun Stretch shirt, but the Self Guided shirt looks very similar.
See our Best Sunshirts guide for more recommendations. Check out our Best Baselayers guide for more non-sun shirt-specific options.
HIKING SHORTS AND PANTS
I used 3” inseam running split shorts from New Balance. You may want a little coverage for modesty and leg protection. Another favorite of mine is the Patagonia Strider Pros. Their latest iteration is stretchy, durable, wicking, breathable, has smart, functional envelope pockets, and is even pretty stylish. If you prefer wearing pants, which is a perfectly sensible option for The Long Trail, especially if hiking when bugs are more present, check out the Best Women's Hiking Pants and Best Men's Hiking Pants for recommendations.
For other shorts recommendations, see our Best Men's Trail Running Shorts guide, Best Women's Trail Running Shorts guide, Best Men's Hiking Shorts guide, or Best Thru-hiking Shorts guide.
SOCKS
I recommend the thinnest merino wool/nylon blend socks that you like. The nylon will aid with durability, and the merino will help with temperature and smell management. The thin weave will dry faster than thicker socks in a wet climate like the northeast US and are less likely to bunch up in your wet shoes. I recommend the Darn Tough Stride Micro Crew Ultra-lightweight socks. They are high enough to provide some lower leg protection for the lower leg, thin enough to encourage drying, and breath exceptionally well. They won’t last as long as some of the “hiking” socks from Darn Tough, but they should last you length of The Long Trail, especially if you carry two to hike in, which is a good idea for this trek. If you need more padding, buy shoes with more padding instead. Check our Best Hiking Socks guide for more recommendations.
WARM HAT
I carried the Zpacks Fleece Hat because it’s an affordable, simple 100wt fleece hat that clings to my head well at night while keeping my ears and head warm when it’s chilly. Zpacks was also the only manufacturer I could find that actually listed the weight of their hat online. Any fleece beanie will do. Though a popular choice off-trail, acrylic hats don’t insulate as effectively as fleece, and also tend to stretch over time.
HAT
I wore the Ciele GoCap instead of my trusted Headsweats Protech hat, though either would work well on The Long Trail.
Check out other suitable hats in our Best Running Hats guide.
GLOVES OR MITTENS
We carried some 1 oz fleece gloves from Montbell, the Montbell Chameece, and some waterproof Showa 282s for rain. The fleece gloves are no-frills, and some people may prefer something warmer. The Showa gloves are waterproof without DWR, dexterous enough for typical hiking tasks, and really durable and affordable. They got their start on fishing boats, after all. The liner on the Showa 282s is subpar though, never drying and tends to separate a little at the fingertips. If you can find them, get the 281s with no liner and a lower-profile wrist cuff. Another easy solution is to cut out and discard the liner, using your fleece gloves as a “removable” liner instead.
For more recommendations on lightweight but warm gloves, see our Best Winter Gloves guide.

I couldn’t wait until morning to finish. Satisfied and grateful after dark at the southern terminus. Photo by Trey French
Other Resources
The Green Mountain Club website on all things Long Trail
Hunting and trapping season for when to consider wearing orange
Cam “Swami” Honan’s Long Trail guide
FarOut, a great on-trail guide for sharing information with, and learning from, other hikers
Gaia GPS, mapping software for pre-planning and on trail use. Get the app!


