The Presidential Traverse Hiking, Backpacking, and Trail Running Guide
A quintessential Northeastern hike with epic above-treeline views, lots of elevation gain on technical trails, and historic mountain huts
May 1st, 2026
Home > Where to Go > Backpacking Trips
Distance: 19 miles
Days: 1-3 days
Elevation gain/loss: 9,000’
Best season: Summer (July to September)
Permits: None. A Hike Safe card is recommended for NH hiking to fund SAR efforts and mitigate any risk of being charged for SAR services.
Difficulty: Very Difficult/Very Strenuous
We create reader-supported, objective gear reviews independently selected by our editors. This story may contain affiliate links, which help fund our website. When you click on the links to purchase gear, we may get a commission — without costing you an extra cent. Thank you for supporting our work and mission of outdoor coverage for every body! Learn more.
Background
The Presidential Traverse (more commonly known as a Presi Traverse) is a quintessential Northeastern hike. It’s 19 miles long, with 9,000’ of gain and 8,500’ of loss, and travels for 12 miles above treeline. More than half of the miles follow the Appalachian Trail (AT) in New Hampshire! Completing this hike in one day is a goal of many northeastern hikers and trail runners.
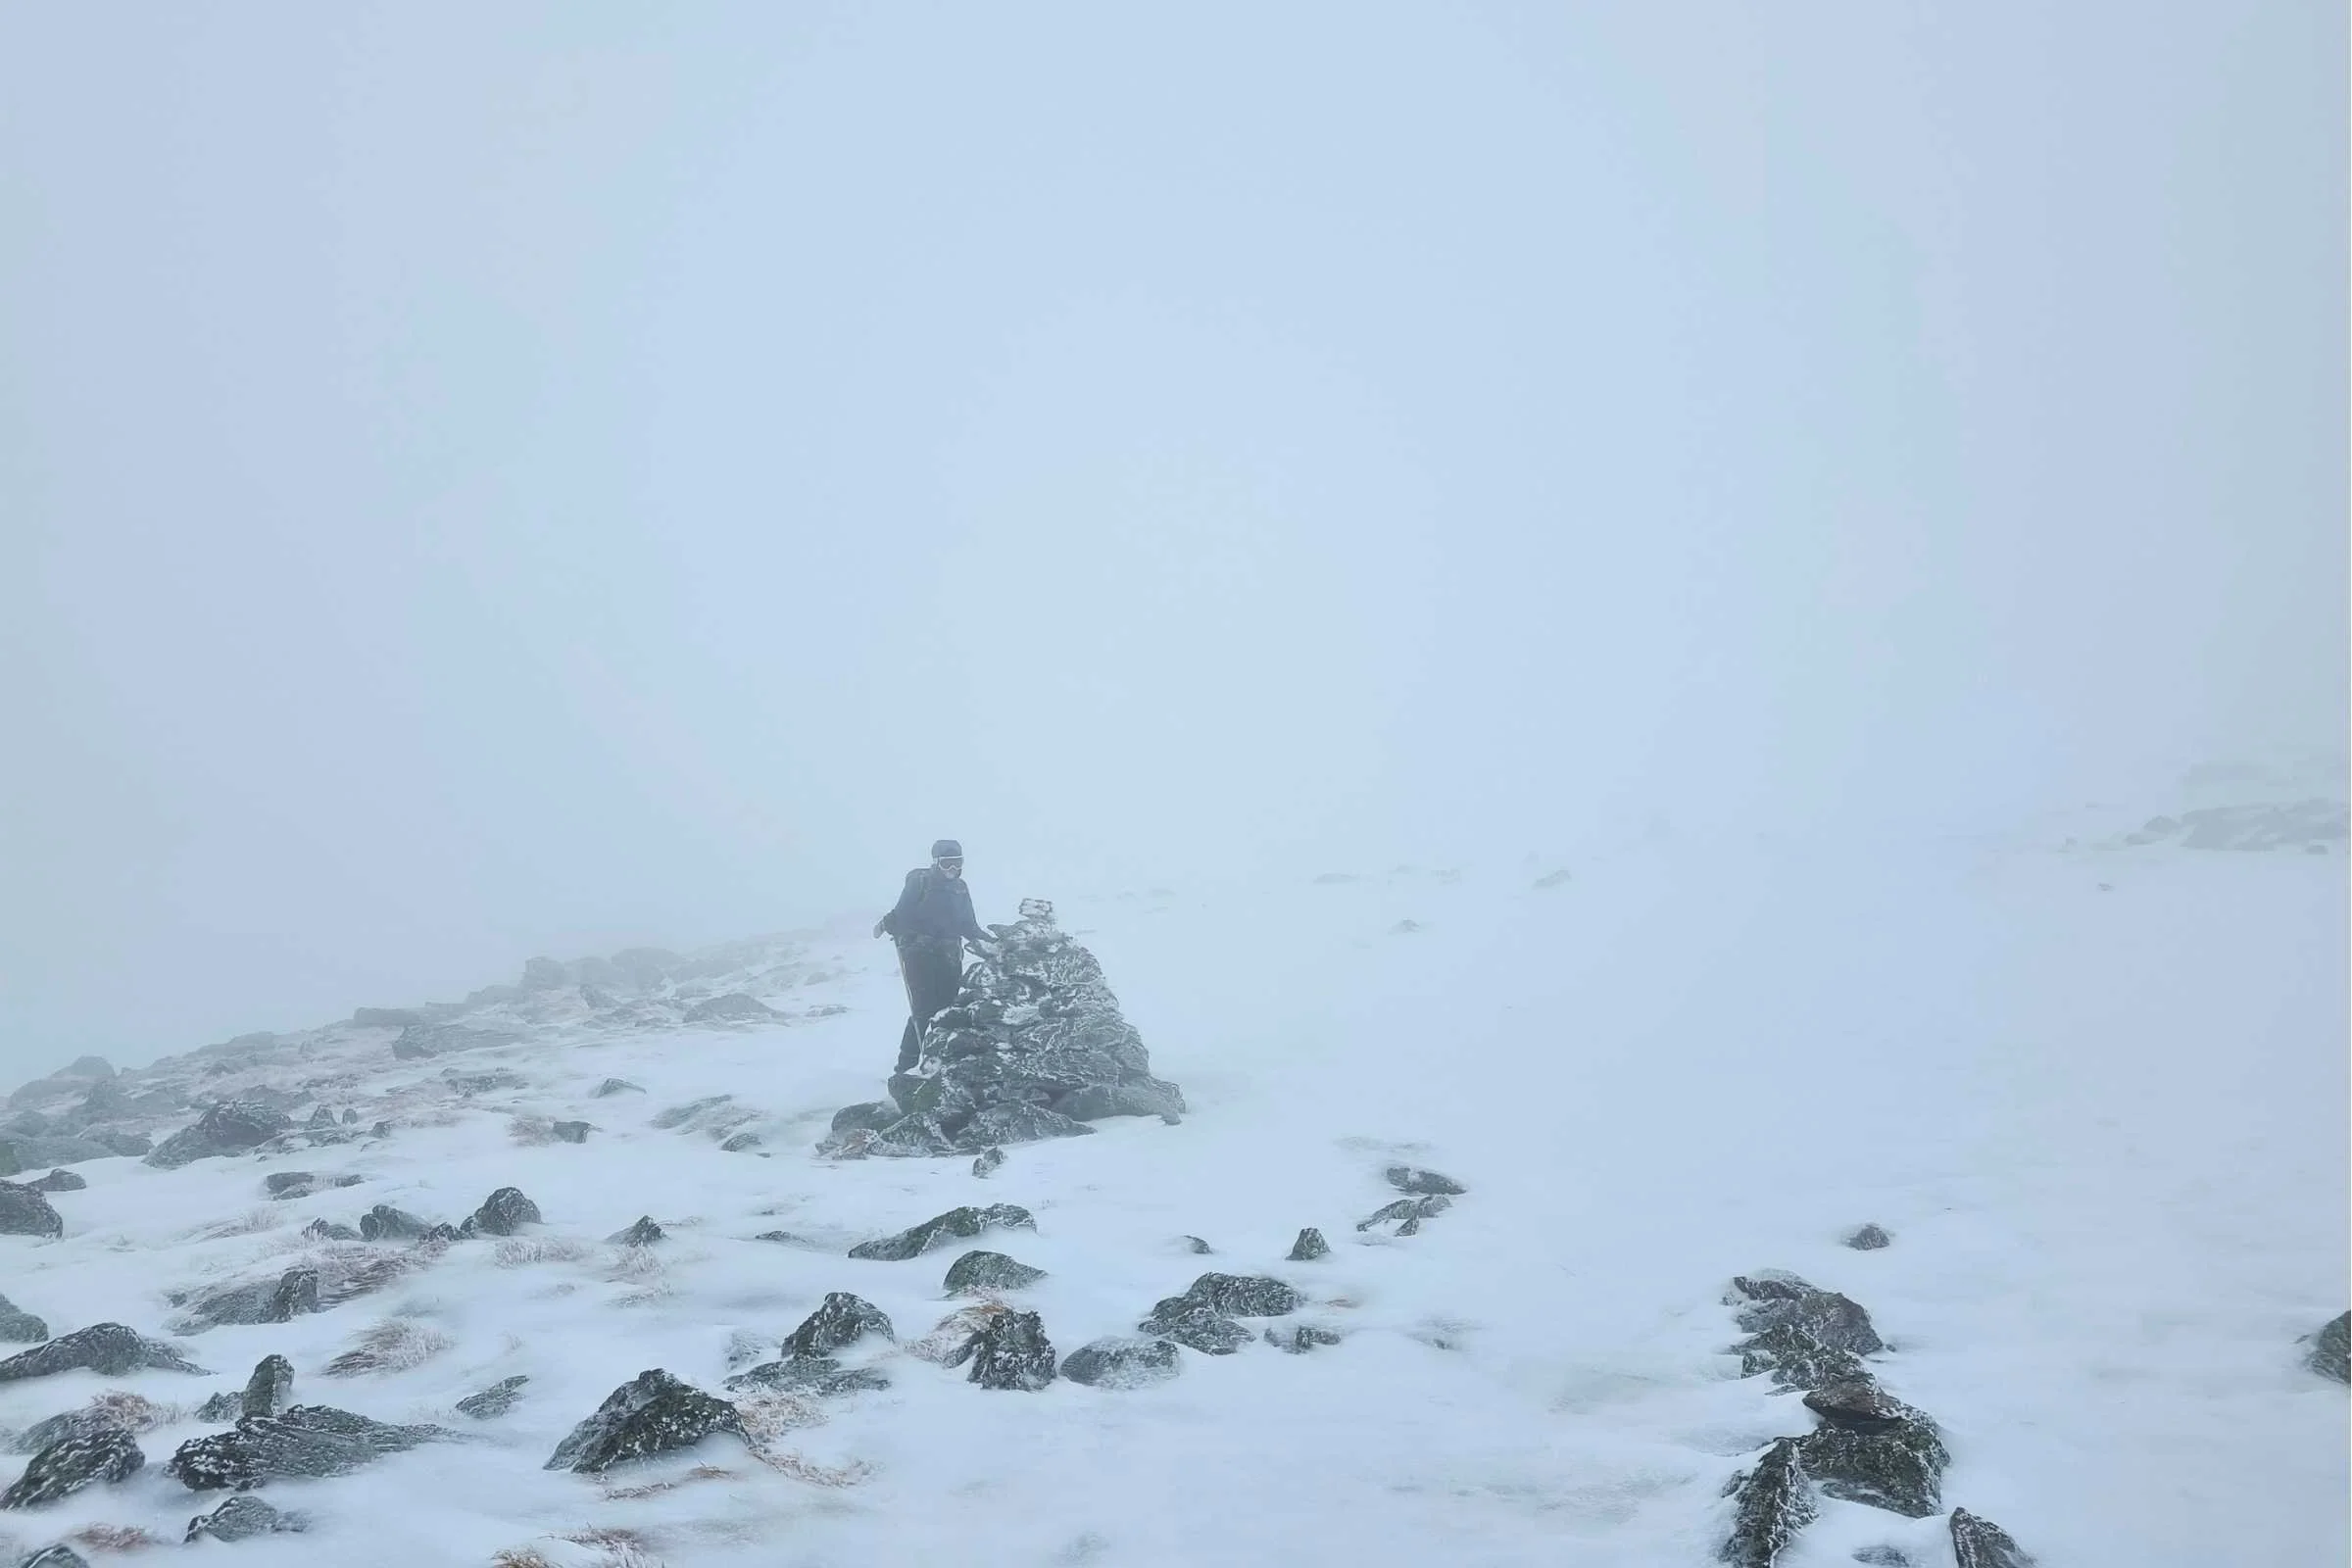
The Presidential Range is one of the only extended above-treeline experiences available on the East Coast. It is an epic, awe-inspiring hiking adventure that requires careful planning to avoid dangerous conditions, like high winds, low temperatures, no or low visibility, residual snowpack, rain, and snow.
I have completed so many Presi Traverses, I’ve forgotten exactly how many. But I have records of at least 12, with half of those being completed in the winter season. I have done Presi Traverses in very tough conditions, including complete white-out, zero visibility due to thick clouds, -50 windchill, sustained winds of 50+ MPH, and gusts of up to 75 MPH.
I also have extensive 4-season experience in the White Mountains, having completed a New Hampshire 48 4,000 Footers grid, where I summited each of NH’s 48 peaks every month of the year for a total of 576 peaks hiked January through December. I’m looking forward to sharing my intricate knowledge of how to have a safe, amazing hike in the White Mountains.
Land Acknowledgement
We would also like to begin by acknowledging that the land on which this hike is located, the N'dakinna, is the unceded territory of the Wabanaki (Dawnland Confederacy), which is the ancestral homeland of the Abenaki, Pennacook, and Wabanaki Peoples, past and present.
The tallest summit of the N’dakinna (often now known as Mt. Washington) was known as Agiocochook or K8daakwaj. We acknowledge and honor with gratitude the land and waterways and the Indigenous peoples who have stewarded N’dakinna and Agiocochook throughout the generations.
We ask you to join us in taking material steps to recognizing our access to stolen Indigenous land, such as through a voluntary land use tax through donation to one of the local White Mountains Indigenous tribes, such as the Cowasuck Band of the Pennacook-Abenaki People or the Sovereign Koasek W8banaki Band.
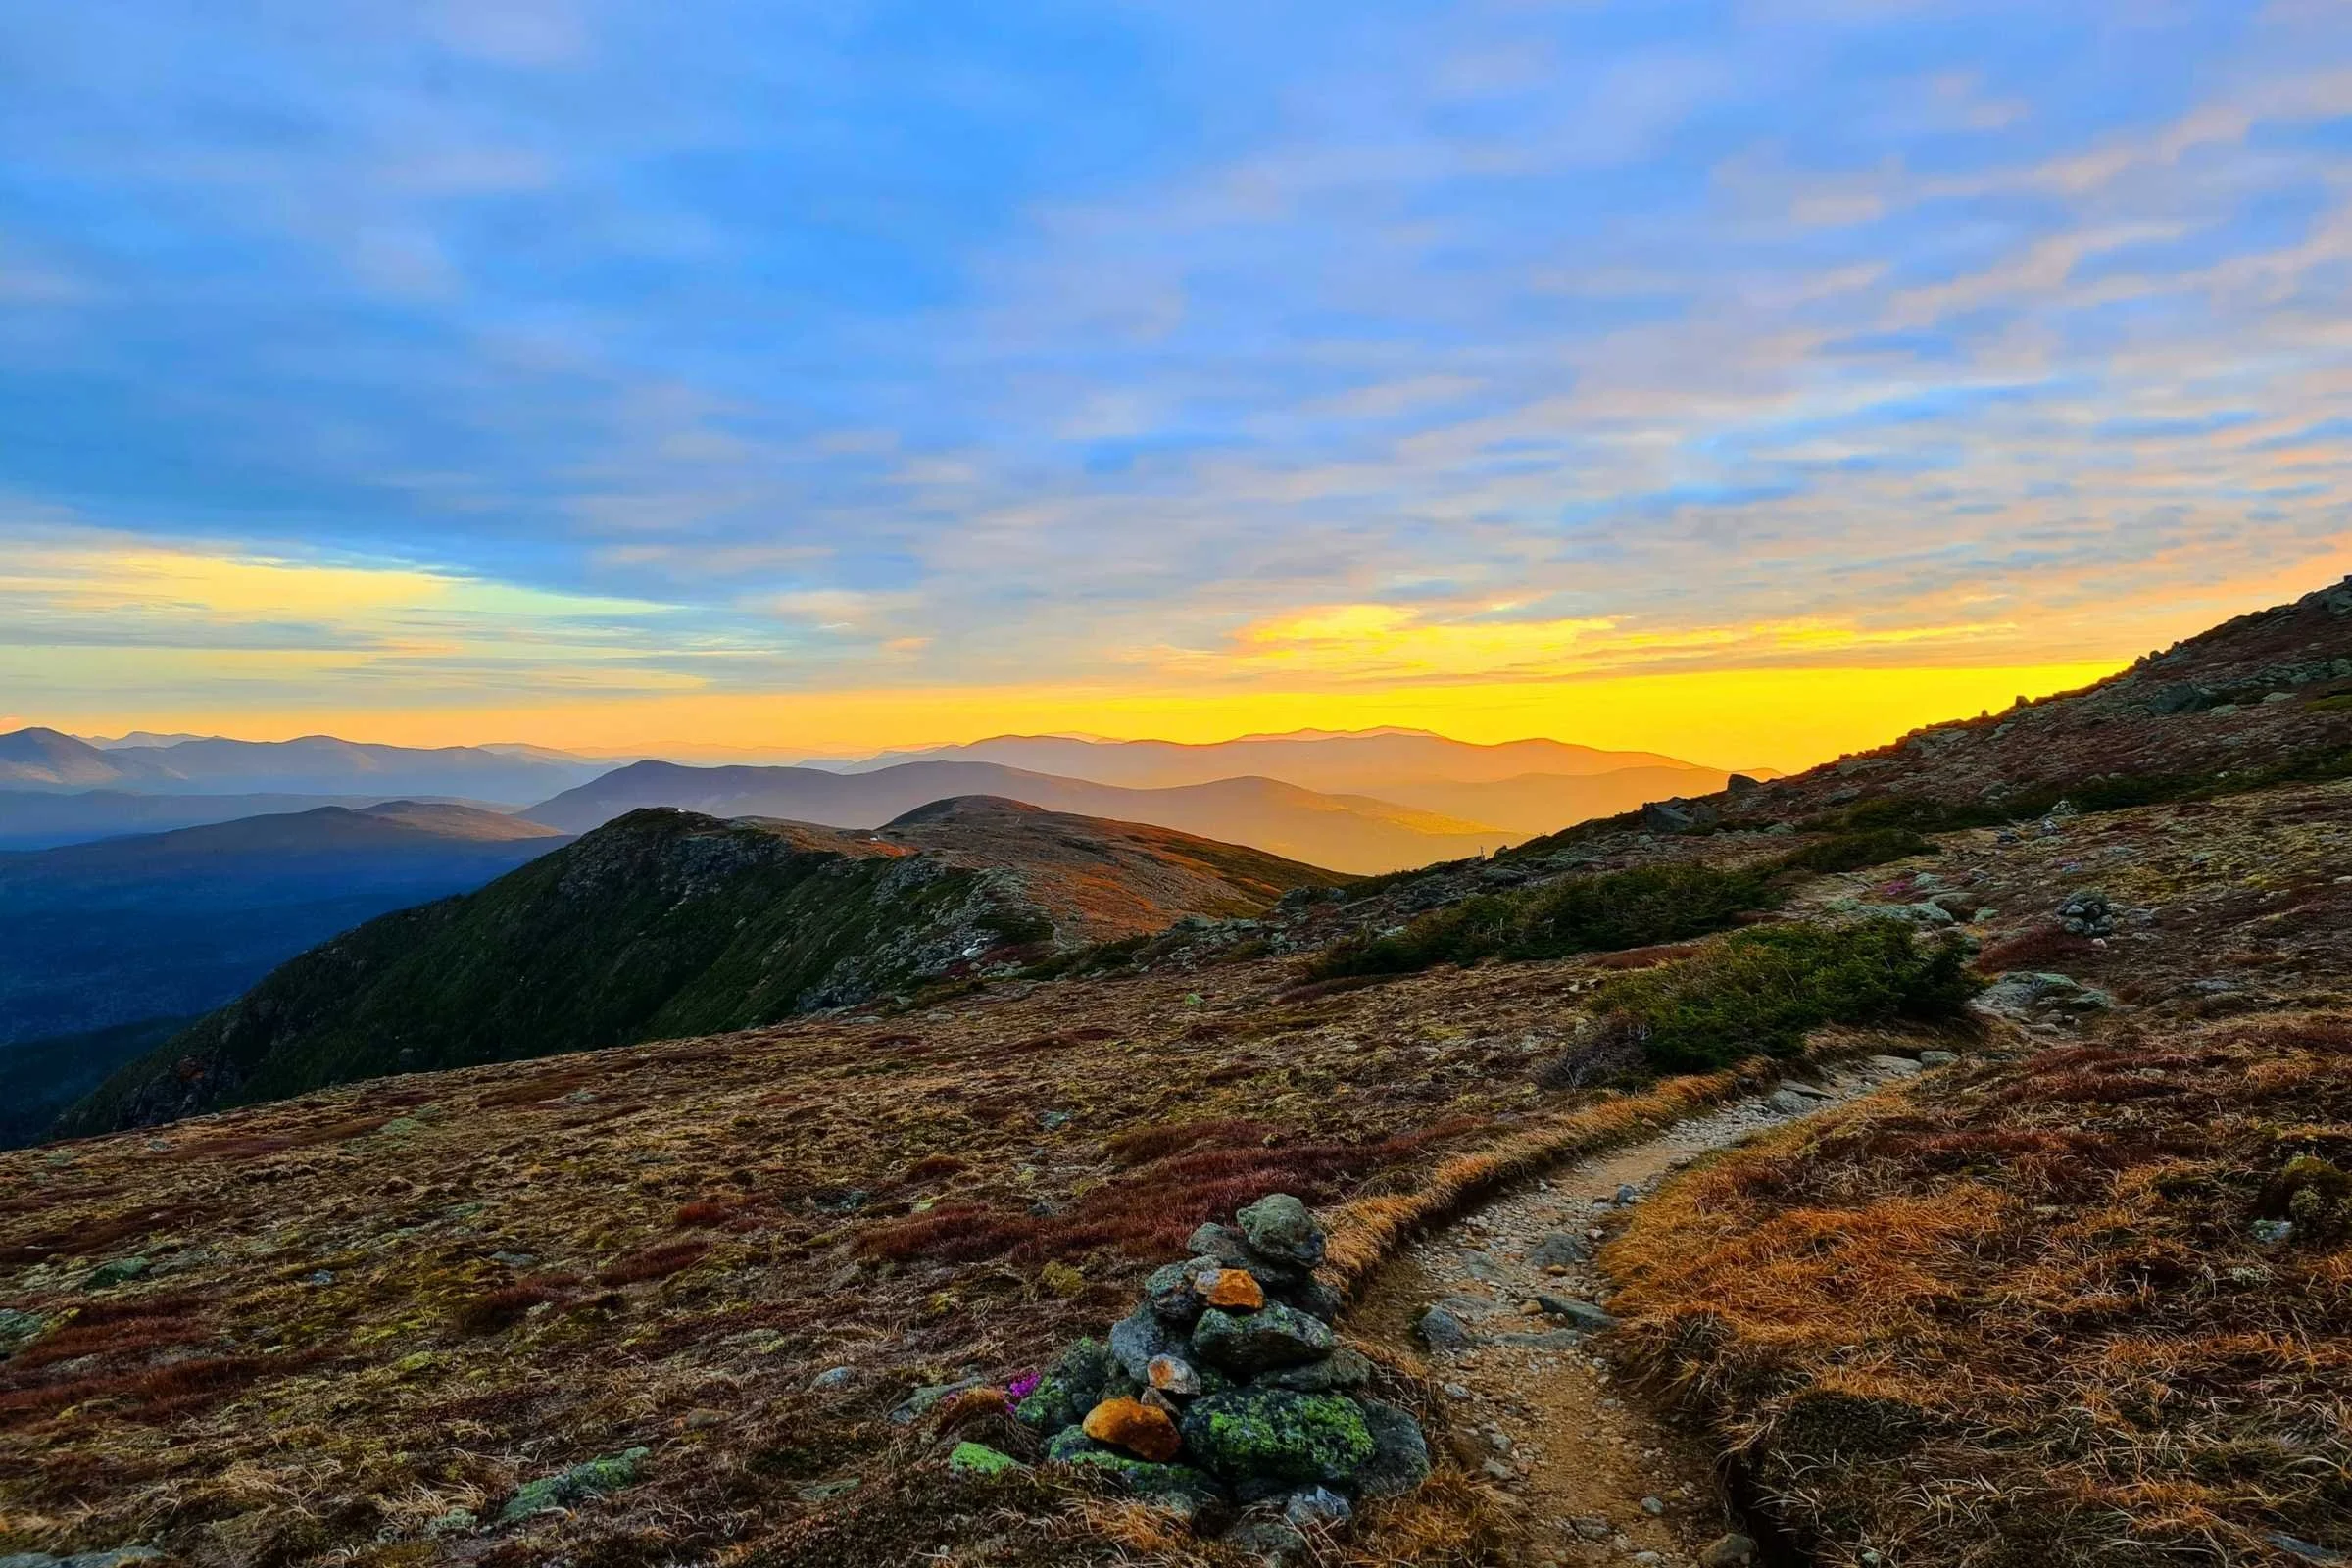
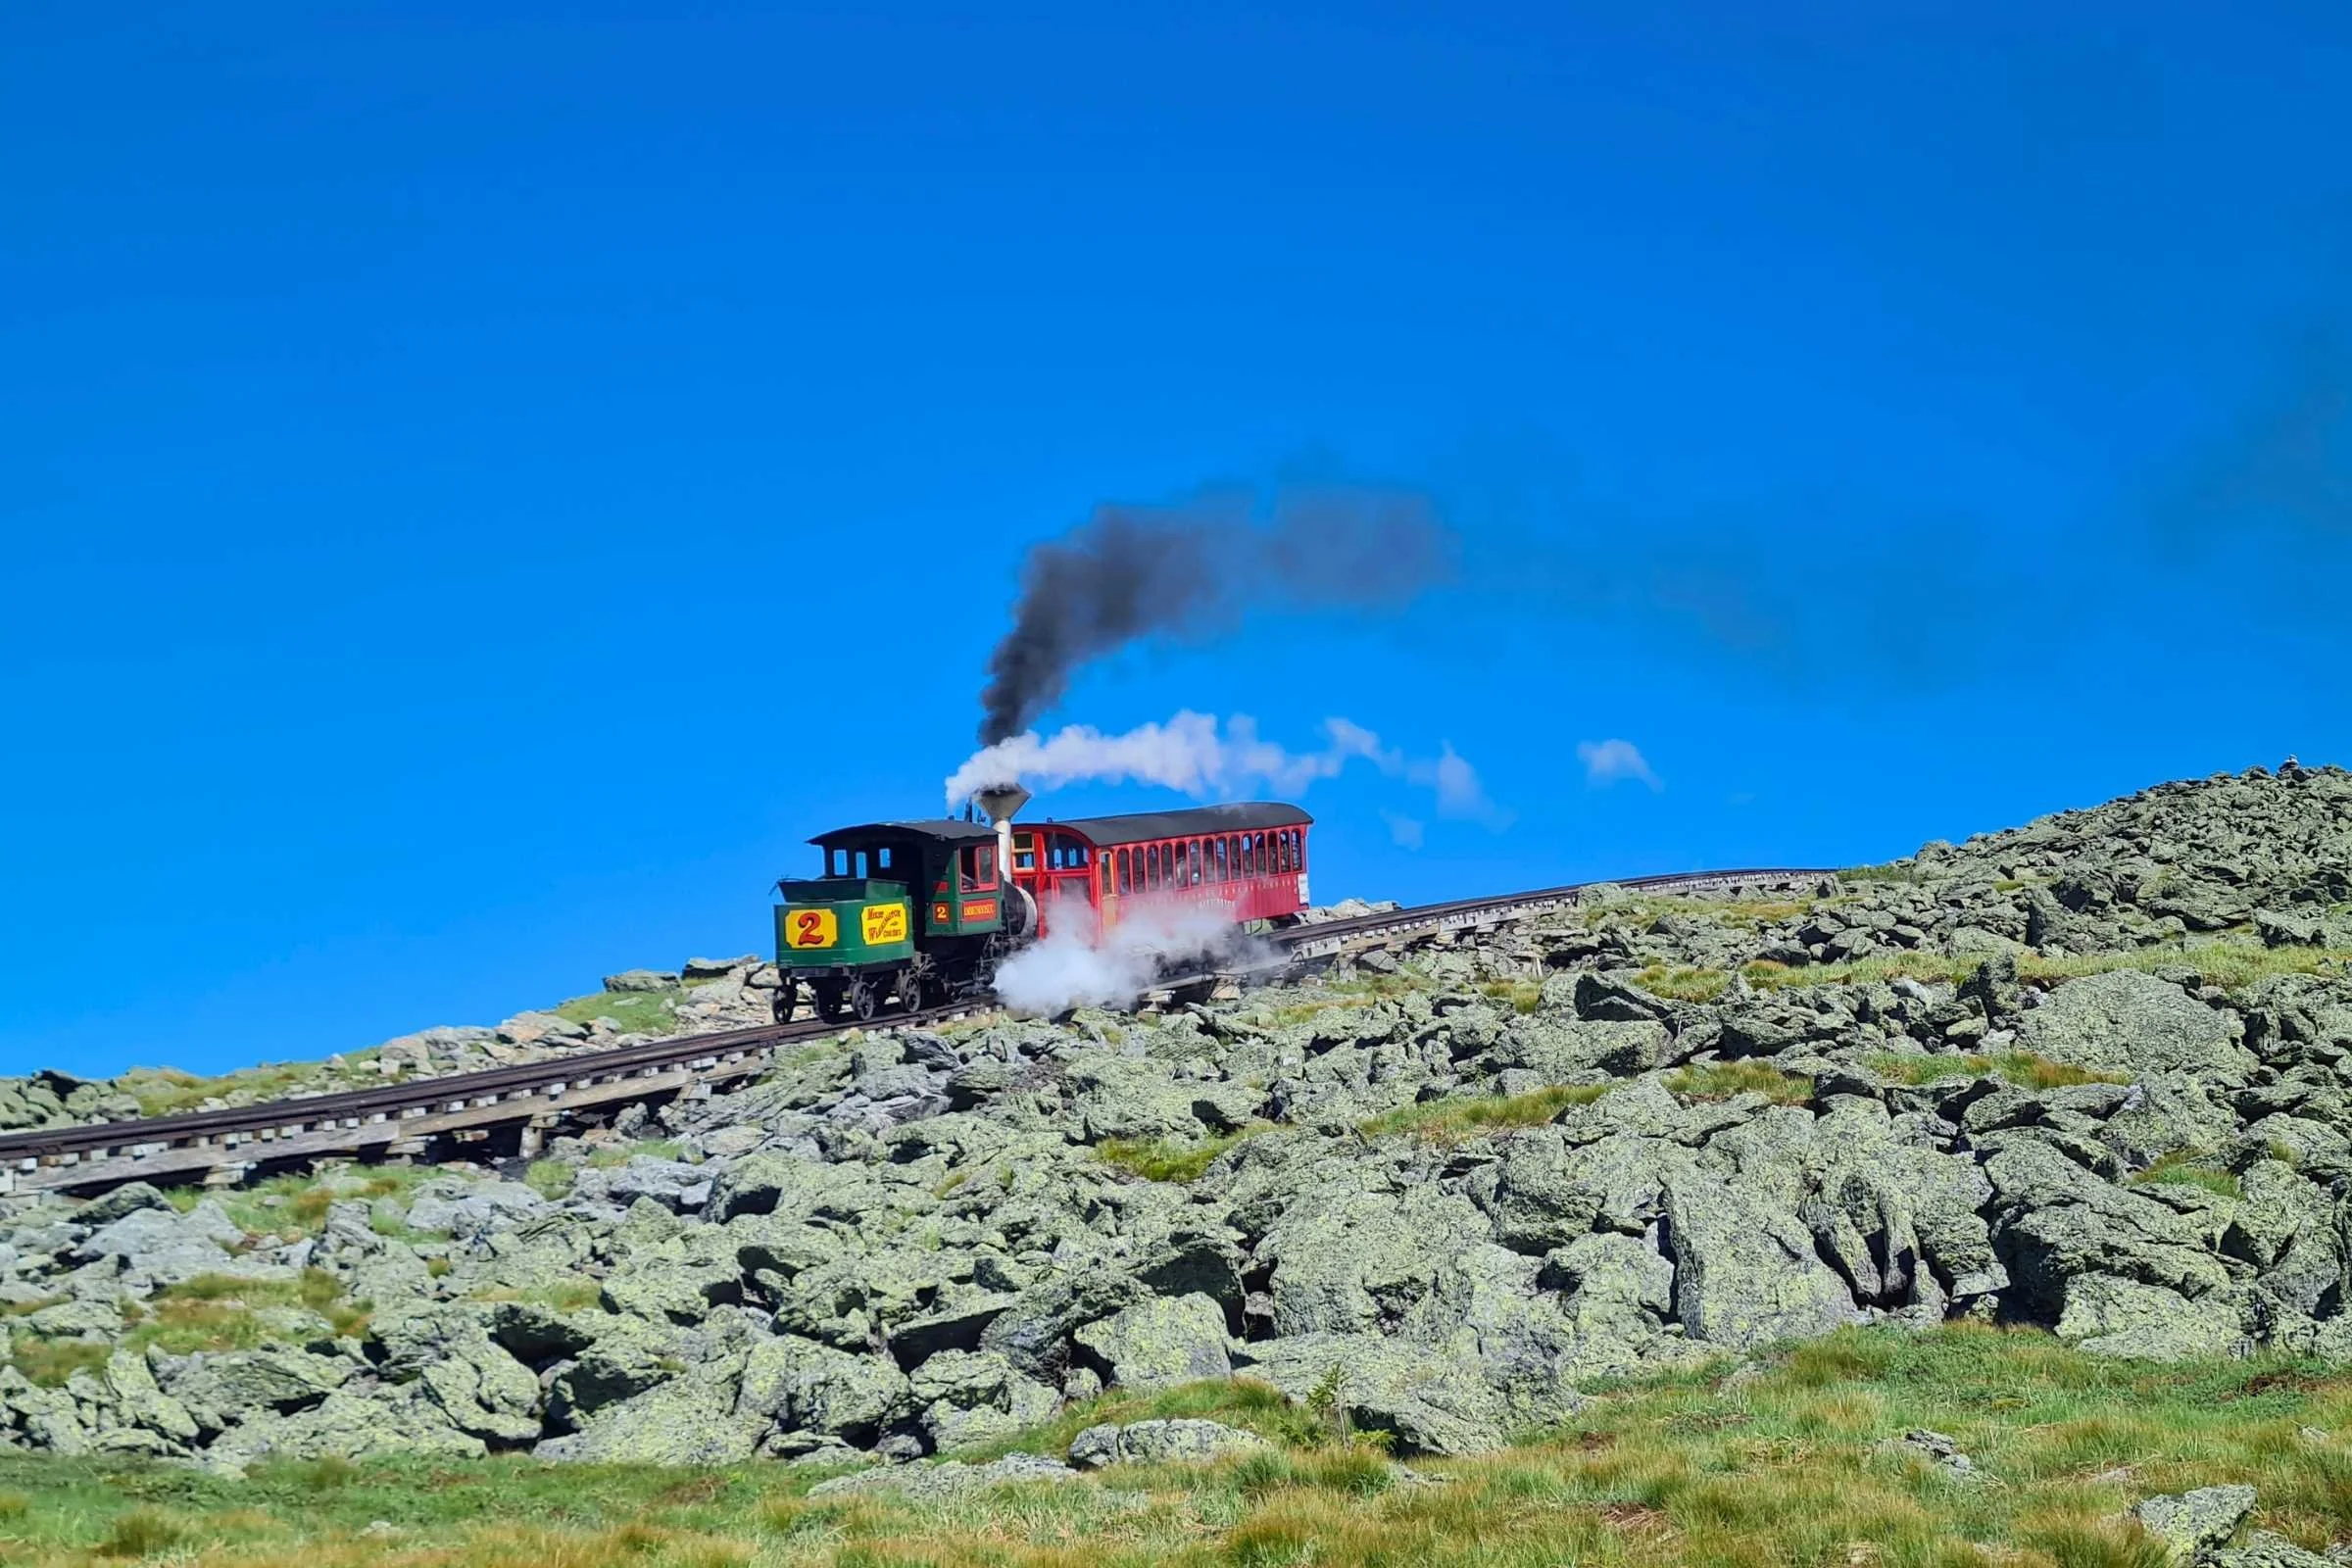
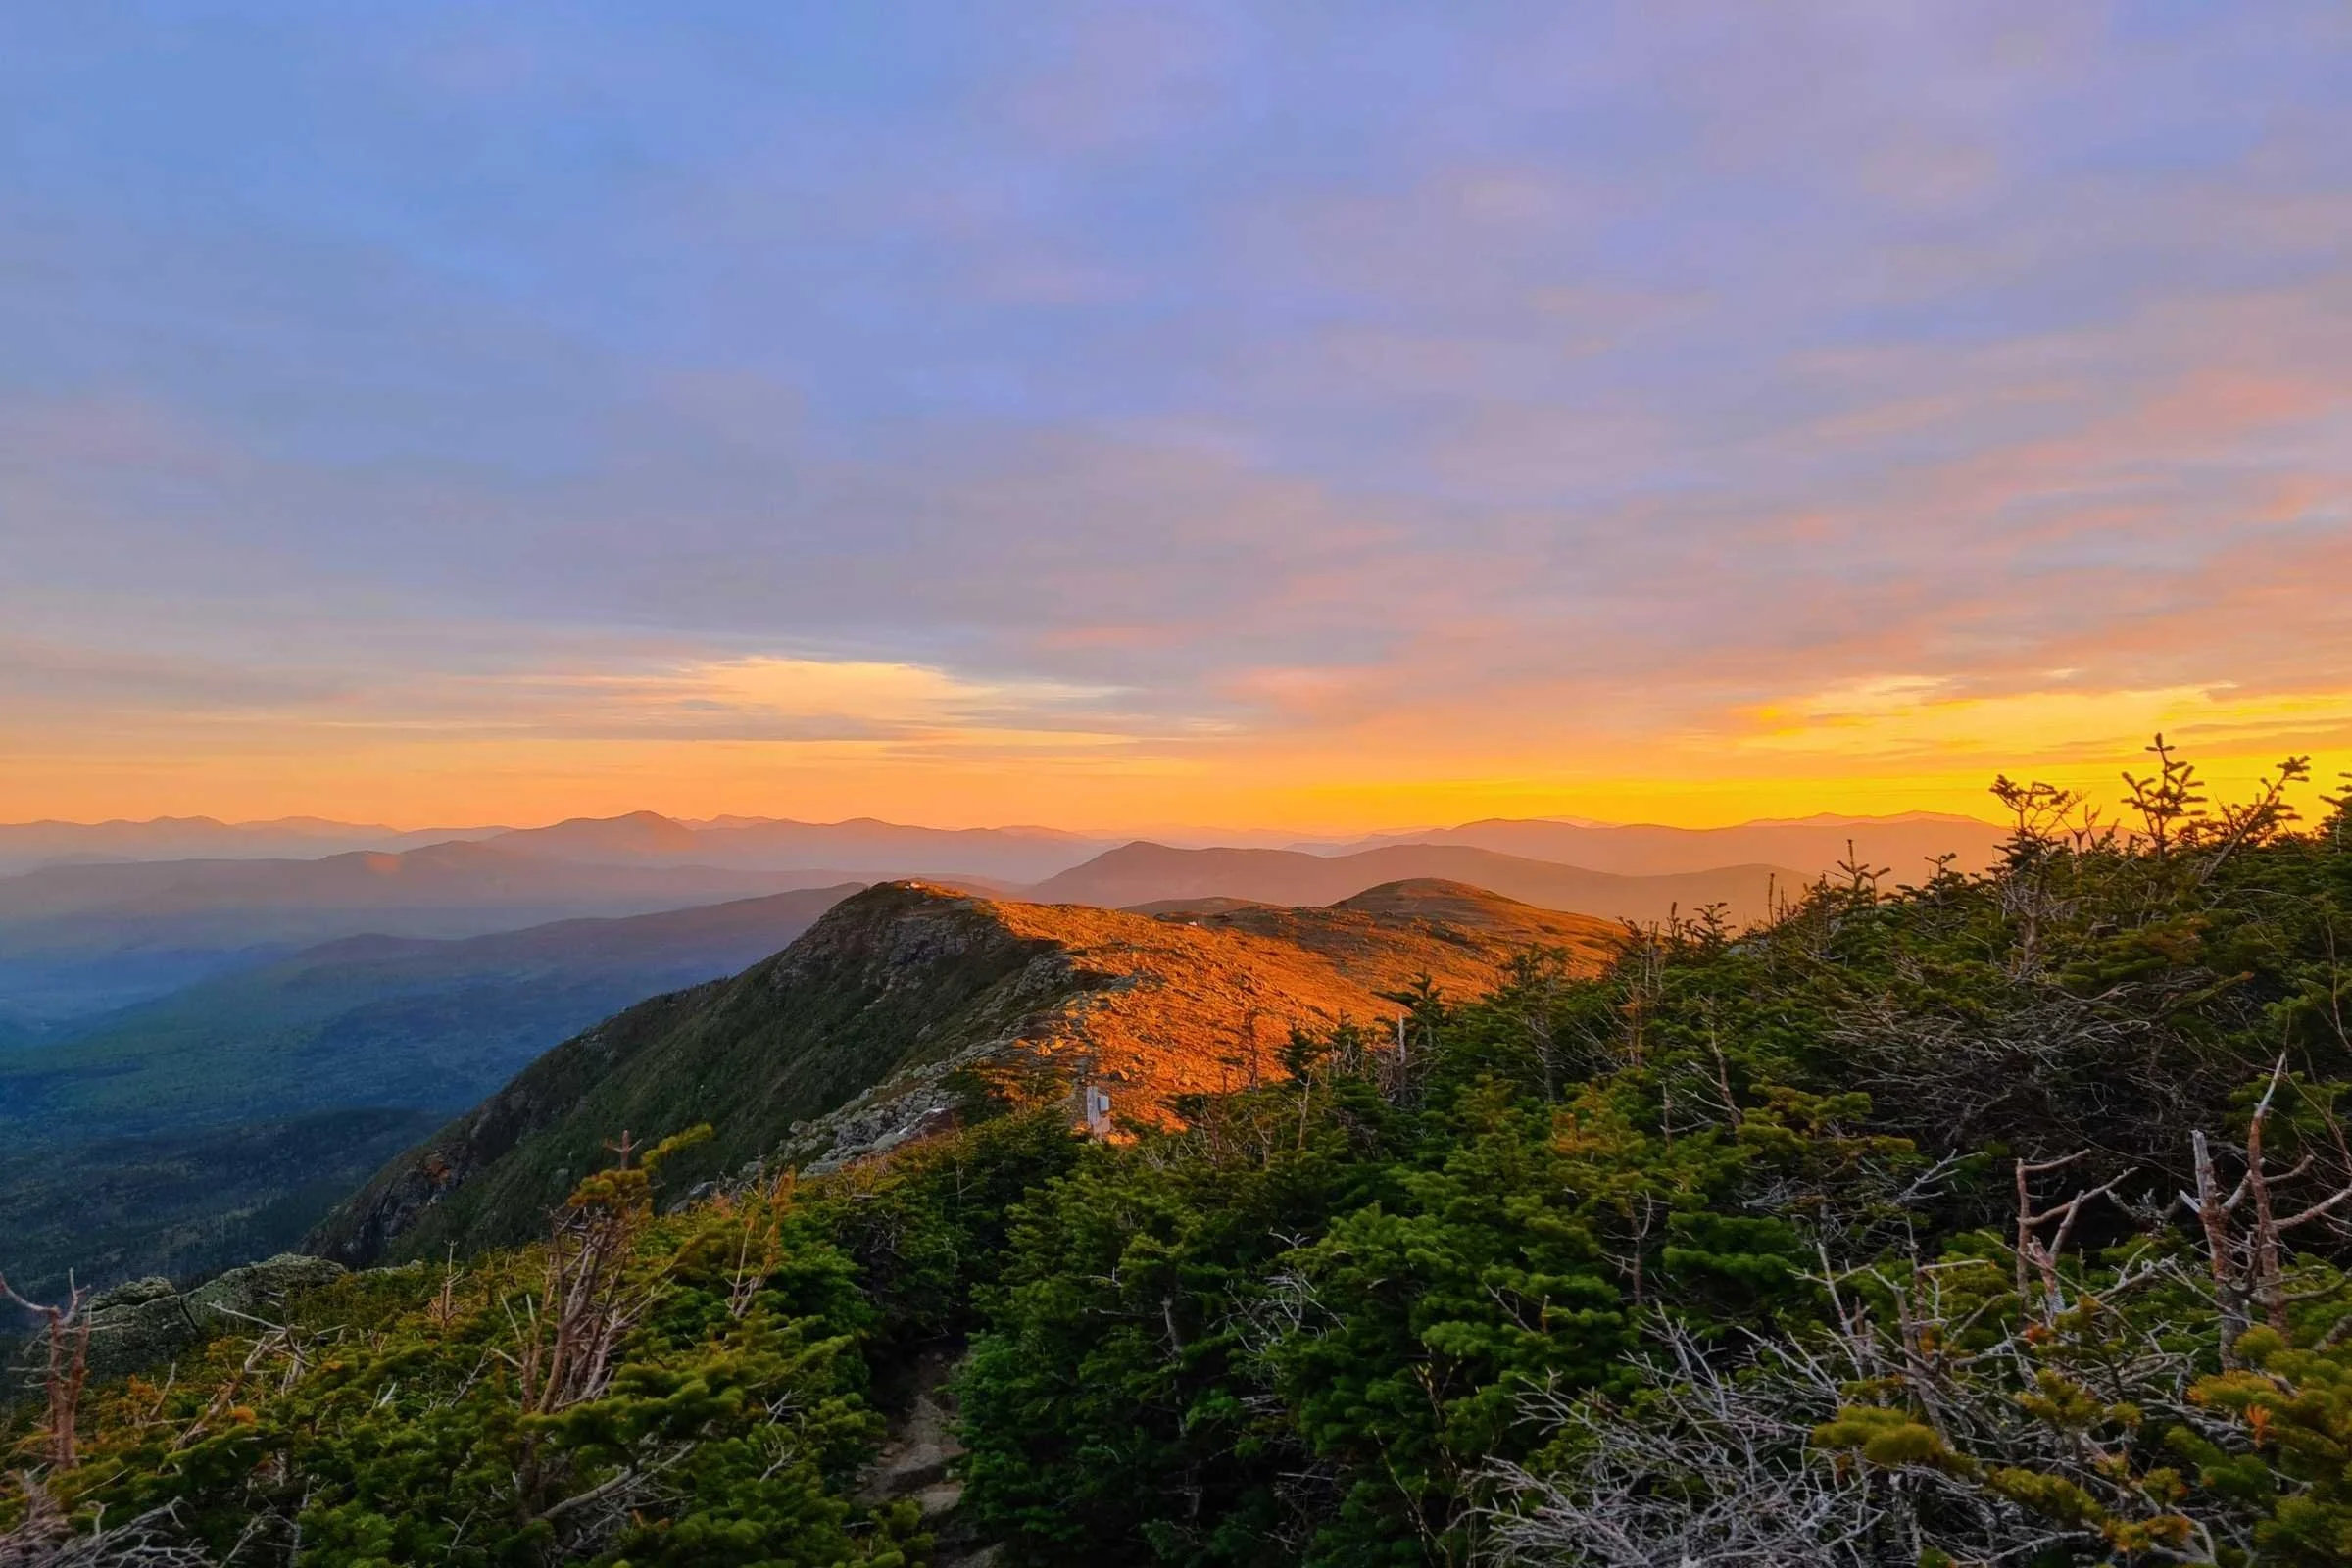
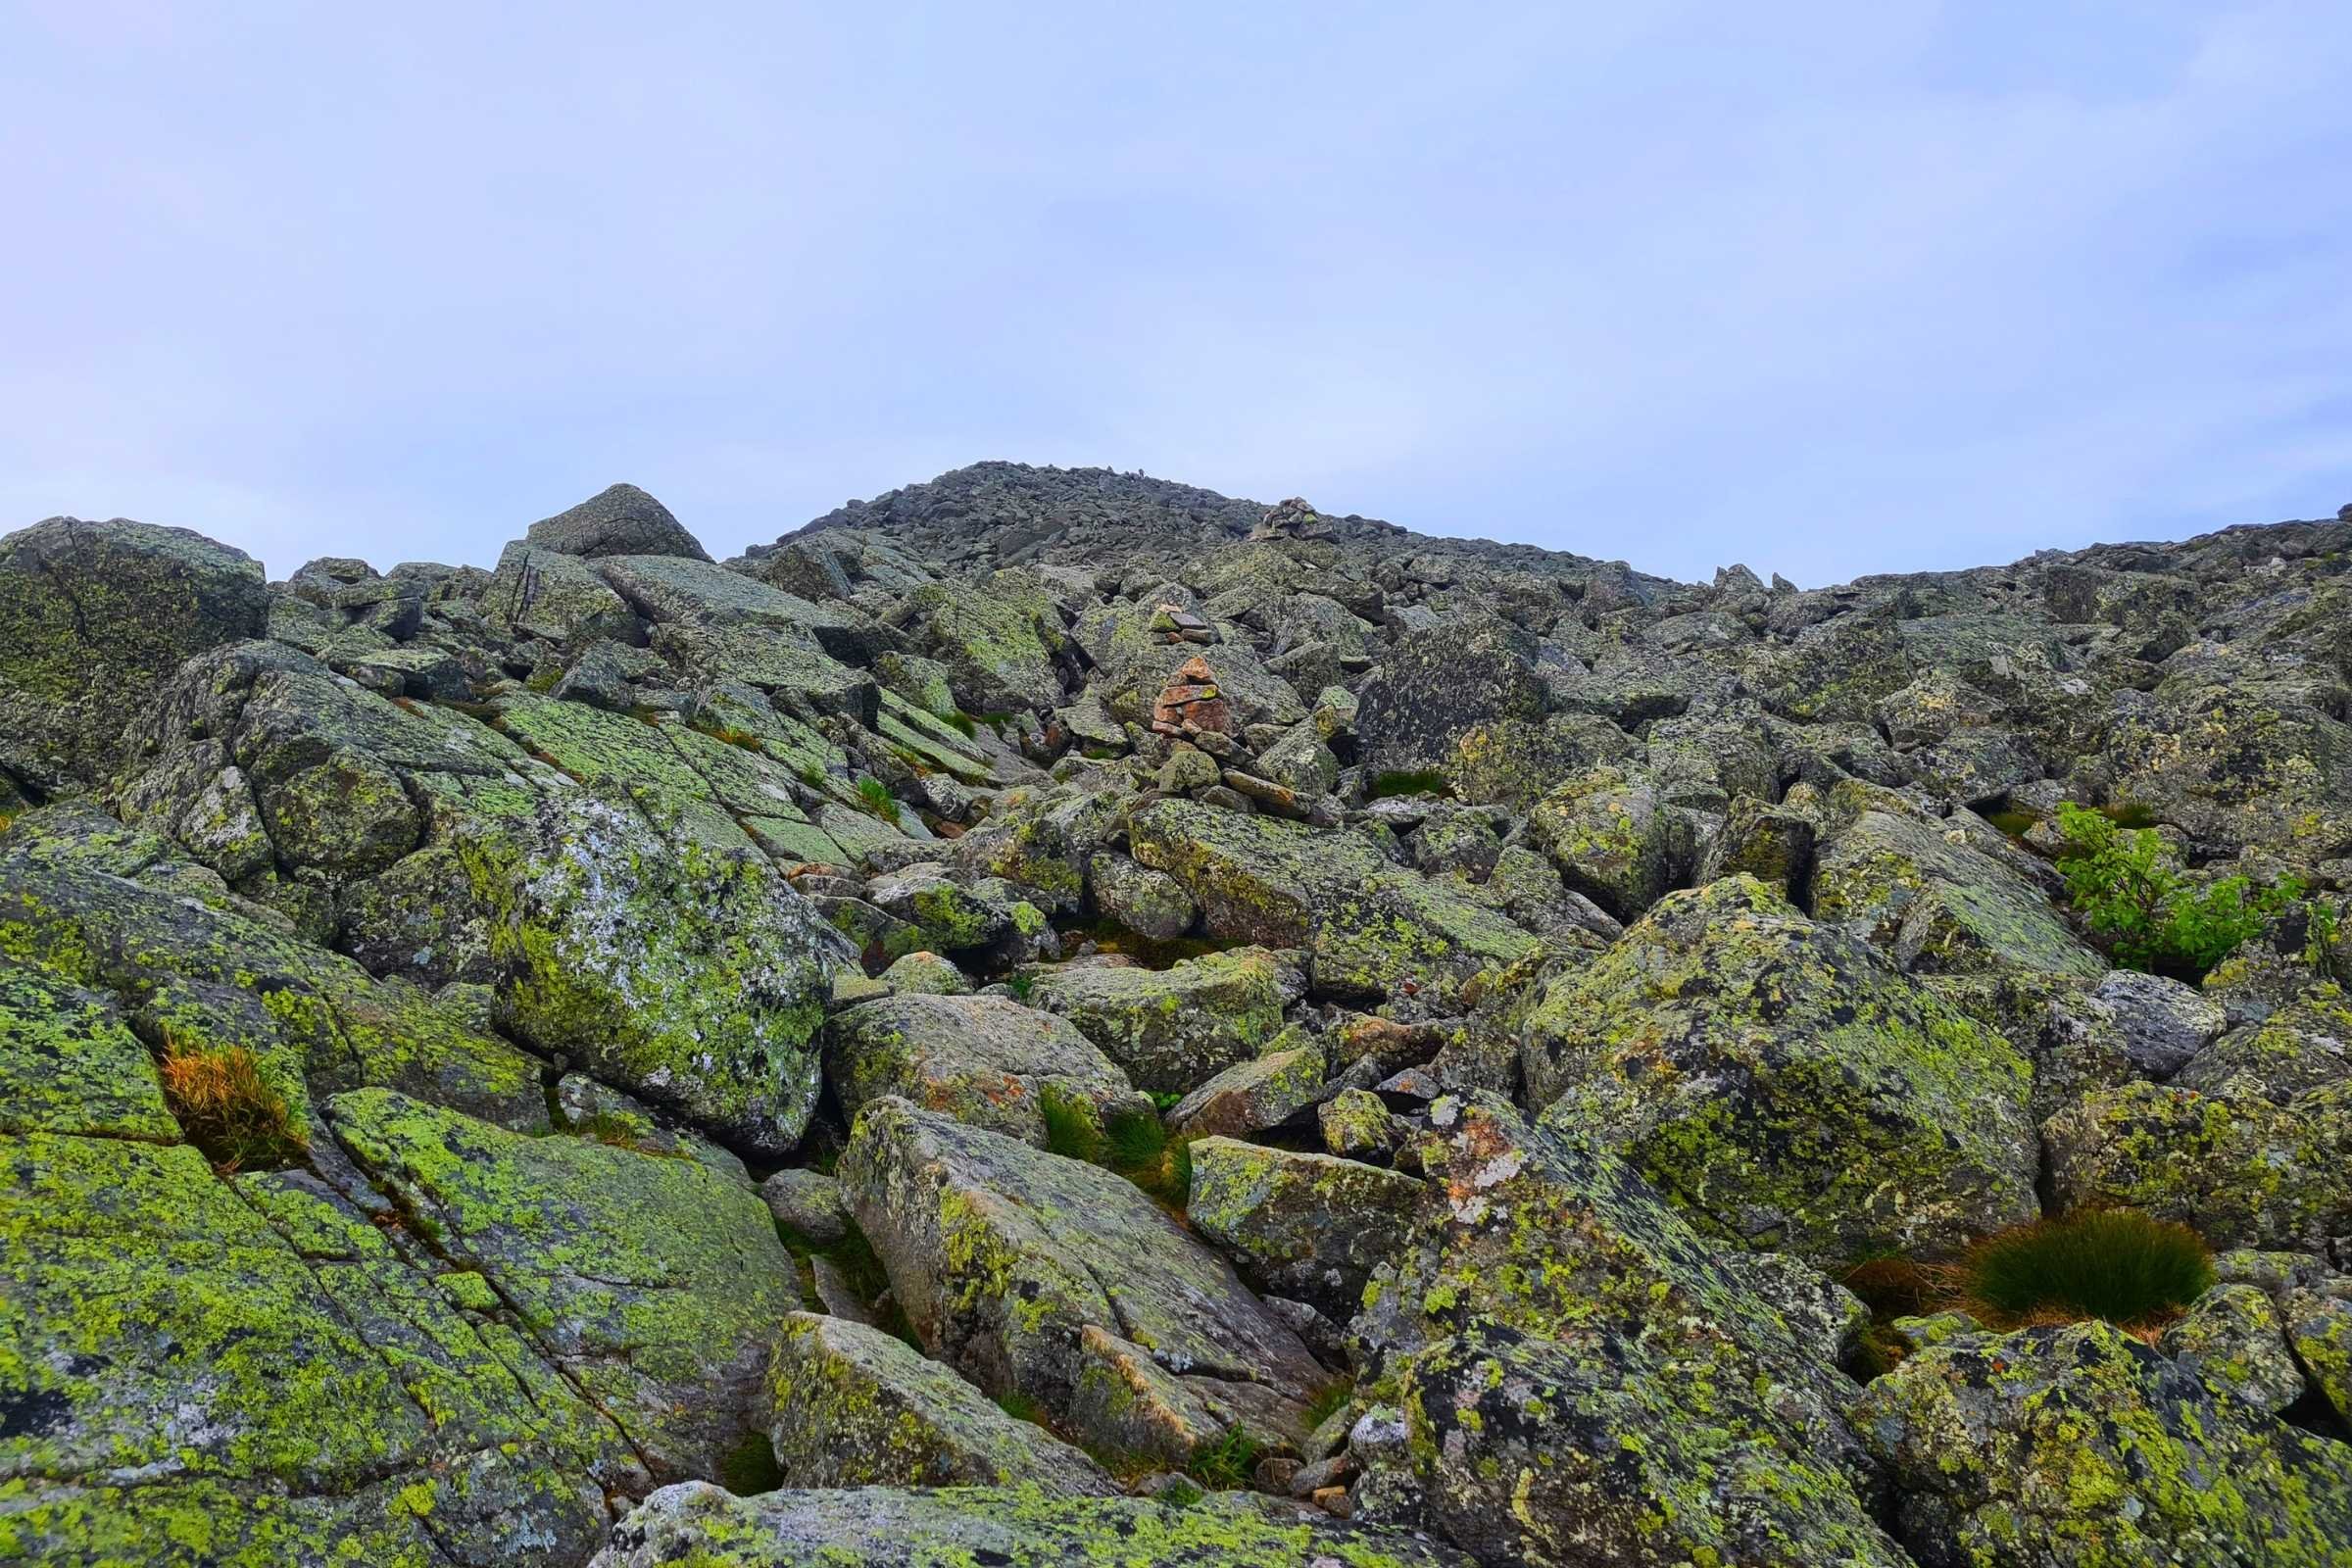
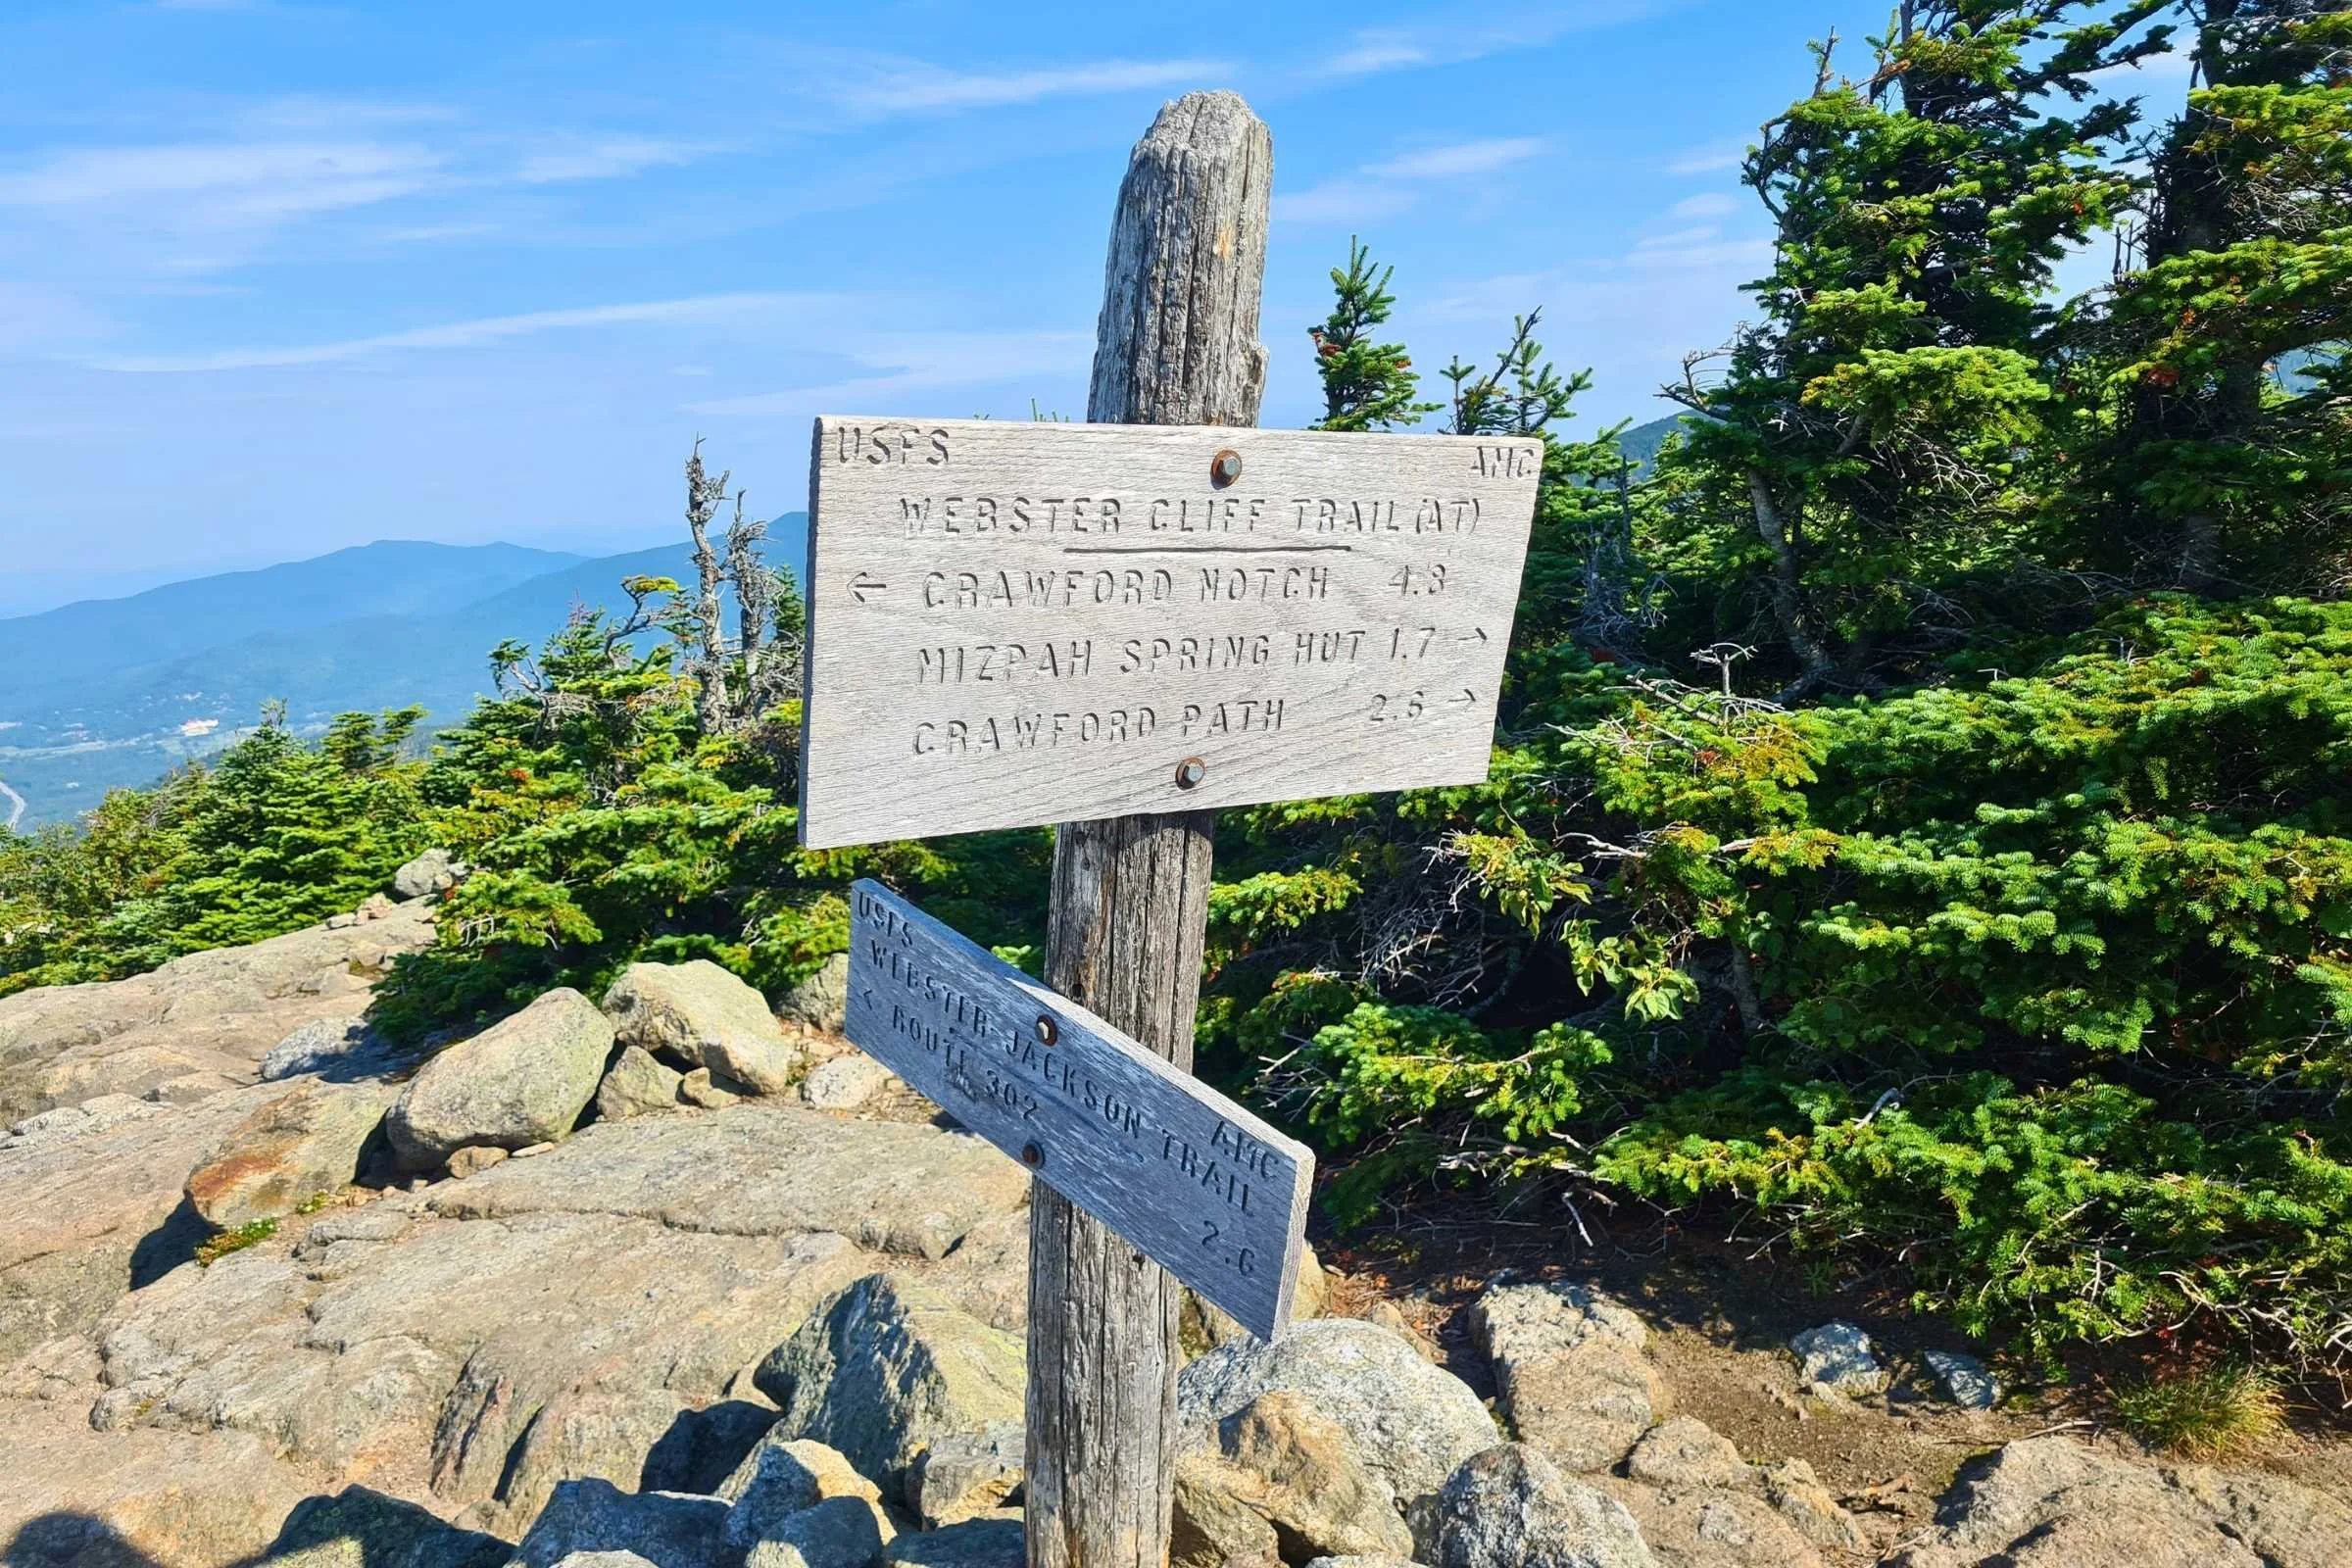
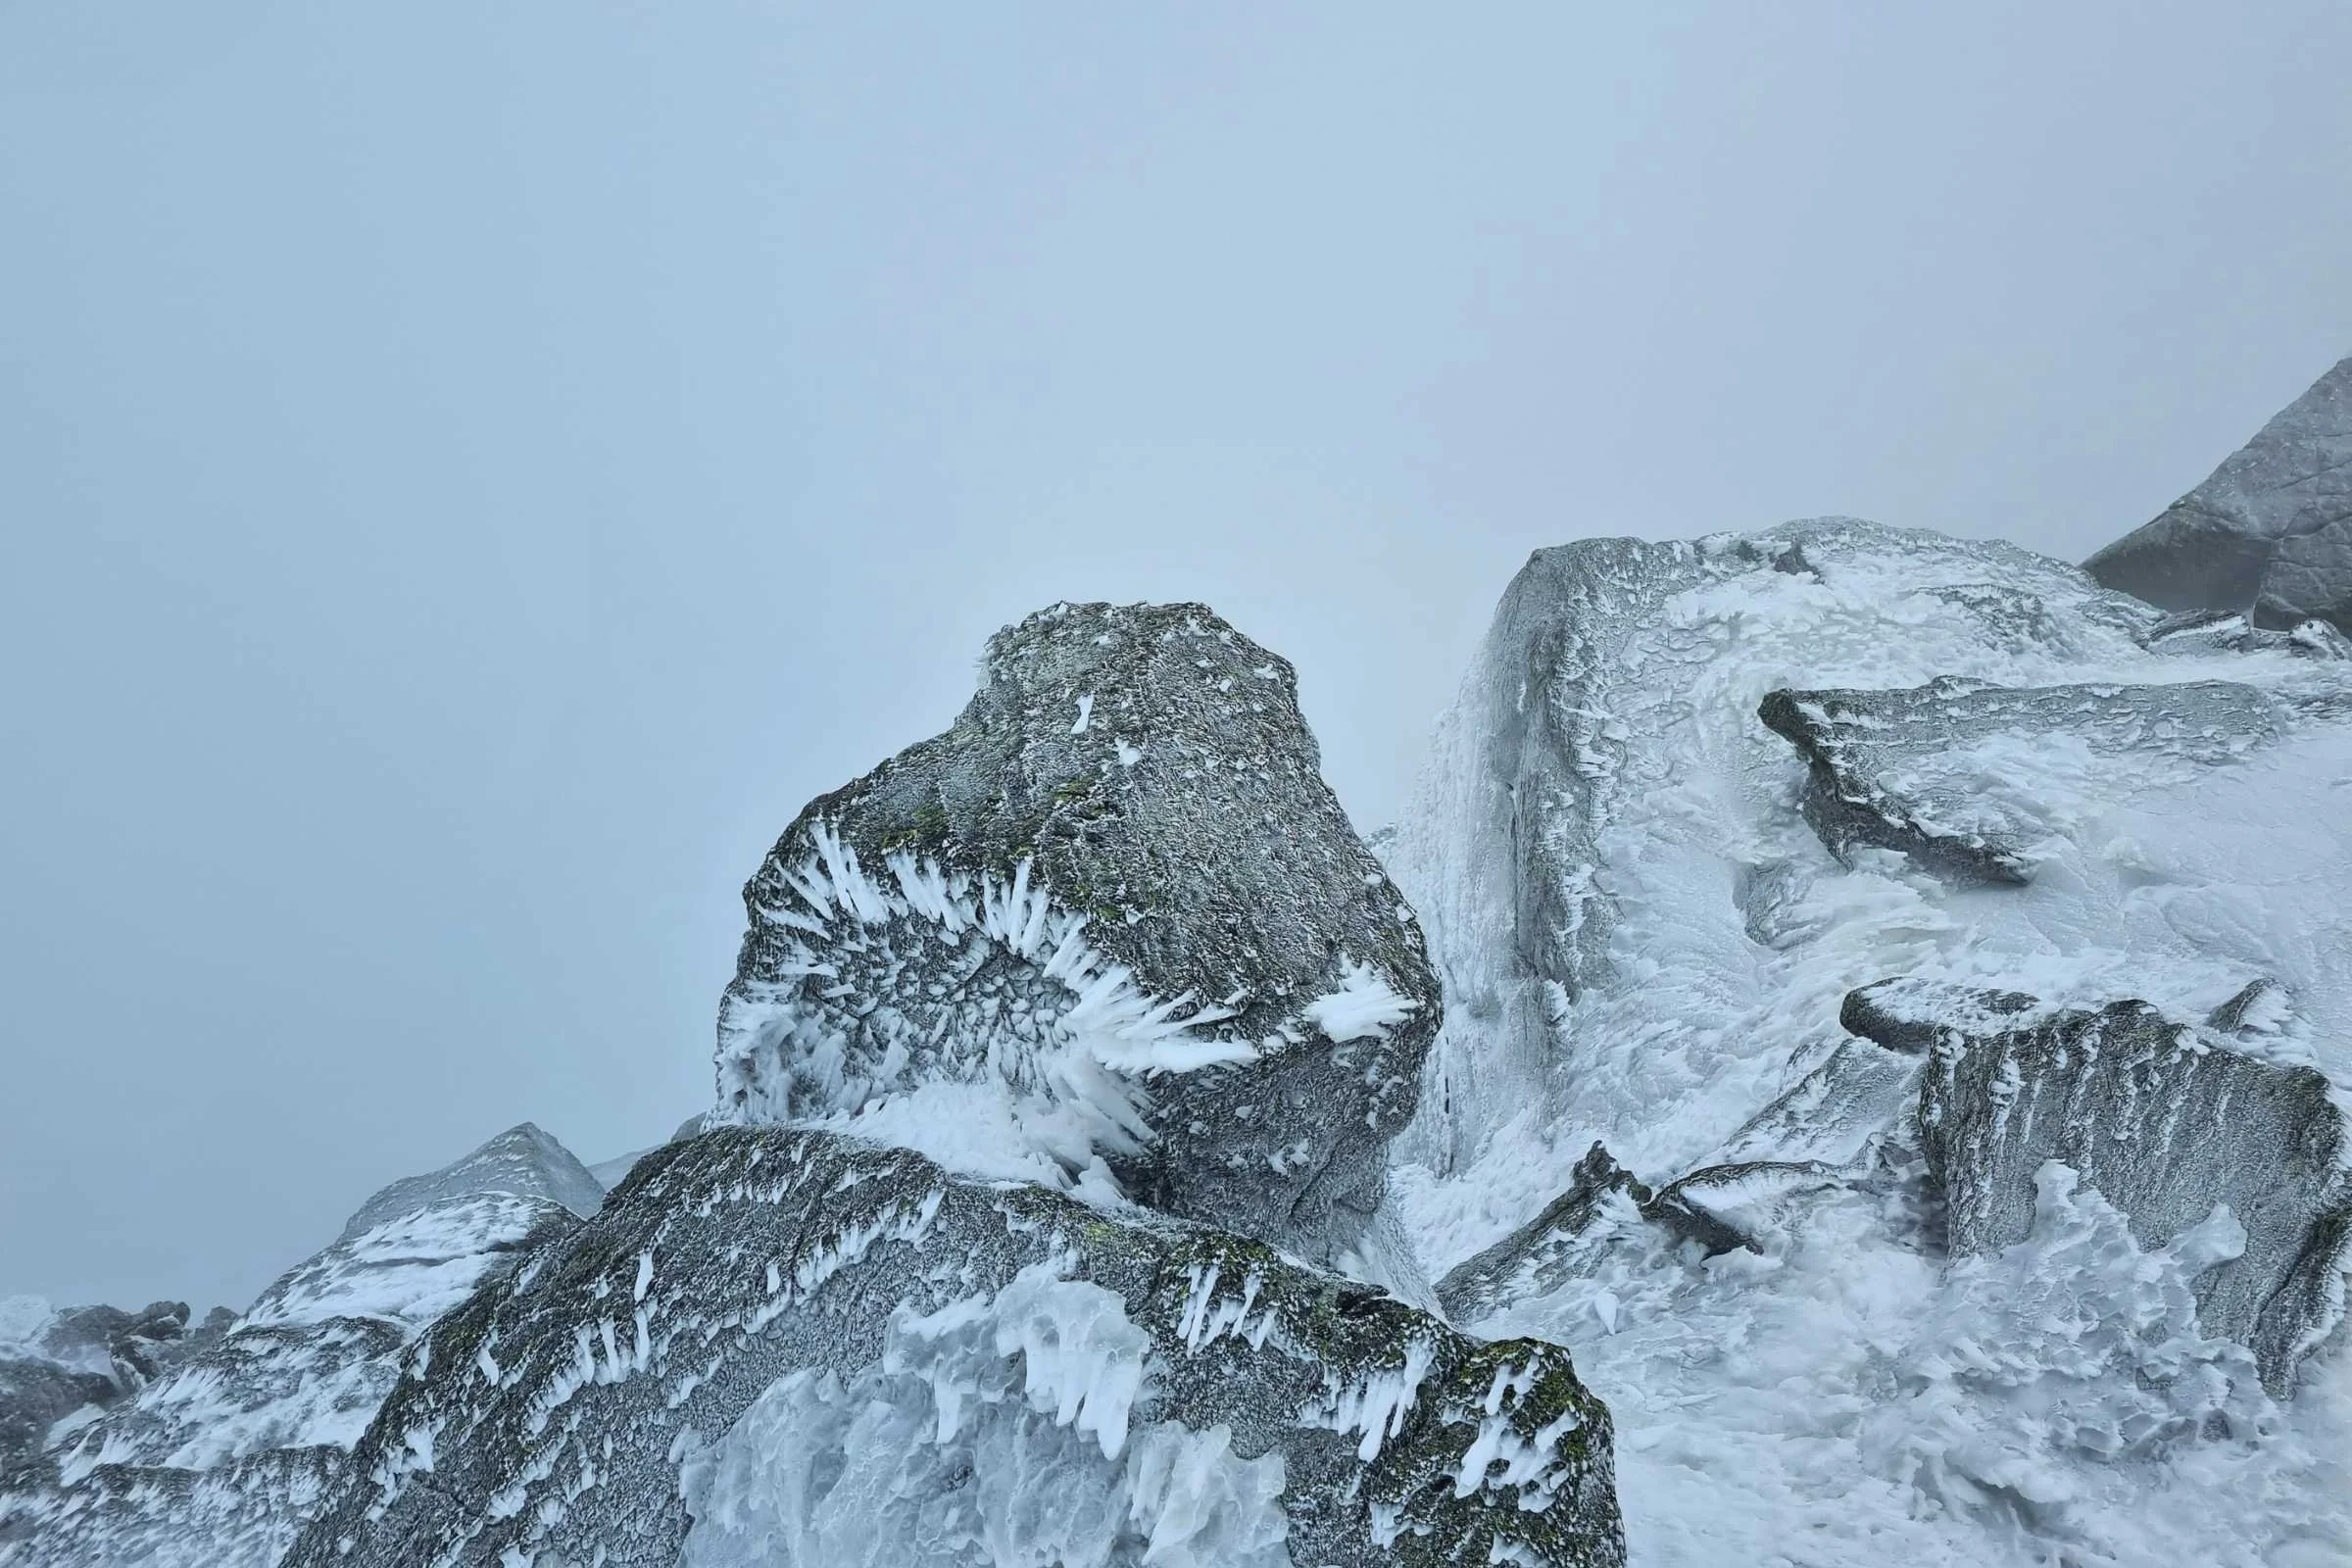
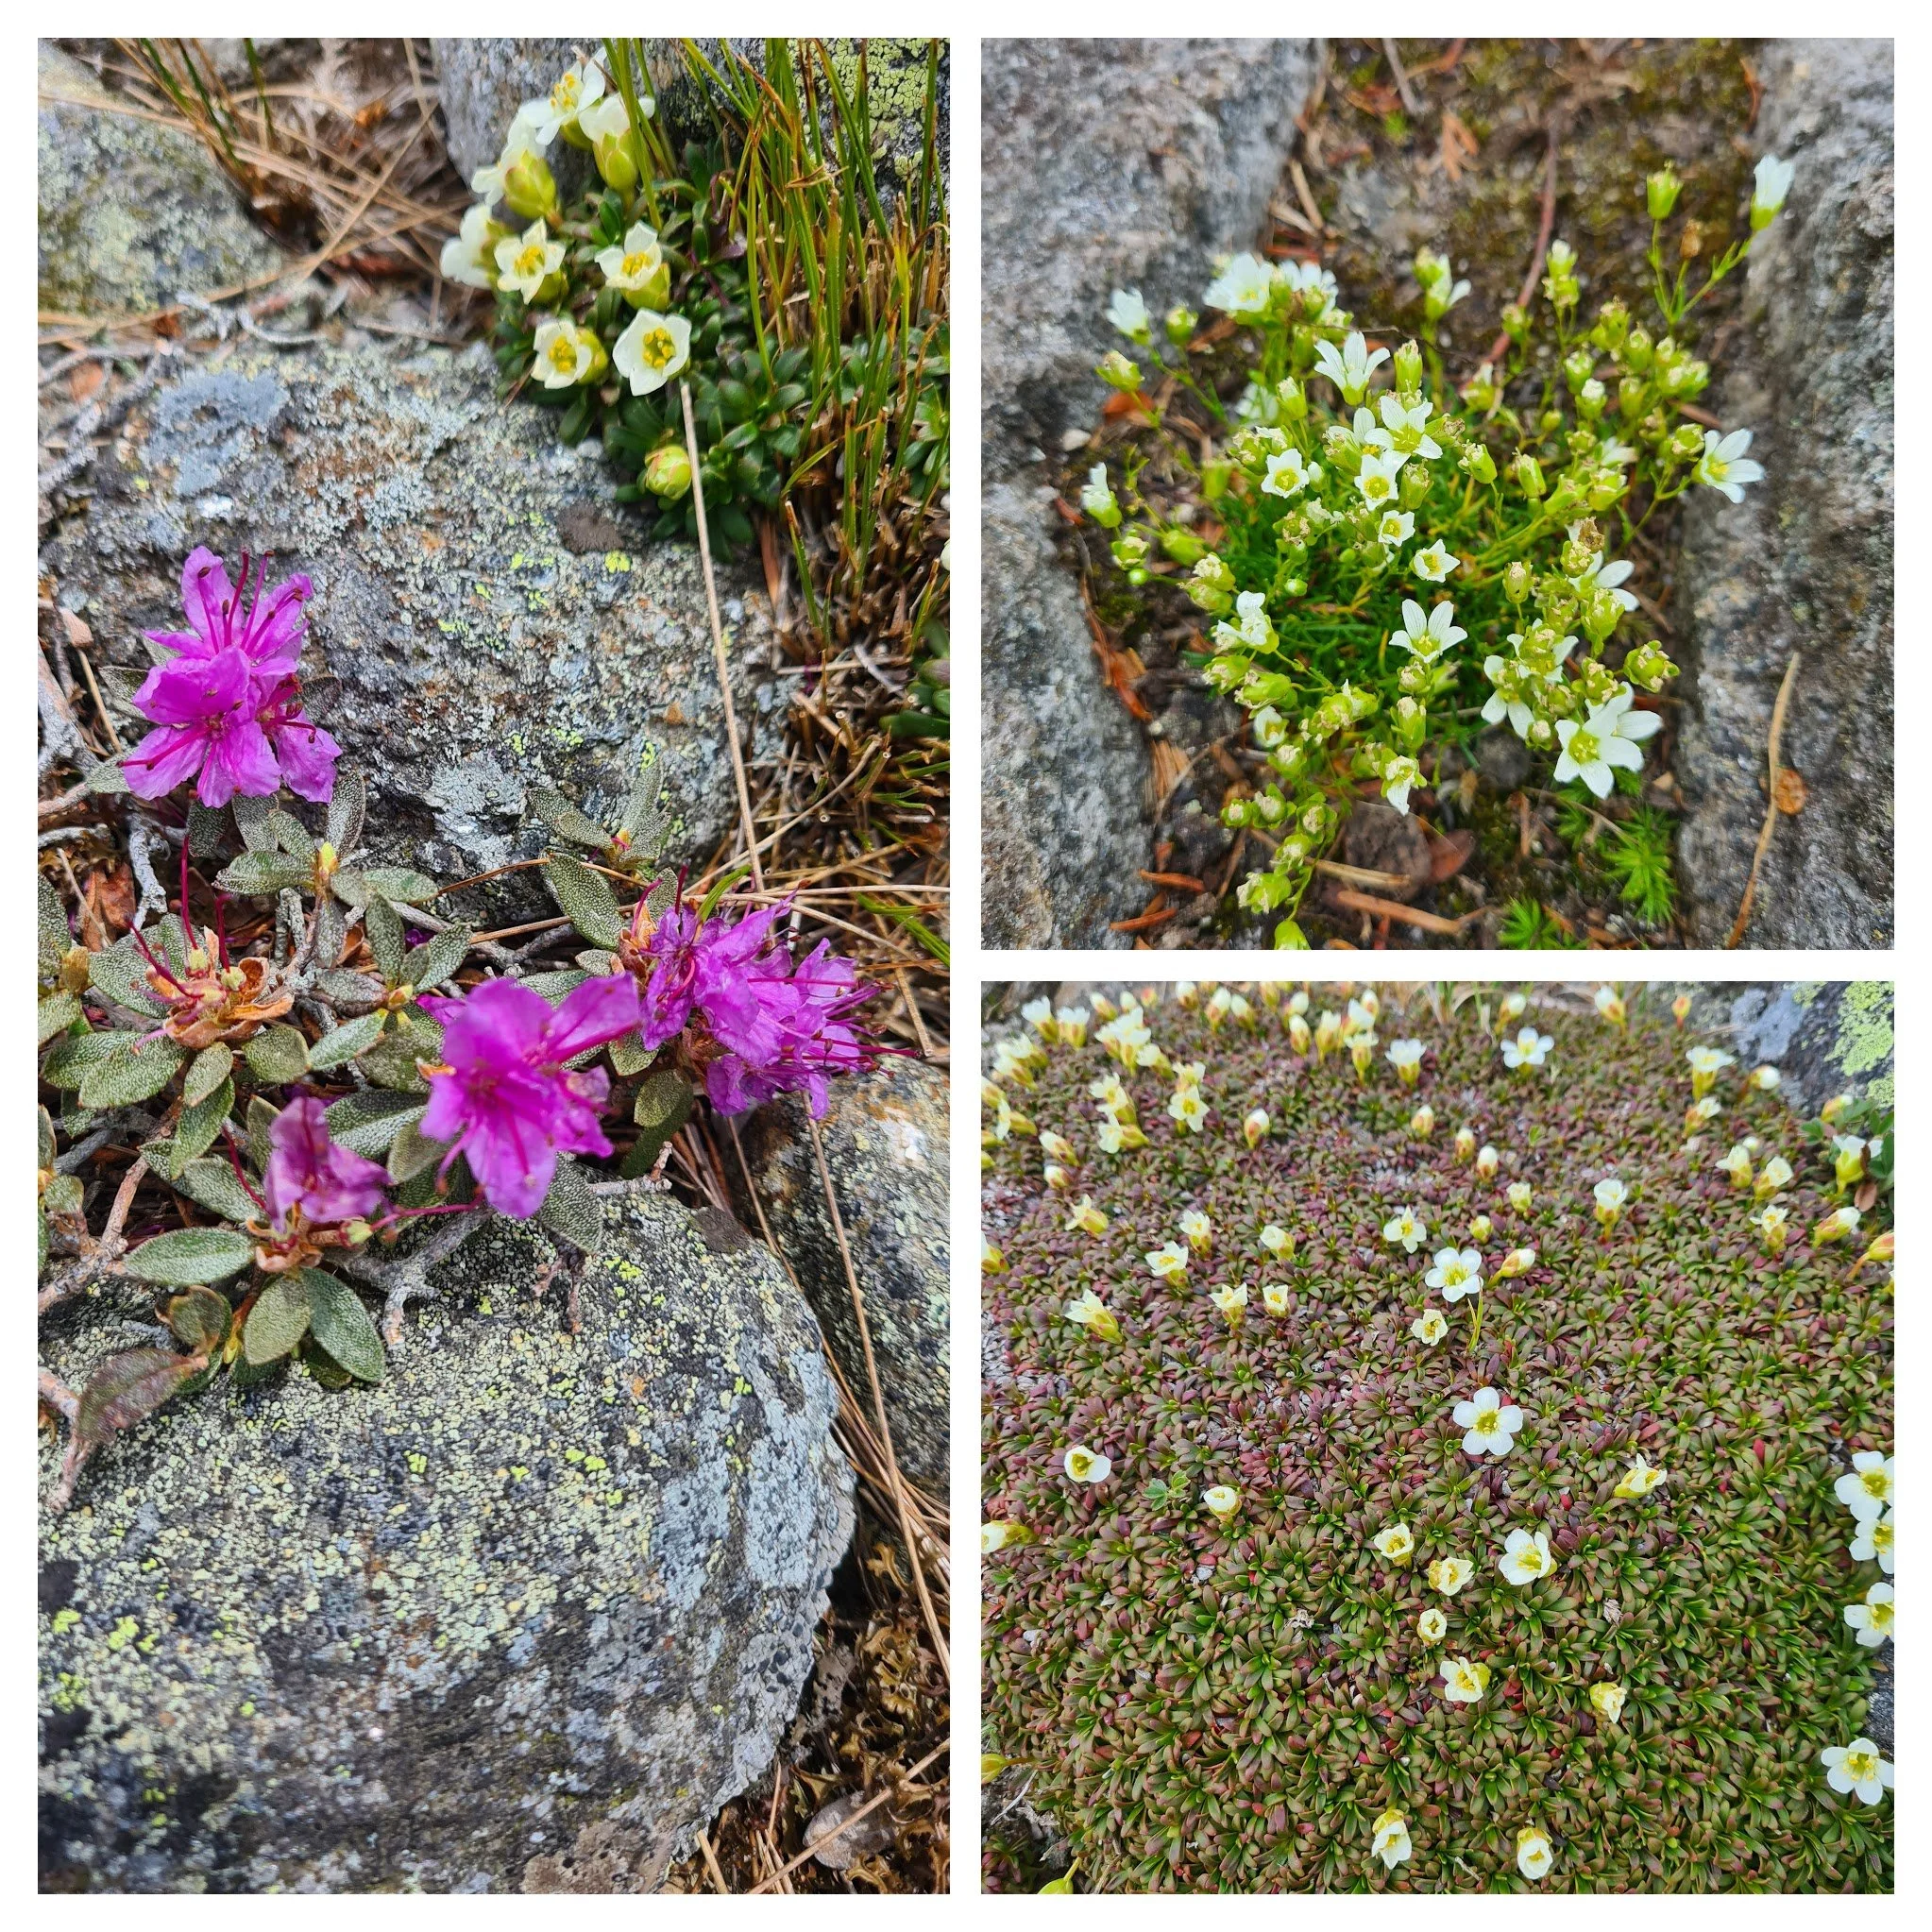
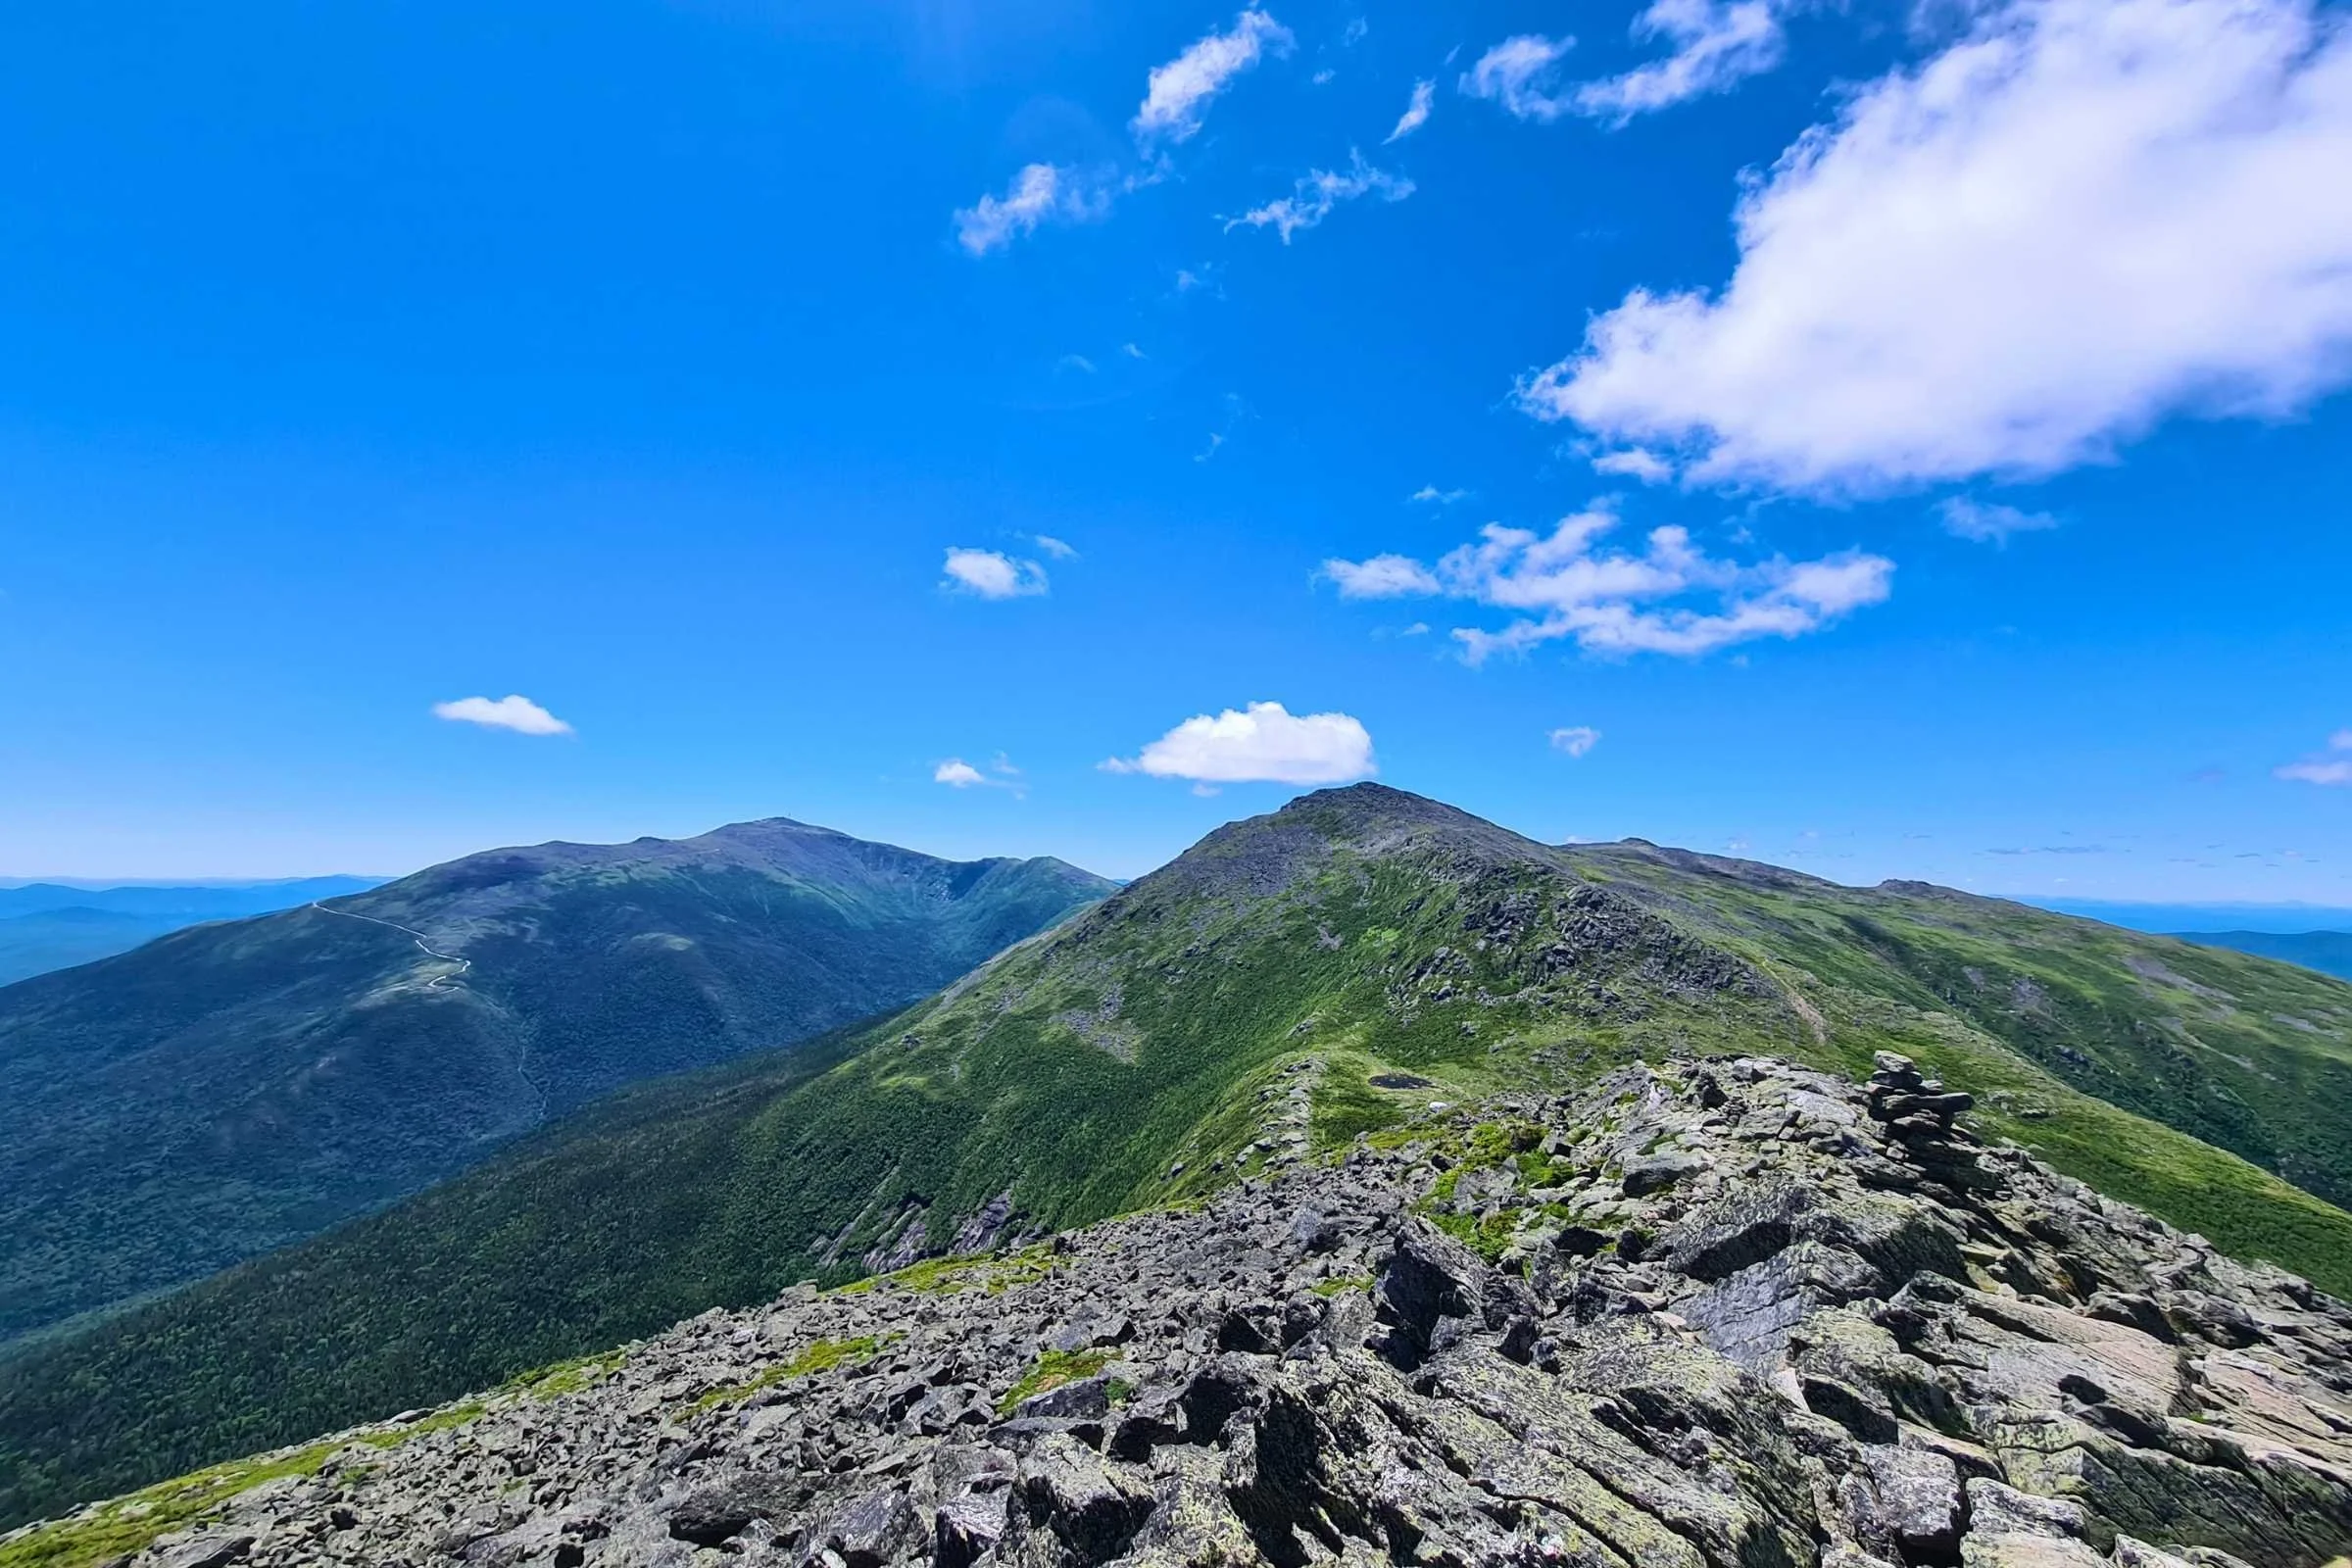
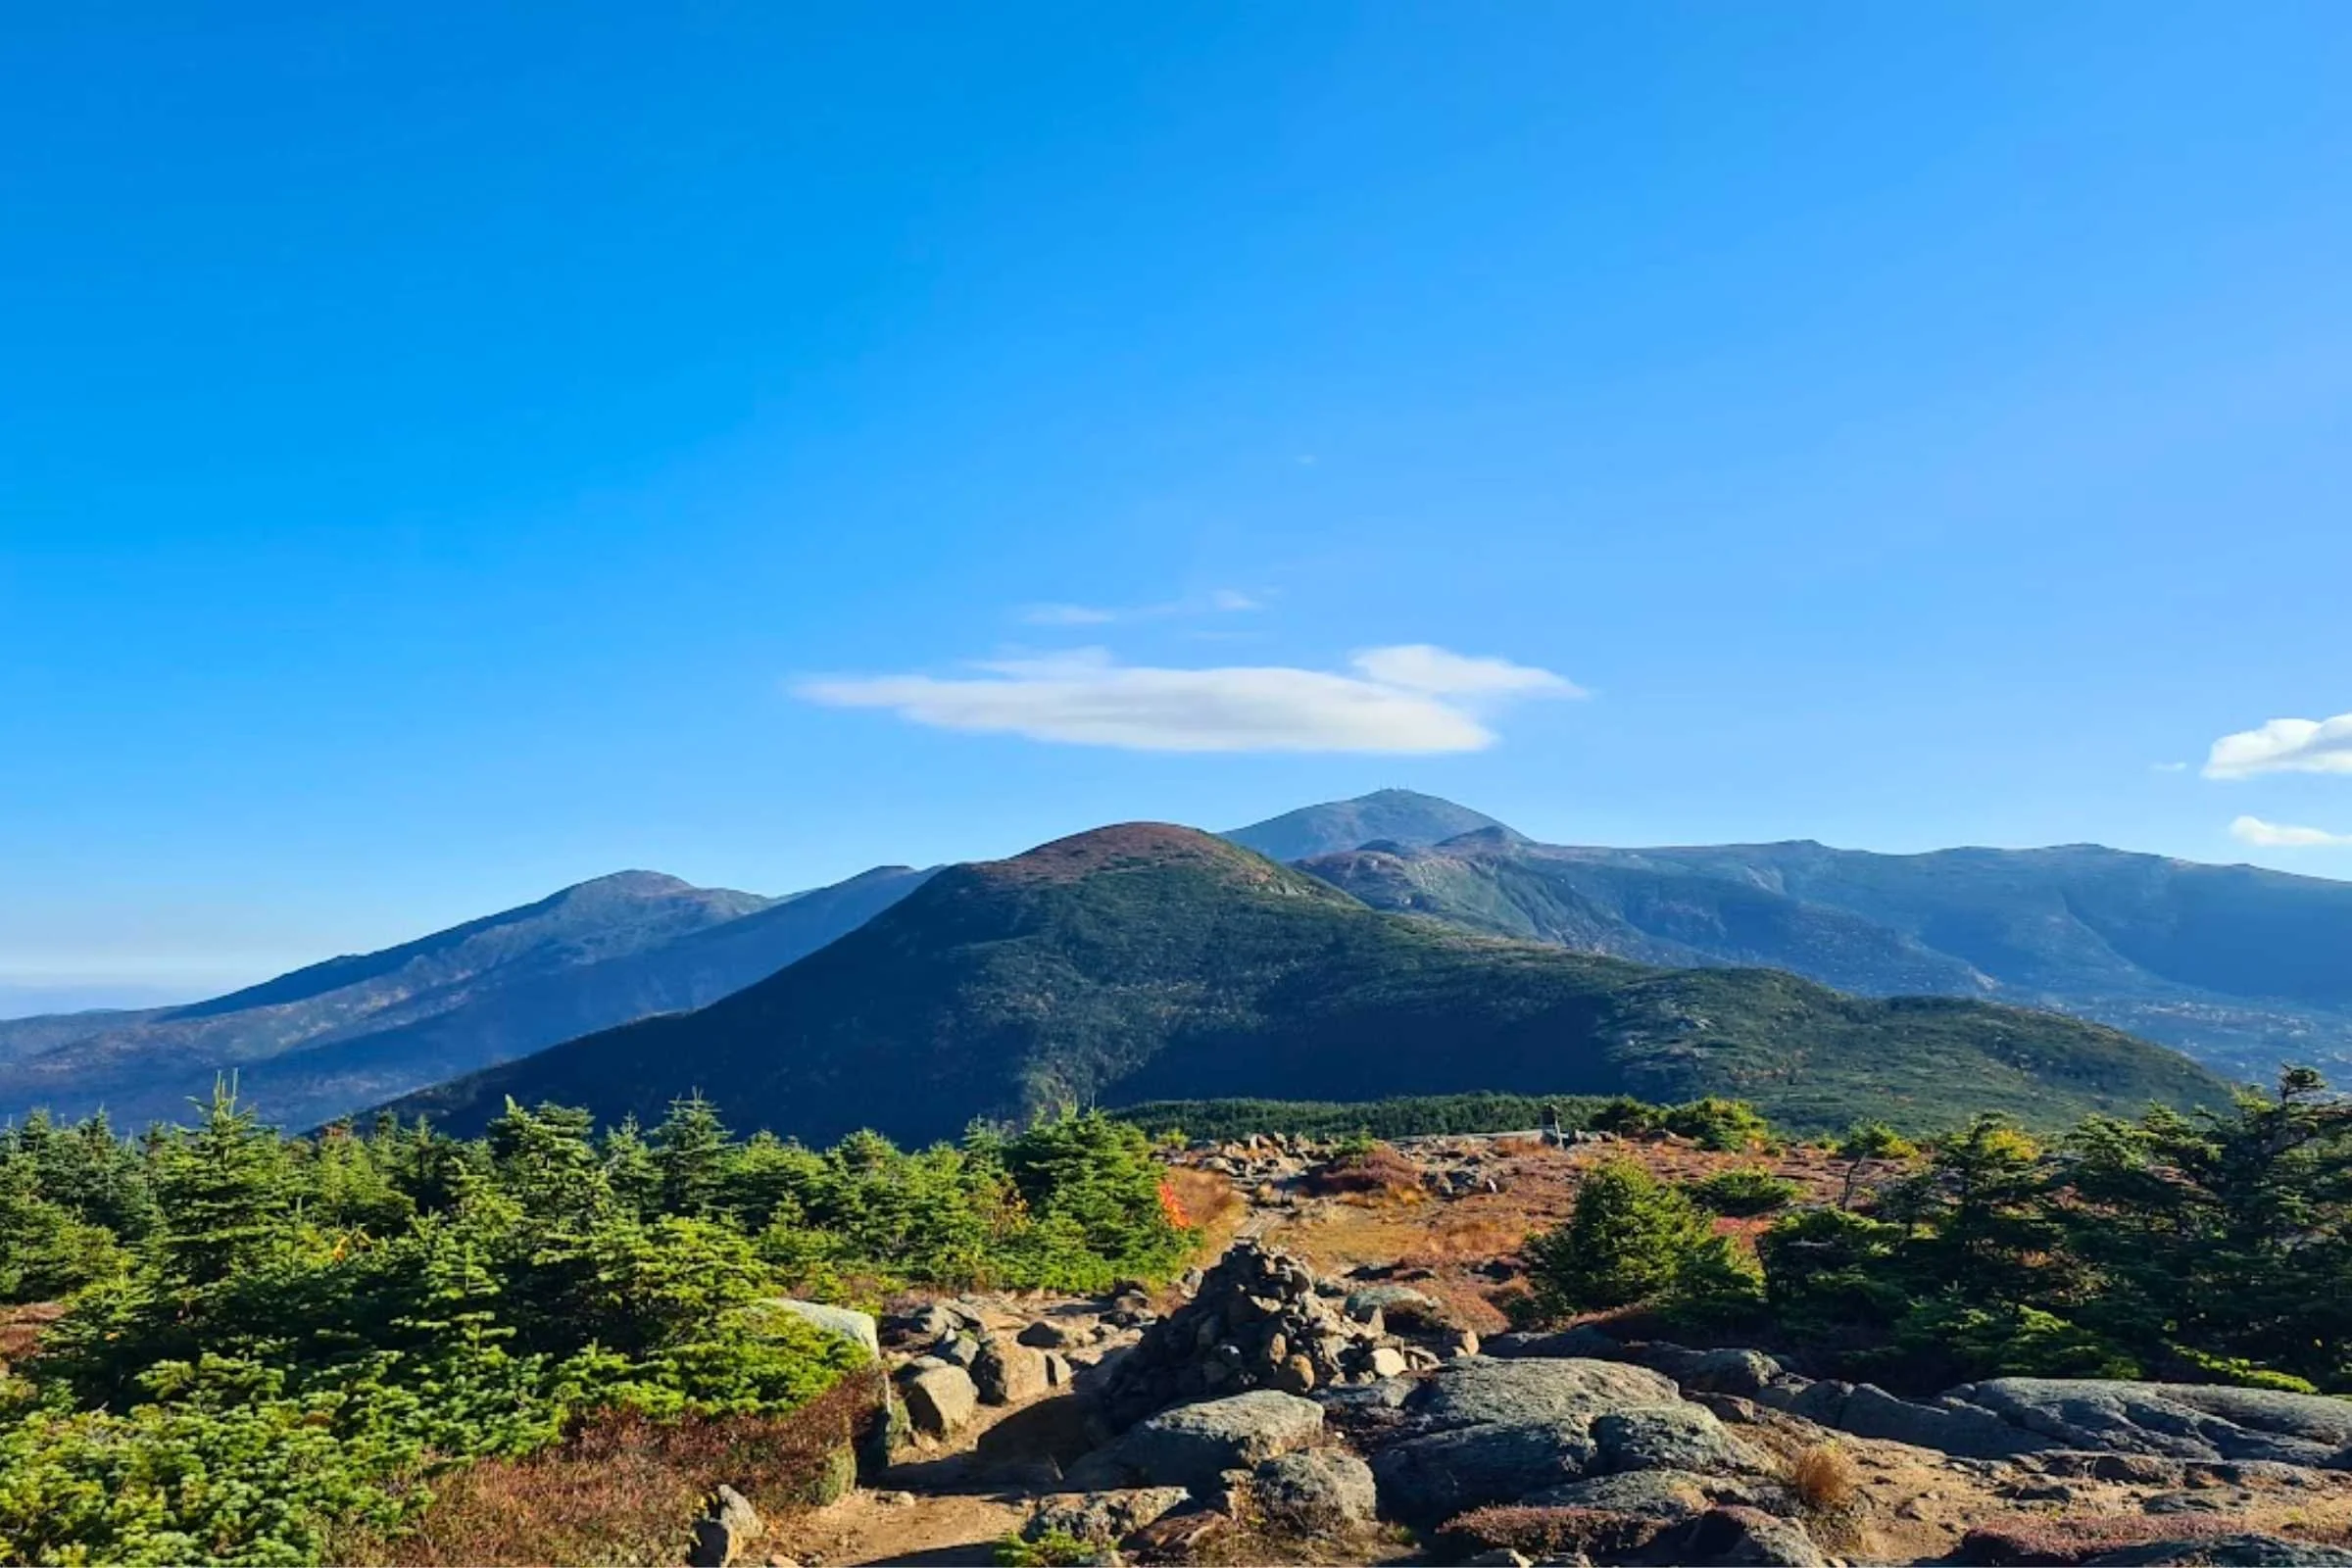
Gallery of photos
Highlights
12 miles of above-treeline travel
Epic 360-degree views
Frequent access to filtered water, privies, and snacks for purchase
Visits to 2 (or 3) of the Appalachian Mountain Club’s historic huts, plus the Mt. Washington Summit Building
Summiting 7 (or 8) of the New Hampshire 48 4,000 Footers in one trip
Seeing endangered or threatened alpine plants, some that only exist in the White Mountains
Hiking more than 10 miles on the Appalachian Trail
Trails above treeline have periodic cairns for low visibility
Challenges
Variable weather that can be dangerous year round
Technical, rocky, and steep trails with unstable footing which can take much longer than expected
Complex navigation with frequent trail intersections. The Presi Traverse route is not noted on any signs.
The long period of time above treeline leads to extended exposure
The route being a traverse makes bailing out more difficult
Gear Checklist
| PRESIDENTIAL TRAVERSE GEAR | OUR PICK(S) | MORE OPTIONS |
|---|---|---|
| Trail Running Gear | ||
| Running vest | Salomon ADV Skin 12 Hydration Vest Women's Men's |
Best Running Hydration Vests |
| Filter/ water bottle | Katadyn BeFree AC 1.0 L Water Filter Bottle | Best Running Water Bottles |
| Headlamp | Black Diamond Storm 450 Headlamp | Best Running Lights |
| Satellite communicator | Garmin inReach Mini | Best Satellite Messengers and Personal Locator Beacons |
Best Season
The Presi Traverse is best hiked between July and September. Travel during late May and June are possible.
However, depending on the snow year, there is often still snow at higher elevations in May that can require traction, crampons, and snowshoes with muddy and flooded trails in between, and alpine plants that are at their most delicate in the spring.
June is typically black fly and mosquito season. October can be an option with crisp nights and cooler days, though it is often a very wet month, with snow and freezing rain mixing in with rain. The average October sees 10” precipitation on Mt. Washington with a record of 11” in 24 hours.
Historically, August and September have less precipitation than June or July, with July and August being the least likely months to have snow (though it is still possible) and the months with the lowest average wind speed (though record wind speed for those months is still 154 MPH and 147 MPH, respectively).
The most typical temperatures in the mountains in July and August are a high of 54-55°F and a low of 43-44 °F. Outside of those months, the temperatures drop quickly. And regardless, record low temperatures for July and August are 24 and 20 degrees, respectively, with windchill far exceeding that. I have experienced a windchill of 10 degrees in August.
Right before we were hit with a complete white-out and 75+ MPH winds. Photo by Aubri Drake.
Difficulty and Skills
Navigation
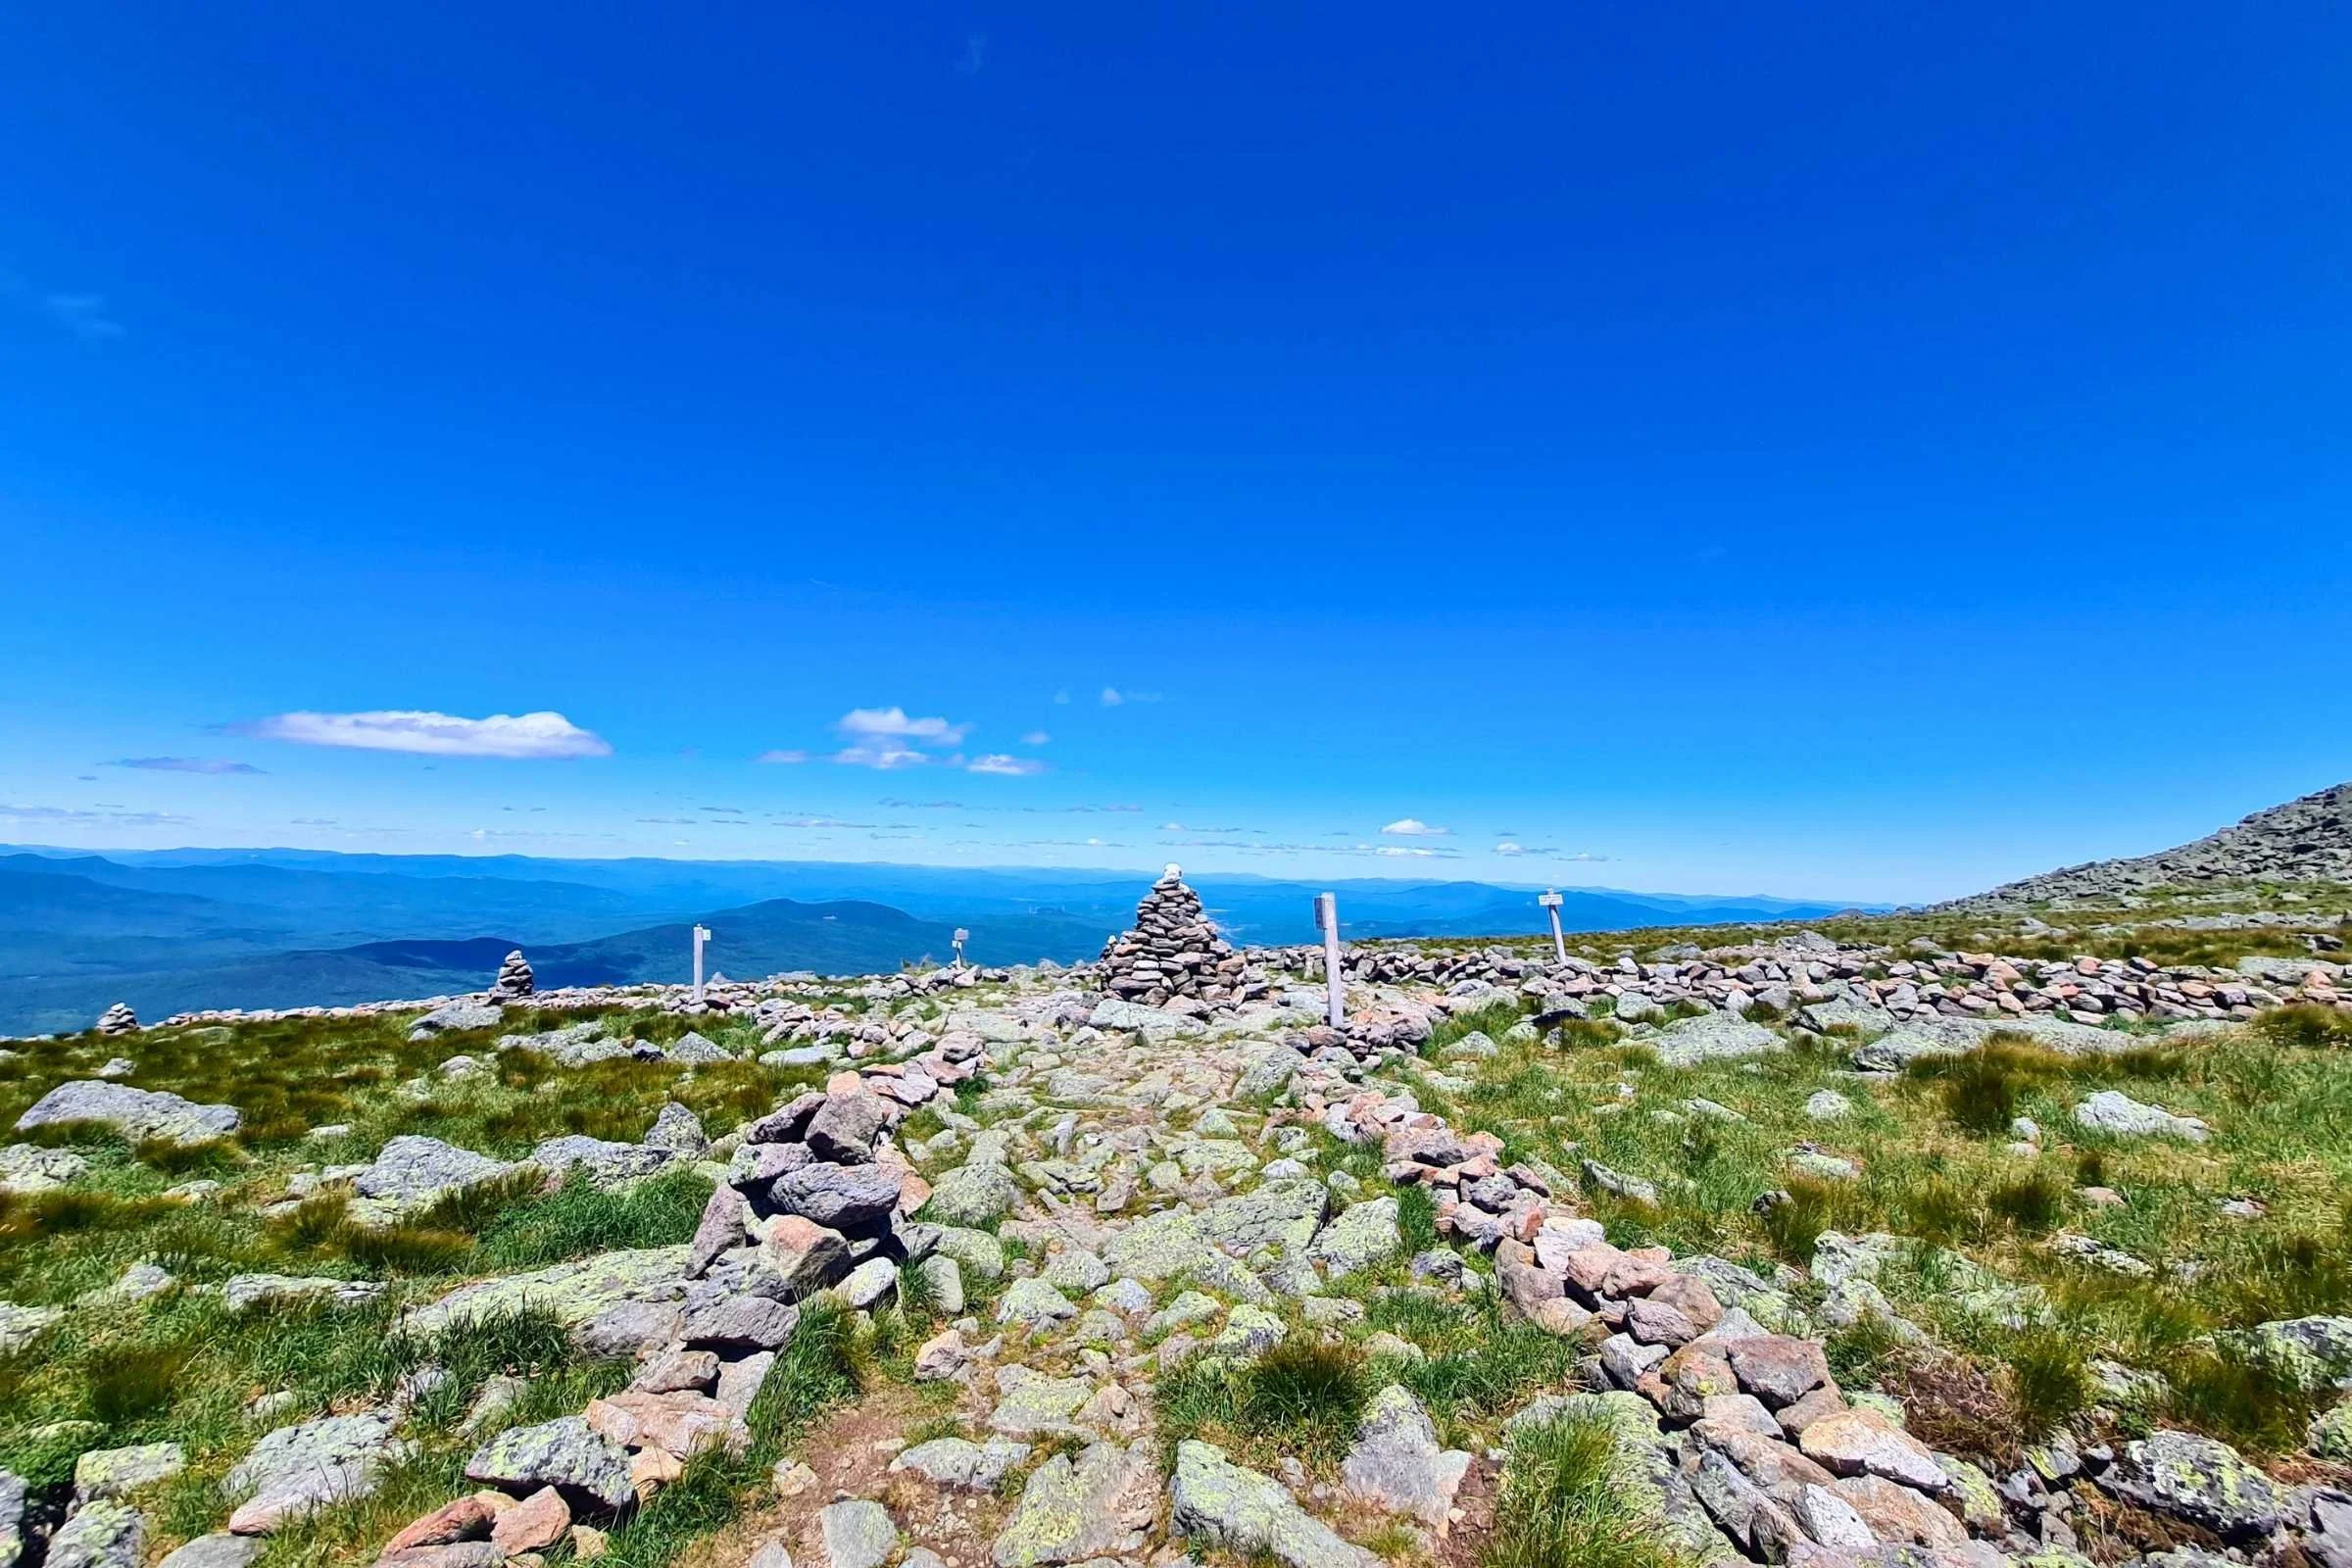
The navigation for the Presi Traverse is complex, especially because above-treeline travel is much more difficult than trail-finding in a forest. There are many turns and confusing trail intersections, so you’ll need to be careful and methodical to keep yourself found. You’ll need to keep a sharp eye out for trail intersections and cairns, and make sure that they’re trail cairns (and not tourist cairns) and that they’re for the trail you want.
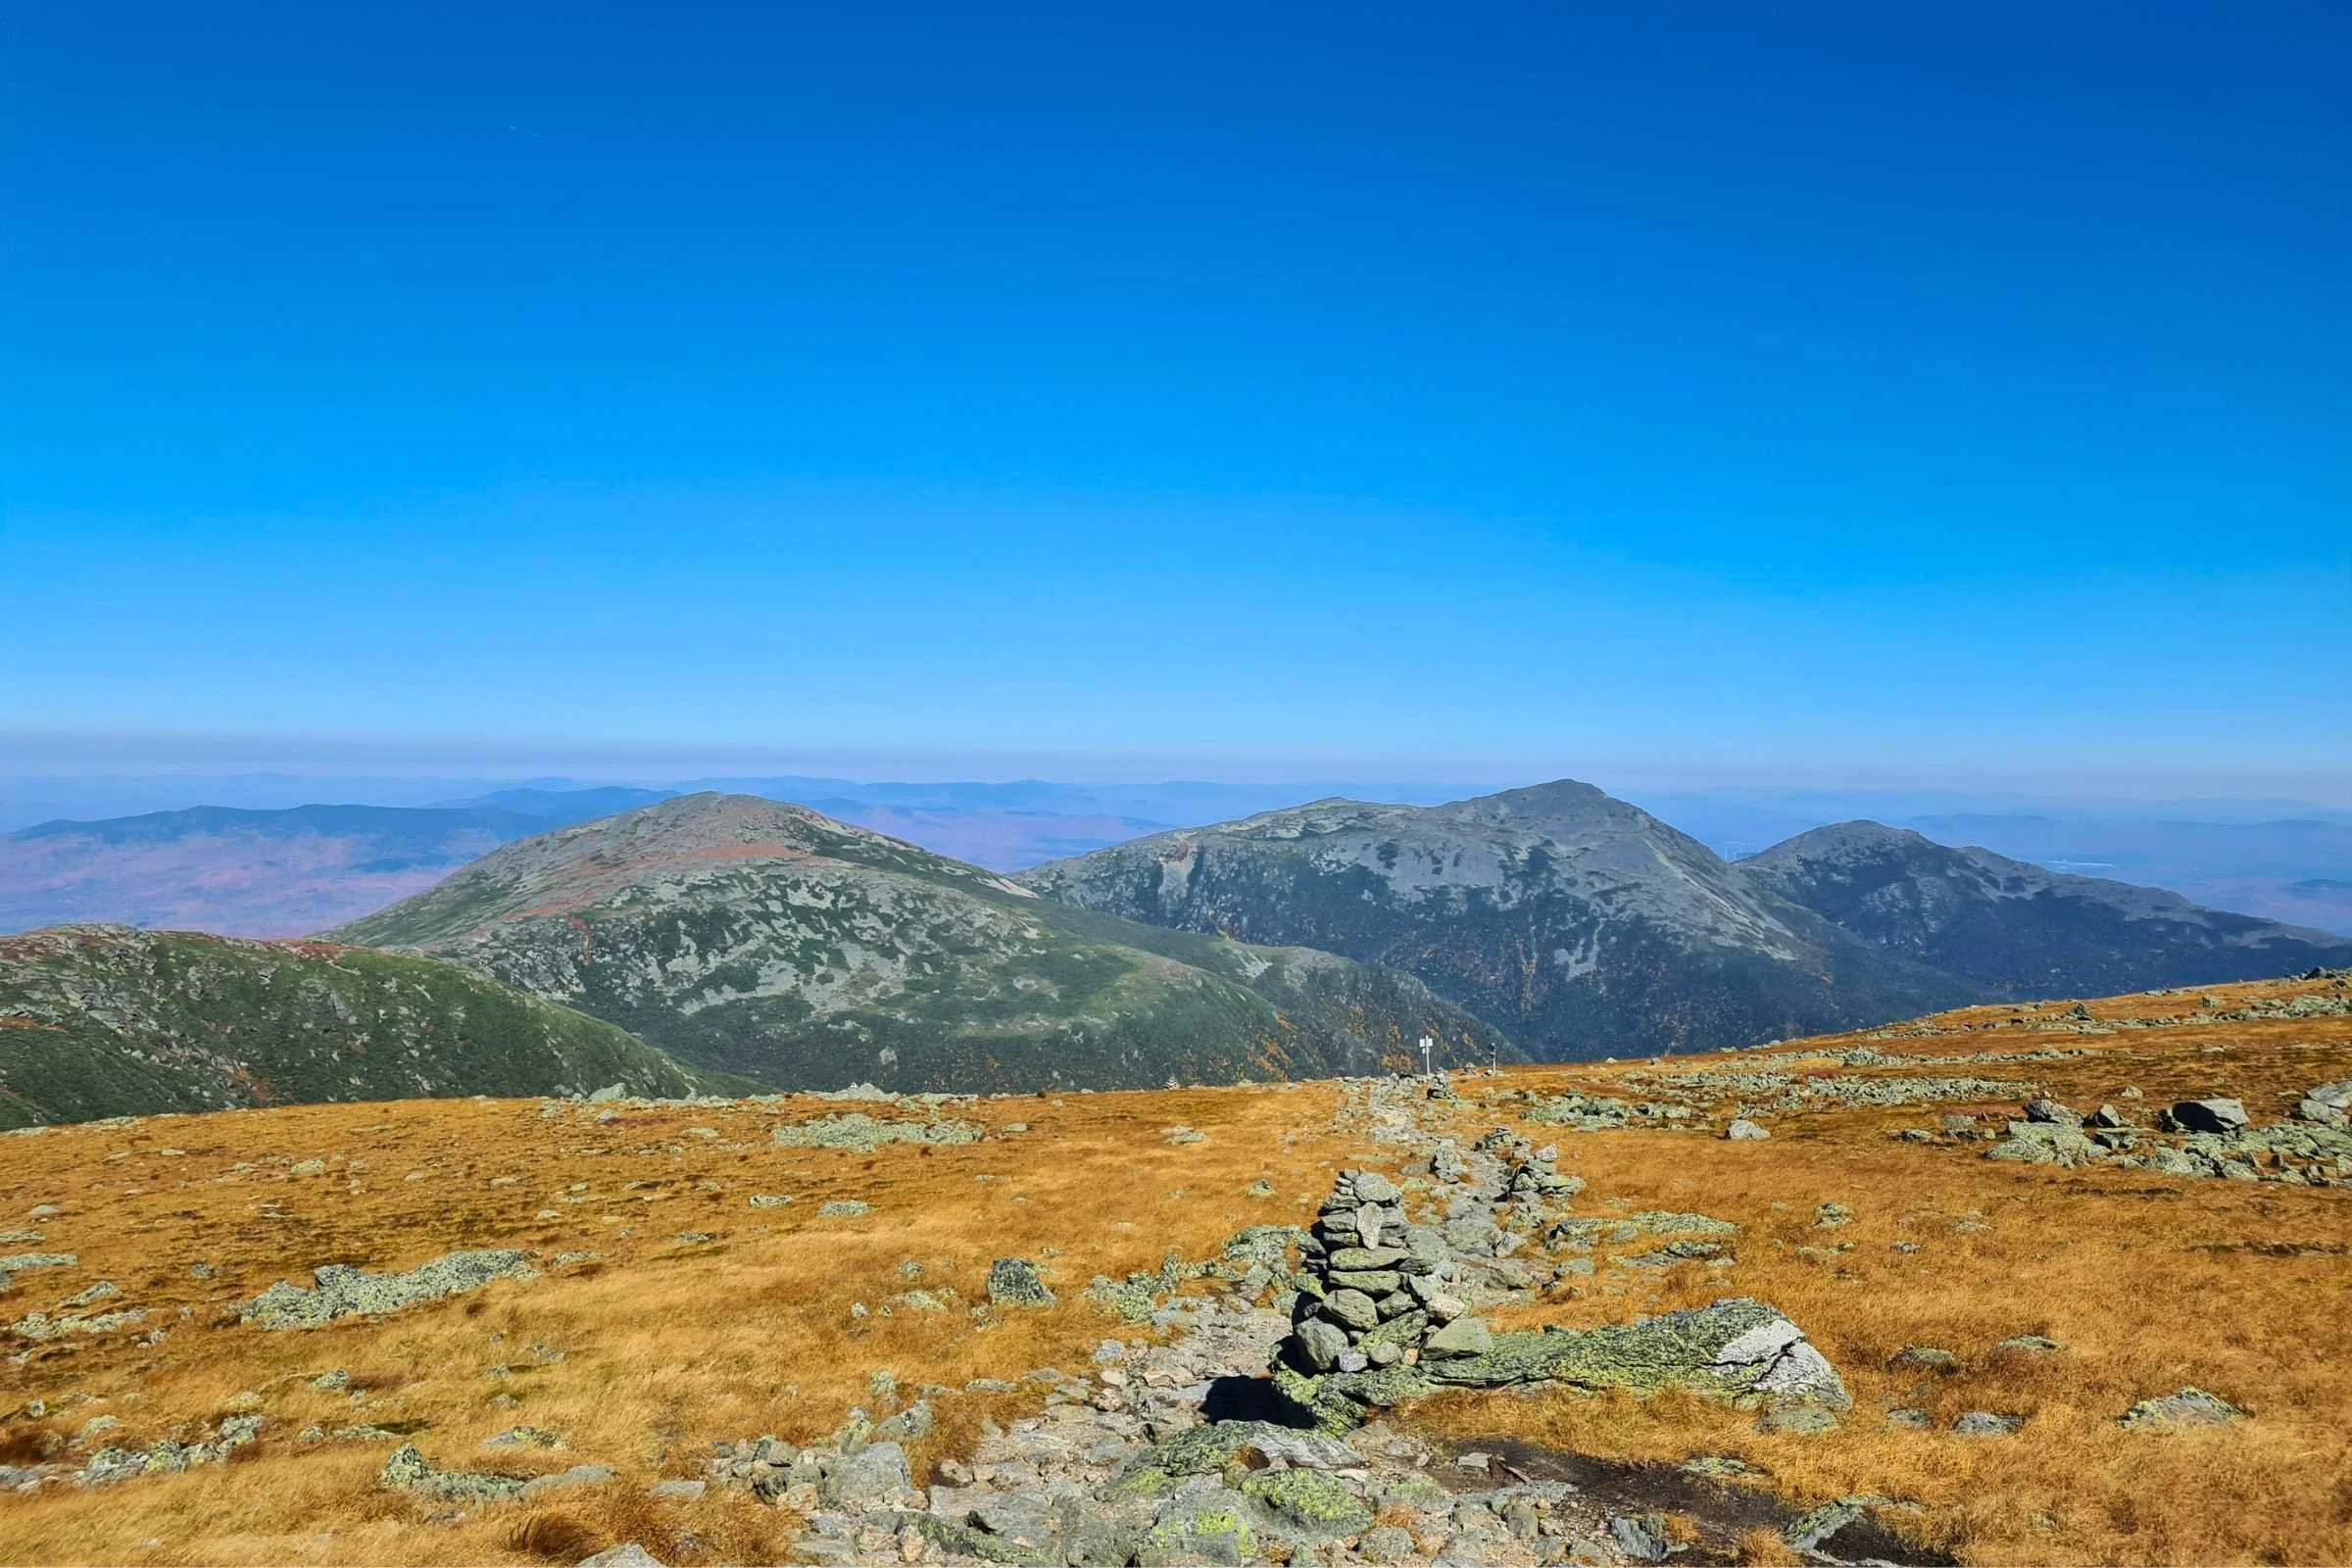
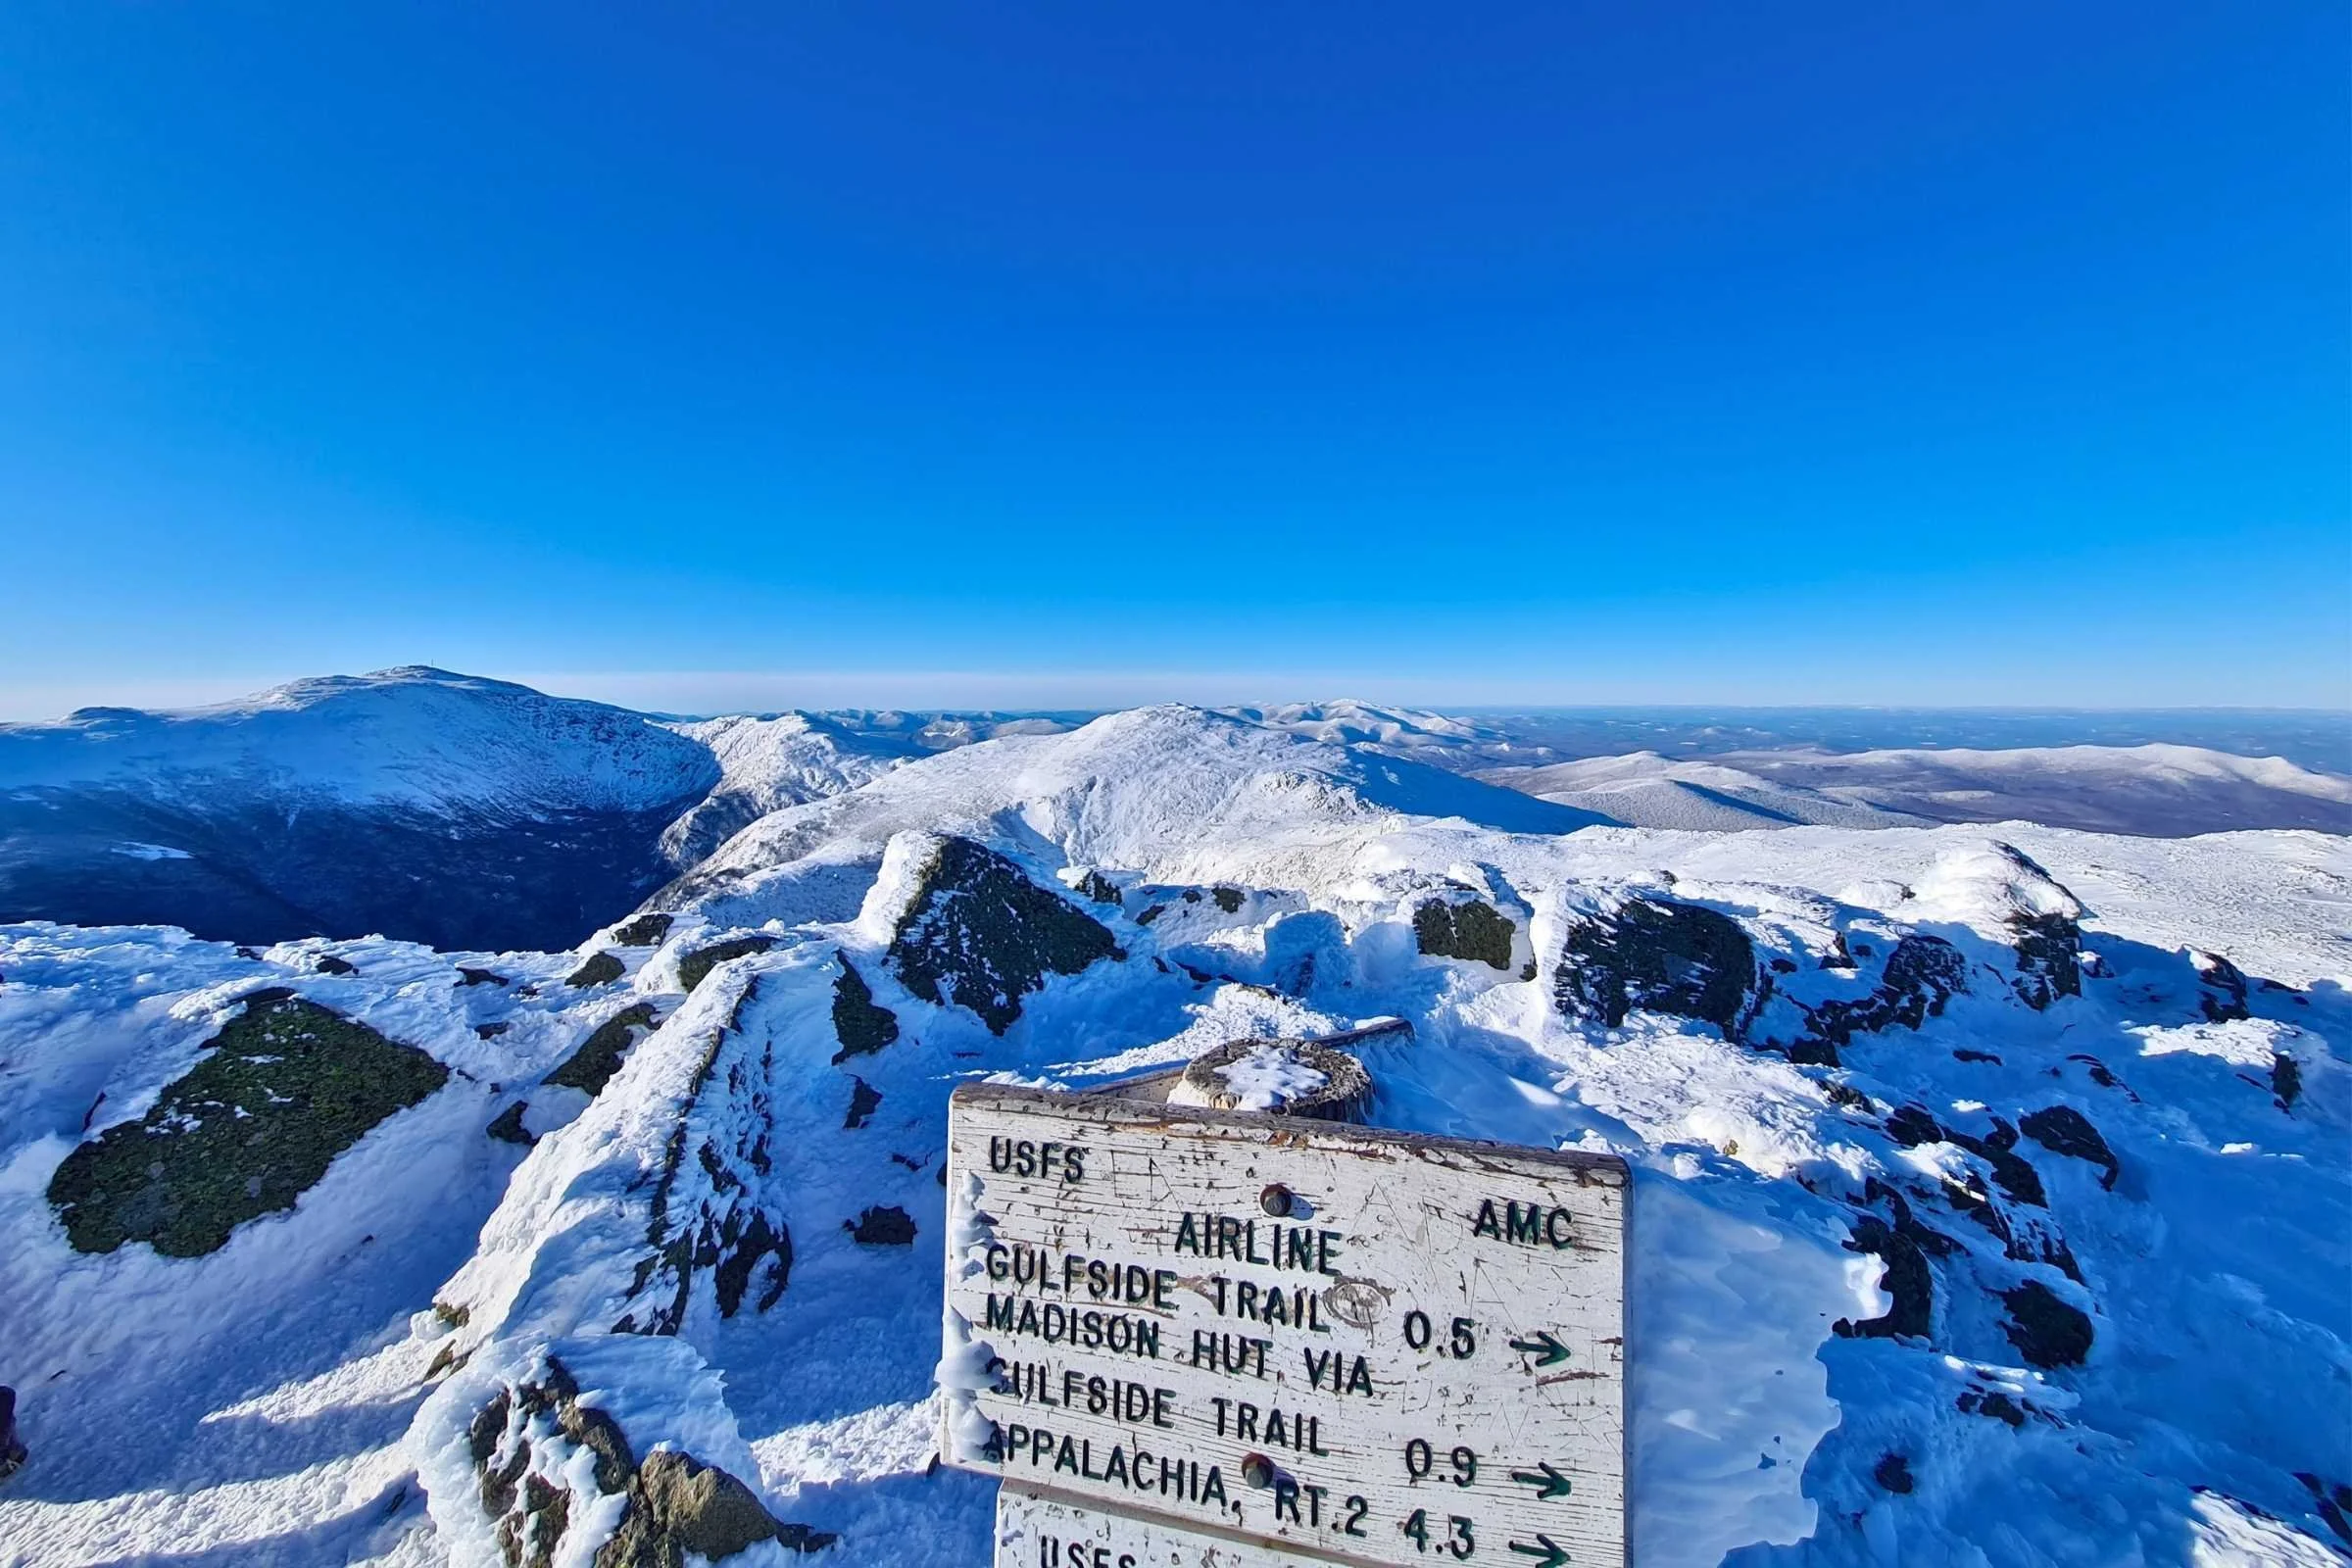
Cairns on the Appalachian Trail with a trail sign in the distance, and Mt. Clay, Jefferson, Adams, and Madison in the background. Photo by Aubri Drake.
You won’t see “Presi Traverse” on any signage, but many intersections are signed, with arrows indicating upcoming peaks or trail intersections, or which route is the official Appalachian Trail (AT). These signs will be most helpful if you have studied the route’s landmarks and trails closely in advance.
A trail sign at the summit of Mt Adams in winter. Photo by Aubri Drake.
I only carry GaiaGPS maps downloaded to my cell phone since the wind and weather often interferes with paper map usage. If you’re looking for a waterproof map covering the White Mountains, this Map Adventures White Mountains waterproof hiking trail map is my recommendation.
Rough Terrain/Scrambling/Rock Climbing
This route is mostly class II terrain with a lot of rocks and roots (sometimes called “northeast technical”), with a few sections of class III. One of the most memorable sections of class III is on the descent off of Mt. Washington heading towards Lake of the Clouds when there’s a sidehill cut into the steep edge of the mountain. The trail section has a fall risk right off the edge of the trail. In winter, it is advisable to wear crampons through this area due to the risk of slide.
However, what many people don’t seem to expect is how rocky and unstable most of the trail bed really is, particularly in the northern Presidential peaks. This makes the trail sections take longer and be much more exhausting than expected.
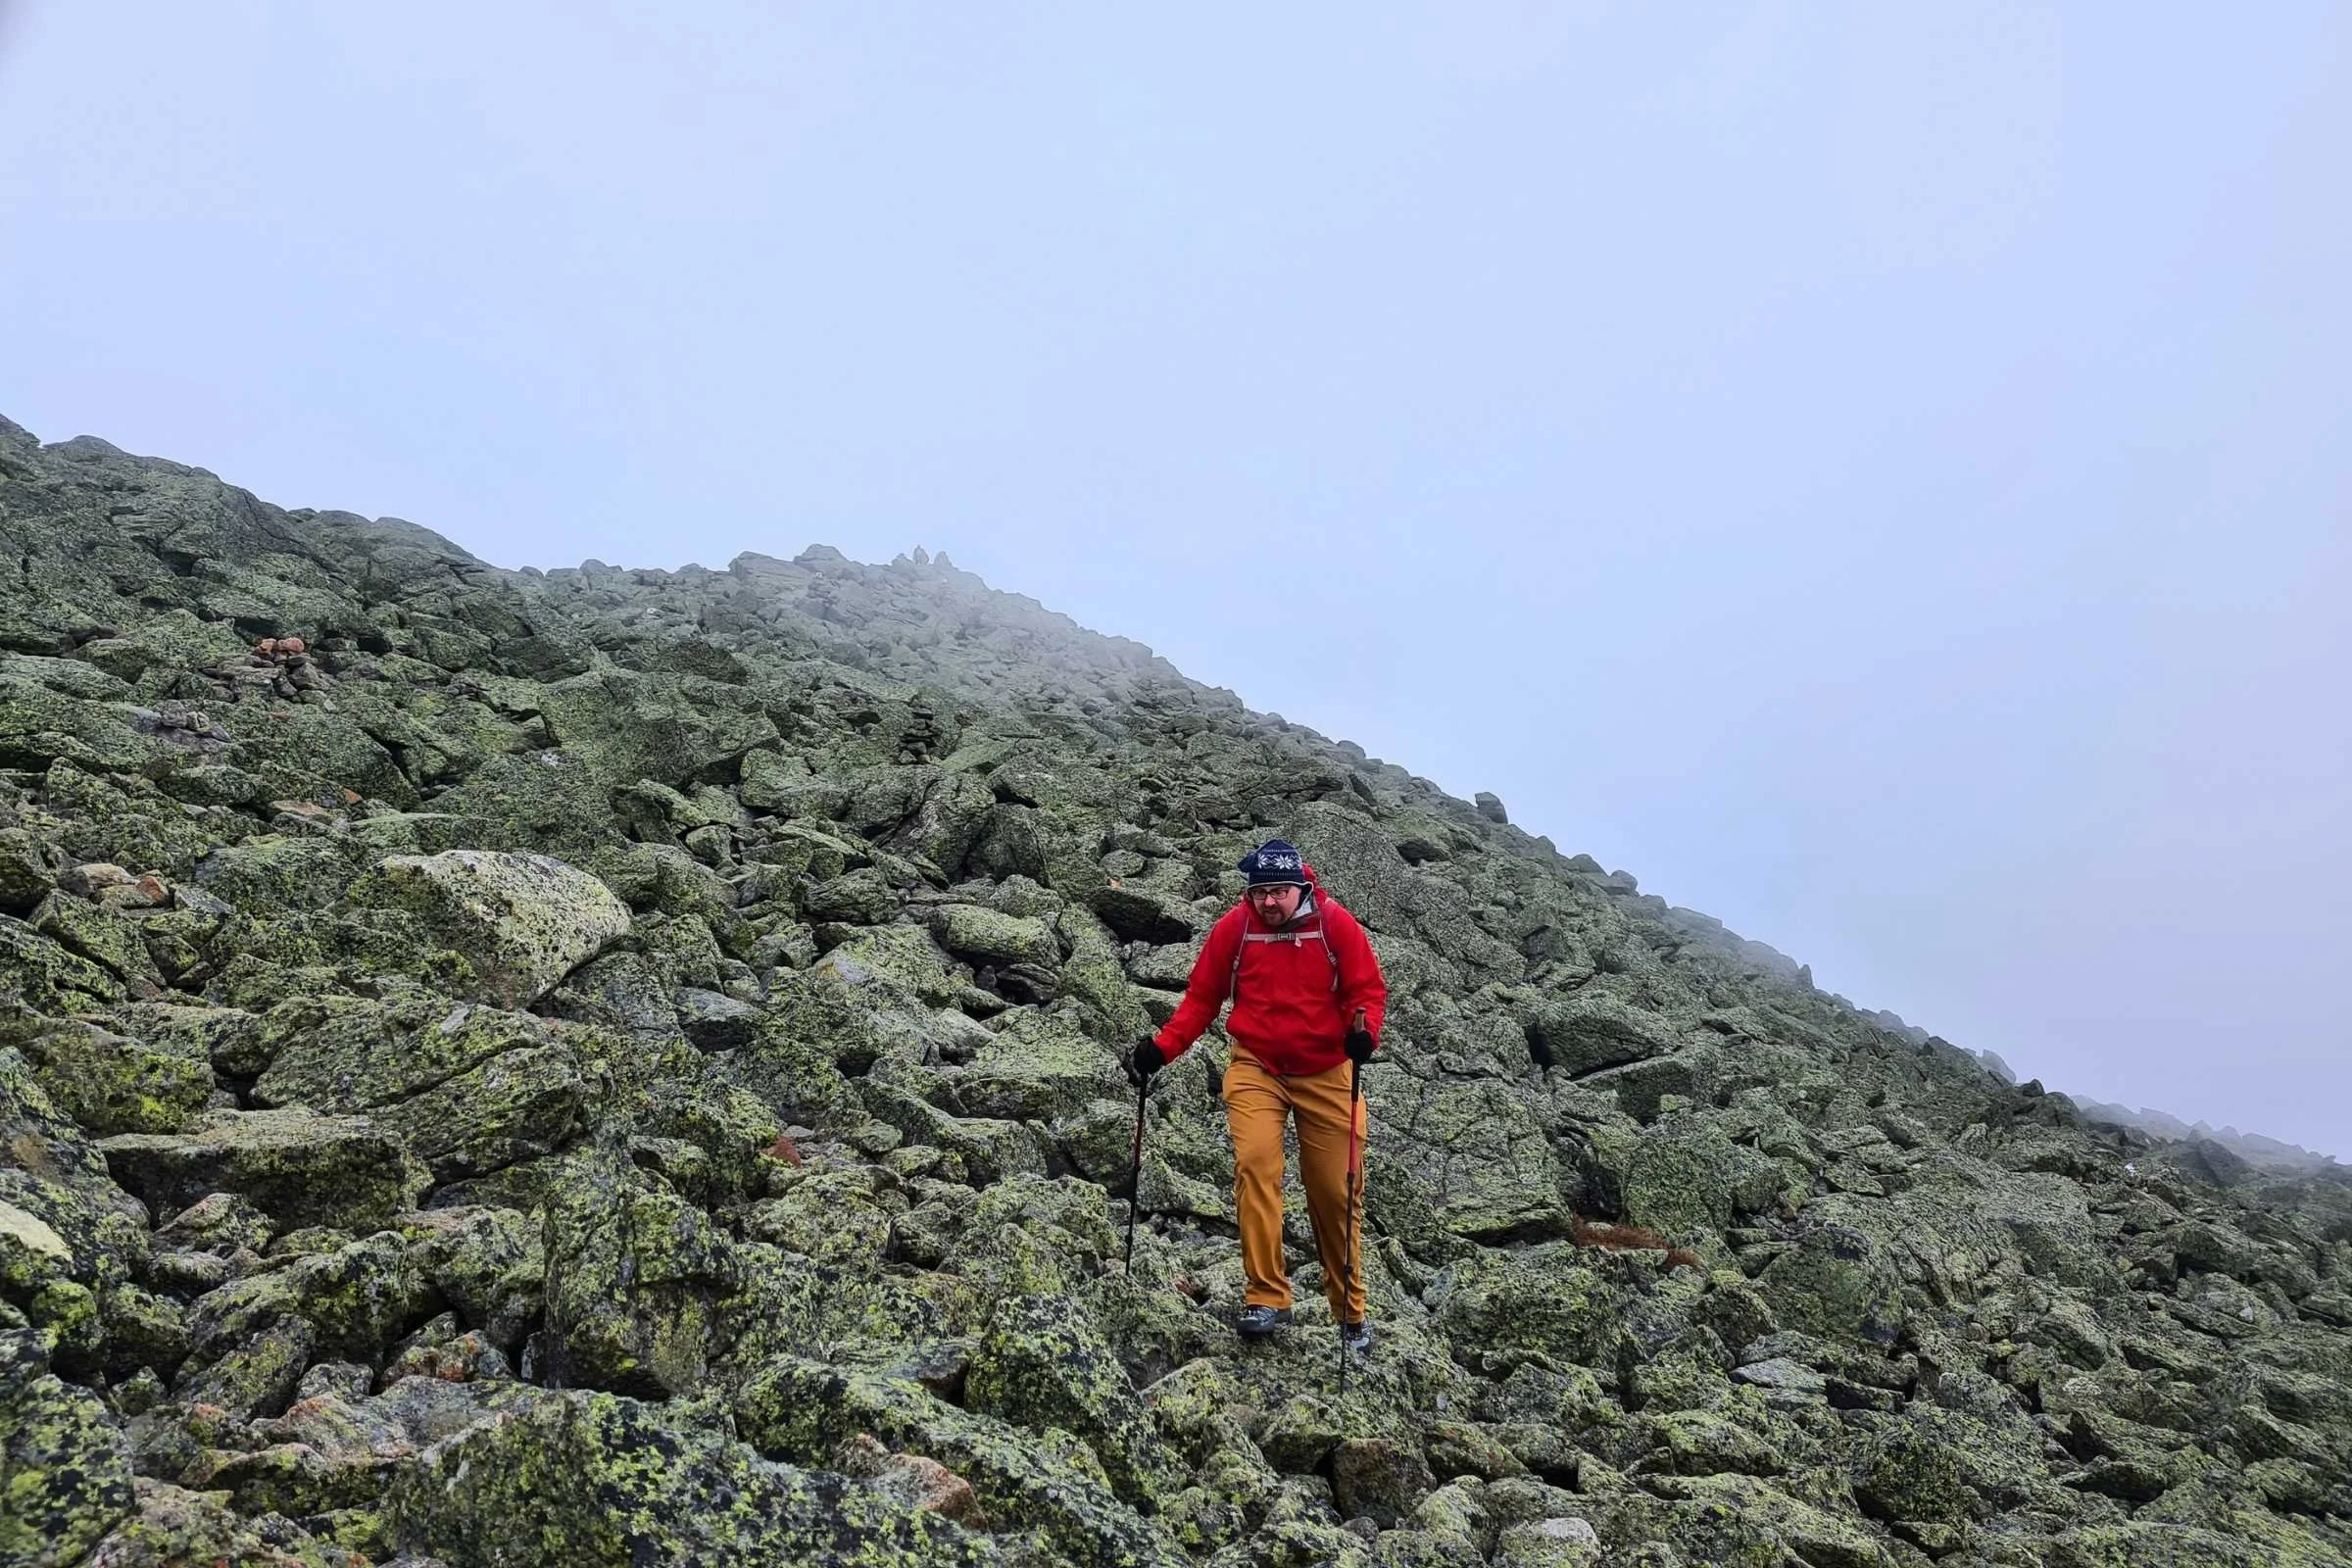
A hiker climbing towards the summit of Mt Adams. This is the formal, official trail. Photo by Aubri Drake.
In the White Mountains, it is frequent for hikers to mention “book time.” The AMC’s White Mountain Guide book uses a rough, approximate formula to estimate the generic time a hike might take. Their formula is 2 MPH, plus an additional 30 minutes per 1,000’ of gain. The “book time” for a standard southbound Presi Traverse is 14 hours. TrailsNH has a useful calculator to get a general idea of time, focused on the White Mountains.
Elevation Gain/Elevation Loss
Over this route’s 19 miles, the trail gains 9,000’ and loses 8,500’. All of this is very hard earned, on extremely rocky and exposed trails. Trekking poles can help with climbing and dispersing the downhill force on the legs during the descents. The most substantial climbs are the first long climb up to Mt. Madison and then the ascents of Adams and Jefferson. From the Appalachia trailhead to the summit of Mt. Madison gains ~3,800’ in 4 miles, with 1,500’ of that in just one mile.
Weather
A unique consideration for the White Mountains, and Mt. Washington and the Presidential Range in particular, is the volatility of the weather. Mount Washington and the surrounding mountains have some of the worst weather in the world, with the second highest wind speed ever recorded on earth taking place on the summit of Mt. Washington.
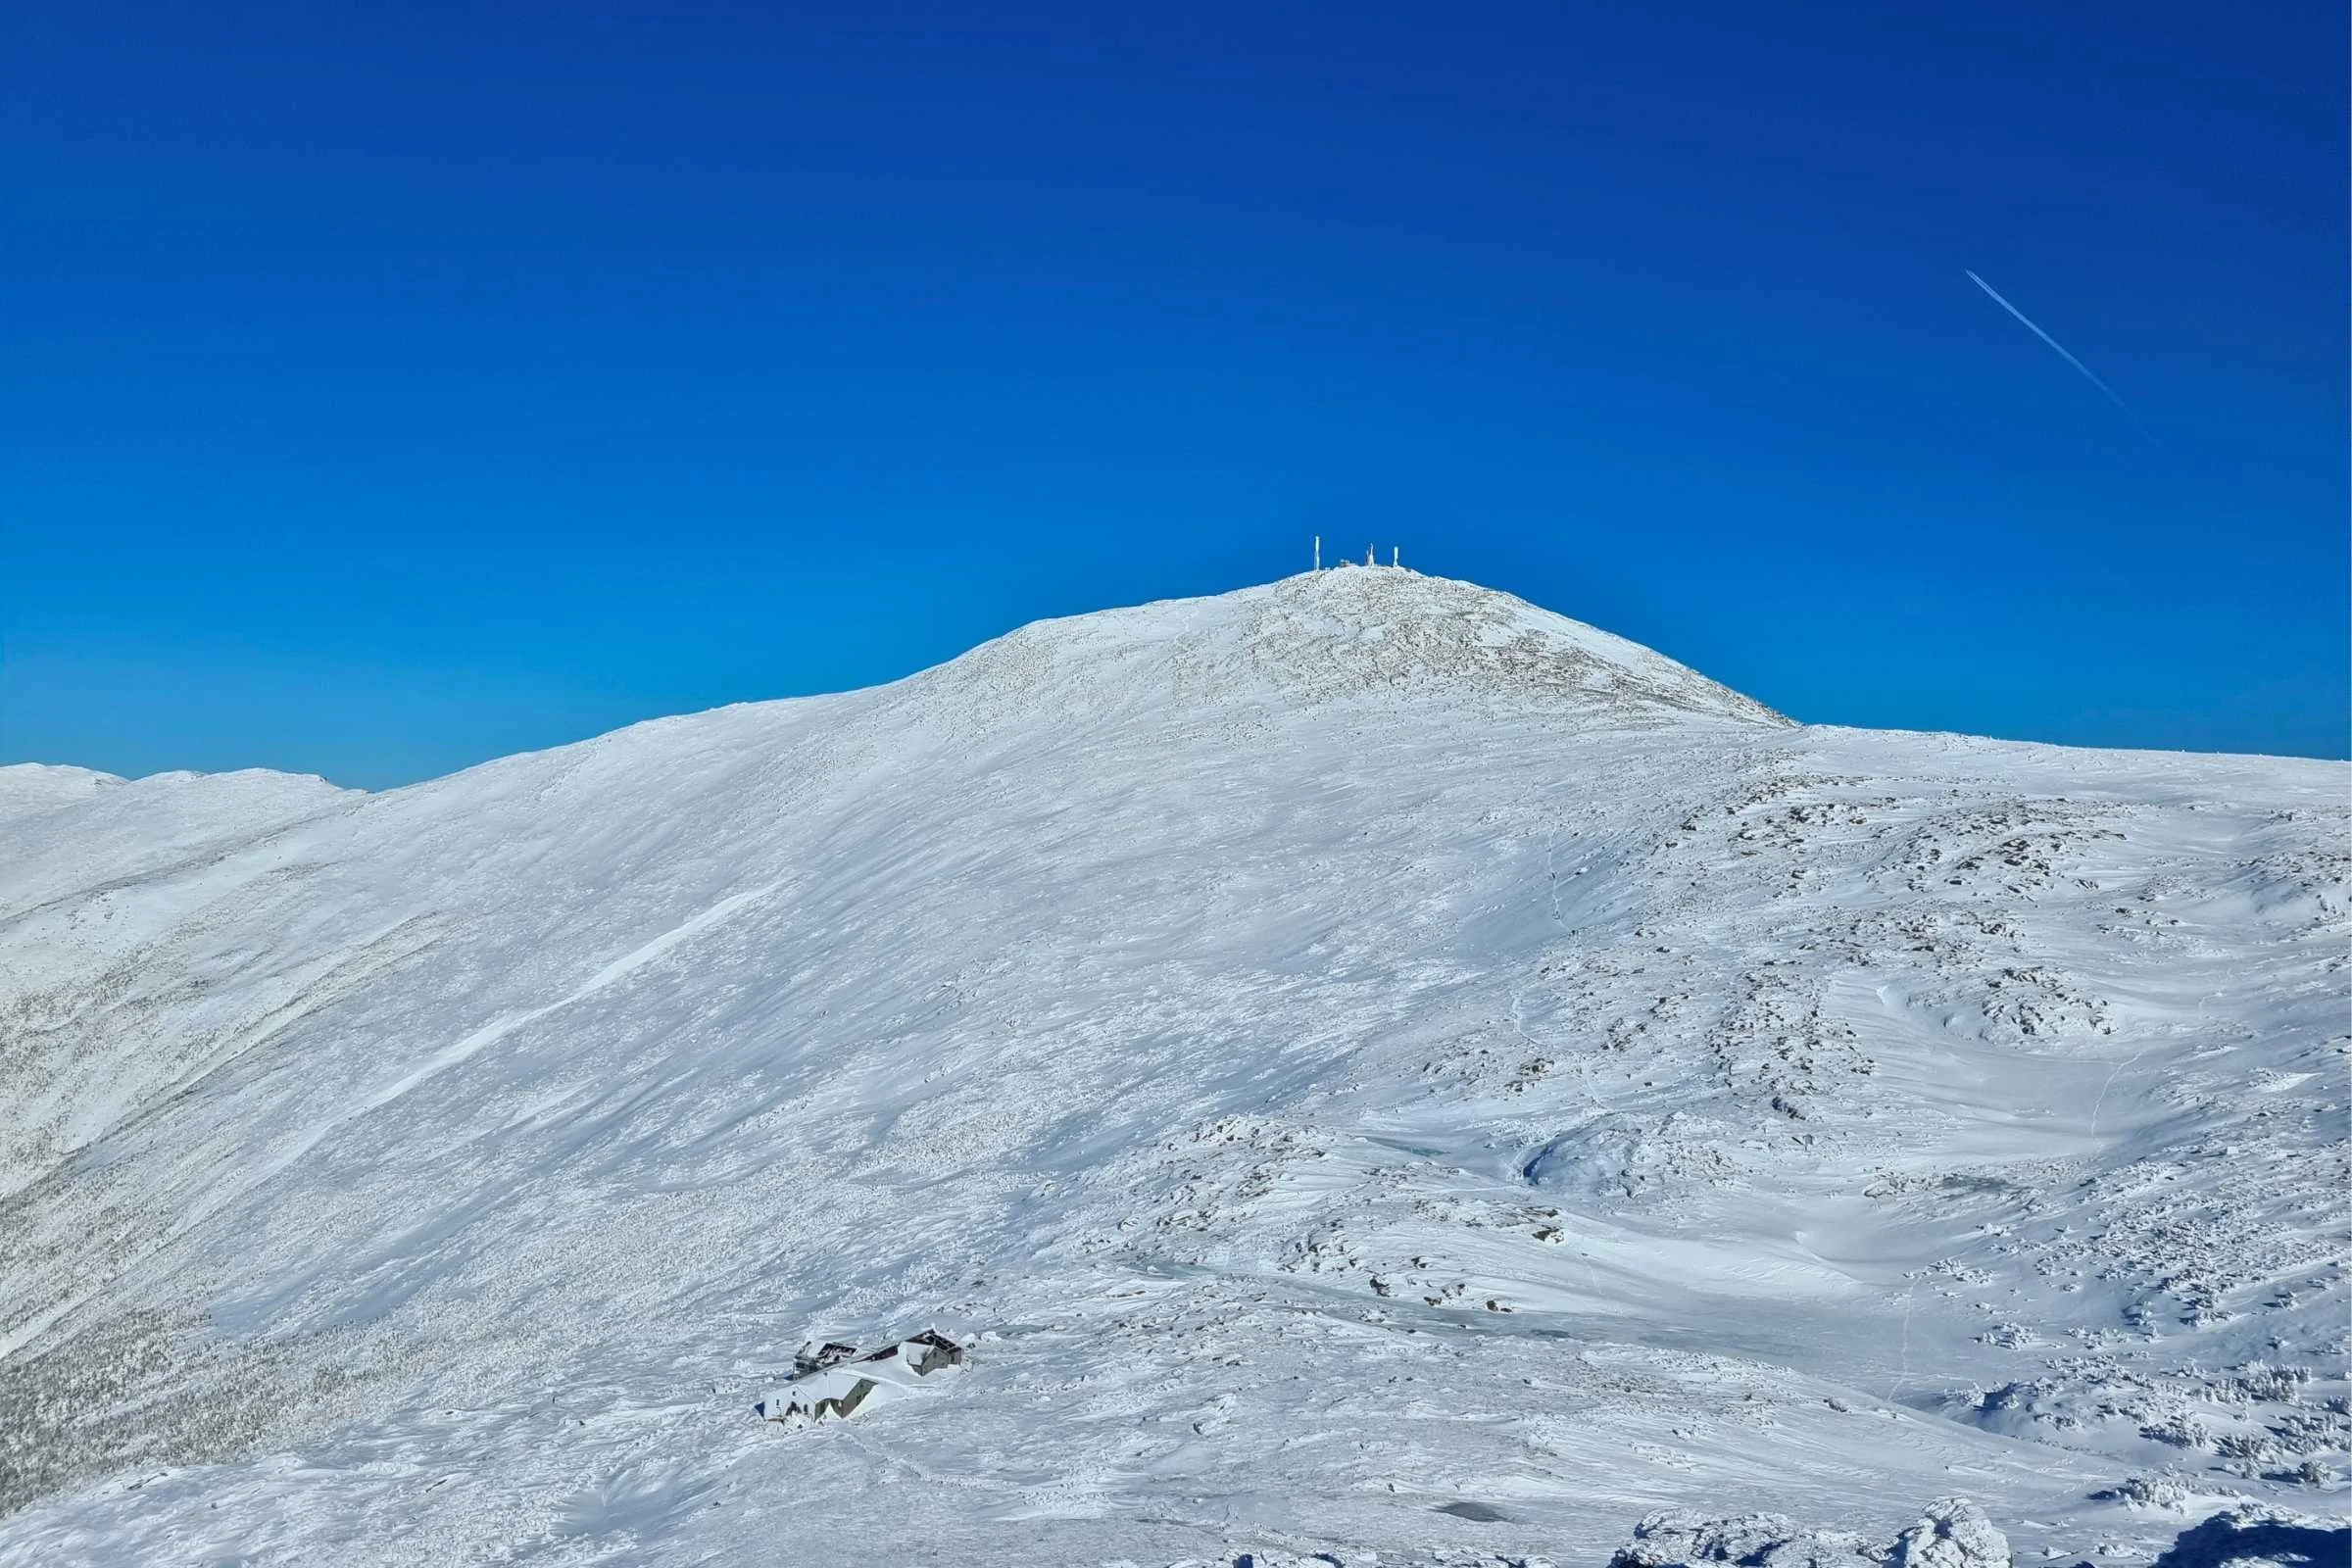
Mt. Washington and the Lake of the Clouds hut in January, as seen from the summit of Mt Monroe. Photo by Aubri Drake.
Eight months out of the year, the record low temperature on Mt. Washington is in the negatives (-47°F is the lowest recorded temperature, and 72°F is the highest). Snow has accumulated on White Mountain summits every month of the year, and each month has seen wind gusts as high as 147 MPH. Fatalities occur each year in the White Mountains due to dangerous weather conditions; it’s most often people who were unfamiliar with the turbulent weather and were unprepared for the impacts of snow, rain, poor visibility, and windchill far lower than actual temperatures.
Please take the time to truly familiarize yourself with the mountains’ weather conditions in advance of your trip, looking at not just weather in the valley but also weather reports specifically for the mountain summits. These can be accessed through NOAA Mountain Point and the Mt. Washington Observatory’s Higher Summits forecasts. A well-known White Mountains blogger pulled together a NH48 summits weather forecast page, with multiple forecast sources for each peak, which I use frequently. However, I would recommend against only utilizing Mountain Forecast, as it shows more fair weather than reality. Triangulating weather forecasts across multiple platforms is recommended.
Thick cloud cover can create low visibility conditions which are disorienting and make navigation more difficult. Photo by Aubri Drake.
My process for determining a go/no-go for a Presi Traverse
5-7 days before: I look at the expected weather of Gorham NH and Bretton Woods NH in a weather app. This starts giving me a feeling for the best possible weather I might be facing. If it is going to be 20 degrees and raining in town, it will be much colder and rainier in the mountains. I also look at the NOAA 7-day forecast for the peak.
3-5 days before: I start looking at the NOAA 48-hour forecast for the peaks themselves. You can move the start date of the graphs as far as 5 days out. I typically look at Madison or Adams, since they tend to be the windiest.
1-2 days before: I closely look at the NOAA 48-hour forecast for the peaks, and look at the Mt. Washington Observatory’s Higher Summits forecast (updated every 12 hours for the next 36-48 hours). This is my most critical go/no-go point. I examine actual temperature, precipitation, wind speed, and windchill to consider if they’re within my comfort, experience, and safety range.
Day of: I always take a look at the Higher Summits forecast and the NOAA forecast right before I leave for the trailhead in the early morning, just to be sure I know the best details available. It helps to know if the 40 MPH wind will be dropping to 10 MPH by 10am or if there is a risk of an afternoon thunderstorm.
Pro Tip: You can text the Mt. Washington Observatory to get an abbreviated forecast and the current summit conditions by text/SMS! Text WEATHER for current Mt. Washington summit conditions, or text FORECAST for an abbreviated Higher Summits Forecast for day-of conditions to 603-356-2137.
Route Summary
The Presi Traverse is most commonly done southbound, starting at the Appalachia Trailhead (TH) and ending at Crawford Notch. This puts the biggest climb at the start of the day and allows hikers to complete the more technical and exposed northern Presidentials while less tired and with a more certain weather window.
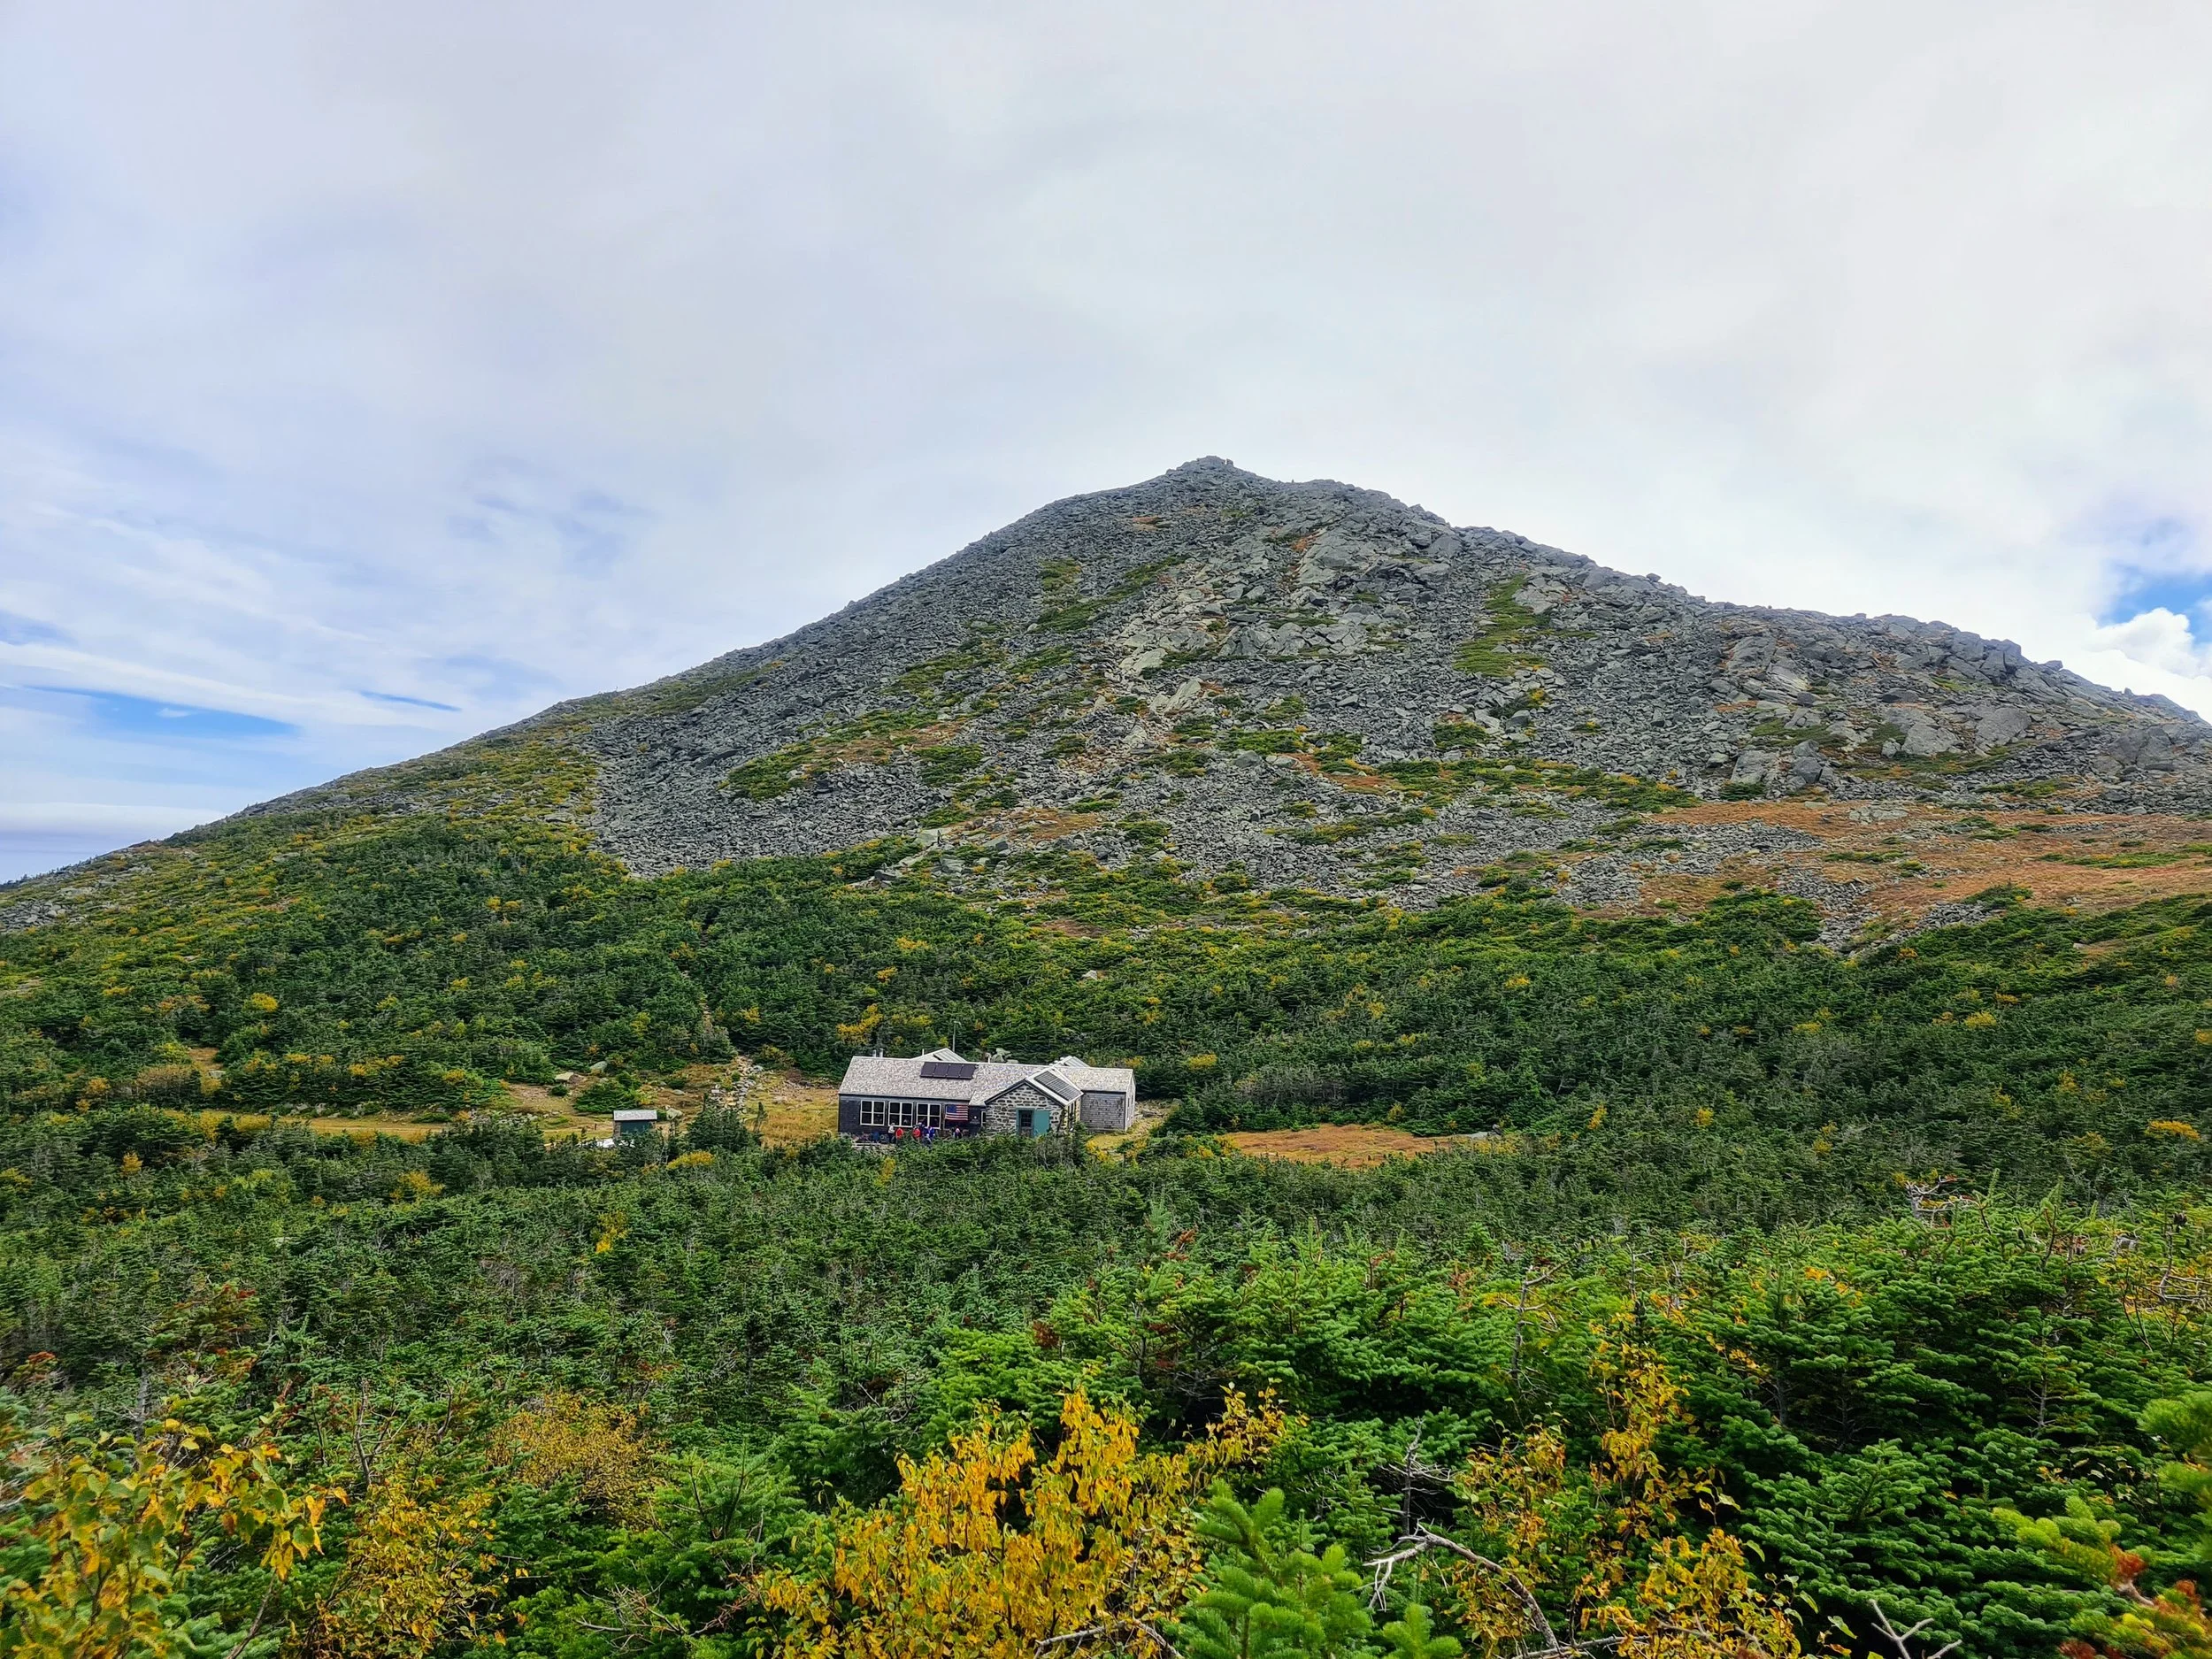
Starting from the Appalachia TH, Presi Traverse hikers hike up Valley Way. The terrain is lightly “northeast technical” but not too bad. The trailbed is fairly smooth and the elevation gain is methodical if a bit relentless. Hikers pass by the Valley Way Tentside spur around mile 3, and break treeline right around 3.4 miles just before arriving at the Appalachian Mountain Club (AMC)’s Madison Spring hut. This is a great spot to take a quick break, change layers, go to the bathroom, or fill up on filtered water.
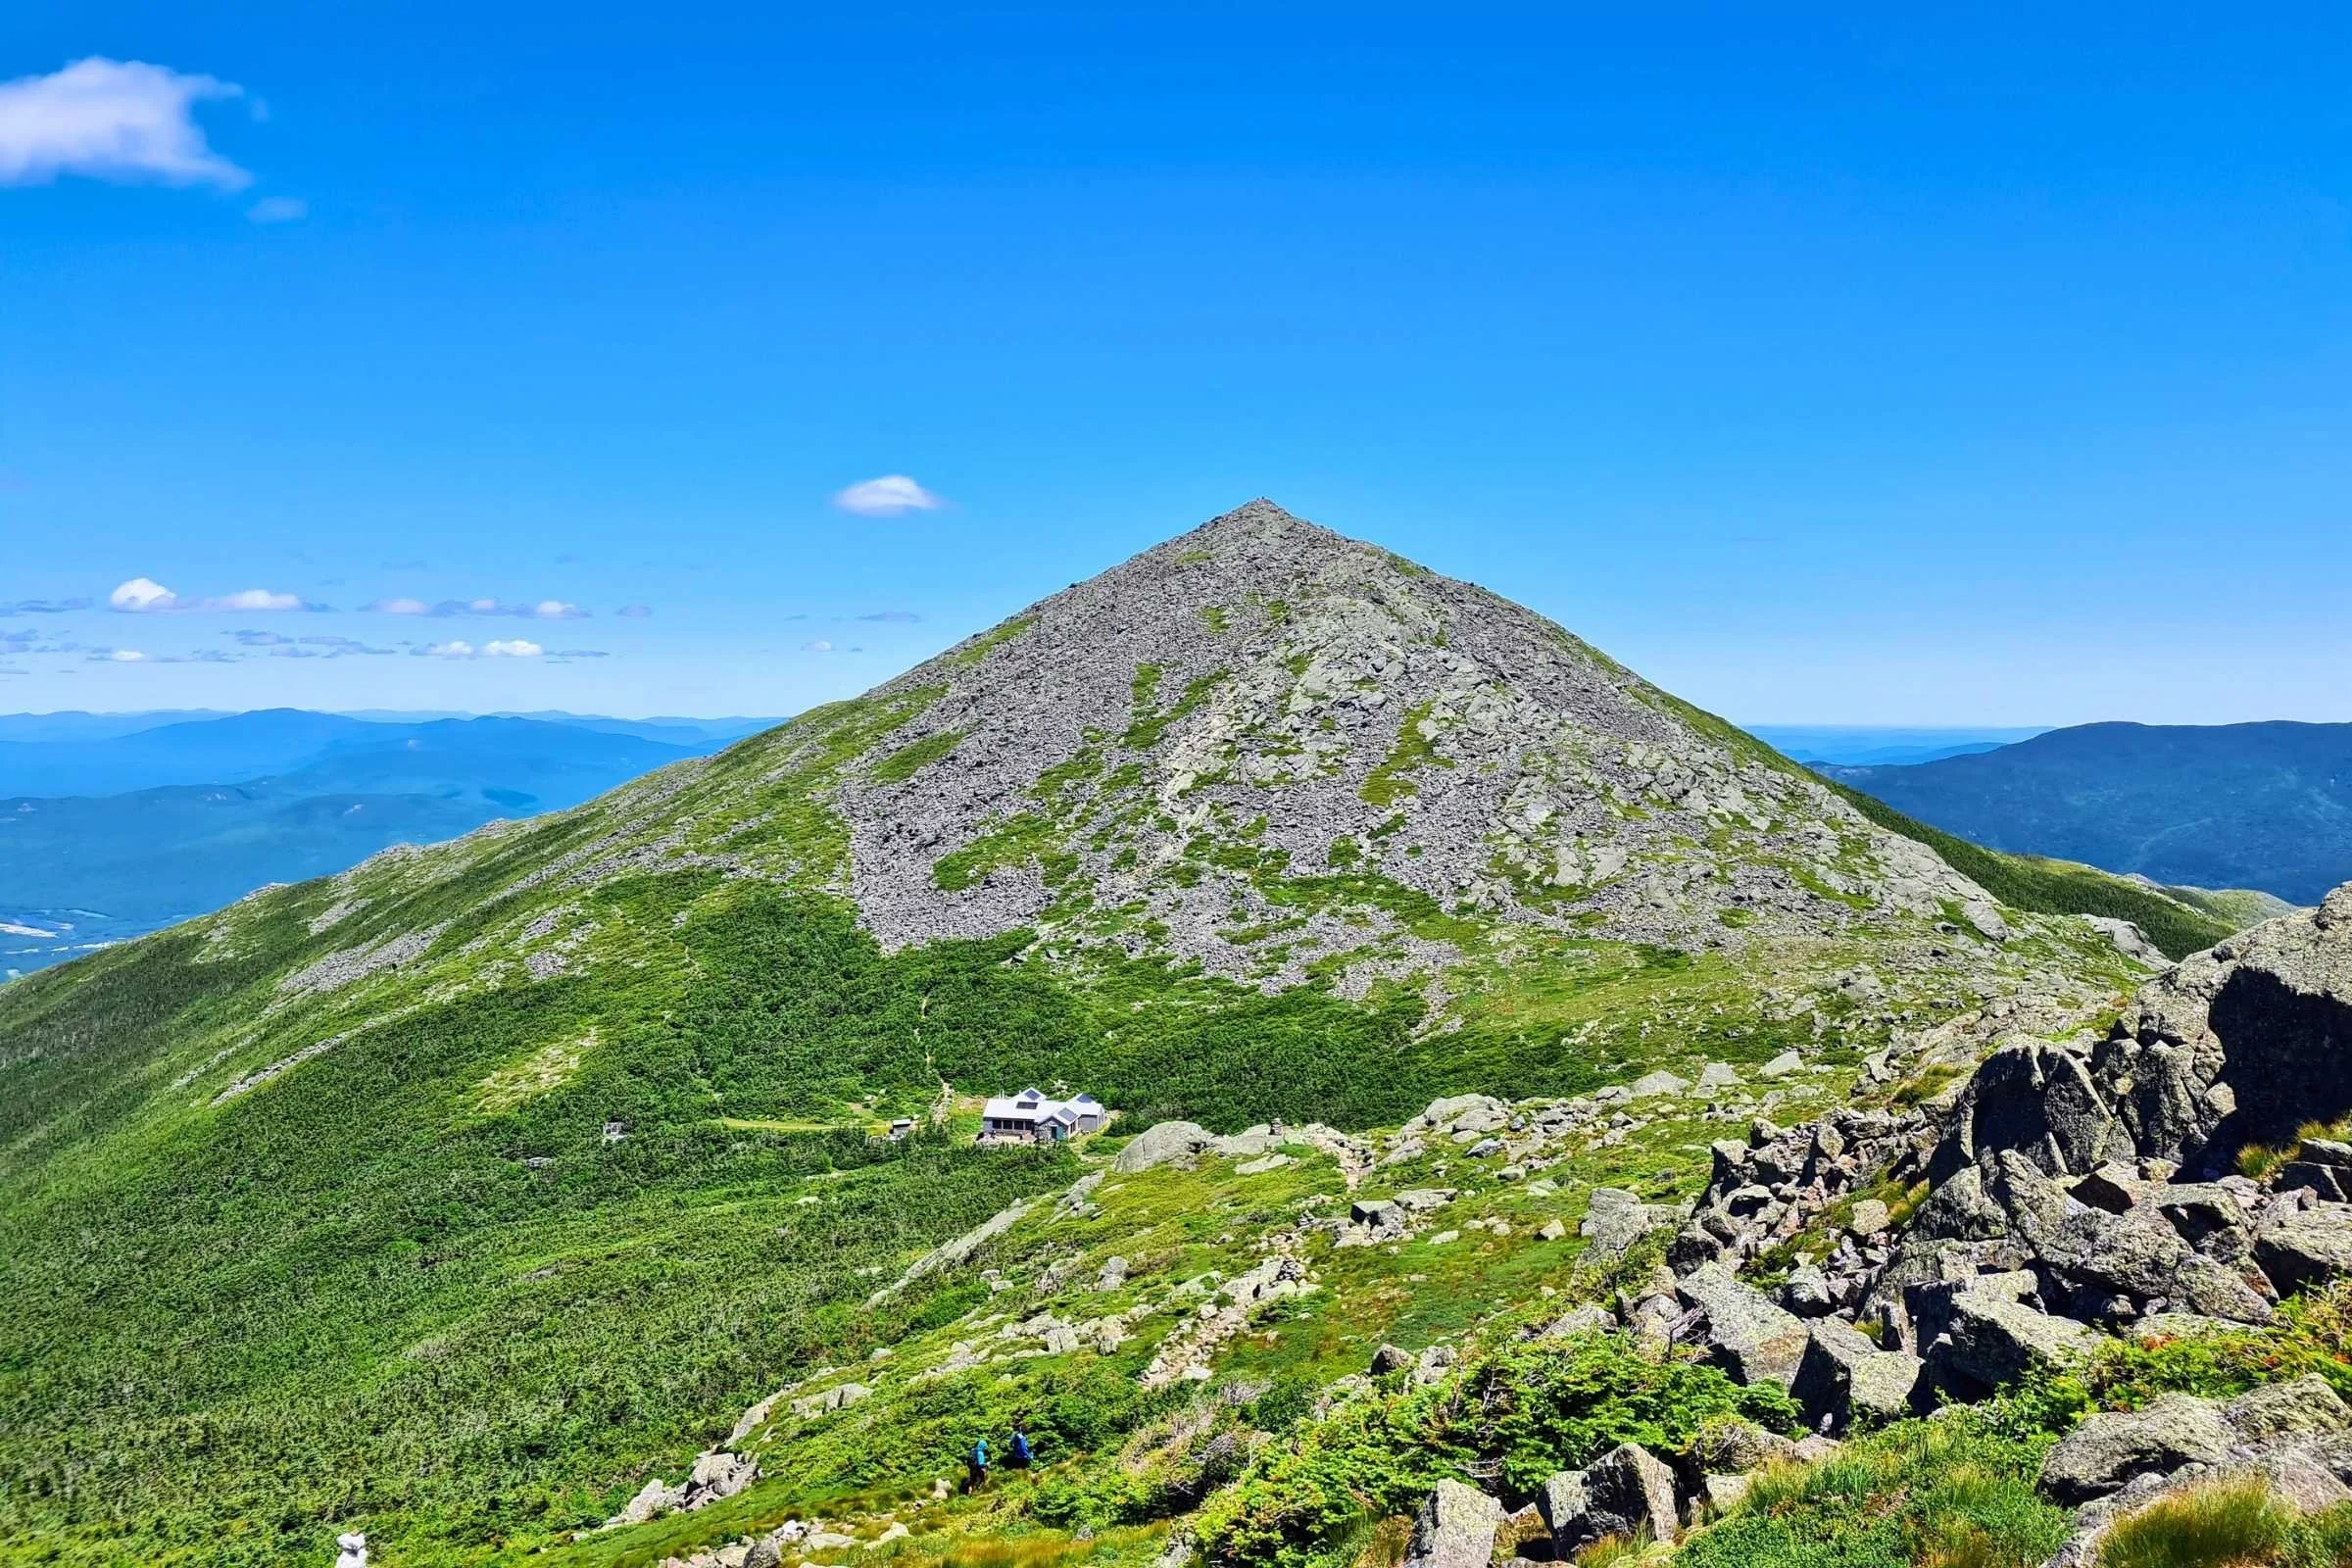
Madison Spring hut in the shadow of Mt Madison, seen from the side of Mt Adams. Photo by Aubri Drake.
Some hikers drop their backpacks by the hut for the short but steep and rocky 0.4-mile out-and-back to the summit of Mt. Madison on the Osgood Trail (also the AT). This is your first taste of the rock scrambling to come. Mt. Madison tends to be very windy, so if you choose to leave your pack, be sure you have enough layers with you.
After the out-and-back to Madison, it’s onward towards Adams on the Gulfside Trail (still the AT). This is one of the more technical areas of the Presi Traverse. It will take longer than you expect. The northern Presidentials are notorious for their difficult trails and high winds. Keep an eye out for cairns as well as white blazes on the rocks.
Note: Do not be fooled into taking the Star Lake Trail on the east side because it’s technically a few tenths of a mile shorter than Gulfside. It is much more difficult with a few sections of class III and a ton of rock scrambling. Star Lake Trail in winter is a slide risk, requiring crampons, and in shoulder season the boulders have many gaps to fall into and get legs/snowshoes stuck.
Any alternative trail in the White Mountains that is shorter than the main route should be immediately distrusted. Shorter means steeper, which typically means it will take the same or more time than the longer but less-steep distance.
A busy intersection below Mt Adams. Photo by Aubri Drake.
Around mile 4.5, you will leave Gulfside, heading up Airline Trail to the left. A truly brutal 0.4 miles later, and you’ll summit Mt. Adams with almost 5,000’ of climbing already done. Mt. Adams tends to have some of the highest winds directly at the summit that you’ll encounter on a Presi Traverse. Just know that once you drop down, the wind is typically cut by 70-90%. I have crawled across the summit due to 60+ MPH wind gusts but once I dropped down off the summit, the wind was almost completely gone.
You’ll then take a hard right to follow the Mt. Adams summit spur path. This section can be hard to follow, so keep a sharp eye for even small cairns here. After 0.2 miles, take a left onto Israel Ridge Path and then rejoin Gulfside Trail (again, also the AT). If you miss the left turn (which I’ve done a few times), in another 20-30 steps, you’ll end up at a 4-way intersection with a huge cairn at the center where hikers can take a left and rejoin Gulfside. Around mile 5.5, there is a sign for the Peabody Spring. You’ll continue to follow Gulfside through Edmands Col and past Gulfside Spring around mile 6.4 where the climb up Mt. Jefferson begins.
Around mile 6.5, turn right up the Mount Jefferson Loop trail. Just before this, early-season hikers may encounter the Jefferson snowfield, which can last into July after a high snow year. If snow may be present, check reports in advance and pack microspikes or crampons if needed. The field is on a steep grade (photos don’t do it justice) and a long slide with an impact on the rocks at the bottom is a risk.
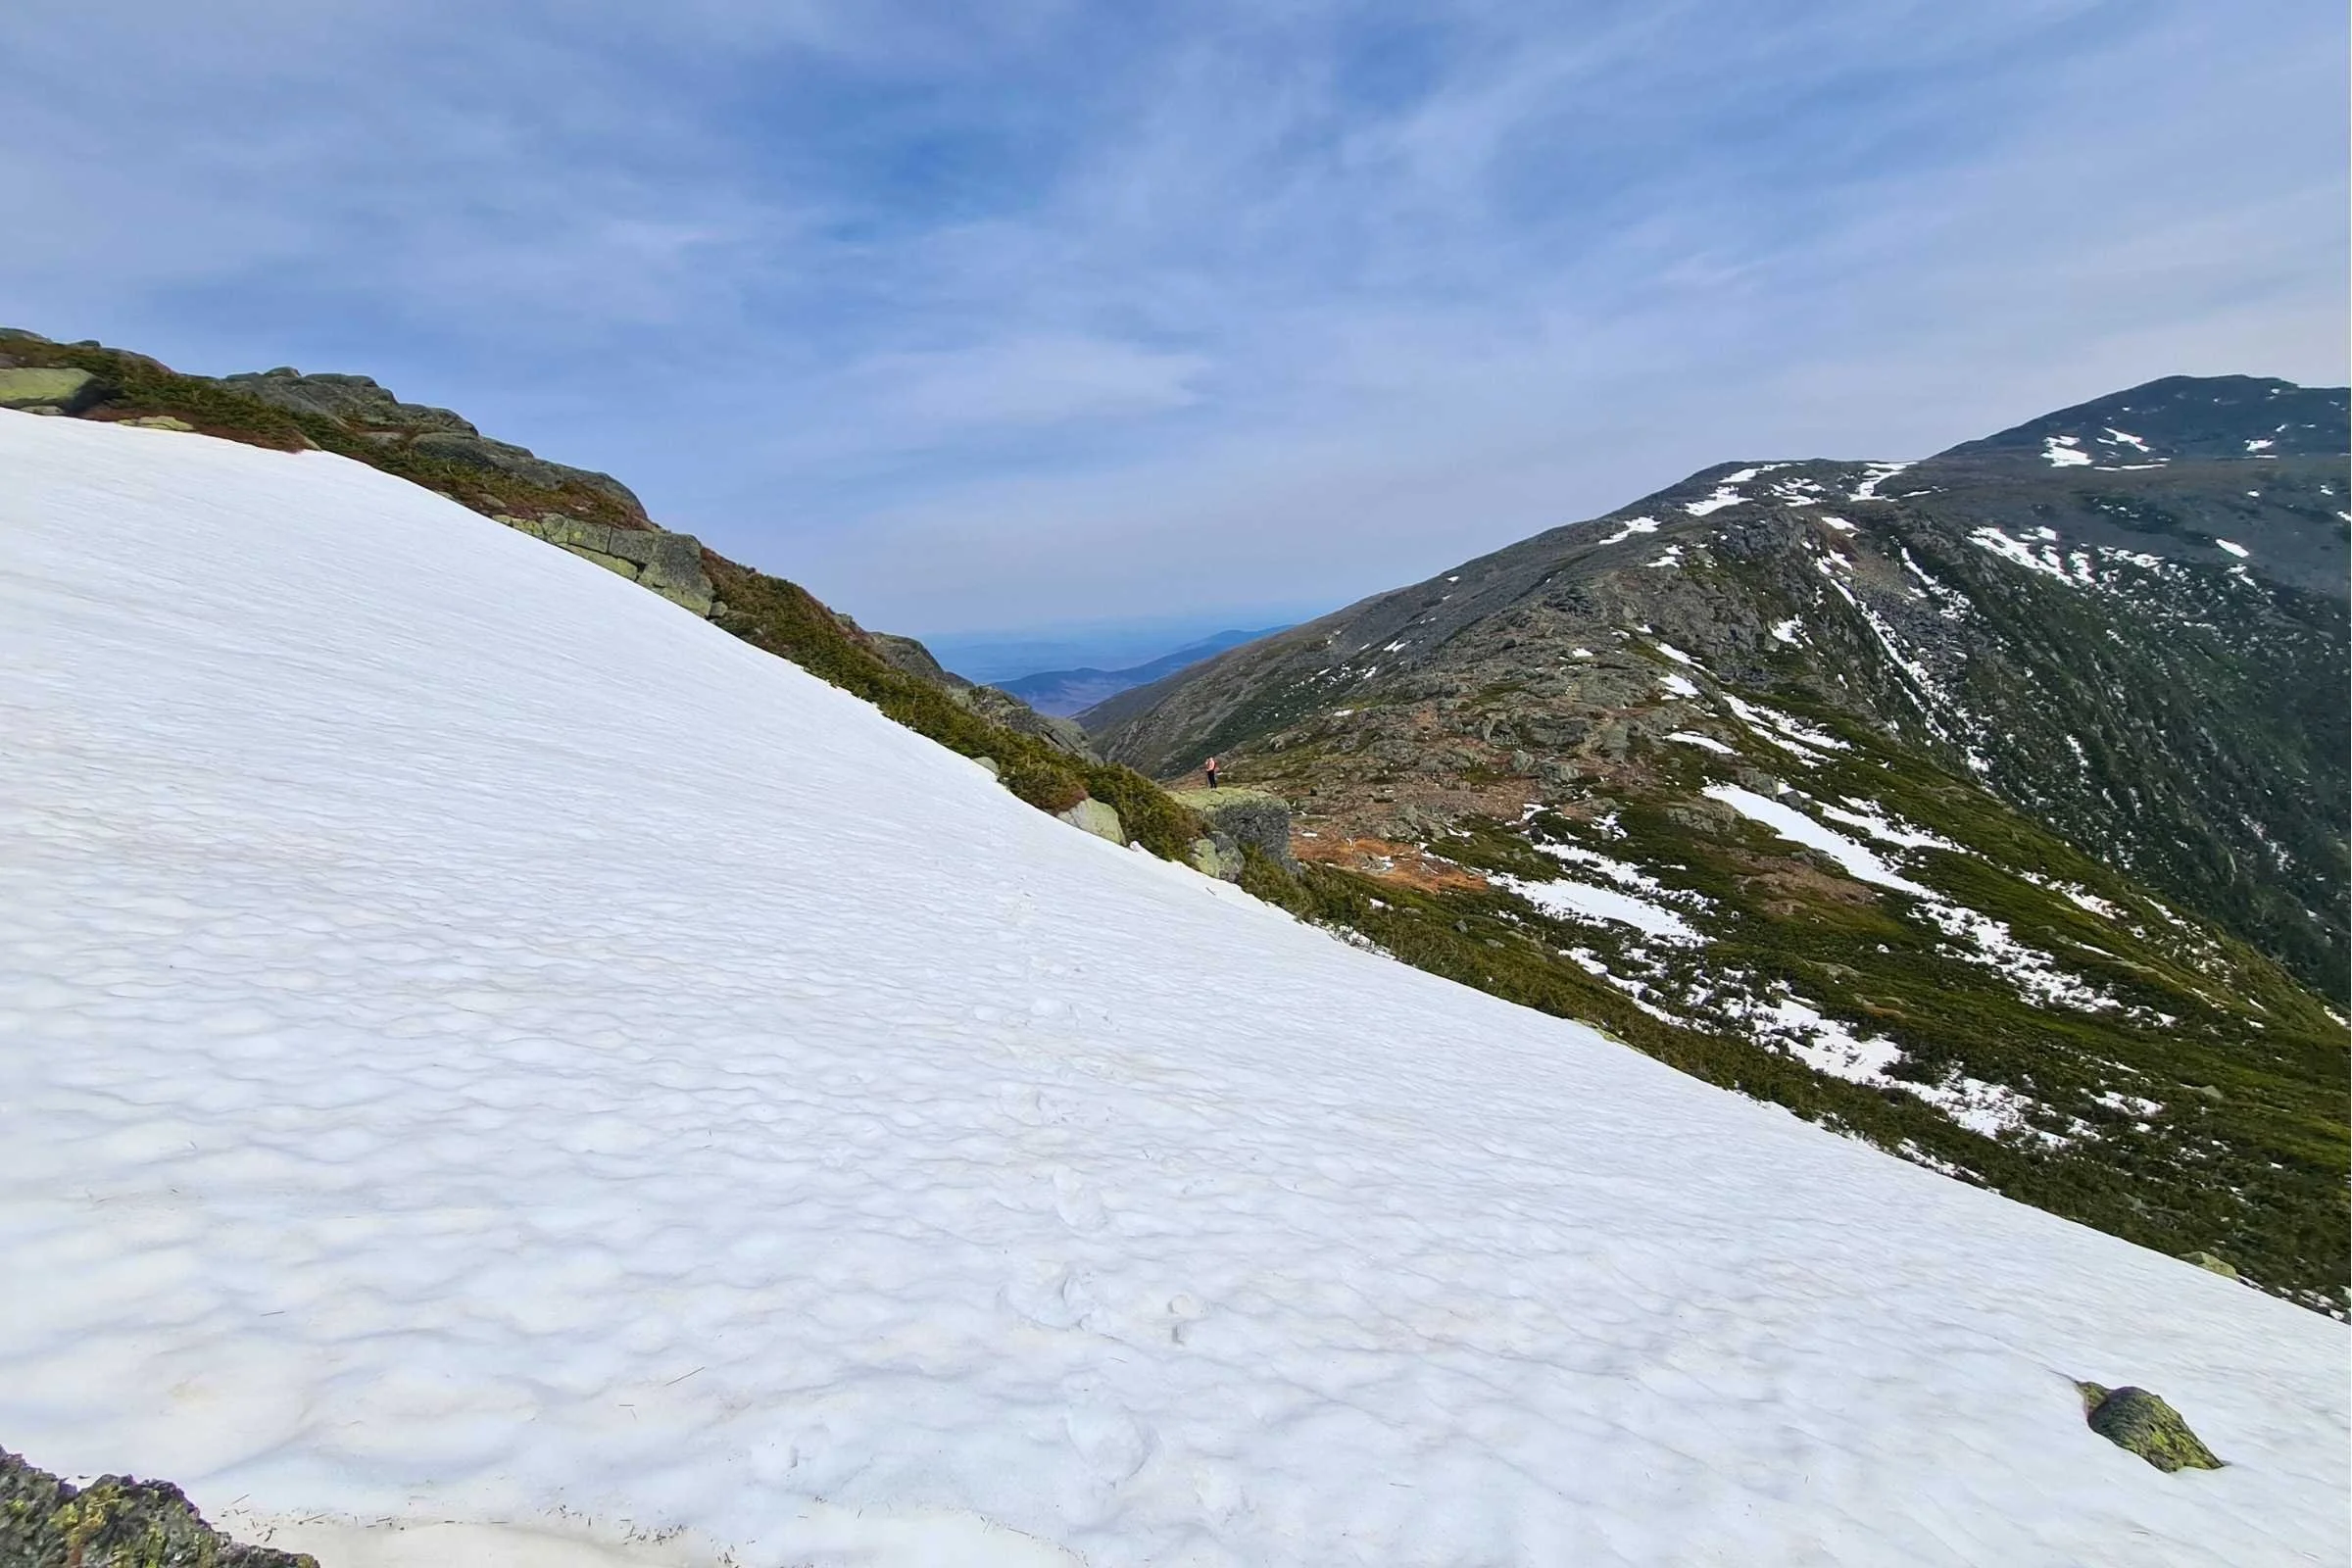
The Jefferson snowfield. Photo by Aubri Drake.
The climb up Jefferson is relatively short but brutal. The trail can be hard to follow, but there are smaller cairns visible when there isn’t snow. After hitting the summit of Jeffrerson around mile 7, you’ll descend by continuing to follow the Mount Jefferson Loop trail. After 0.2 miles, the trail reconnects with Gulfside (the AT).
Around mile 8, pass through the Sphinx Col and follow Gulfside around Mt. Clay. Some hikers may want to summit Clay; see below for Side Trips. Continue to follow Gulfside as it meets and then parallels the Cog Railway tracks, with the Great Gulf Wilderness off to the left.
The Great Gulf, with the Mt Washington summit in the distance. Photo by Aubri Drake.
In poor weather, it is common and recommended to cut over to the Cog tracks and follow them closely up the mountain, keeping the tracks to your right-hand side, rather than staying on Gulfside/AT where the trail hugs the side of the Great Gulf. There are areas around the Great Gulf headwall where a few missteps could easily lead to a fatal fall.
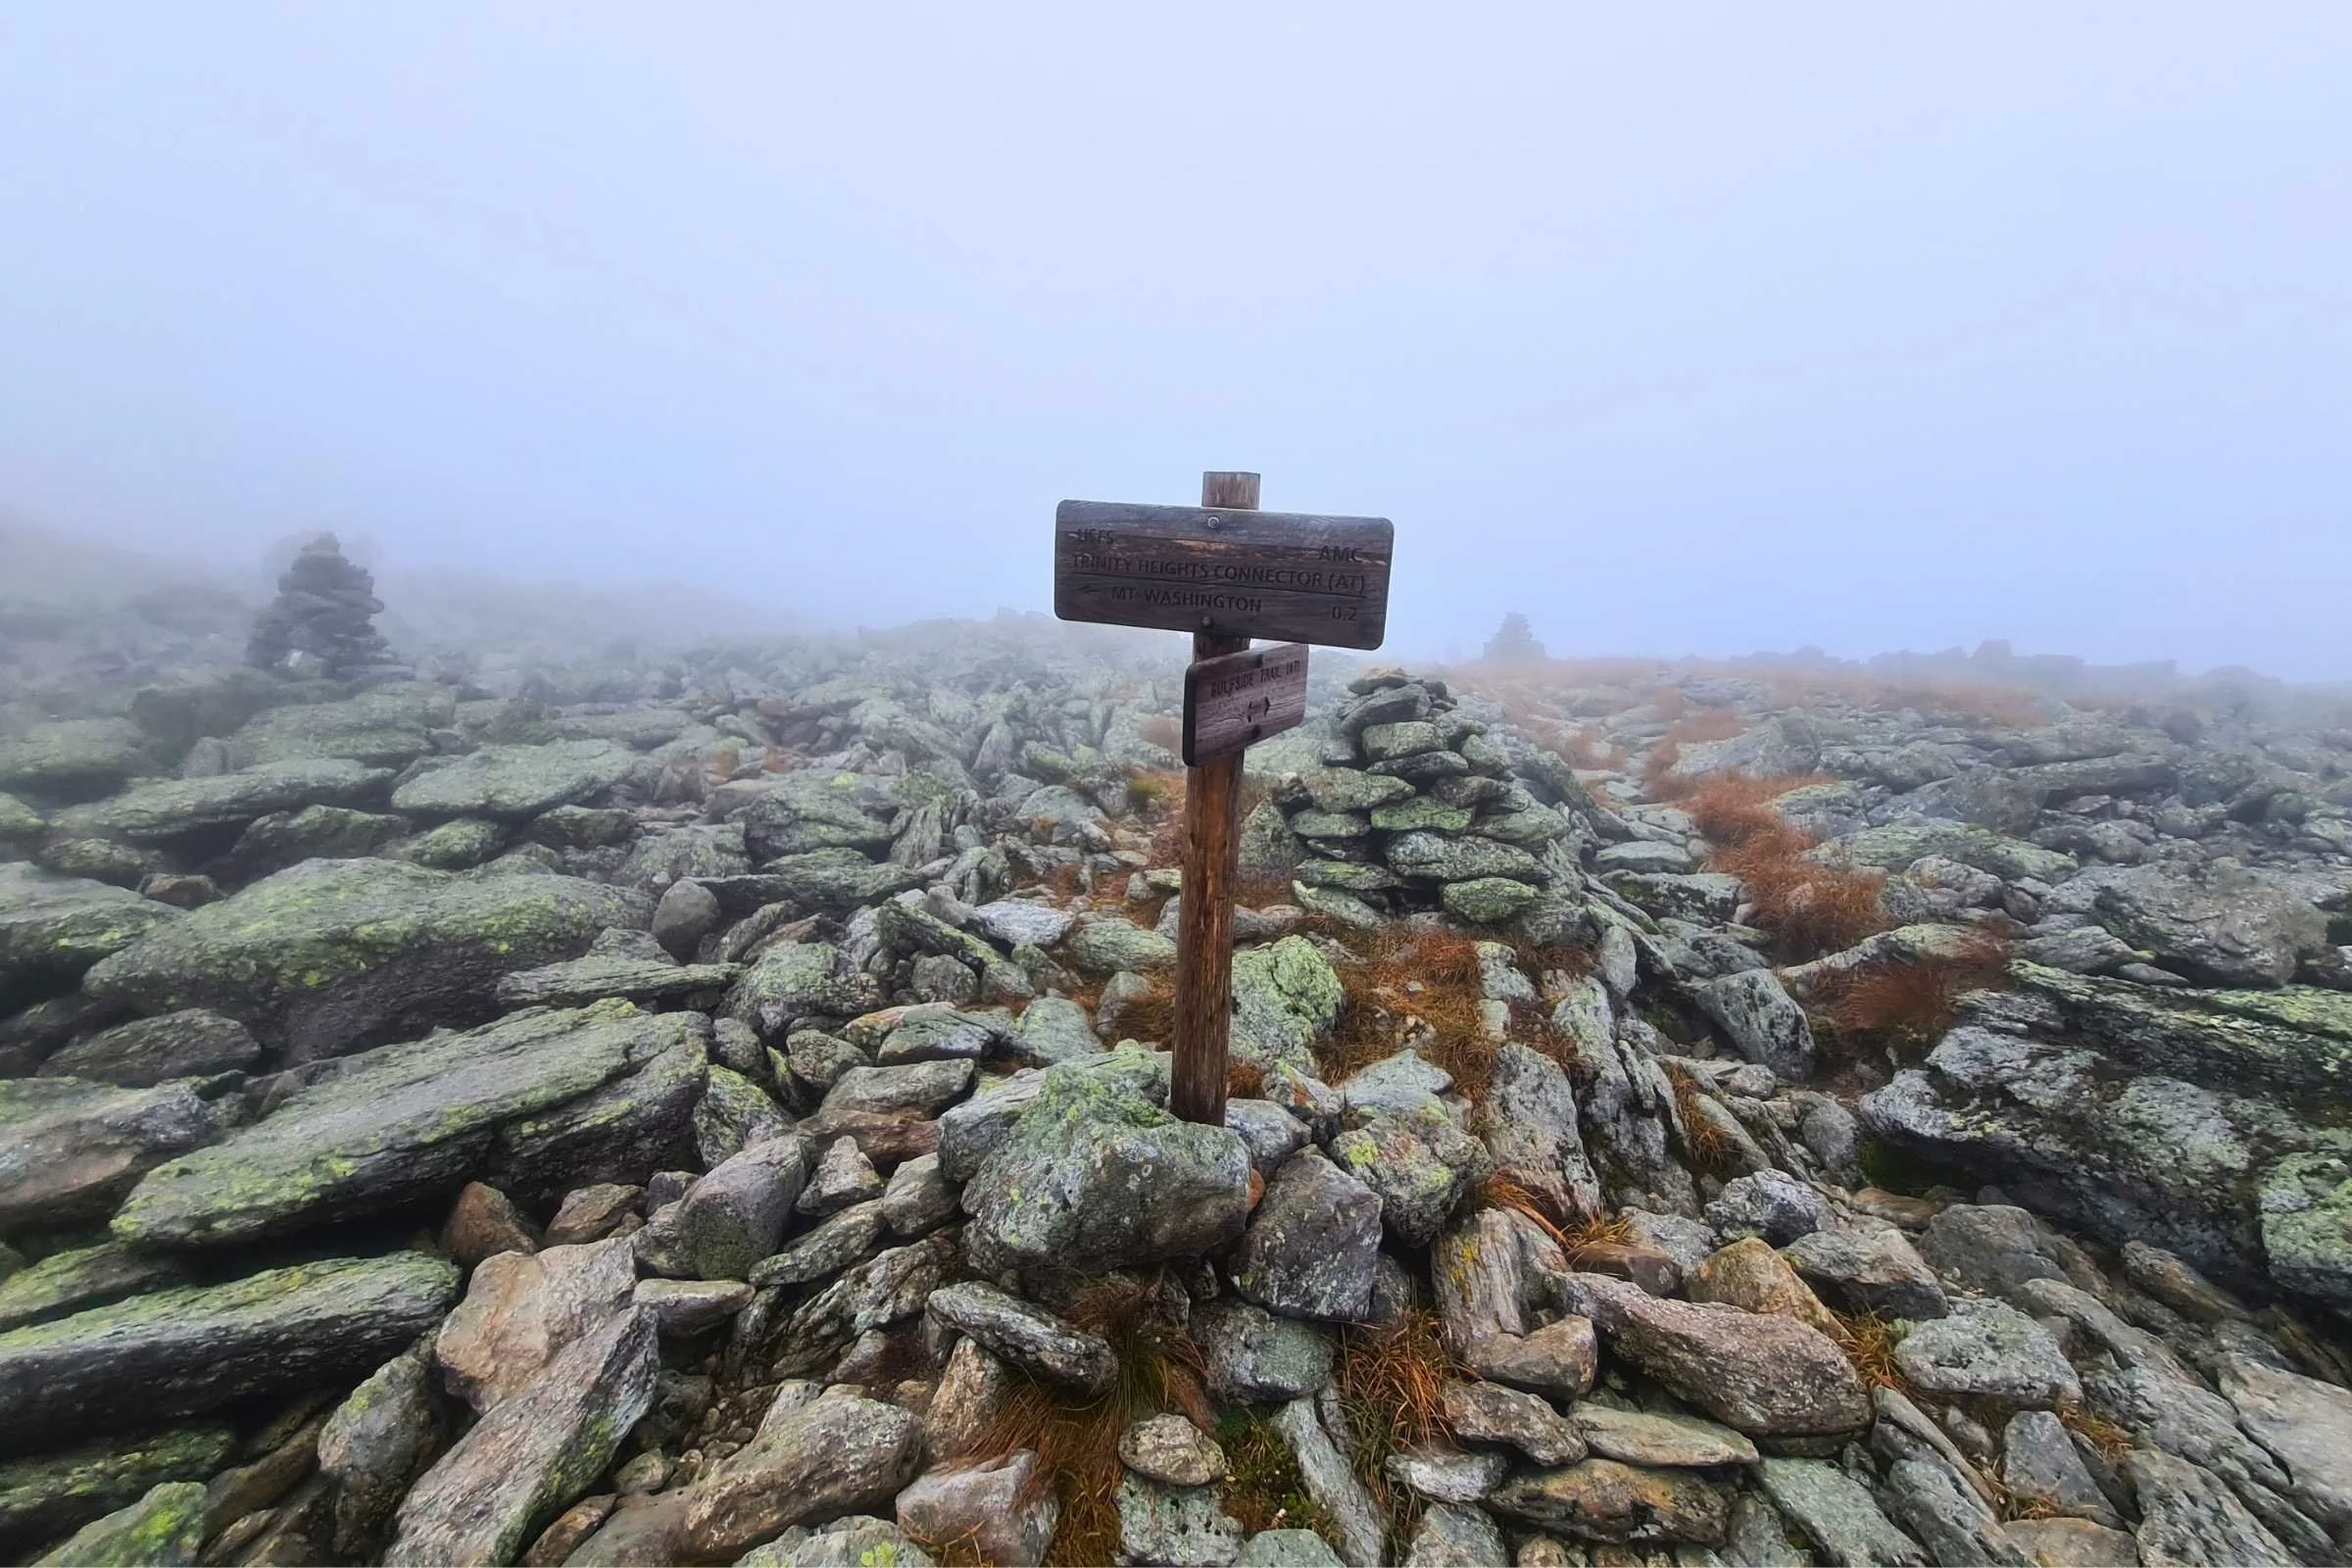
Around mile 9.5, take a right to stay on Gulfside/AT. A tenth of a mile later, you’ll take a left to follow the Trinity Heights Connector to the summit of Mt. Washington. Around 9.8-10 miles, you’ll reach Mt. Washington and the Summit Building straight ahead. If it’s early enough or bad enough weather, there might only be a few people waiting to take their picture with the summit sign. If it’s a nice summer day, there’s likely a 20+ minute queue. This means that I have more photos of myself with the summit sign in winter than summer! At the very least, celebrate that you’ve now completed more than 70% of this route’s elevation gain!
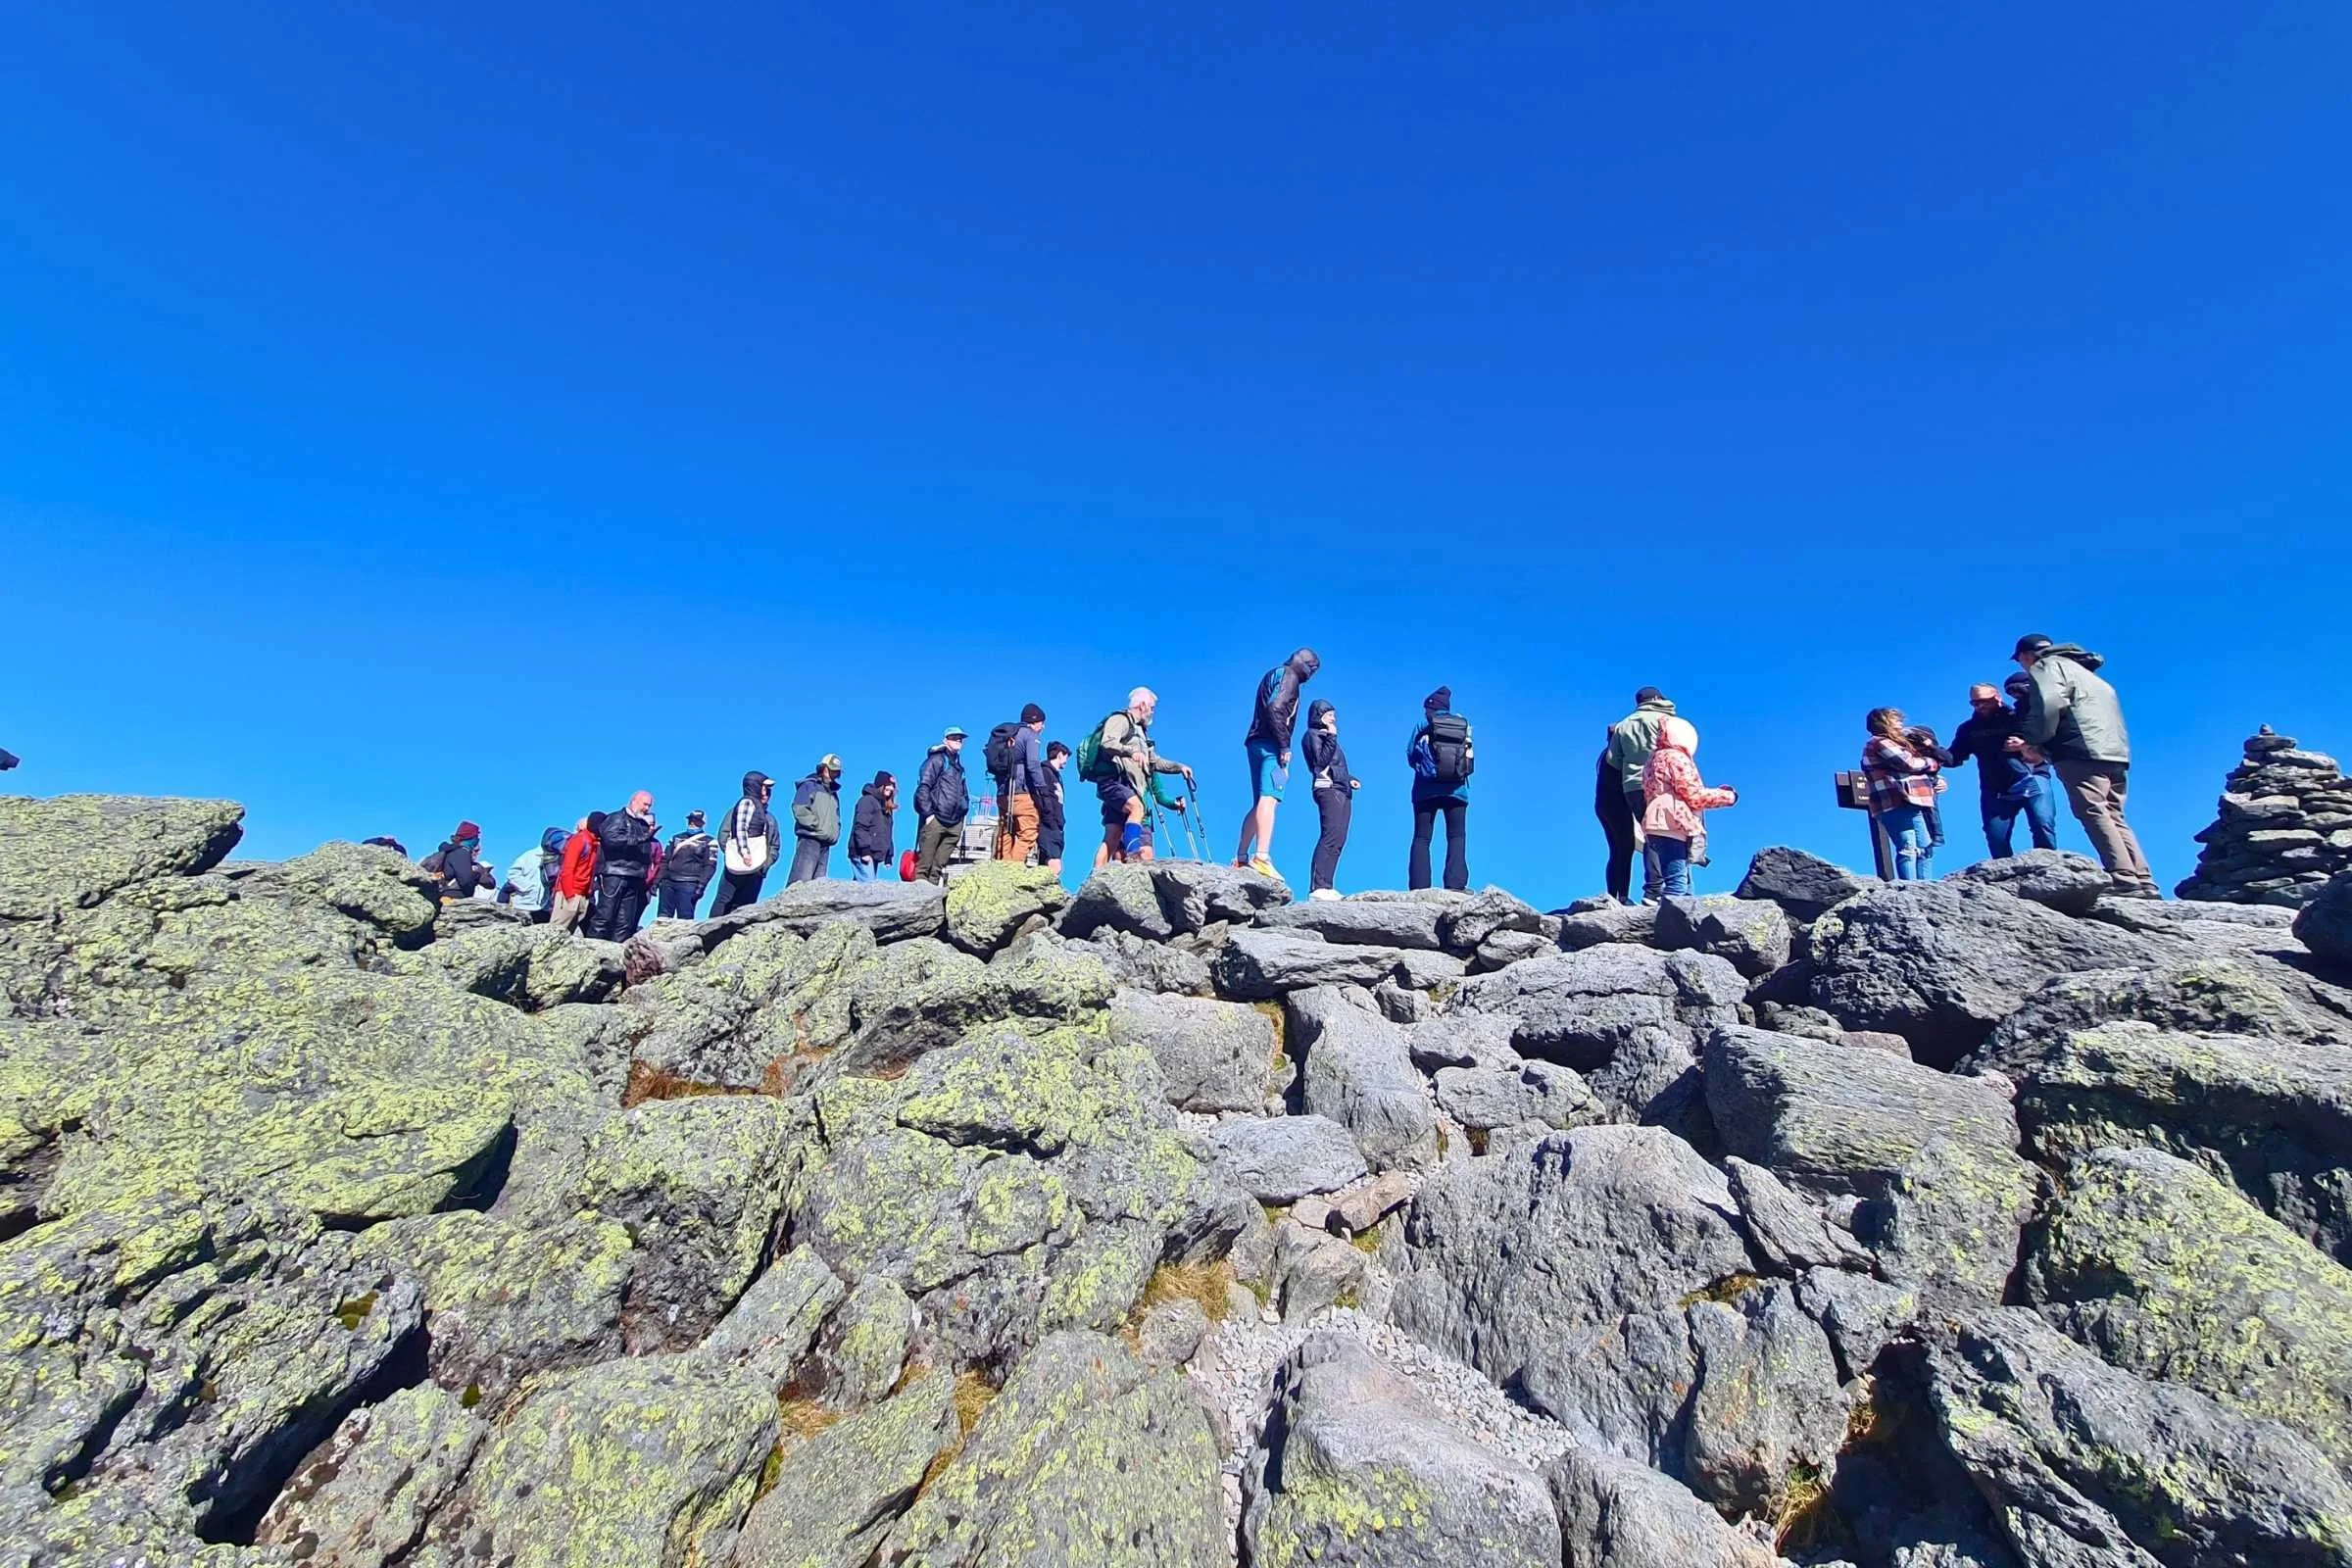
The Mt Washington summit queue on a sunny but chilly fall day. Photo by Aubri Drake.
At the summit building, there is a potable water tap outside, around the east side of the building, for easy refilling. If you’d like to go inside, they have flush toilets and a small cafeteria with food for purchase. From there, follow the signs for Crawford Path and Gulfside Trail, with the Mt. Washington Observatory (the concrete building-bunker thing) on your right and the parking lot on your left. If the crowds are making that difficult, look for the large satellite dishes and head towards those.
Descend Crawford Path/Gulfside until the intersection with Crawford Path/AT. Take a left to continue descending towards Lake of the Clouds hut. This is one of the longer, more exposed descends, dropping more than 1,200’ in the next mile. This is often the busiest section of the entire Presi Traverse.
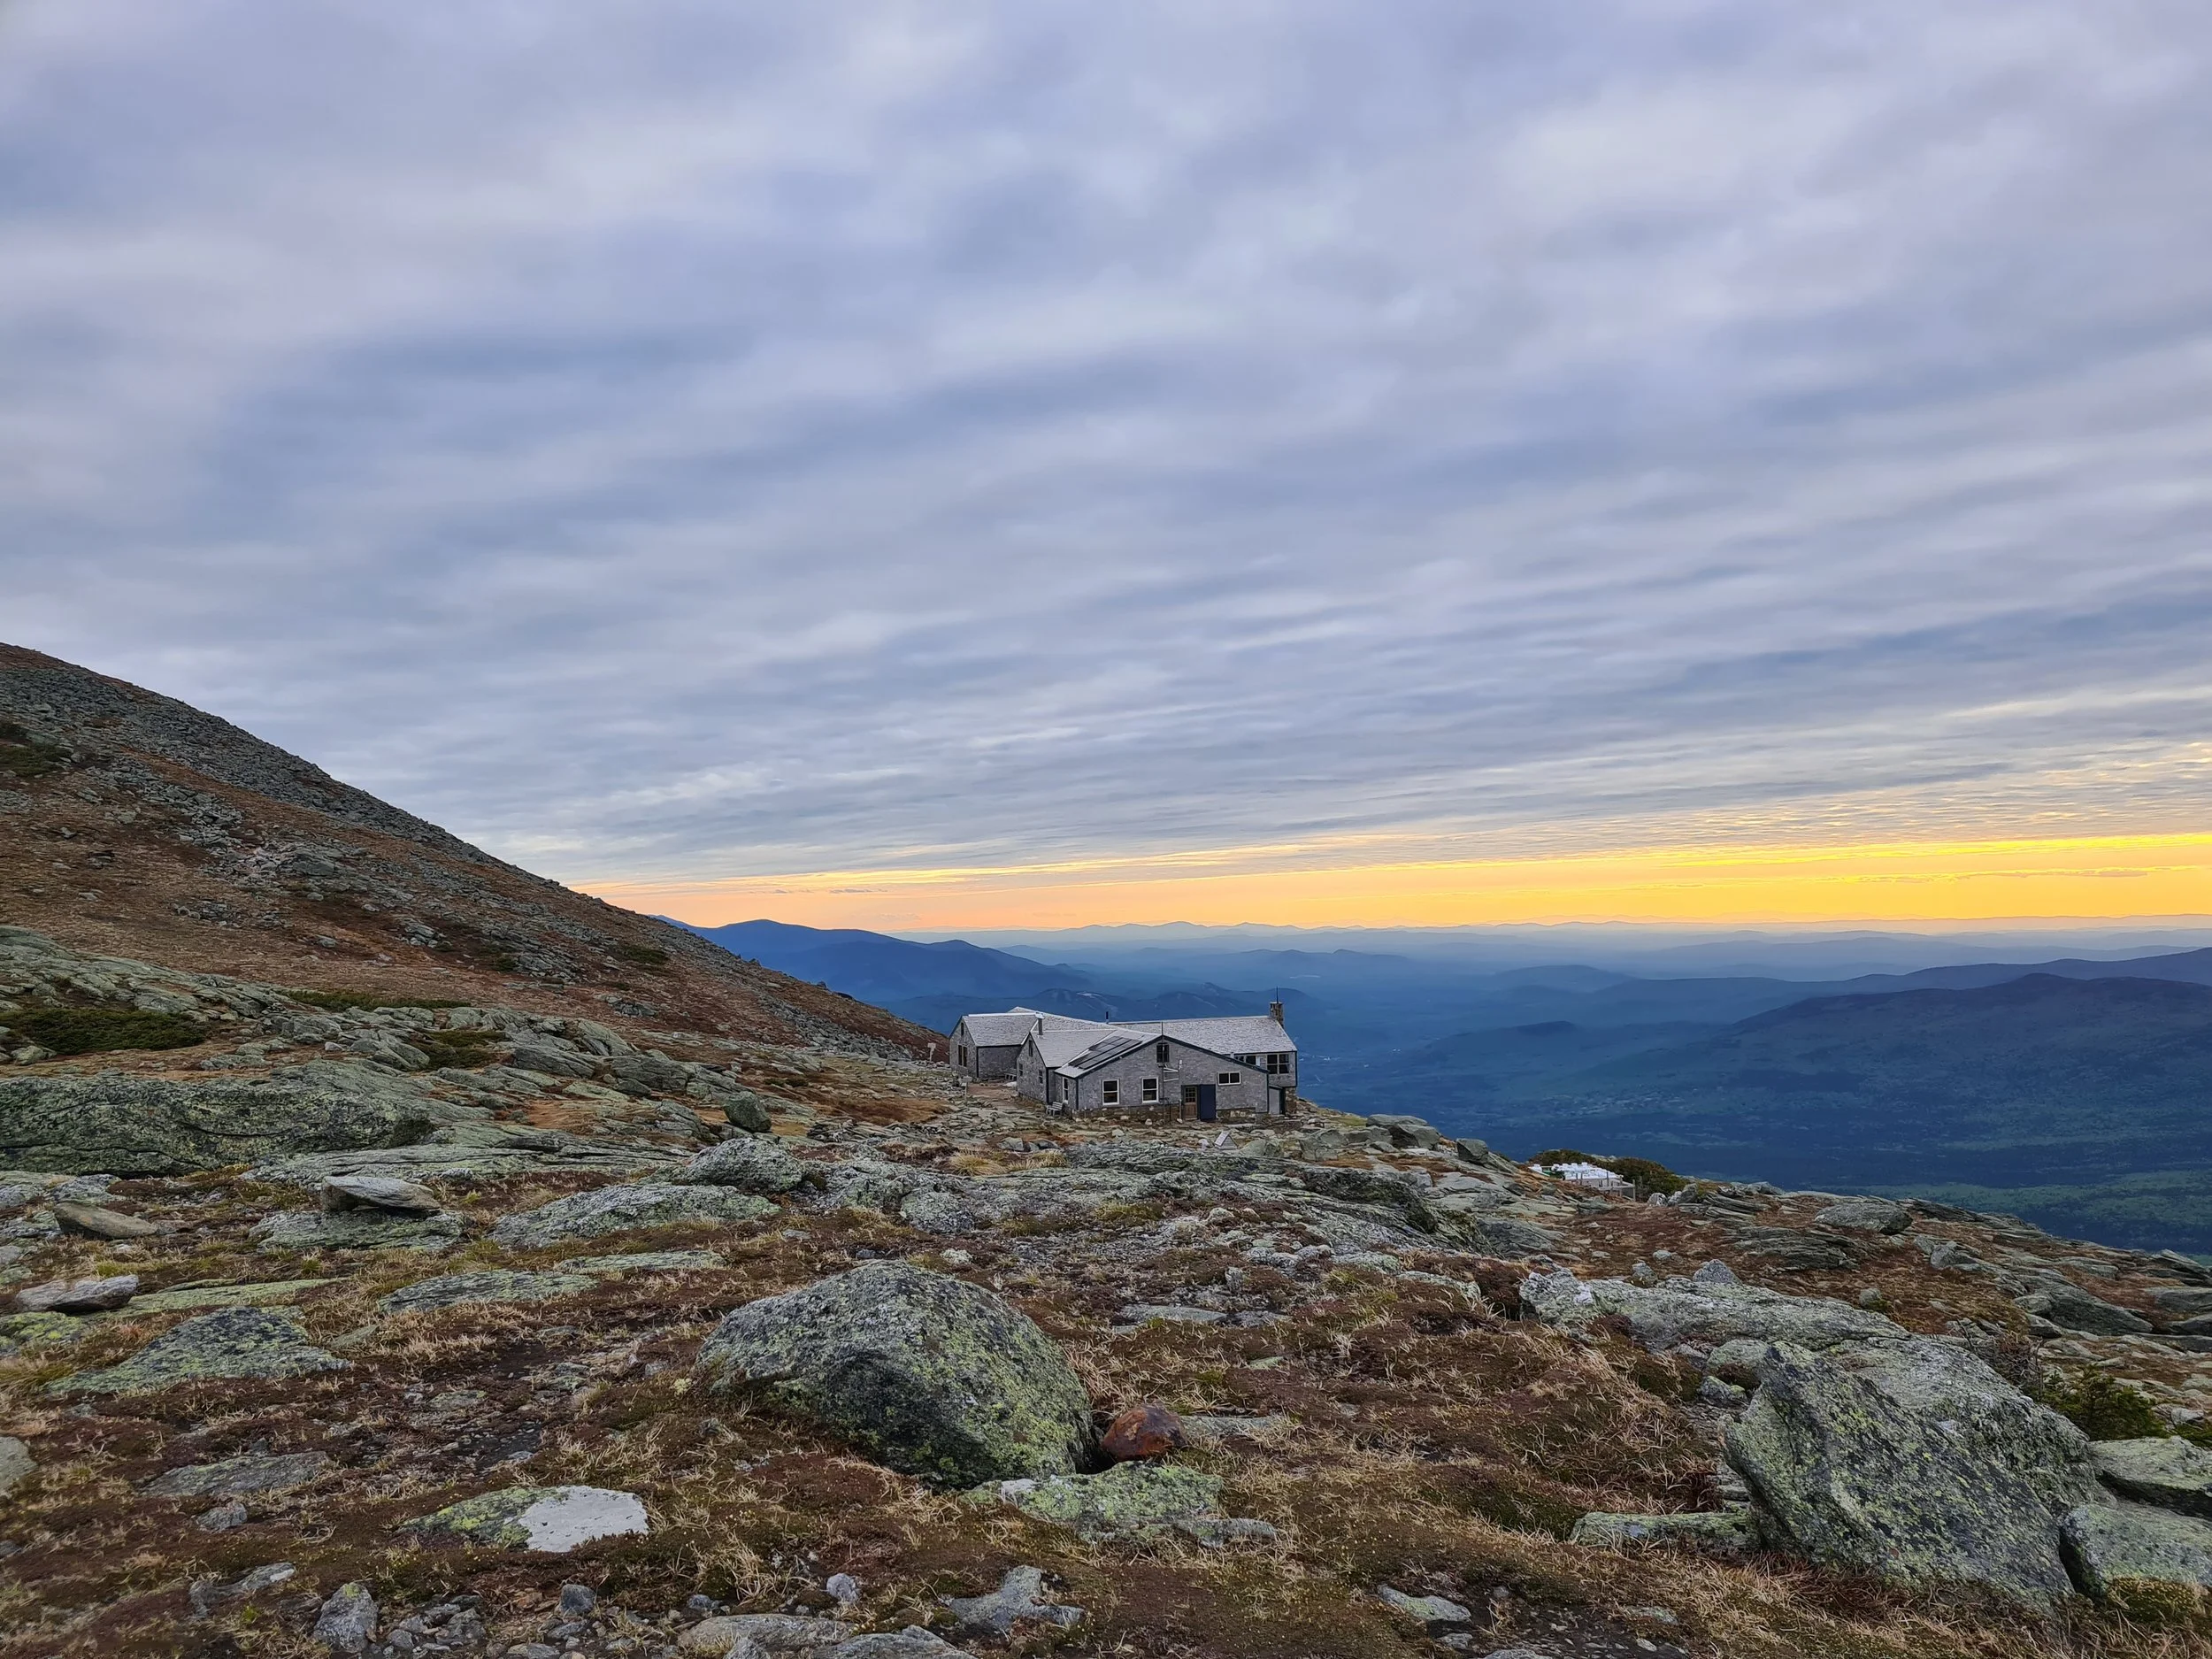
Around mile 11, you’ll arrive at the Lake of the Clouds hut. This is another spot with snacks, toilets, and potable water available. However, this hut tends to be extremely busy, with many people lingering outside because it is on a direct route to Mt. Washington via the Ammonoosuc Ravine Trail.
Once you’re ready to leave, continue past the hut and to the left, to begin your ascent to Mount Monroe. The trail splits right from Crawford Path to head up Monroe. The summit looks big, but it’s only 0.3 miles from the hut.
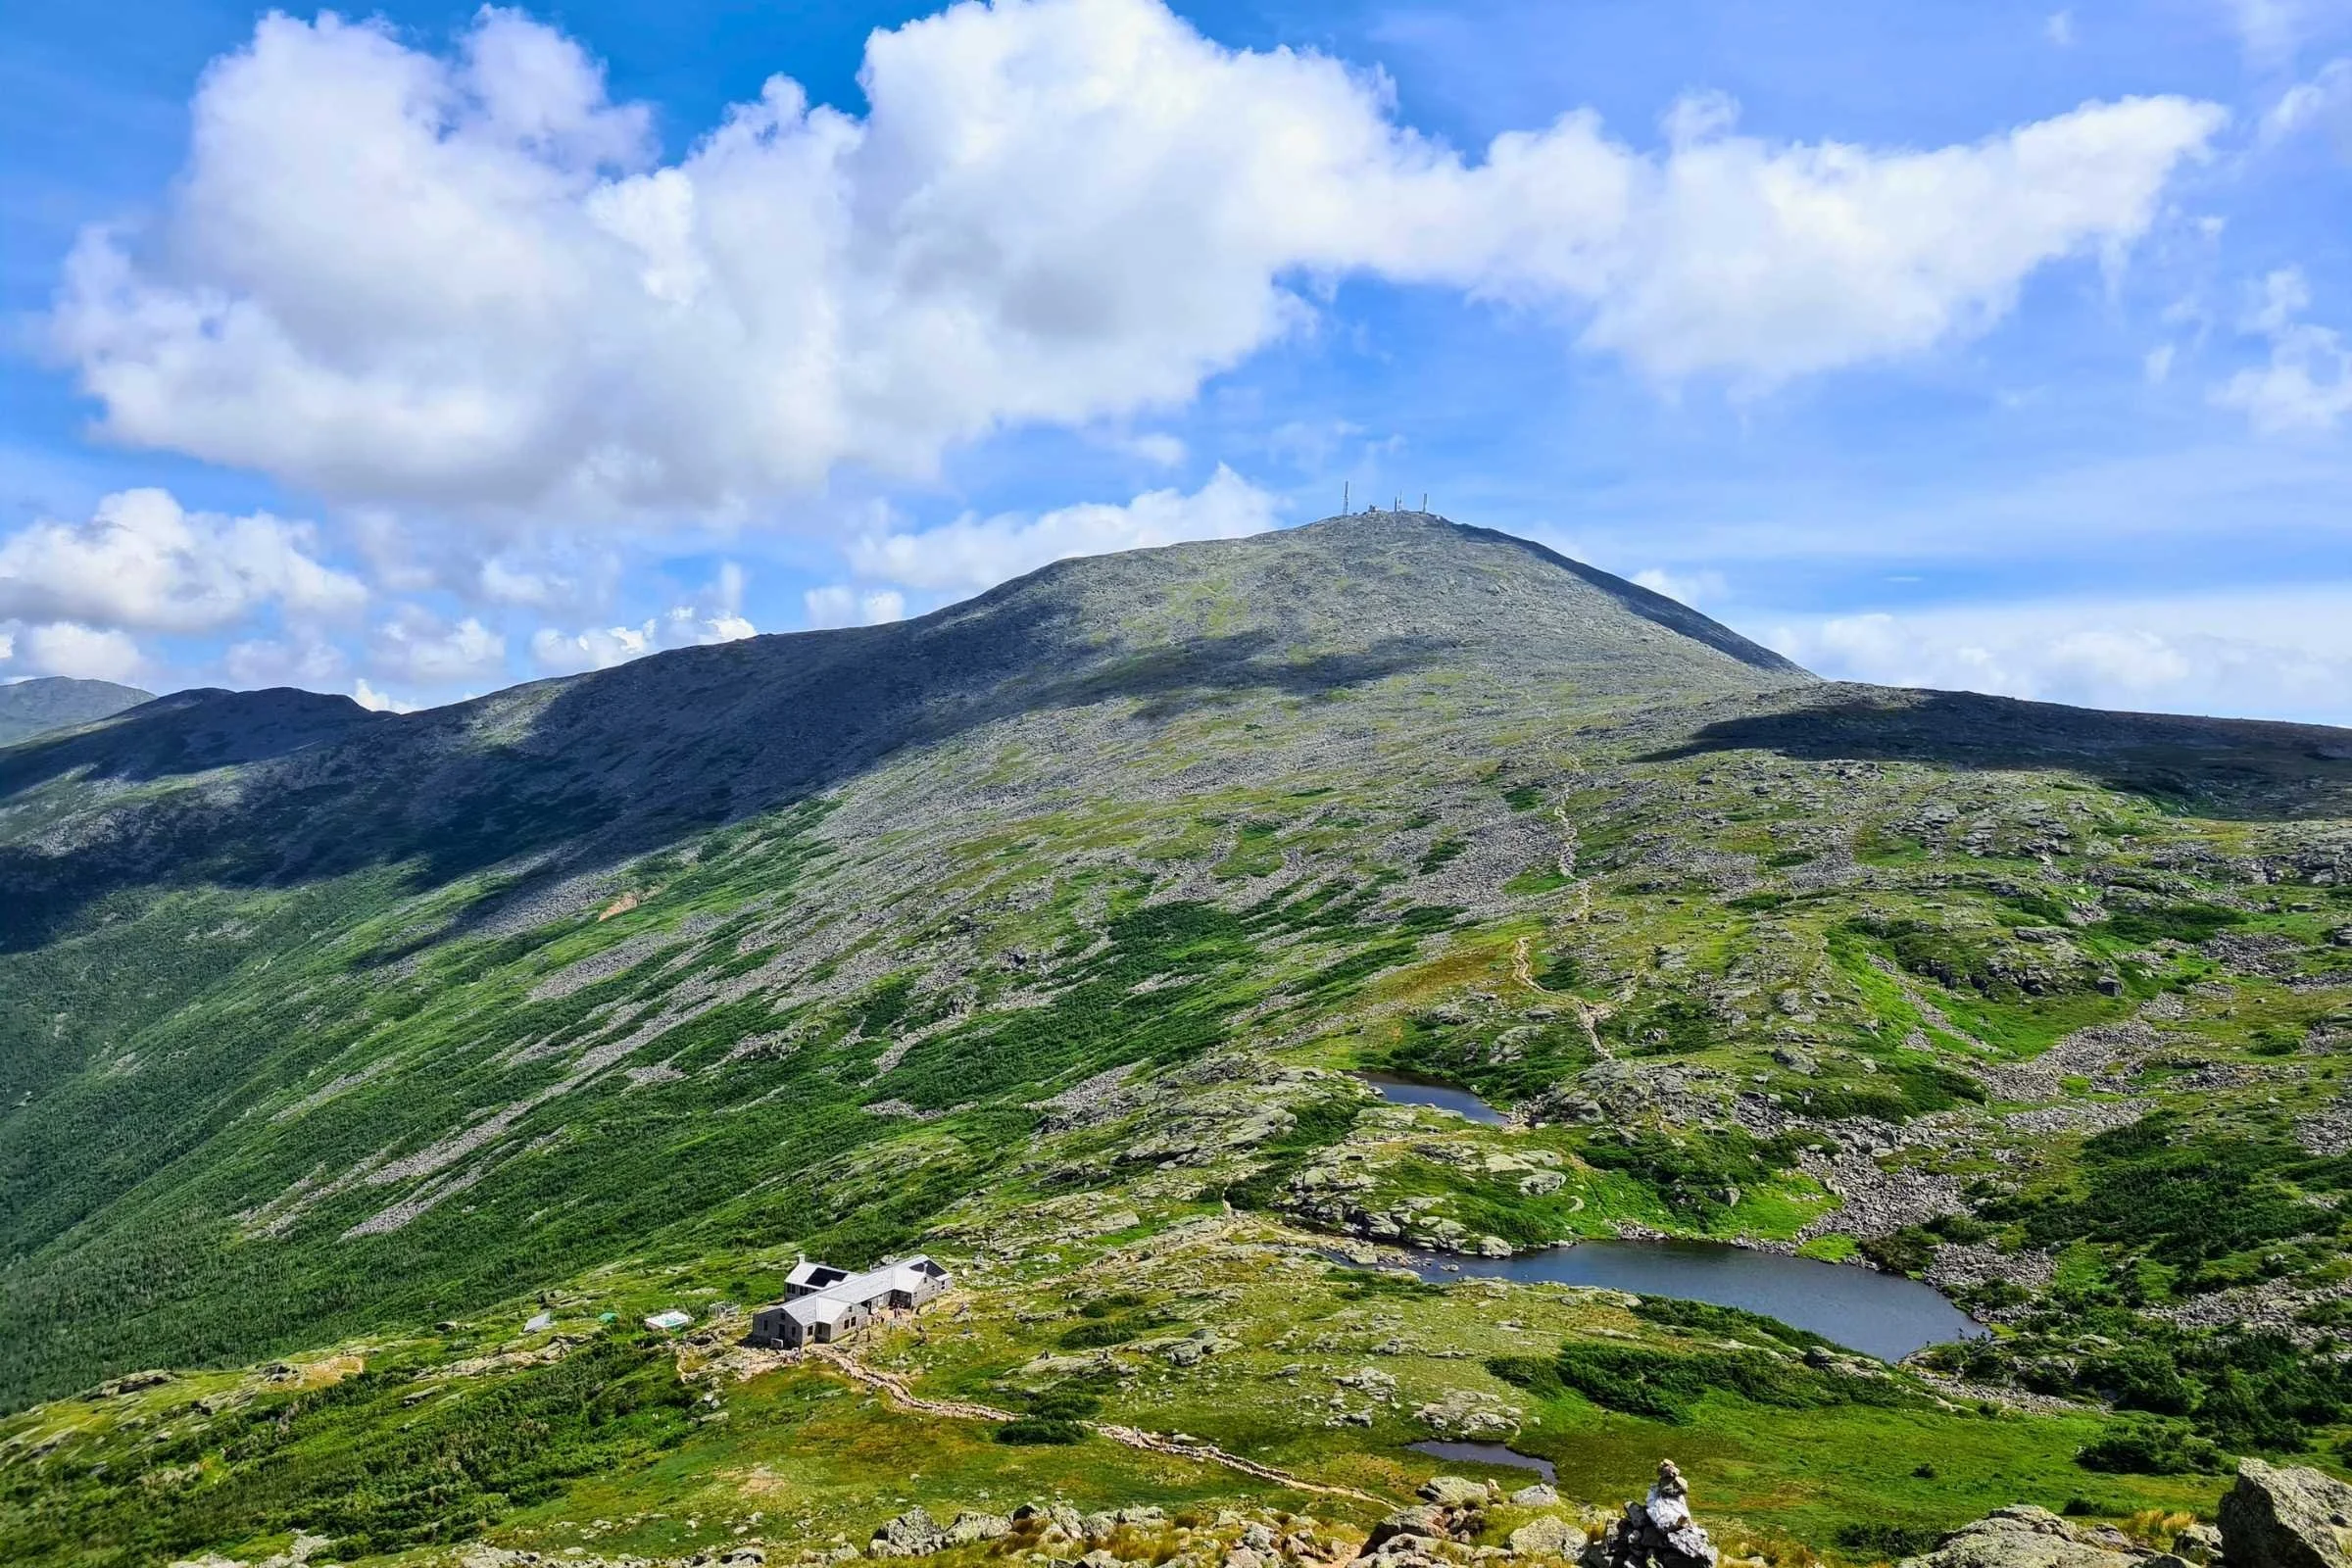
Mt Washington and Lake of the Clouds from the summit of Mt Monroe. Photo by Aubri Drake.
Once enjoying the summit with its epic view of the descent just made from Mt. Washington, continue over Monroe and descend back to Crawford Path/AT. From this point forward, the terrain becomes smoother and the weather, warmer and less windy. The southern Presidentials are less rocky with shorter summits and less wind. The trail starts ducking below treeline, weaving in and out of forested nooks. When the weather is bad in the northern Presidentials, I comfort myself with the knowledge that I’m pushing towards a safer area.
After Monroe, follow the Crawford Path/AT for ~1.5 miles to the intersection of the Mount Eisenhower Loop trail, which heads up and over the mountain. It’s easy to miss the trail to Eisenhower since it’s in an indented area that looks like a drainage with some short spruce trees. It’s a quick 0.3 miles to the summit, with beautiful views back towards Mt. Washington.
Between Monroe and Eisenhower, there are two easy side trips to Little Monroe and Mt Franklin. See Side Trips below for more details.
From Eisenhower, it’s a smooth, cruisy 1.5 miles mostly in the woods to get to Mt. Pierce, the final summit of the standard Presi Traverse. To get to the summit, you’ll need to complete a short 0.1 mile out-and-back on the Webster Cliff Trail/AT. At the summit of Pierce is where a decision needs to be made about how you will descend and where you’ll end your trip.
The view of Mt Washington from the summit of Pierce. Photo by Aubri Drake.
For those looking to add Mt. Jackson to their Presi Traverse (one of the most popular additions), see Variations below for details.
Bonus: Adding only an extra 0.3 miles total, you can continue on the Webster Cliff Trail/AT over the summit of Pierce to head to the Mizpah Hut and Nauman Tentsite before descending to Crawford Notch. The hut is very cool, and they have water, snacks, and toilets. You would then use the Mizpah Cutoff to return to the Crawford Path. Just be aware that those 0.5 miles descending between Pierce and the hut are pretty steep and have a number of long (often wet and slippery) rock slabs. It’s still class II but it is much more difficult than following the Crawford Path, especially when everyone’s legs are already very tired.
After celebrating at the final summit, it’s back to the Crawford Path for the somewhat-rocky ~3 mile, 2,300’ descent to Crawford Notch!
Then it’s time to find where everyone parked and celebrate, before driving back around to retrieve the car left at the start! I always love to leave future-me a few treats in the car, like food and drinks kept cold in an insulated bag or cooler. This can give me a pep in my step for the last few miles when I’m especially tired, and helps make sure I’m mentally sharp for the drive back to the Appalachia trailhead.
Navigation Resources
FarOut
FarOut offers the White Mountain National Forest bundle, as well as an option to individually purchase just the Presidential Range.
Gaia
GaiaGPS is my preferred navigation app, and it functions very well in the White Mountains. You will likely have service for the majority of the ridge walking above treeline but may lose service once you drop below treeline, so be sure to download the route and maps before heading out of town.
Avenza
The Avenza app offers digital maps that enable offline GPS use, locating you on the map as a dot. They do have an interactive White Mountains map for purchase.
Maps
Map Adventures offers a White Mountains waterproof hiking trail map of the White Mountains. There is also a more detailed 6-map set available from the Appalachian Mountain Club.
Getting There
Shuttle
Since this is a traverse, you will need some method of returning to your start point. It is a ~30-minute drive over 28 miles to connect between the start and end points of this traverse. It is highly advisable to arrange for a shuttle from your end point back to the start, which will likely be very early in the morning. This means you’re not rushing to make a pick-up time or potentially missing the shuttle you arranged due to hiking conditions or pace. See below for potential drivers to assist with shuttles around if you do not have two cars available or a friend who lives nearby who is willing to provide early morning help.
If you’re looking for bonus miles and are very motivated, you can stash a bicycle where you intend to finish your hike and bike back to your car after you finish a Presi Traverse—also called a Presi Picnic!
By Plane
Fly into Boston Logan International Airport and then either rent a car or take a Concord Coachline bus to Lincoln, Gorham, or Pinkham Notch. See below for bus details.
By Car
This is by far the easiest method. The Appalachia Trailhead is 30 minutes off of I-93 and less than 10 minutes outside of Gorham. Crawford Notch is 20 minutes off of I-93 and 35 minutes away from North Conway and Lincoln.
Bus and Shuttle Services
Concord Coachline offers bus service from Boston to Lincoln, Gorham, and Pinkham Notch. In order to get directly to and from the two trailheads, it is possible to take the AMC Shuttle from Lincoln to the Highland Center, Pinkham Notch to Appalachia TH, and Highland Center to Pinkham Notch. Reservations are necessary, their shuttle schedule is very restricted, and any distance one-way ride is $24. For off-schedule transit, a taxi or shuttle service would be required, like Ali’s Rides, Shuttle Connection, or Maura At Your Service.
Trailheads
The Presi Traverse traditionally starts at the Appalachia Trailhead and ends at Crawford Notch, either at the end of the Crawford Path or the end of the Webster-Jackson Trail.
Appalachia
The Appalachia Trailhead lot (medium) is free and gets very full very early on nice summer weekends (I’ve seen it full by 5am on a nice summer Saturday). However, it is allowable to park on the side of Rt-2. Be very careful walking or opening car doors if you park on the side of the road as it’s a fast-moving and busy road.
Crawford Notch
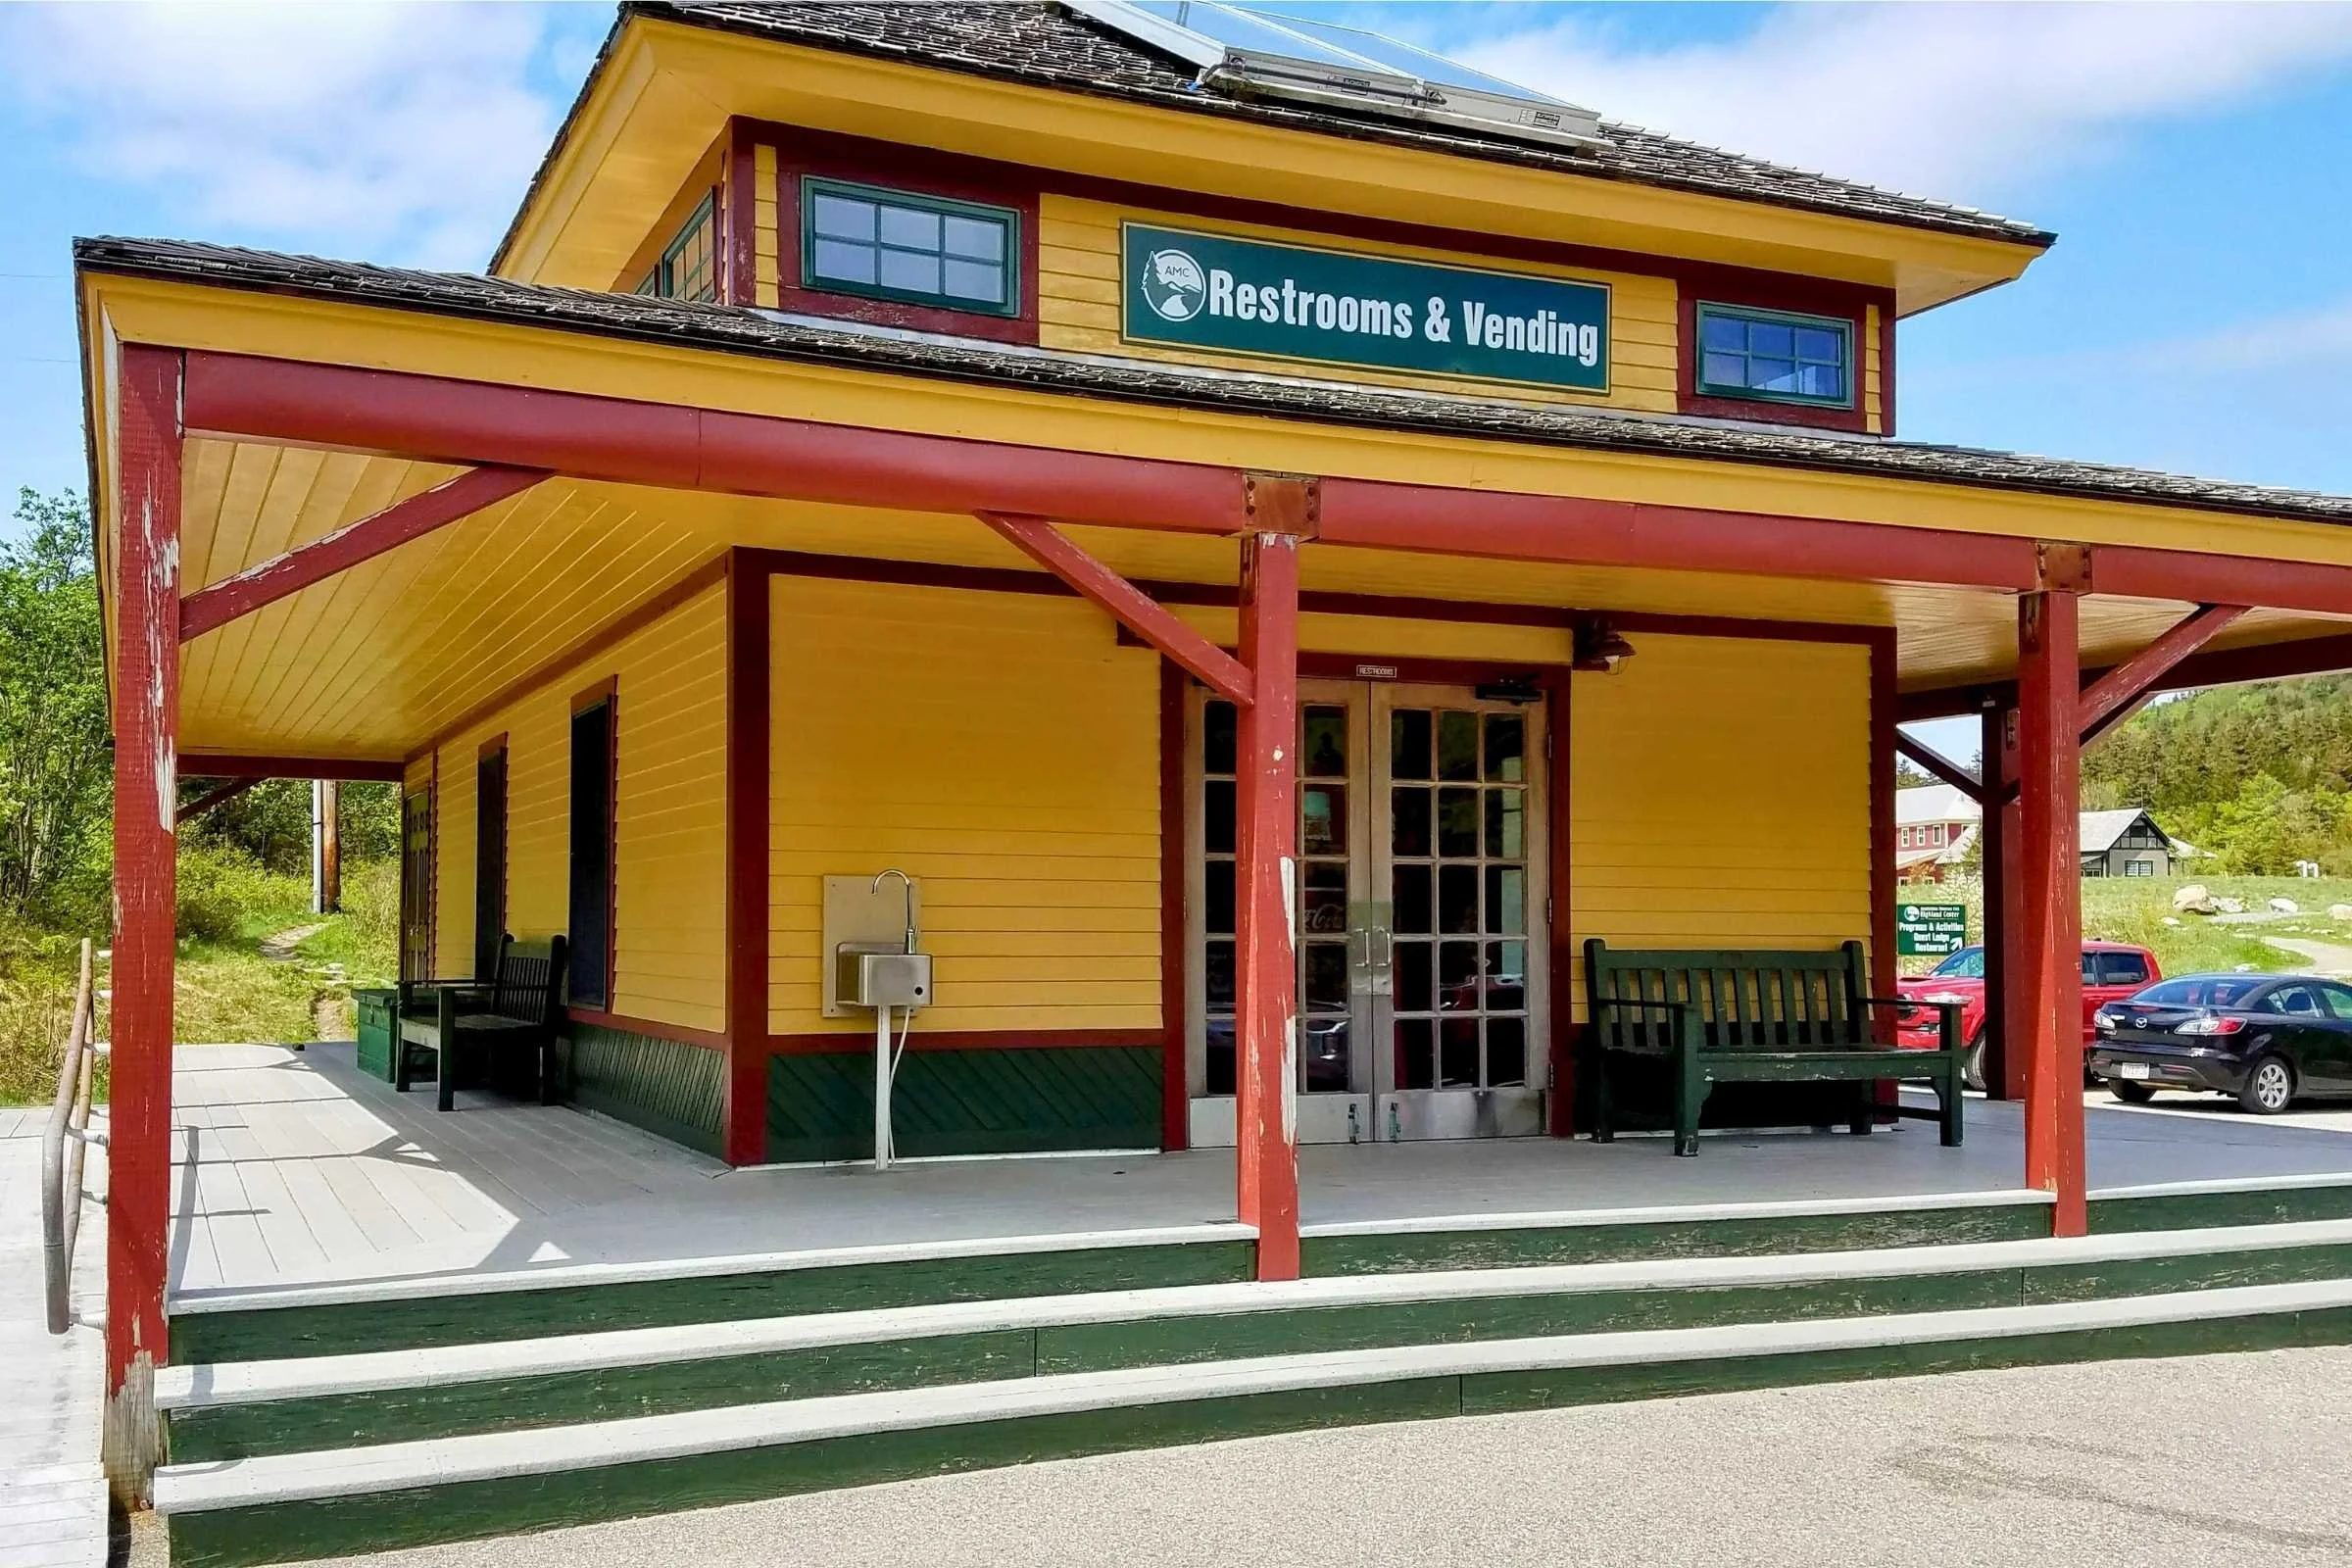
It costs $5 to park at the Crawford Connector Trailhead, and there are composting toilets there open 24/7/365. Otherwise, you can park for free at the Crawford Notch Depot lot (small), at the lot across the road from the Webster-Jackson Trailhead (medium), or on the sides of Route 302. During summer hours, the Crawford Notch Depot offers free bathrooms.
On either end, be sure to respect any “no parking” signage—they will ticket or tow improperly parked vehicles.
The Crawford Notch Depot. Photo by Aubri Drake.
Post-Trip Favorite Restaurant/Bakery/Brewery/etc.
My favorite stop after a Presidential Traverse is Yaya’s Market and Deli. They’re a small gas station with a full-service deli counter, an ice cream counter, and a fryer, directly between the two trailheads. They offer everything deli-themed that you might want, from fries to pickle chips, to fresh custom-made cold and hot sandwiches; from pizza to breakfast sandwiches. They make their own egg salad and chicken salad; no pre-made for them! They make your food fresh just for you, so it can take 10-30 minutes for your food to be ready.
If you’re in a rush, Bretton Woods Market and Deli is a decent option also between the two trailheads. They’re smaller than Yaya’s and less friendly, but they offer deli-case grab-n-go sandwiches as well as custom-made sandwiches that are good for a quick in-and-out stop.
And if you find yourself in Gorham, I love the White Mountain Cafe & Bookstore. Their coffee drinks are delicious and their sandwiches are unique and excellent. There can be a 5-10 minute wait for food and drinks, so include that extra time in your plans.
Post-Trip Rinse-off and Nearby Car-Camping Options
After a long hike in summer, I most often want to cool down and rinse off the corrosive salt coating my skin. Since my muscles are usually very tired and it’s often late, I gravitate toward showers rather than wild swimming/splashing in a river with more risk and effort involved.
Though frequently out of service, the Crawford Notch Depot building offers coin-operated showers. New Hampshire Dry River State Campground is 7 minutes down the road and also has coin-operated showers that I have used after a long hike or backpacking trip. New Hampshire Moose Brook State Campground is 6 minutes down the road from Appalachia TH and has coin-operated showers as well. These two campgrounds are also excellent staging areas for the night before and the night after a Presi Traverse.
More minimalistic car-camping options include USFS Sugarloaf I and II Campgrounds and Zealand Campground. There is also boondocking allowed at specific sites off of Cherry Mountain Road nearby, though those sites tend to fill up quickly.
For those who would like to explore a river, the Ammonoosuc River off of Route 302 close to Zealand Road and Base Station Road has a few popular swimming holes, though caution and knowledge of the location are warranted.
Regulations
Follow Leave No Trace Ethics
Per US Forest Service regulations in the White Mountains, dogs must be leashed when in developed recreation areas such as campgrounds, picnic areas, trailhead parking lots, and on developed trails. Once outside of developed recreation areas, dogs may be off leash if they are under strict voice command.
Beyond this, please note this route requires a very athletic and experienced hiking dog. There are also very few natural water sources, so you’ll need to carry additional water.
It’s also good to know that dogs are not allowed inside of AMC huts, so they’ll need to wait outside. They’re also not allowed inside the majority of the Mt. Washington Summit House, so please plan accordingly. At Valley Way and Nauman Tentsites, dog waste must be composted in the privy.
Camping on this traverse is only allowed at established campsites to prevent overuse and damage to the fragile alpine environment. There also just aren’t any flat spots. This route skirts two Wilderness areas, and is in an extremely fragile ecosystem.
Group size is recommended to be 10 people or less.
Stay on the trail, particularly above treeline where there are fragile alpine plants that are easily damaged by careless footsteps. Please respect all “Revegetation area - stay out” signs.
If staying on trail overnight, please utilize the bear boxes located at each campsite.
Camping
Going southbound, the two campsites available on the Presi Traverse are the Valley Way Tentsite (around mile 3) and Nauman Tentsite (0.7mi off the main Presi Traverse route, around mile 16—see Variations below for how to make this stop directly on your route). They’re each within 3 miles of the start or finish trailhead.
Each of these locations is first come, first serve. Valley Way is free with no caretaker, while Nauman Tentsite is $15/person/night with a caretaker. They both have a water source within walking distance, bear box, tent platforms, and composting privy. Nauman also has a dishwashing area and the Mizpah Spring hut nearby. These campsites can be extremely crowded on fair weather summer weekends. Valley Way Tentsite in particular can be very chaotic and cramped. I have often found trash discarded in the tentsite area.
Another lodging option on the traverse are the three AMC huts; reservations are required and hard to get, and no camping is allowed. The huts are ~$200/night/non-AMC member (~$170/night/AMC member) and includes a bunk, blankets, pillow, dinner, and breakfast.
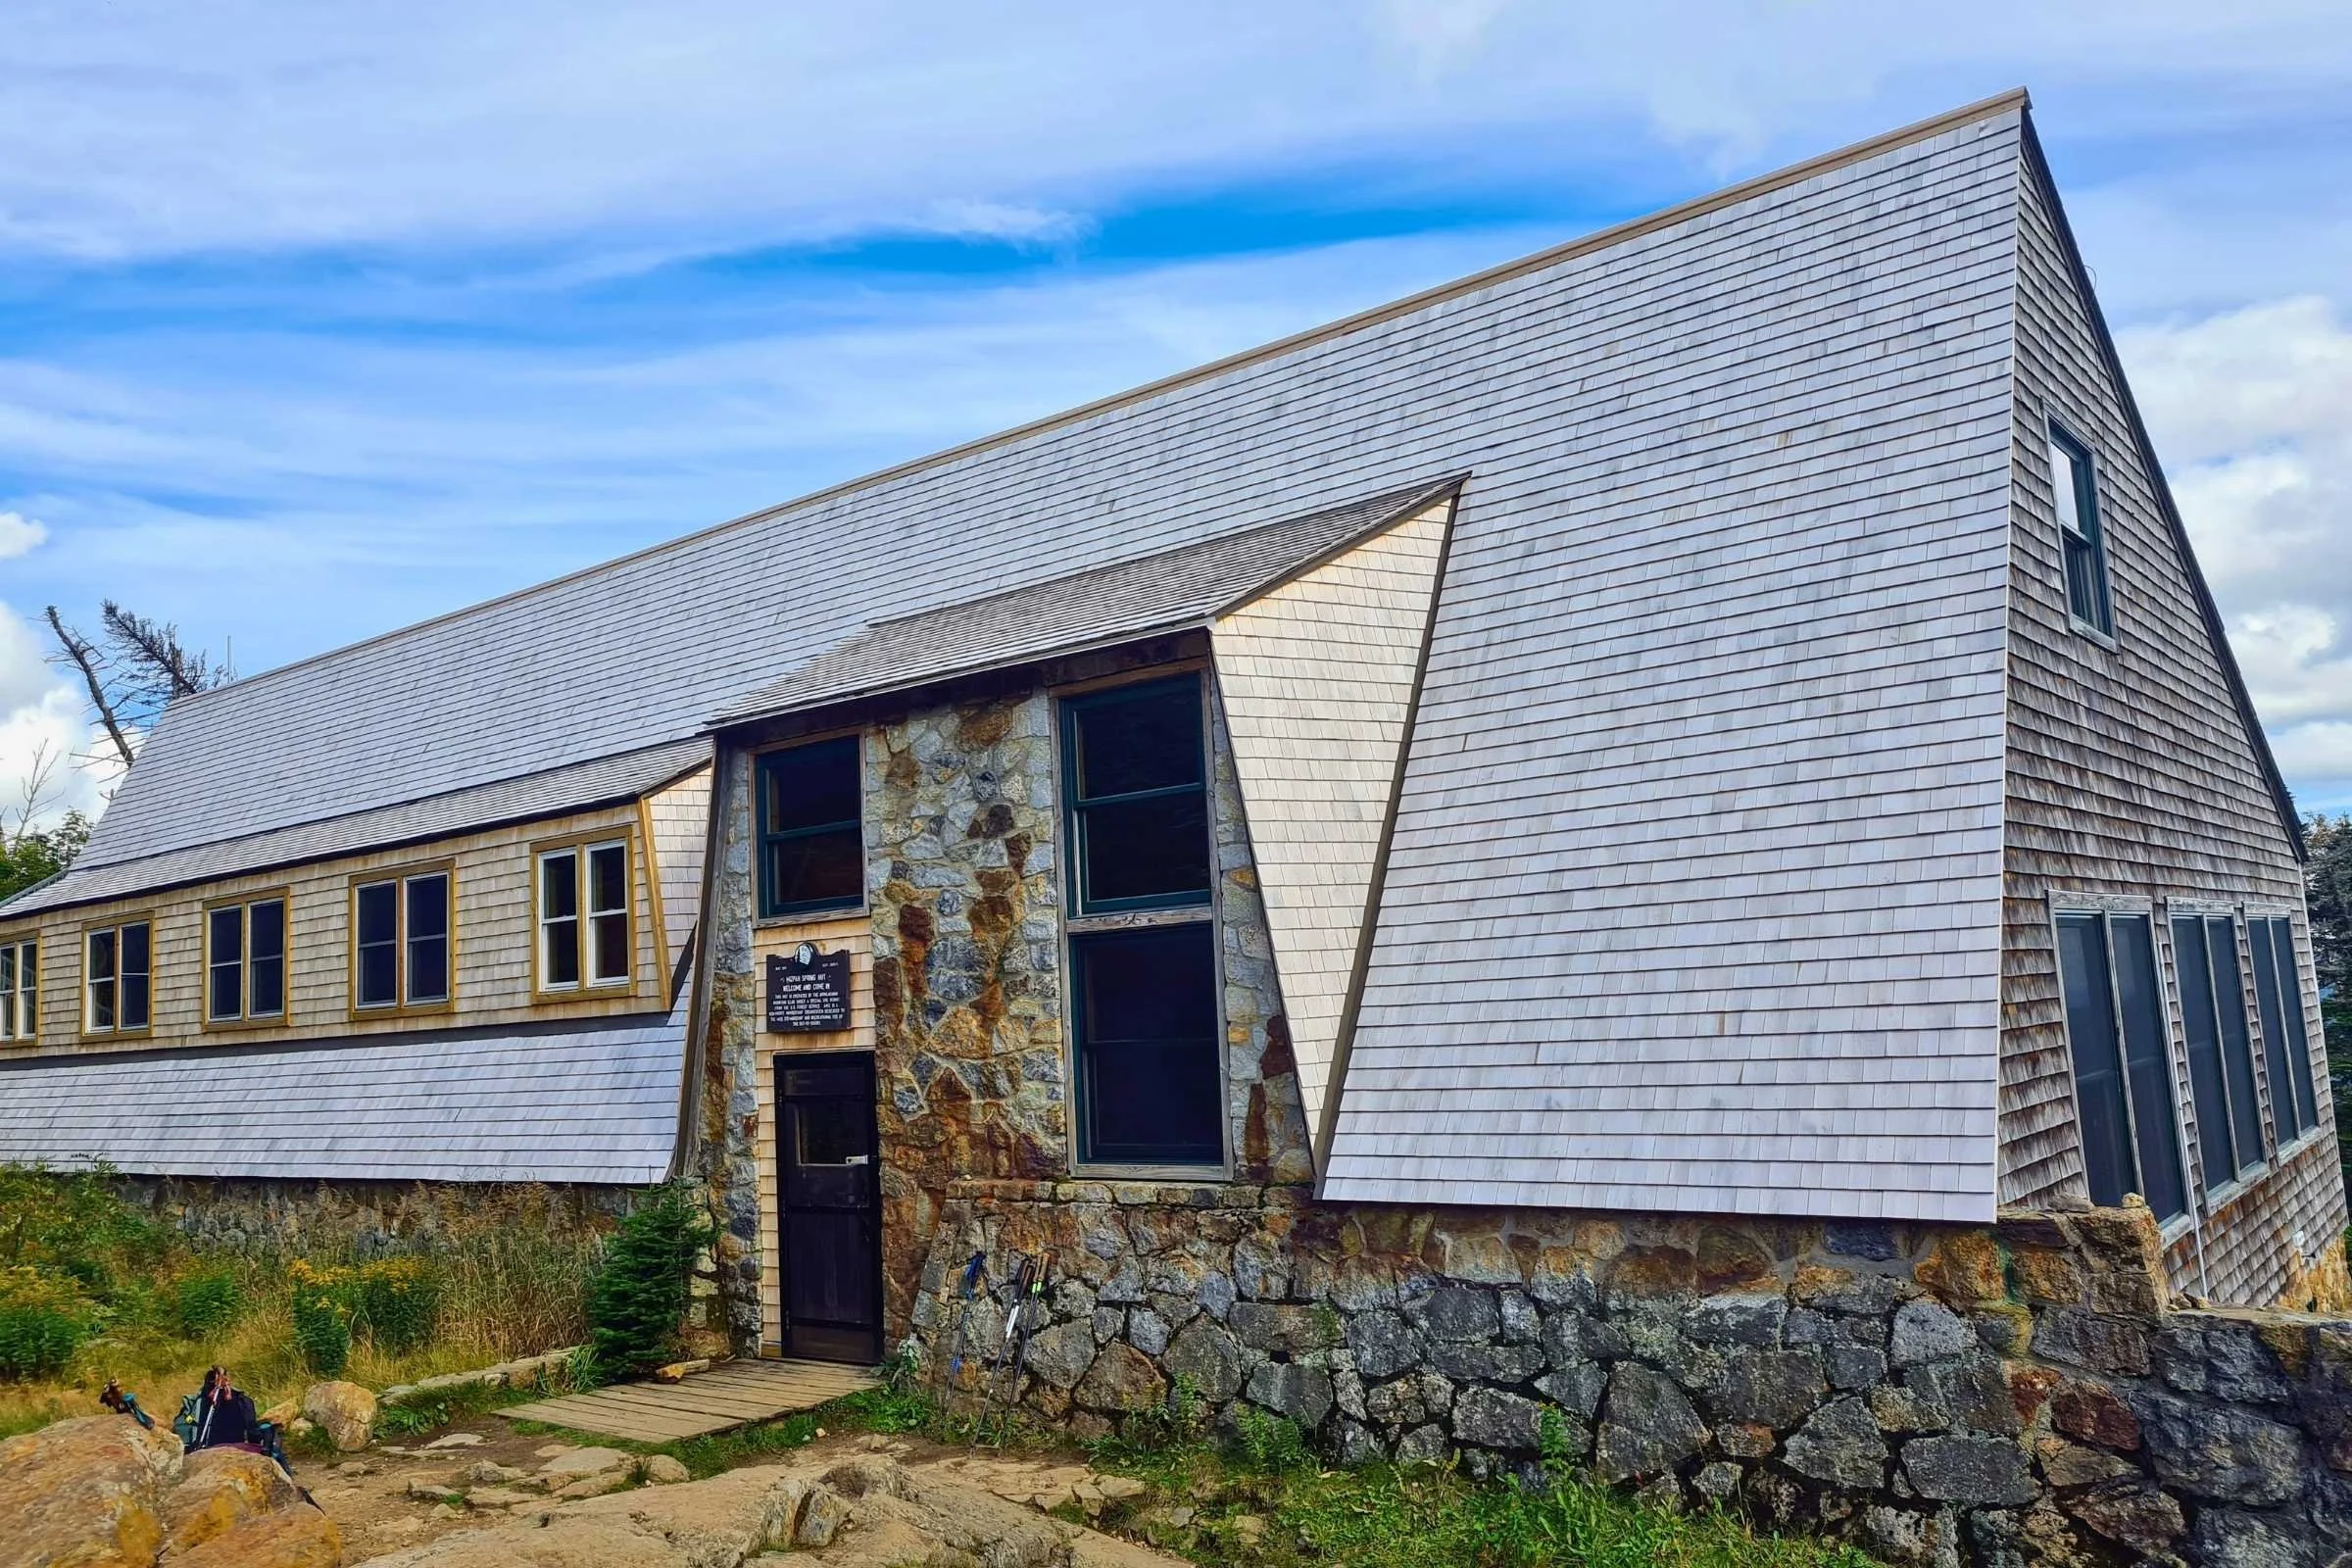
The Mizpah Spring hut. Photo by Aubri Drake.
Off-trail, there are three overnight options in the northern Presidentials, fairly close together off the west side of Mt Adams, all run by the Randolph Mountain Club (RMC). They’re first come, first serve, and at least 1 mile and 1,000-1,200’ descent off (and then back up) the ridge.
Water Planning
Sourcing water during a Presi Traverse can be either very easy or very difficult depending on the time of year. During the AMC huts’ open season, you will find potable water at Madison Spring, Lake of the Clouds, and Mizpah Spring huts. These huts all open in early June. Madison Spring and Lake of the Clouds close in mid-September and Mizpah Spring closes in mid-October. Potable water is also available at the Mt. Washington Summit House during their open season (~May-Oct).
Water sources for filtering are accessible early and later in the traverse when below treeline. Above treeline, there is the Madison Spring at the foot of Mt. Madison near the hut, the Peabody and Gulfside Springs between Mt. Adams and Mt. Jefferson, and the Lakes of the Clouds. They are generally reliable water sources but check reports in advance if you’ll be relying on these for water, particularly in the fall when these water sources may be dry.
Bears and Food Storage
If staying on trail overnight, both recommended backcountry campsites provide bear boxes. No other precautions are required.
Please note that birds (particularly Greyjays) are well known in these mountains for begging or stealing food; please follow Leave No Trace and do not feed them. Greyjays (sometimes called “camp robbers”) have been known to become aggressive, and scratch and peck hikers who do not feed them, myself included. They’re all well accustomed to life above treeline year-round, and they don’t need handouts, no matter how cute they look.
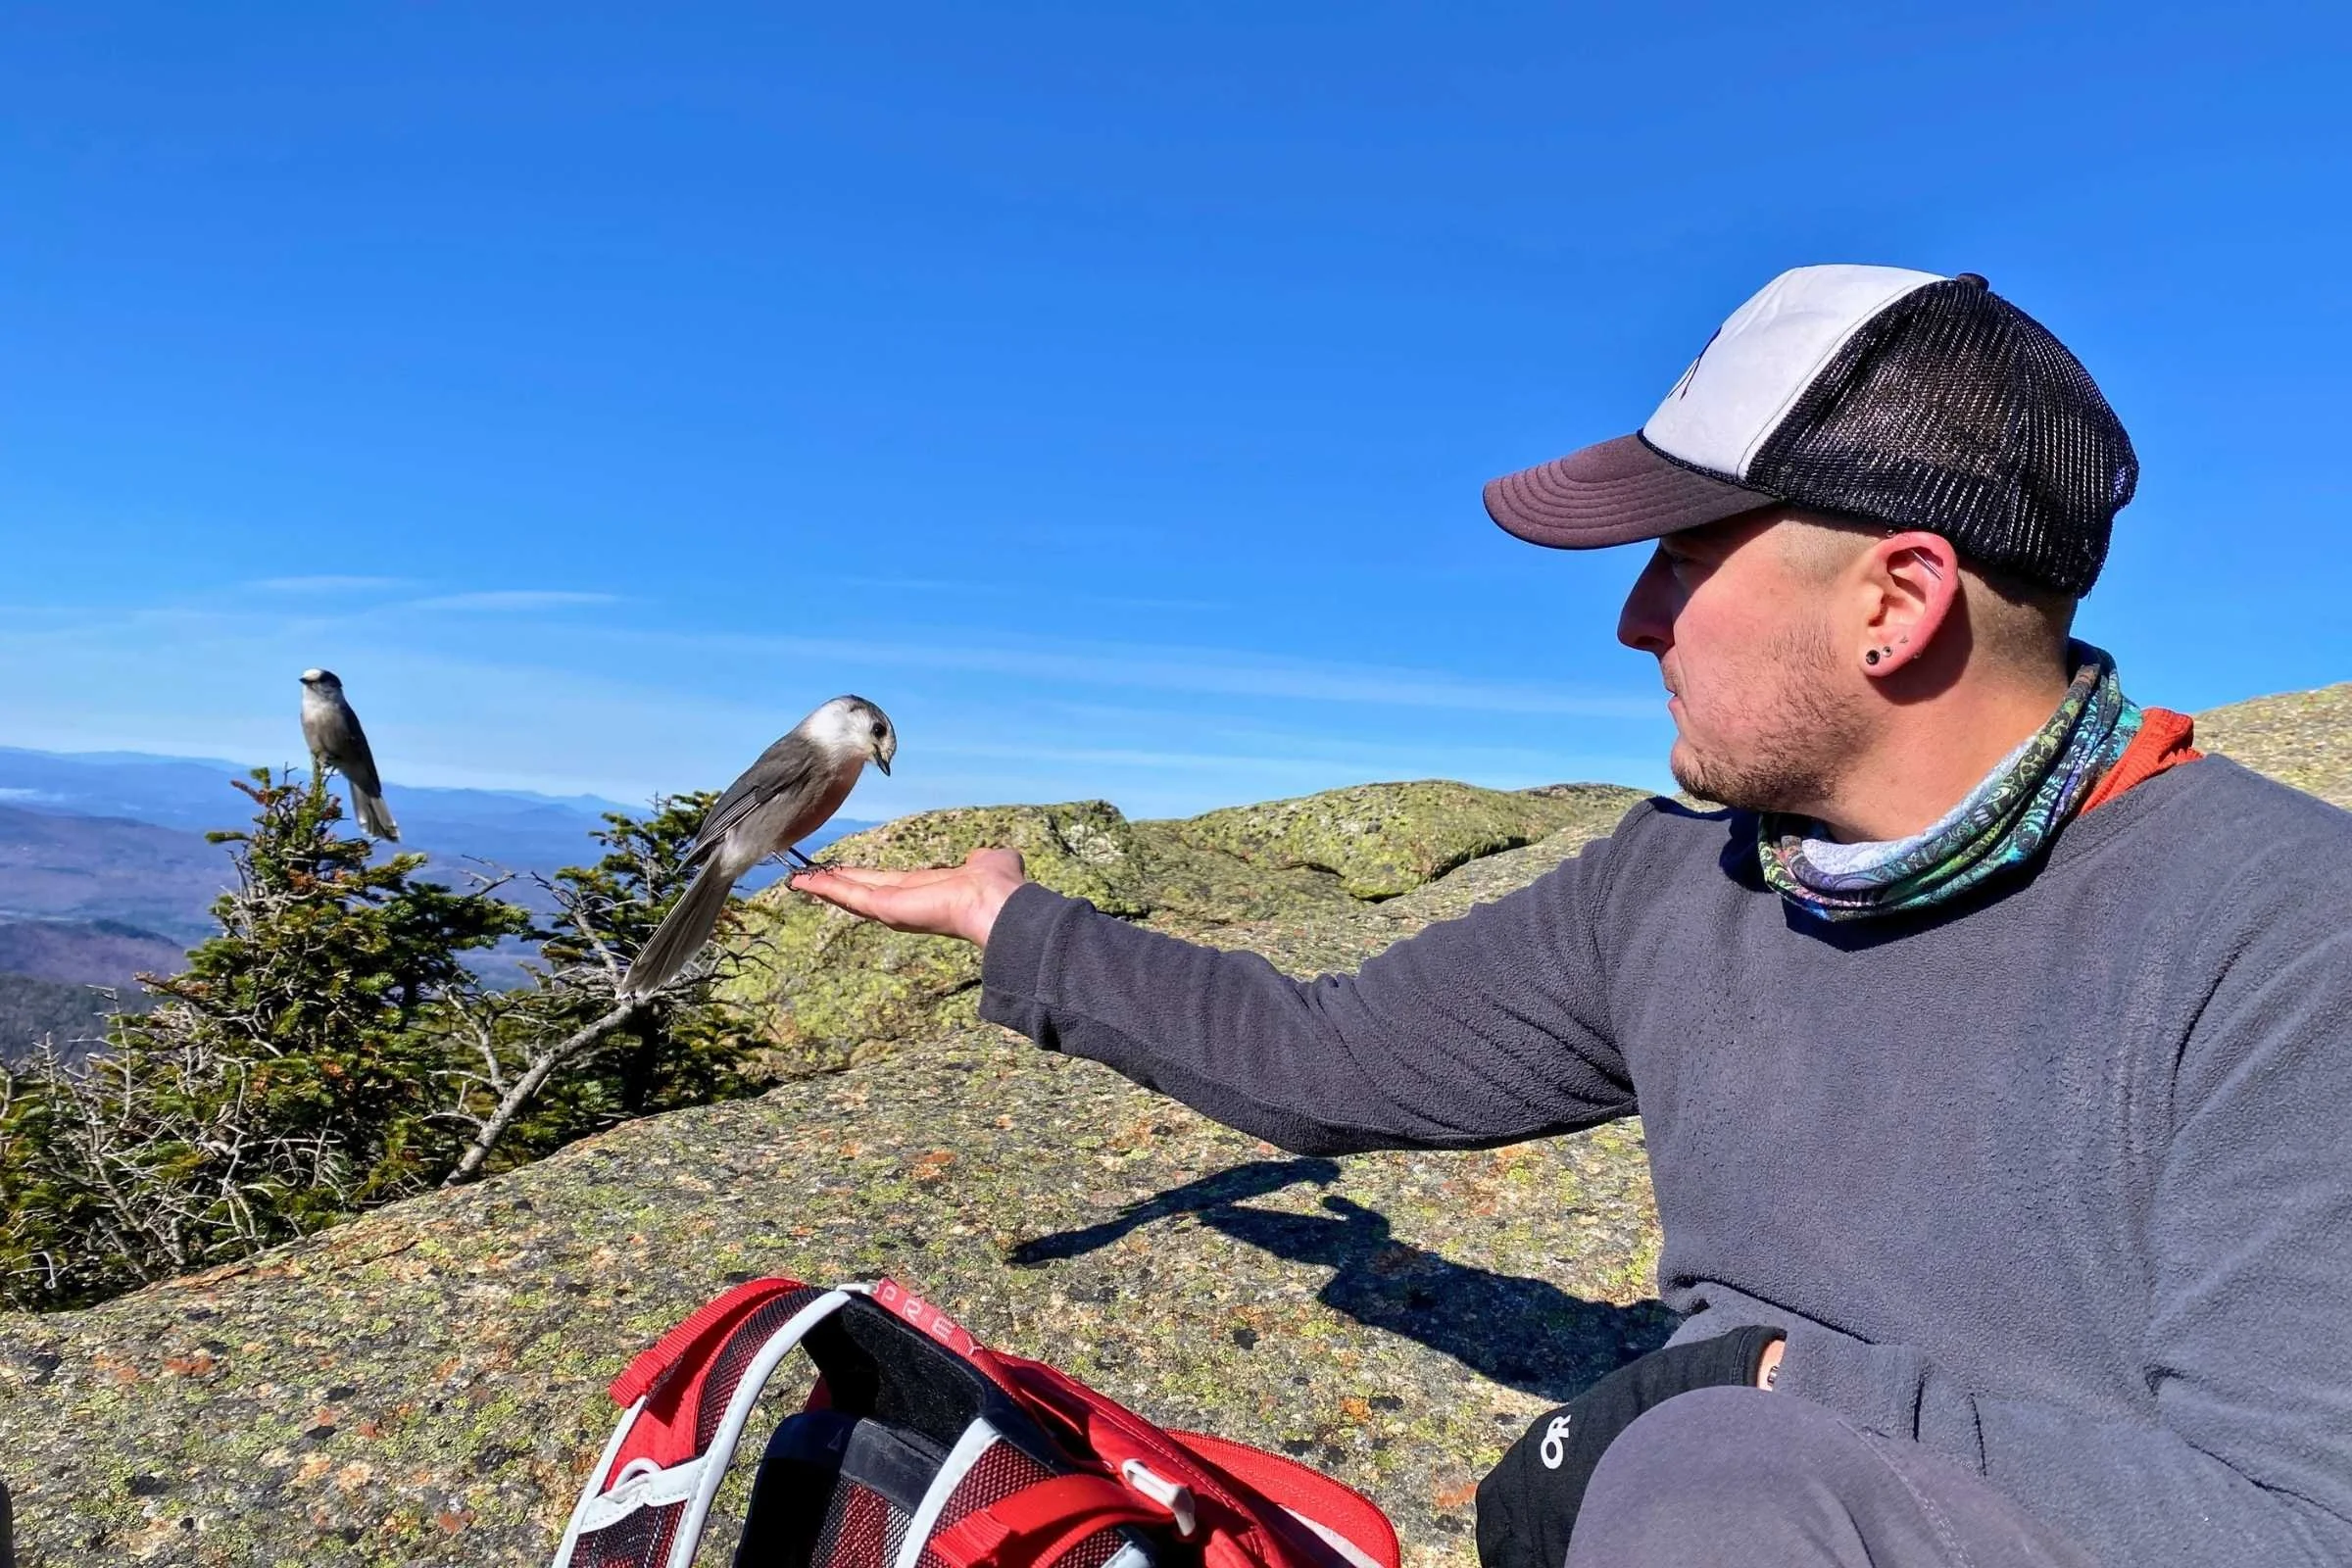
Greyjays are inquisitive and expect food, even when there is none being offered (please note the empty palm). Photo by Tobias Davis.
Side Trips
Along the Presi Traverse, there are a few peaks that can be added that aren’t typically included in a standard traverse. Mount Clay is frequently skipped unless someone is following the Fastest Known Time (FKT) route. It adds ~500’ of gain and loss though no additional distance, and is an interesting addition.
Little Monroe and Mount Franklin are both small side trips that add ~50’ of gain and loss with no additional distance. They provide slightly different views of the same surroundings and can add variation if the route has been done before or people want to do something a little different than the standard route.
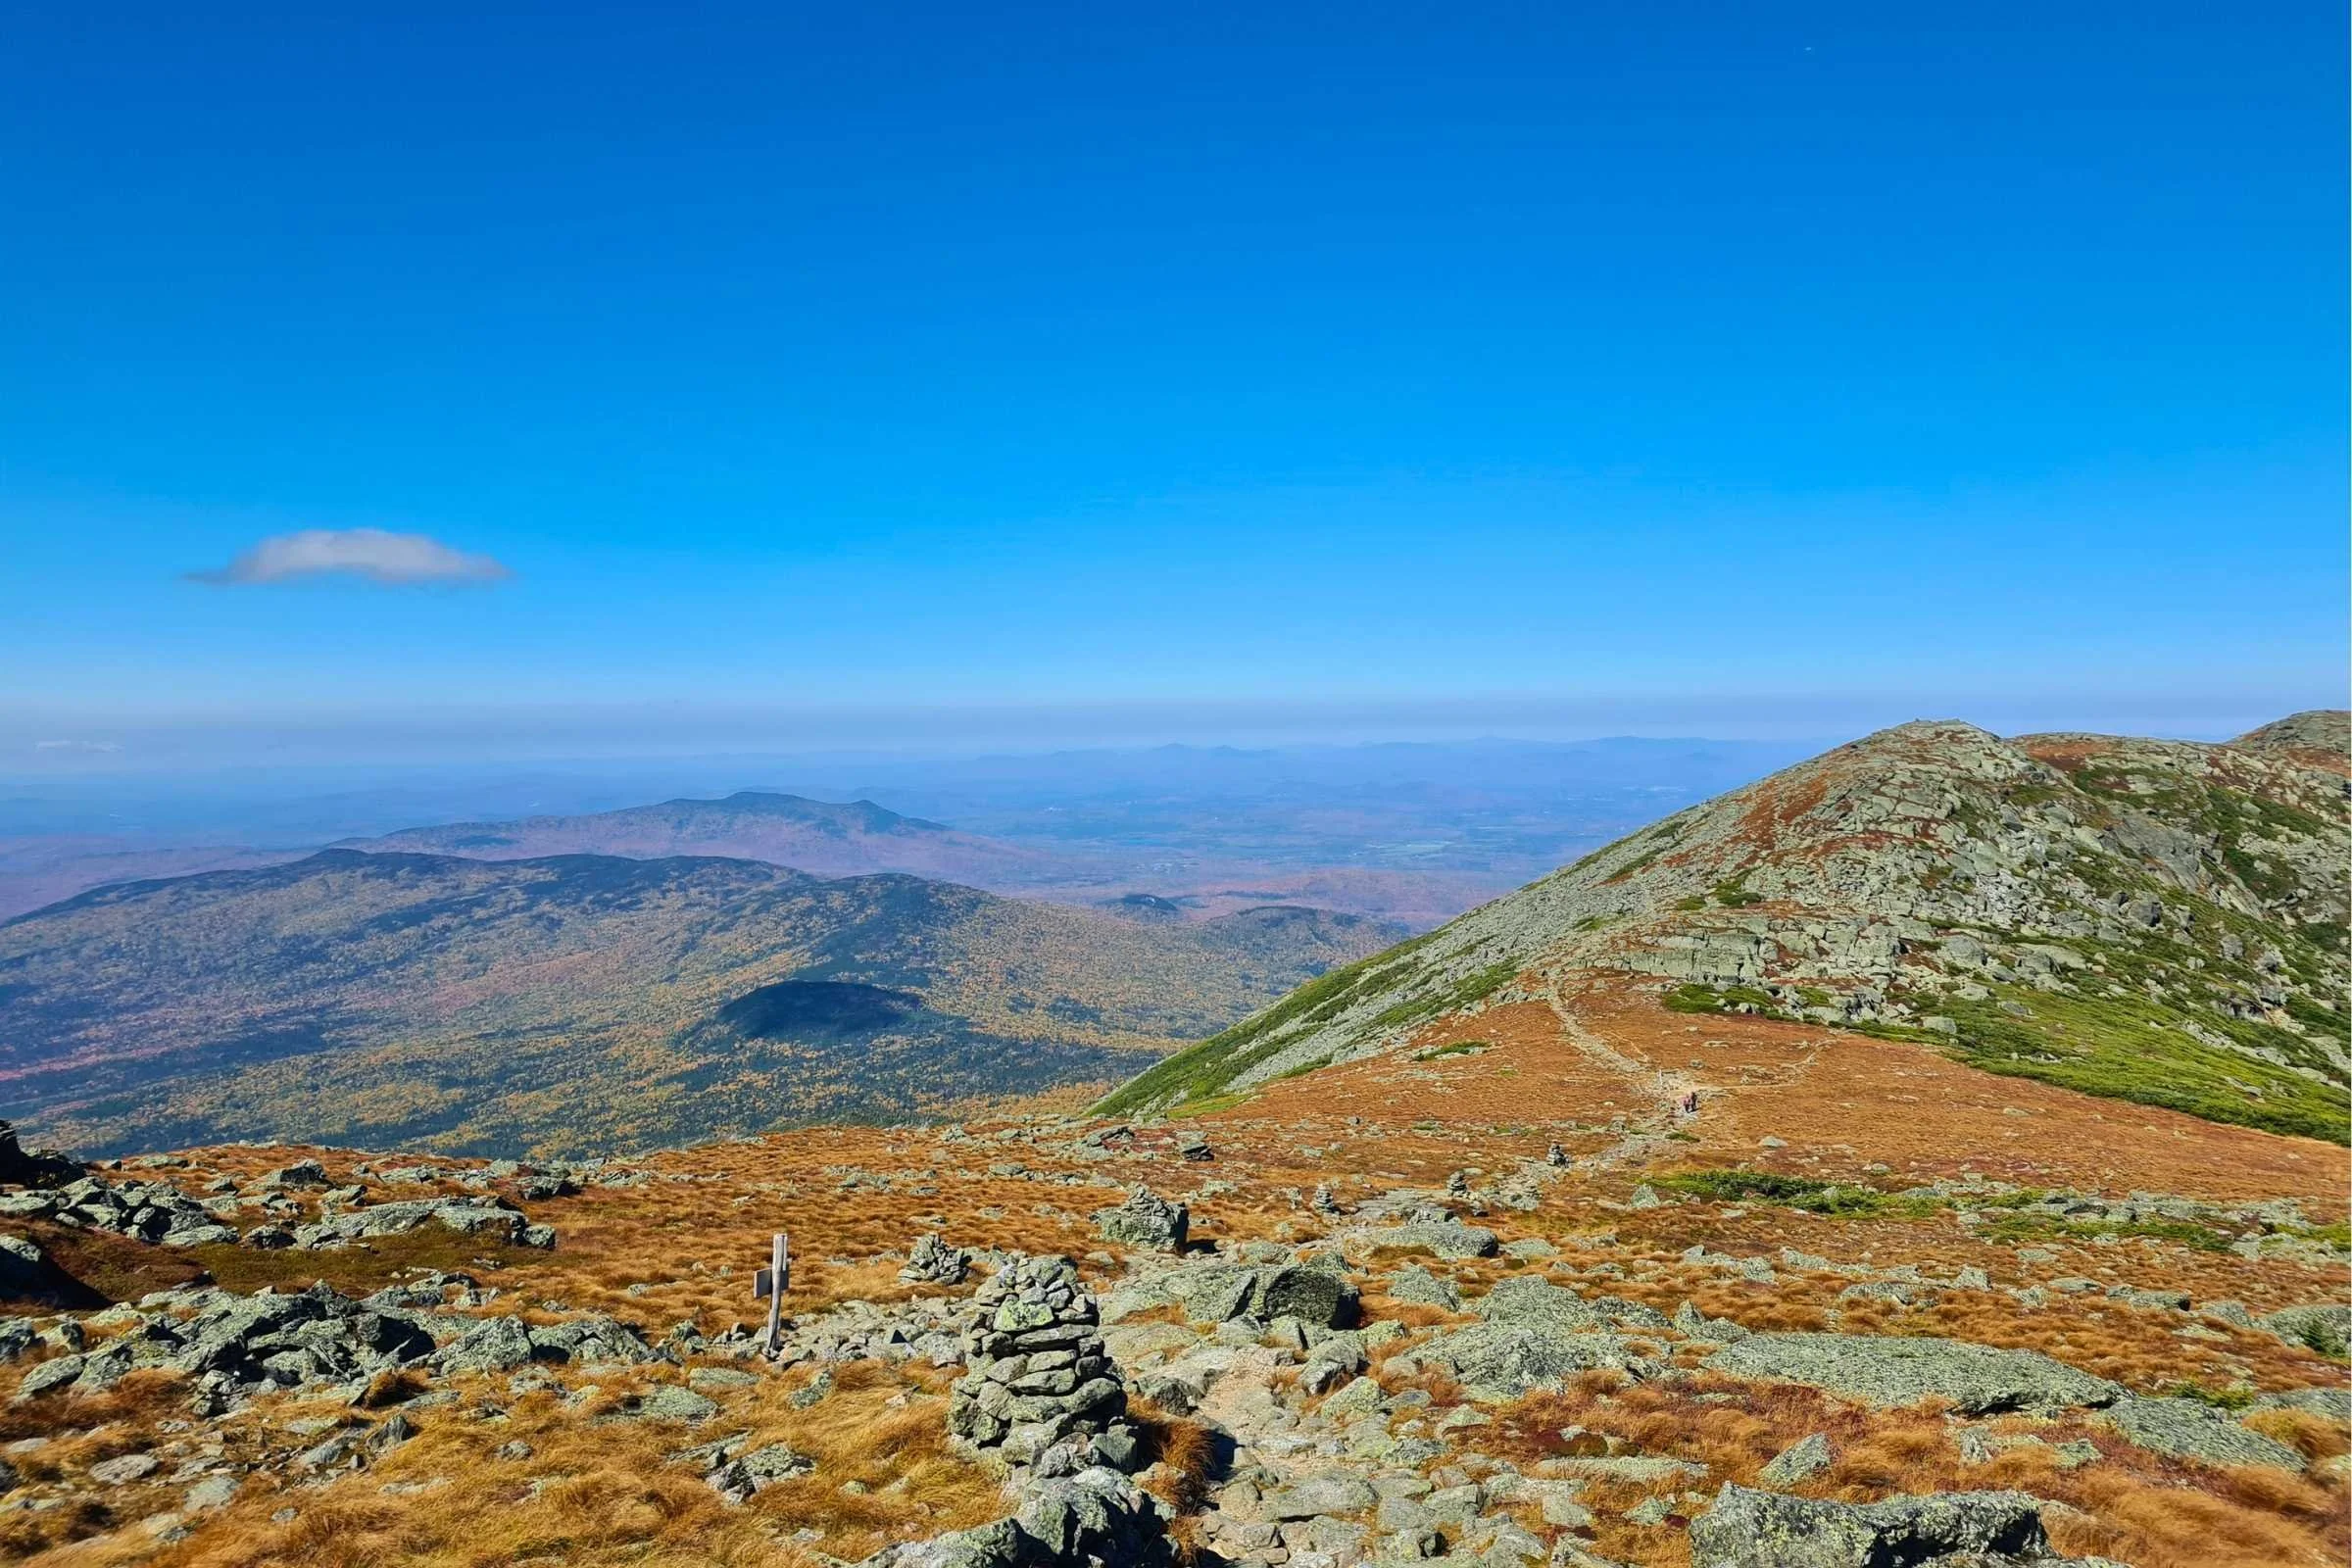
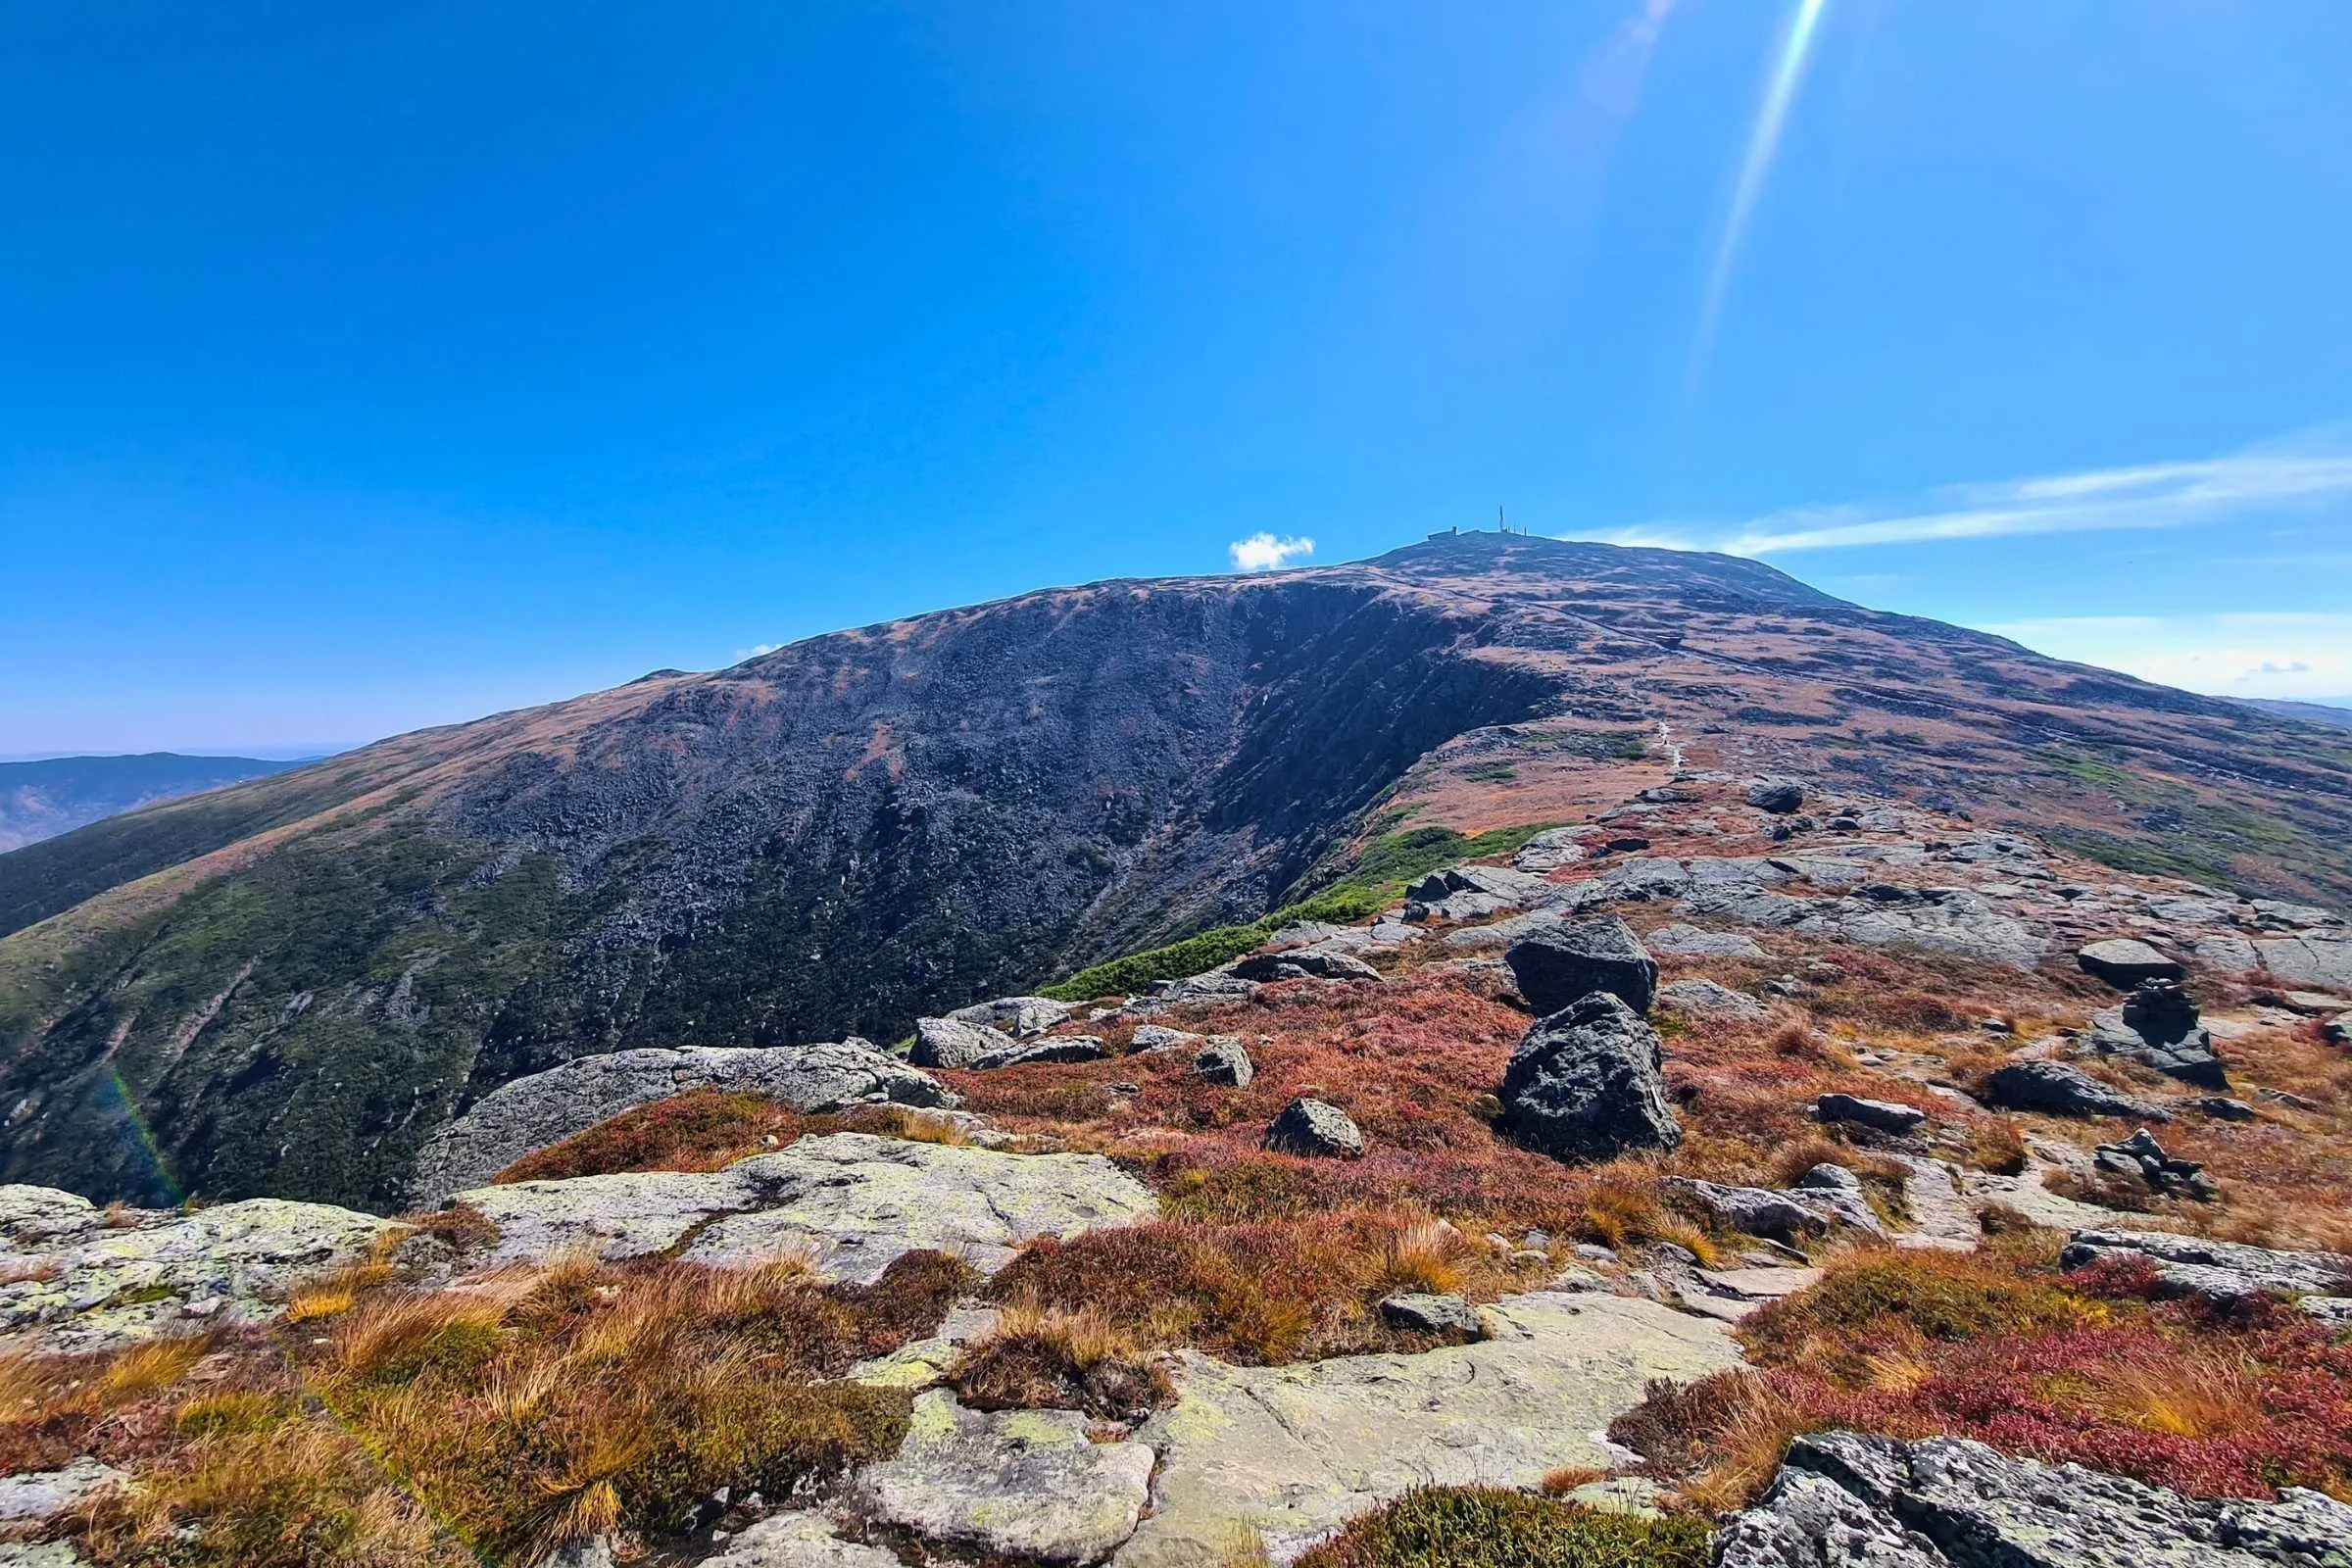
Mt Clay along the Presi Traverse on a fantastic day in September. Photo by Aubri Drake.
Variations
Northbound
Typically, a Presi Traverse is done southbound. This puts the hardest climb and most exposed peaks first, when you are fresh and have the best knowledge of the weather window you’re working within. However, it is quite possible to do the traverse northbound, and shortens the total elevation climbed by ~500’, though you then have to descend those 500’ instead. It’s a unique spin on the traverse for those who have successfully completed the full traverse before, have experience with White Mountains weather, and would like to do it again but from a different angle.
Mt. Jackson
Traditionally, a Presi Traverse does not include Mt. Jackson. However, it is a fairly common added-on peak to the end of a Presi, since it is on the New Hampshire 4,000 Footers list. This does add ~2 miles and ~500’ of gain and loss, and bring you to the Webster-Jackson TH in Crawford Notch rather than the Crawford Connector TH, though they’re no more than half a mile apart on the road. It’s a nice addition, offering epic views of the Presidential Range that you just hiked! It also makes a visit to Mizpah Spring hut or Nauman Tentsite directly on your way, rather than a little bit out of your way.
The view of Washington and the Southern Presidentials from Mt Jackson. Photo by Aubri Drake.
Gear Rentals
There are no gear shops near the Presi Traverse. There are a few gear shops within 30 minutes of the trailheads, but they all cater to skiers and snowboarders, not hikers. The best nearby option is the Walmart in Gorham. If gear beyond that is needed, you can find Eastern Mountain Sports and REI in North Conway, and REI typically offers gear rentals.
What to carry
I have day-hiked and trail run the full Presi Traverse and its variations more than a dozen times. I’ve backpacked around the entire Presidential Range more than five times.
For my trail runs, I’ve worn the Salomon ADV Skin 12 hydration vest, and carried a Katadyn BeFree 1L filter, a Black Diamond Storm 450 headlamp, a Garmin InReach Mini, an Outdoor Research Helium II rain jacket, and an emergency bivy sack.
Tent
I would use the Big Agnes Fly Creek UL2 (former Treeline winner for Best Roomy Tent for One Person) for this trip because the two campsite areas on the Presi Traverse use wooden tent platforms or dirt pads very tightly together, making it difficult (verging on impossible) to pitch a freestanding trekking pole tent, and the weather and humidity in the Northeast typically require a double-walled tent.
See our Best Backpacking Tents guide for more recommendations.
Backpack
I would use my Gossamer Gear Mariposa, Treeline’s pick for Best Backpack for Thru-hiking, since it carries a heavy load well and has a light frame.
Sleeping Bag
I would use my Katabatic Gear Alsek (a variation of Treeline’s Best Overall pick for Best Backpacking Quilts) for this trip since it’s my favorite 3-season quilt/bag hybrid, in the short and wide variety to comfortably accommodate my wide shoulders. The weather can shift quickly, and I always want a way to stay warm in my tent regardless of the temperatures.
See our Best Sleeping Bags story for more recommendations.
Sleeping Pad
I would use my Therm-A-Rest XTherm wide pad (winner of Treeline’s Best Backpacking Sleeping Pad for Cold) for its excellent cushion and comfort and its warmth and high r-value. Mountain nights can get very cold, even in summer. If I’m sleeping in a shelter, I’ll bring a 3-mil plastic dropcloth to place underneath my sleeping pad to protect it from punctures.
Trekking Poles
I used my Black Diamond Trail Ergo Cork trekking poles for this trip (a previous version of Treeline’s best overall trekking poles pick), because they’re light, mold to my hands, and don’t grow slick when I sweat. The White Mountains are very hard on trekking poles, and these aluminum poles are light but also hold up well despite everything I ask of them. For more recommendations, see our Best Trekking poles story.
Cooking System
I would use my MSR Pocket Rocket 2 stove on this trip because it’s simple, inexpensive, and hard to break, the GSI Pinnacle Soloist II cook set, and my beloved Toaks titanium long handle spoon.
See our Best Backpacking Stoves story for more recommendations and our Best Cooking Pot guides for our recommendations.
Headlamp
I have carried either the BioLite Range 400 (our pick for Best Overall headlamp) or the Black Diamond Storm 450 because they’re waterproof, comfortable, and bright.
Satellite Messenger
Cell reception is not always guaranteed on this trail. There is typically cell service on the summits and ridgeline but no service below high points. I carried a Garmin inReach Mini to be sure I could contact Search and Rescue if needed for myself or other hikers around me.
See our Best Personal Locator Beacon and Satellite Messenger guide.
Water Filter
I carried a Sawyer Squeeze, our pick for the best for thru-hiking in our Best Water Filters guide, as a back-up for filtered water from the huts and summit house, in case I need more water between them or they’re closed for the season.
Potty trowel and toilet kit
There are backcountry toilets frequently available at the huts and summit house along this trail. We highly recommend using those during your traverse. Carrying a formal or self-made WAG bag is also a good idea. Do not dig a cathole above treeline.
If you absolutely must dig a hole below treeline, dig 6” deep (this will be very difficult due to roots and tight-packed trees) and pack out all toilet paper, as the alpine environment does not allow it to degrade. The area is also very highly trafficked and cannot absorb many backcountry catholes, particularly with toilet paper. As an alternative, consider carrying a Backcountry Bidet to avoid the need for toilet paper.
What to wear
Shoes or Boots
I typically wear Saucony Peregrine trail running shoes (the Best Affordable winner in our Best Women’s Trail Running Shoes guide) or Danner Trail 2650 hiking shoes on this route because they are available in 2E/men’s wide sizes and provide excellent traction. On this route, I’d strongly recommend that whatever shoe you select has more aggressive lugs and softer rubber to allow for better grip.
If you’d feel more comfortable in boots, check out our Best Hiking Boots or Best Lightweight Hiking Boots guides.
A nice footwear compromise for this trip can be hiking shoes, which are designed to feel like a trail runner but have stability more like a boot. See our Best Hiking Shoes guide for footwear that has more durability and stability than trail runners.
Rain Jacket
I either wear the Outdoor Research Foray or the Outdoor Research Helium jacket, depending on the likelihood of rain. If it is very unlikely, I’ll bring the Helium. If there is a possibility of rain, I’ll bring my 3-layer Foray. Rain/wind protection is critical above treeline to prevent hypothermia.
For more recommendations, see our Best Rain Jackets guide.
Rain Pants
If rain and colder temperatures are expected, I wear a base layer legging underneath my Patagonia Wind Shield Pants, which is our pick for Best Running Pants for Rain.
Fleece or Midlayer
I run warm so I used the SmartWool Merino 250 long sleeve shirt, our best base layer pick for extreme cold) as my midlayer.
Hiking Pants
If it was cold enough for pants, I used the Zpacks Ultralight Trail Cool Joggers.
See our guides to the Best Women's Hiking Pants and Best Men's Hiking Pants for more recommendations.
Hiking Shorts
I used Mier 5” men’s running shorts, because they’re inexpensive, quick-dry, and do not have a liner.
For more recommendations, see our Best Men's Trail Running Shorts, Best Women's Trail Running Shorts, Best Men's Hiking Shorts, or Best Thru-hiking Shorts guides.
Gaiters
I used my Dirty Girl Gaiters, our Best Thru-hiking Gaiters pick, to keep rocks, grit, and dirt out of my shoes.
Base Layer
I used the SmartWool Classic All-Season base layer T-shirt because it fully covers my upper arms, dries quickly, doesn’t smell, and provides great temperature control.
Hiking Socks
I typically wear the DarnTough Hiker Cushion socks because they dry quickly, provide good temperature control, and hold their shape.
Warm Hat
I used my TurtleFur fleece hat because it’s light, comfortable, and covers my ears.
Gloves or Mittens
I typically used the Minus33 Merino Wool Glove Liner, paired with the lightweight waterproof and windproof Salomon Bonatti Mitten shells, since I most often only need a light pair of gloves for the morning chill until the day warms up. However, the wind in the Presidential Range can cause debilitating windchill so a waterproof, windproof layer for my hands is necessary. For more recommendations on lightweight but warm gloves, see our Best Winter Gloves guide.
Miscellaneous Gear Items
First Aid Kit
Leukotape
Ibuprofen
Emergency bivy sack
Adhesive bandages
Hemostatic gauze
Safety pins
Gold Bond Friction Defense Stick
Hot Hands
Sun Protection
Sunscreen is very much needed for this traverse, since so much time is spent above treeline. However, since these aren’t high-altitude mountains, the sun’s strength isn’t as strong as out west. If you’re sensitive to the sun, you should consider something like a wide-brimmed hat and long sleeves or a baseball hat and a sun hoodie.
You can also check out our Best Body Sunscreens and Best Face Sunscreens guides.
Why you should trust us / About the Author
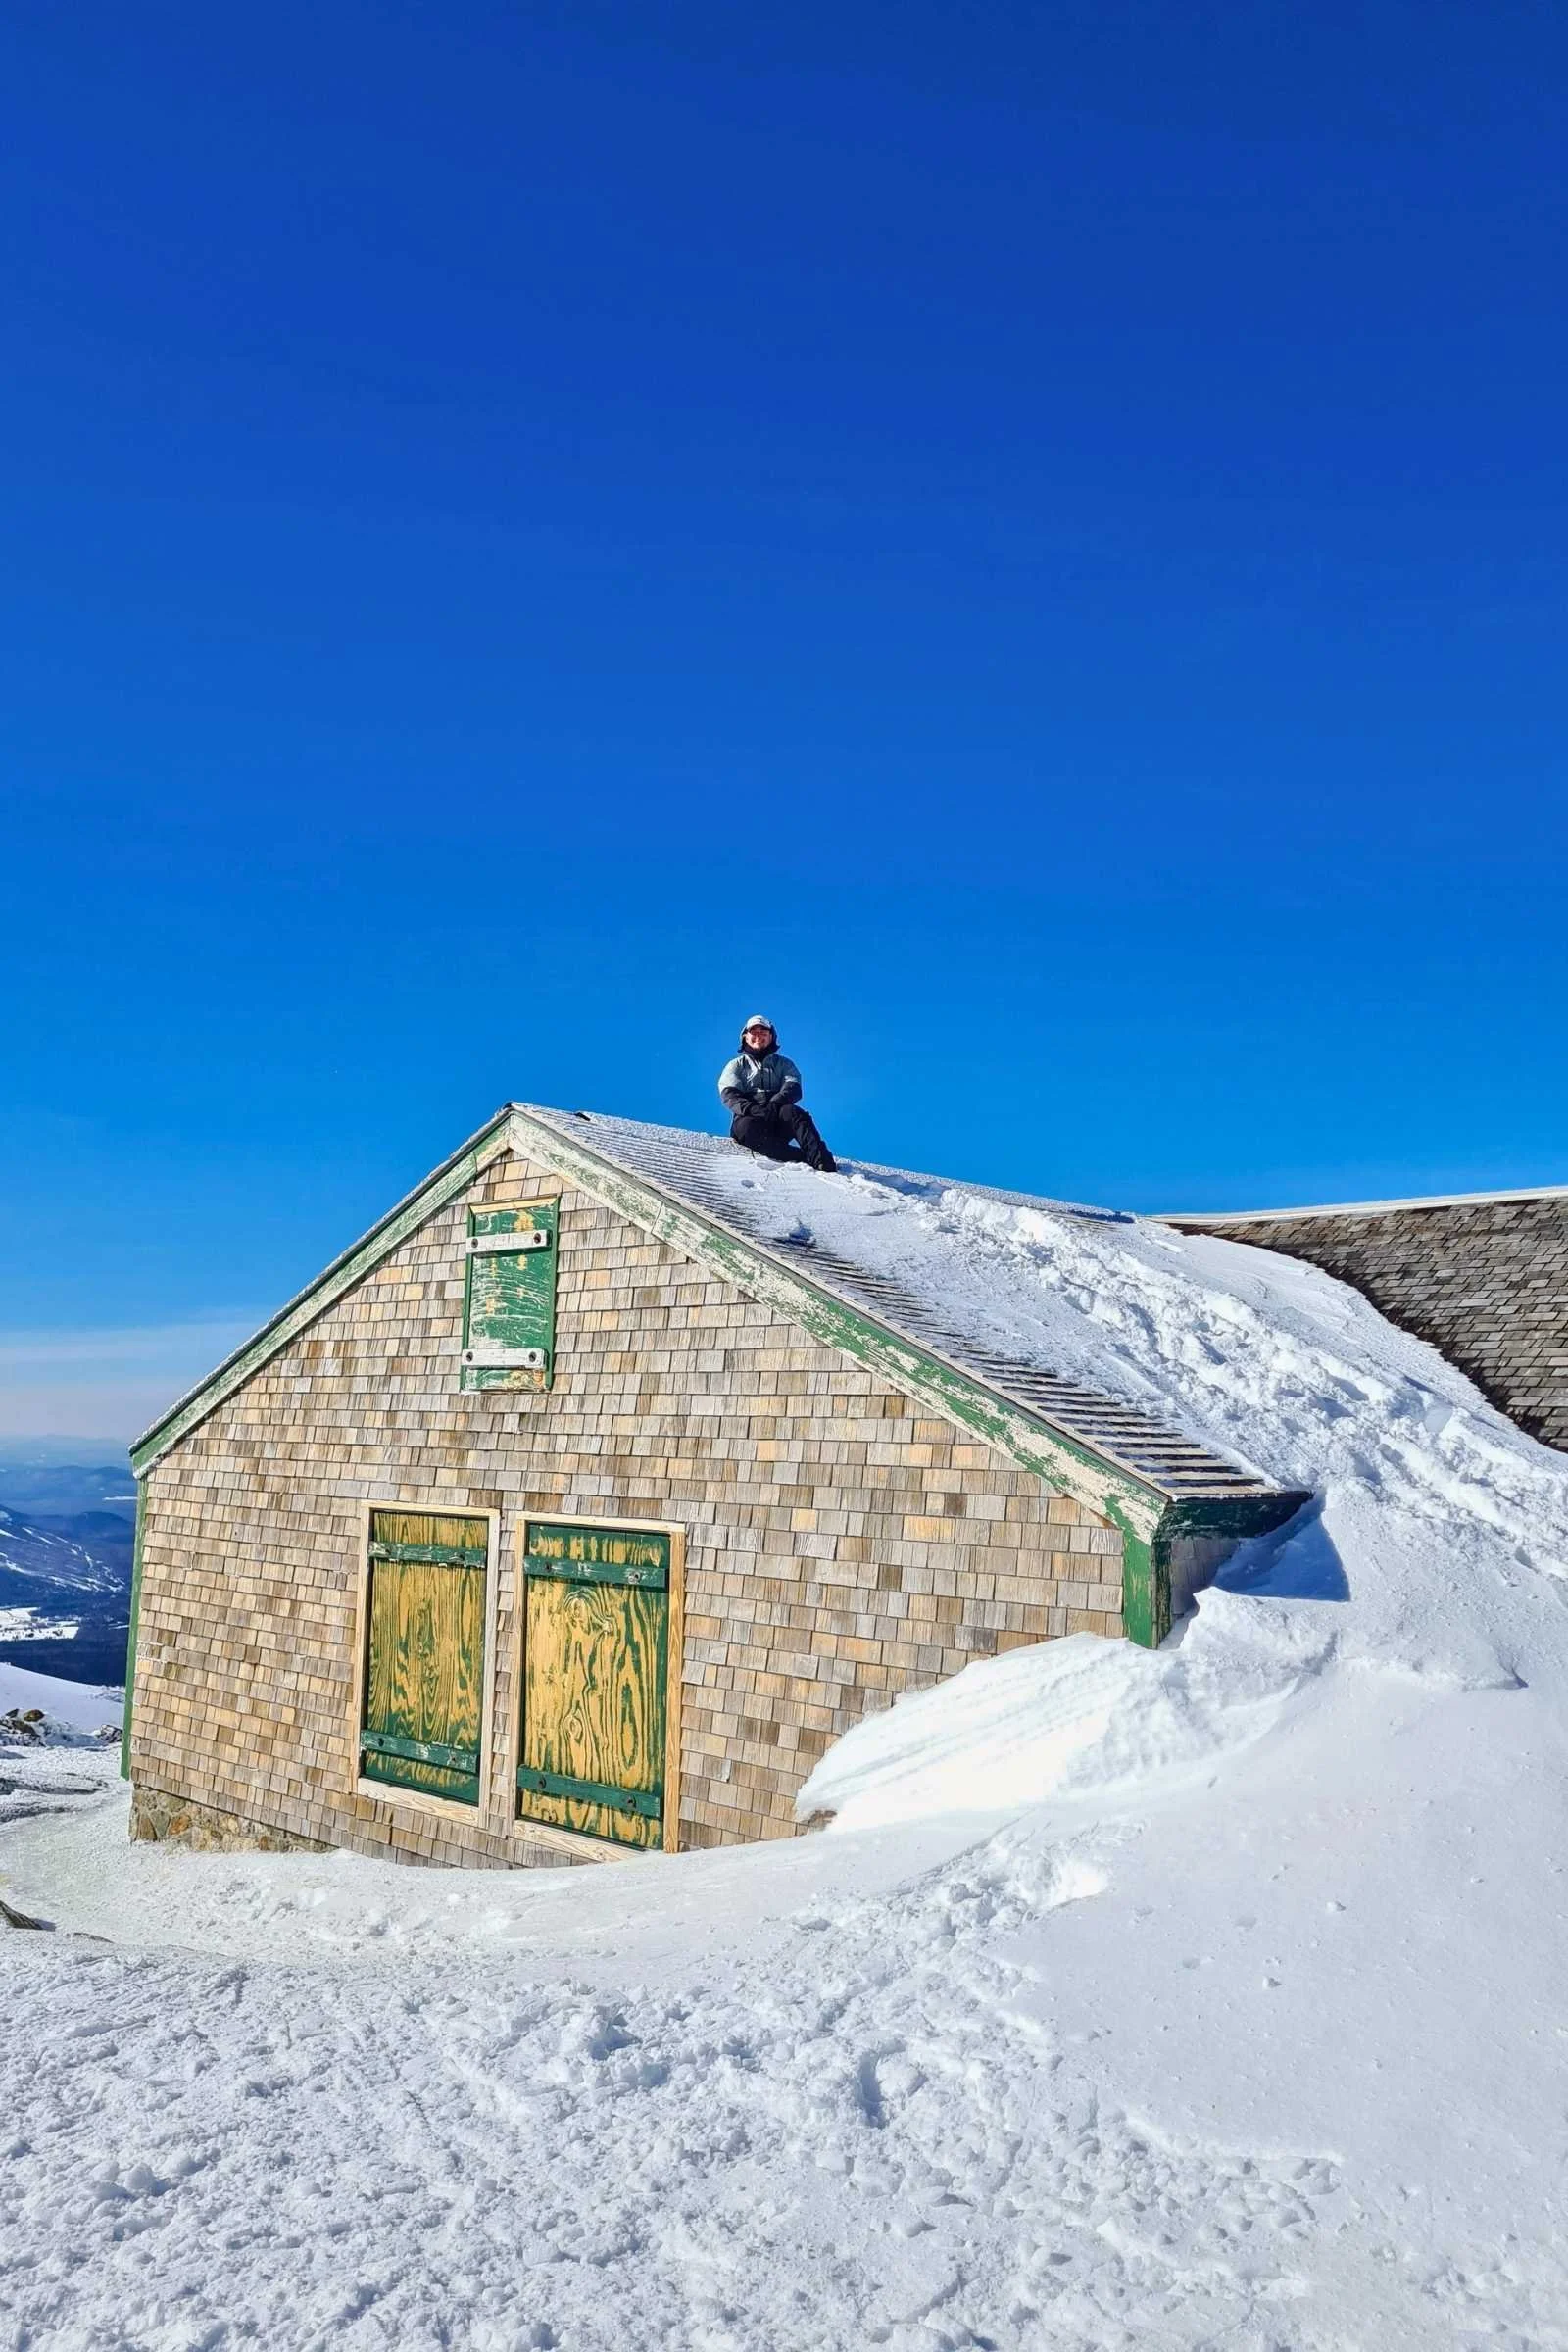
The author sitting on the roof of Lake of the Clouds hut in February. Photo by Matt.
Aubri ('Data') Drake (he/him) is a white queer and transgender hiker, backpacker, ultrarunner, writer, and activist passionate about making the world a better place. He discovered long-distance backpacking in 2013 and has been running off to the woods ever since. He’s always looking forward to his next big outdoor adventure, in between working full-time in research administration. He’s hiked the Appalachian Trail, Pacific Crest Trail, Arizona Trail, Colorado Trail, Vermont's Long Trail, Nüümü Poyo (twice), Europe’s Tour du Mont Blanc, Tahoe Rim Trail, New England Trail, and New Hampshire's Cohos Trail.
Because 75 MPH winds, waist-deep unbroken snow, and ice eyelashes have a strange appeal, Aubri has also completed numerous Northeast peakbagging lists in both winter and summer seasons, including the Northeast 111 4,000 Footers and the New England Hundred Highest, as well as the New Hampshire 48 4,000 Footers Grid (48 peaks x every month of the year = 576 peaks).
For reasons unknown, he’s also started running ultramarathon distances up to 100 miles, and set more than 20 Fastest Known Times. Aubri has logged more than 9,000 miles on his feet in the last three years, and in addition to this publication, his writing has been featured in Trail Runner Magazine, Long Trail News magazine, and five research journals.
Website: https://transcendingmountains.blog/
Instagram: @genderqueer_hiker
For more stories by Aubri, see his author page.
Other Resources
White Mountain National Forest webpage
Androscoggin Ranger District webpage
Pemigewasset Valley Search & Rescue Team’s hiker information page, with numerous resources
Sectionhiker.com’s excellent round-up of NOAA weather reports, Mountain Forecast, and trail conditions webpages for each of the NH48, including the peaks on the Presi Traverse


