Pacific Northwest Trail Backpacking and Thru-hiking Guide
A 1,250-mile route from the Continental Divide Trail to the Pacific Ocean
November 11th, 2025
Home > Trip Reports > Thru Hikes
Distance: 1,250 miles
Days: 50-80
Elevation gain/loss: 210,000 feet
Best season: Summer/fall
Permits: Required for Glacier, North Cascades, and Olympic National Parks
Difficulty: Yes! This is challenging
The Pacific Northwest Trail is an approximately 1,250-mile hiking trail that goes from Glacier National Park in Montana to Cape Alava in Olympic National Park, Washington—the westernmost point in the continental United States. It crosses the indigenous lands of the Cayuse, Umatilla, Walla Walla, Puyallup, Quinault, Queets, Blackfoot, Salish, Kootenai, Nez Perce, Spokane, Colville/Okanogan, Kalispel, Coeur d'Alene, Swinomish, Quileute, Hoh, Skagit, Snohomish, Skagit, Stillaguamish, S'Klallam, and Makah people.
During a thru-hike of the PNT, you’ll traverse rugged beaches, ancient forests, alpine terrain, temperate rain forest, and high desert landscapes. The trail crosses three national parks, seven national forests, and six wilderness areas. It is one of the few east-west thru-hikes and travels from the Continental Divide to the ocean across seven mountain ranges: the Rockies, Whitefish, Purcell, Selkirk, Kettle, Cascade, and the Olympic ranges You’ll have the opportunity to see grizzly bears, black bears, moose, elk, mountain lions, lynx, wolverines, wolves, martens, seals, salmon, otters, and orcas along the route.
The PNT is a National Scenic Trail, but it is not "complete." Depending on your perspective, this can be a pro or a con. If you want to experience an evolving trail, this is your opportunity. If you want a fully developed trail, as the Pacific Crest Trail is today, you'll need to wait.
I thru-hiked the Pacific Northwest Trail in 2025, going westbound. Liz Thomas and Naomi Hudetz, founders of Treeline Review, thru-hiked the PNT westbound in 2017. This is everything we learned that you should know to plan a backpacking trip on the Pacific Northwest Trail.
Related: Sam’s Favorite Gear from the Pacific Northwest Trail
We create reader-supported, objective, independently-selected gear reviews. This story may contain affiliate links, which help fund our website. When you click on the links to purchase gear, we may get a commission — without costing you an extra cent. Thank you for supporting our work and mission of outdoor coverage for every body! Learn more.
Pacific Northwest Trail Gear List
| PACIFIC NORTHWEST TRAIL GEAR | OUR PICK(S) | MORE OPTIONS |
|---|---|---|
| Main Gear | ||
| Shelter | Zpacks Pivot Solo Tent | Best Backpacking Tents |
| Backpack | Pa’lante V2 | Best Lightweight Backpacks |
| Sleeping bag/ quilt | Outdoor Vitals StormLoft 30 Down Quilt | Best Backpacking Sleeping Bags Best Backpacking Quilts |
| Sleeping pad | Therm-a-Rest NeoAir XLite NXT Sleeping Pad | Best Sleeping Pads For Backpacking |
Highlights

Wild huckleberries and other berries
Hiking through old-growth forest and temperate rainforest
Passes through three national parks
Coastal wilderness backpacking
Crossing seven mountain ranges
Wilderness solitude
Stunning scenery
Challenges

Wildfires are a likely sight on the PNT.
Most of the trail isn’t well-marked (may be a plus for some people)
Some portions of the trail don’t have a well-defined trail (same)
Soul-crushing bushwhacks
Steep terrain
Long road walks on busy highways, sometimes making finding camping difficult
A long section between resupply locations
Rain for multiple days in a row is likely
Best Season

The Pacific Northwest Trail is best hiked in the summer. The best months to hike the trail are July, August, and September. In July, you may see more rain than you would in August and September, but that will also mean less wildfire risk. In July, you may also encounter snow in the higher mountains early on in the trail. In August and September, you’ll likely have some stretches of trail that are quite smoky from fires in the region or possibly even closed due to fire.
Difficulty and Skills

Navigation
Most of the PNT is not marked, and the correct route isn’t always obvious. In some areas, there isn’t even a clear path to follow. I used a combination of Farout and Gaia GPS to navigate the PNT, and I had to check that I was on the correct route often.
Rough Terrain/Scrambling/Rock Climbing
In general, the PNT doesn’t see as much trail maintenance as many national scenic trails. This means that many of the singletrack portions of the trail are over rough terrain. There are a few sections of trail that require scrambling over steep, exposed terrain as well.
Downed Trees

Thousands, if not millions, of trees fall in Pacific Northwest forests every year. Many of those downed trees will inevitably fall on the PNT, blocking the path. You will climb over countless downed trees on this trail. I never kept track of the number of fallen trees I climbed over in a day, but I would guess that number was near 100 on some days.
Bushwhacking
There are several stretches of “lost trail” along the PNT, where you must bushwhack along a barely defined or undefined route in order to connect portions of maintained trail or dirt road. These sections can be quite challenging, disorienting, and very slow-going. Sometimes you’ll be bushwhacking through thorny, brambly brush, too, though most of the ‘shwacks aren’t too spikey.
River Fords
You must ford multiple rivers and creeks along the PNT. In the Pasayten wilderness, you have to cross the Pasayten River without a bridge. In the Mount Baker Wilderness, you have to ford back-to-back high-flowing glacially-fed waterways at Rainbow and Swift Creeks. These creek crossings can be up to your waist or higher, even in August. There are many other smaller creek fords, but these three are the most notable. See our story on How to Ford a River for tips on safety.
Elevation Gain/Elevation Loss
Over the entire trail, you gain and lose over 210,000 feet of elevation. There are a few flatter sections, like in the Puget Sound area and on the Olympic Coast, but most of the trail is steep.
You should be prepared to climb and descend a lot. This trail goes up and over seven mountain ranges, after all. I regularly went up over 5,000 feet in a day. Some days I gained twice that elevation, but those were long days.
Permits

You need backcountry permits to camp in Glacier National Park, North Cascades National Park, and Olympic National Park. Here is all the info you need to obtain permits for each of these parks.
Glacier National Park
Around 30% of backcountry permits in Glacier National Park are reserved for walkups. This means you can likely simply show up at a backcountry ranger station, with a loose idea of an itinerary, and obtain the permits required to backpack across the park. We’ve used this method to get backcountry permits multiple times, and have always had success by arriving at the ranger station when they open for the day.
The other 70% of wilderness camping permits are awarded through the early access lottery. If you want to make sure you get the exact itinerary you want, you can try your luck at the lottery on Recreation.gov, which has drawings in March and April. The online permit system limits your daily mileage between campsites, though, often to mileage lower than many thru-hikers prefer. And just because you win the lottery doesn’t guarantee you’ll get the itinerary you want.
North Cascades National Park
You can obtain backcountry permits for North Cascades National Park through Recreation.gov or by calling the wilderness information center at (360) 854-7200. They reserve about 40% of backcountry permits for walk-up trips, and issue those the day before.
The North Cascades National Park wilderness information center makes a special exception to administer permits over the phone to thru-hikers. This doesn’t mean the process of getting permits is easy, but you can obtain them without physically going to the backcountry permit office. We obtained backcountry permits by calling the Wilderness Information Center. You’ll have to call and leave a message, then wait for a ranger to return your call, which could take up to 24 hours.
Starting in 2025, the backcountry permit office began issuing permits via email to the general public as well. To obtain permits via email, follow these steps:
Watch this video on Backpacking in North Cascades National Park.
Email noca_wilderness@nps.gov early in the morning, the day before you want to start your trip. Include your Recreation.gov account email, itinerary, and group size. Rangers will review your itinerary and issue your permit.
Print your permit online from Recreation.gov.
Bring a signed copy of your permit with you into the backcountry to show rangers in the field.
Olympic National Park

You can book backcountry permits for Olympic National Park on Recreation.gov. The permit office has created a starting point for backcountry trips called “PNT Thru Hike.” Select this as your starting area, then select which of the 7 backcountry zones you plan to camp in each night.
Since a typical itinerary through Olympic National Park involves staying a night or two outside of the park, there is a $0 layover option, which you should select for the nights you don’t plan to camp in the park. After you select an itinerary, the Wilderness Information Center will review your itinerary and issue your permit. You can then print your permit to carry it with you as you hike the park.
The PNT thru-hiker permit does not allow you to reserve a permit in certain quota areas, including Sol Duc/Seven Lakes Basin, Grand Valley, Royal Lake, and the Cape Alava/Sand Point area. Check out the Olympic Wilderness Trip Planner Map . You’ll have to stay outside of this area unless you obtain a permit separately to camp in this area.
Some areas operate on a quota basis, such as Sol Duc / Seven Lakes Basin, Grand Valley, Royal Lake, the Cape Alava / Sand Point area, and others. Check the Olympic Wilderness Trip Planner Map (included below) for more info.
Route Summary

You can hike the Pacific Northwest Trail either Westbound, starting at Chief Mountain in Glacier National Park, or Eastbound, starting at Cape Alava in Olympic National Park. This summary is for a westbound hike, but you can reverse it if you plan to go eastbound. Almost all thru-hikers are westbound, as the snow in Olympic National Park in July can prohibit travel, and starting later often means not being able to finish before snow falls in Glacier National Park in September.
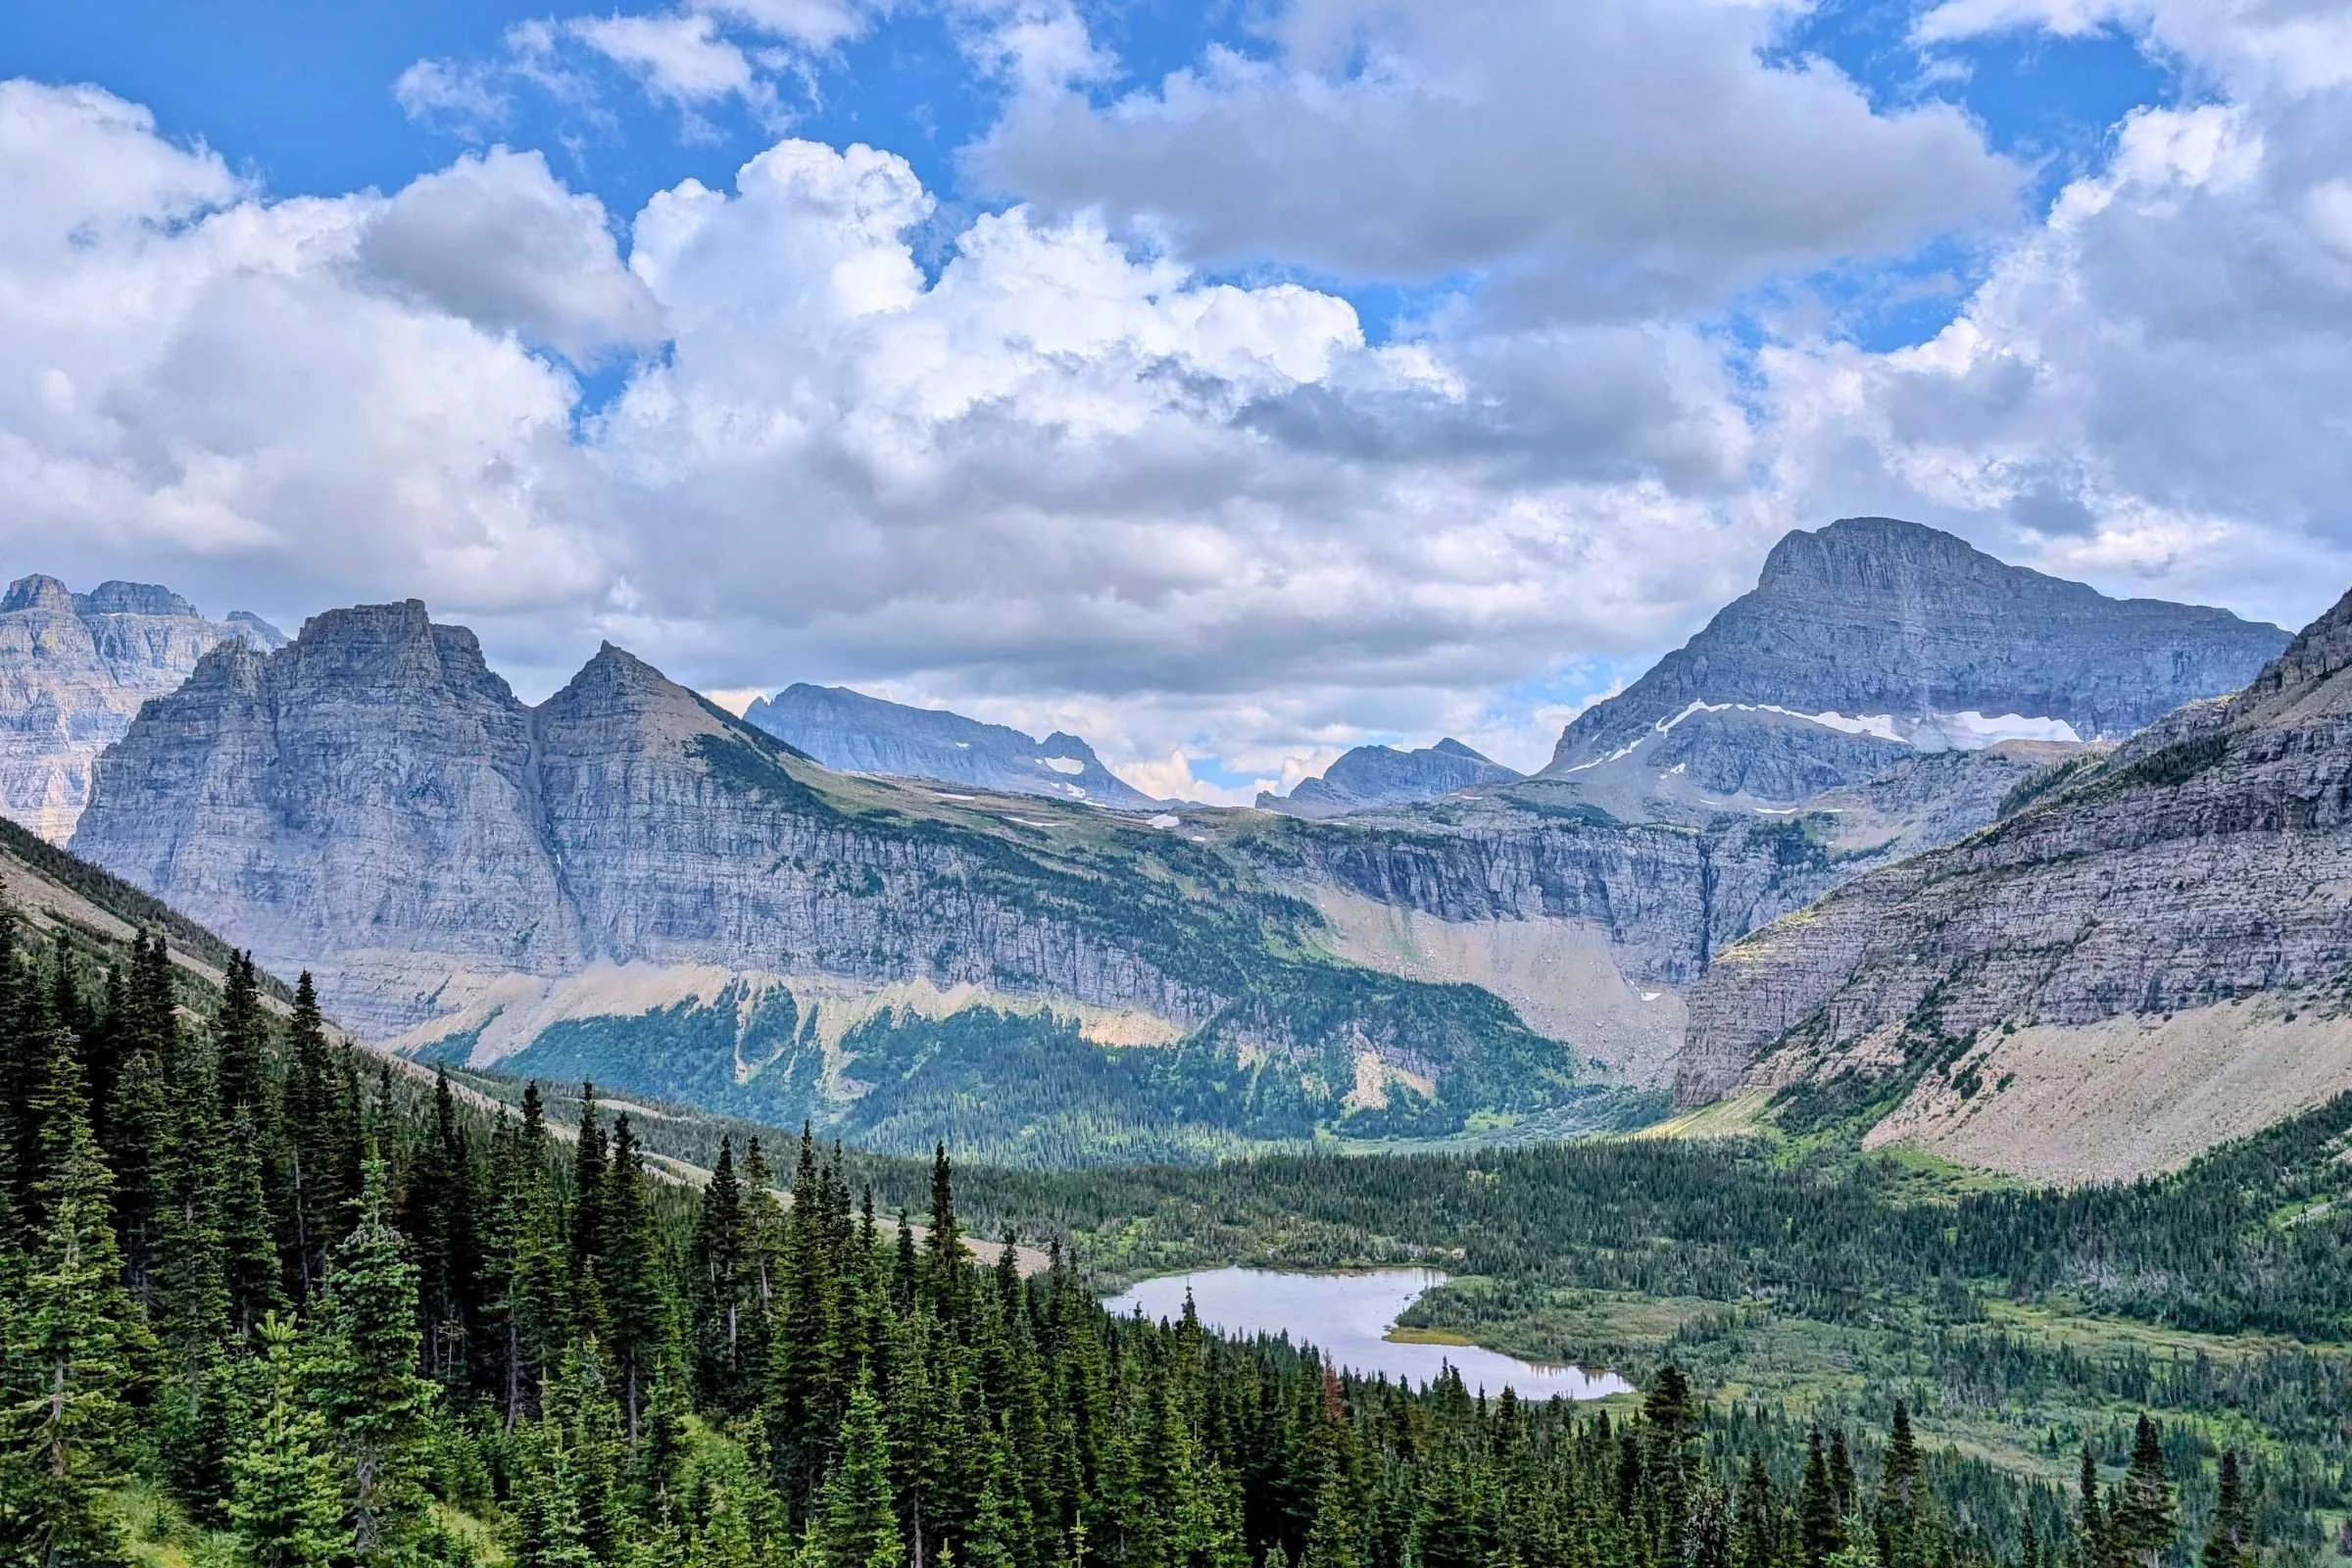
Rocky Mountains

The PNT starts at the Chief Mountain Border crossing in Glacier National Park. You then hike across the park, through the heart of the Montana Rockies, and exit at the Polebridge Ranger Station.
Near the ranger station is the small off-grid community of Polebridge. This is your first resupply location. There isn’t a great place to resupply in town. The only places that sell food are a small mercantile with an amazing bakery and a saloon, so we recommend mailing a food box. You can mail your resupply box to the North Fork Hostel. You can also stay overnight here.
After Polebridge, you hike through the Flathead National Forest and up to the Whitefish Divide. The Whitefish Divide is a stunning ridgeline with 360-degree views of the area. You then hike through the town of Eureka, Montana, where you can resupply.
Purcell Mountains

The Purcell Mountains section is one of the most remote parts of the PNT. You pass four fire lookouts as you hike a combination of remote singletrack and 4x4 roads in the Kootenai National Forest, Northwest Peaks Scenic Area, and Idaho Panhandle National Forest after you cross into Idaho.
Selkirk Mountains

Just after crossing into Idaho, you’ll pass north of Bonners Ferry, where you can hitch into town to resupply. After Bonners Ferry, you enter the Selkirk Mountains. This is perhaps the most rugged section of the PNT, and you’ll have to tackle a 5-6-mile long bushwhack in this section. Alternatively, you can bushwhack up to Wildcat Ridge and follow the steep ridge off-trail. Neither way is easy.
You’ll then pass Upper Priest Lake, near the furthest inland temperate rainforest in North America along the Washington-Idaho border. In Washington, the PNT enters the Colville National Forest and Salmo-Priest Wilderness. After leaving the wilderness, you pass through the small town of Metaline Falls. There is a small grocery store in Metaline Falls, where you can resupply.
Kettle Range

After Metaline Falls, the PNT follows a series of dirt roads until a long paved stretch leading into Northport and over the Columbia River. After crossing the Columbia, you hike a series of dirt roads until the Kettle Crest Trail, which follows the spine of the Kettle Range for 44 miles.
The trail in this section circles around the town of Republic, where you can resupply. Highway 20 passes through Republic, and the PNT crosses the highway twice, at points about 50 miles apart. The PNT also crosses Highway 21, which passes through Republic. You’ll have ample opportunities to hitchhike into Republic to resupply.
After the first highway 20 crossing, the PNT passes through more sections of Colville National Forest, then it enters the Colville Indian Reservation north of the Sanpoil River. You are allowed to pass through the reservation on the designated route without a permit, just be respectful.
After, the route turns north to make its second crossing of Highway 20. After some rolling grassland, you’ll go near Bonaparte Lake and Bonaparte Mountain. There is a small resort on the lake, the Bonaparte Lake Resort, where you can get a hot meal and/or send a resupply box. The mountain has a fire lookout at the top, and the views are worth the side trip.
The PNT then goes through the town of Oroville, where you’ll want to rest and resupply, because the next town you can easily hit is Glacier, Washington, over 200 miles away. In 160 miles, on the other side of the Pasayten Wilderness, you’ll pass Ross Lake Resort, where you can send a resupply box. If you’re willing to hike off trail and hitchhike, you can also stop in Mazama or Concrete, Washington, but these towns are a detour.
Pasayten Wilderness

The Pasayten Wilderness is stunning and vast. The PNT follows the Boundary Trail through most of this stretch, which is mere miles from the Canadian border. At several high points, you can clearly see into Canada from the Boundary Trail.
After crossing Frosty Pass, the PNT shares 13 miles with the Pacific Crest Trail. I saw more thru-hikers on this short section than I did throughout the entire rest of the PNT. The PNT splits off from the PCT at Holman Creek, and follows the Devil’s Ridge Trail to Ross Lake National Recreation Area. Ross Lake is managed by the same backcountry permit office as North Cascades National Park, and you’ll need a permit to camp along Ross Lake.
North Cascades

After hiking around Ross Lake and maybe stopping at Ross Lake Resort to pick up your resupply box, the PNT crosses the Cascade Range in North Cascades National Park.
You’ll go over three passes in the park: Beaver Pass, Whatcom Pass, and Hannegan Pass. Before Hannegan Pass, you cross the Chillawok River on a cable car. The trail exits the park at Hannegan Pass and continues through the Mt. Baker Wilderness.

In the Mt. Baker Wilderness, you must ford Rainbow Creek, then Swift Creek, and each of these fords can be harrowing, especially during peak snowmelt. But just on the other side of these creek crossings is the Swift Creek Trailhead, where you can take a short side trail to the Mt. Baker Hot Springs.
The PNT then passes through the Mt. Baker National Recreation Area before transitioning to the Puget Sound. You’ll pass through the small town of Alger, where you can take a 20-minute bus ride to the city of Bellingham.
Puget Sound
After the Mt. Baker area, the route follows a mixture of federal, state, and private timber lands over dirt and paved roads to get to the Puget Sound coast. The route passes through Anacortes, where you can resupply.
After Anacortes, you cross Fidalgo Island. You leave Fidalgo Island at Deception Pass. This isn’t a mountain pass, though. Rather, it’s a massive bridge over a huge expanse of water that connects Whidbey Island and Fidalgo Island. There's a campground at Deception Pass, which can break up the long road walk with some legal camping.. However, note that it is under a military flight path, so it can be loud.
On Whidbey Island, you hike mostly paved roads until you get to a beach walking section down the island’s west coastline. Then, you take a ferry from Fort Casey State Park across the bay to Port Townsend with excellent resupply options.
Olympic National Park

The PNT leaves Port Townsend on a paved bike path, then follows paved highways to the Olympic National Forest. After a short stretch through the National Forest, you cross into Olympic National Park.
The eastern side of the Olympic National Park crosses the Olympic mountain range. After the Olympic range, you can resupply in Port Angeles via either Hurricane Ridge, where a free shuttle runs every hour into town, or the Madison Falls Trailhead, where you’ll have to hitchhike into town. Both of these access points require going off the official PNT route.

After these trailheads that go into Port Angeles, you pass the Olympic Hot Springs. You should plan to spend at least an afternoon at these hot springs, which can only be accessed on foot.
Then, you drop down into the Hoh and Bogachiel Rainforests, where you’ll experience a stunningly beautiful temperate rainforest with more shades of green than you’ve likely ever seen. Also, it’s a rainforest, so be prepared for rain. After passing through these rainforests, you cross Highway 101. Just north of where the trail crosses the highway is the town of Forks, where you can resupply for one last time. There is a large grocery store in Forks.

After Forks, the trail follows forest roads to the Olympic Coastline. You will need to time your travel with the tides and carry a tide chart, as parts of this route are not easily passable and sometimes literally under 10 feet of water at high tide. The final section of the trail follows the coast for about 60 miles.
The PNT ends at Cape Alava, the westernmost point of the continental United States.
Navigation Resources

FarOut
The FarOut app for the Pacific Northwest Trail is very helpful for navigation. It has most important intersections marked, some info on towns, roads, water, and more.
An extremely useful feature of the FarOut app is user comments. Hikers ahead of you will (hopefully) share trail updates, such as dry water sources or trail detours.
Gaia
The Gaia App is very useful for navigating on the PNT. I relied heavily on the GPX track for the PNT that I uploaded to my app before leaving. This app allows you to download base maps of the region you’ll be hiking through, and is more accurate for following a track than the FarOut App. Gaia is also very useful for taking alternate routes, which you might have to do to avoid any unforeseen conditions.
Maps
The Pacific Northwest Trail provides a free set of printable maps you can download and print yourself. You can also order a waterproof map set.
Guidebooks
There are several guidebooks for the Pacific Northwest Trail. The PNTA has compiled a list of guidebooks here.
Other Apps
I didn’t use any other apps for navigating the Pacific Northwest Trail, but if you want to use the PNTA’s printable map set in a digital app, I recommend Avenza Maps.
Getting There
PNT Western Terminus at Chief Mountain
Here is a detailed account of how to get to the PNT Western Terminus (which is also the CDT northern terminus).
By Plane
To get to East Glacier, MT, the closest town to the PNT's western terminus at Chief Mountain border crossing, you can fly to Glacier Park International Airport in Kalispell, MT.
After you get to Kalispell, you can walk 12 miles, take an airport shuttle, or hitchhike to the Whitefish Amtrak Station, where you can take a train to East Glacier. Uber and Lyft in Whitefish and Kalispell are also a possibility. Or, get to Apgar Visitor Center in West Glacier, then take the Going to the Sun Road free shuttle across the park to St. Mary’s visitor center.
From St. Mary’s or East Glacier, it’s a relatively short drive to the Chief Mountain border crossing, where the PNT begins. I’ve never had problems hitchhiking to Chief Mountain.
By Car
To get to the Chief Mountain Border Crossing trailhead, drive Chief Mountain Highway 17 north from Babb, Montana, towards the Canadian Border.
Bus and Shuttle Services
PNT Eastern Terminus at Cape Alava
The closest major airport to the eastern terminus of the PNT at Cape Alava is Seattle-Tacoma International Airport. Cape Alava is pretty far from Seattle, but you can make it most of the way there by public transportation.
By Car
The simplest way to get to Cape Alava is by car. However, it will take over four hours to drive from Seattle to Ozette Triangle Coastal Trailhead.
Bus and Shuttle Services
The Ozette Trailhead is very remote, and if you don’t have a prearranged ride you should budget at least two days to get there.
It is possible to take a series of buses most of the way to Ozette Triangle Trailhead. From Seattle, take the Bainbridge Ferry to Bainbridge Island. From there, you can take the Clallam Transit Straight Shot to Port Angeles. From Port Angeles, Clallam Transit has buses that will take you all the way to Clallam Bay.
There is no public transportation to Ozette Trailhead, which is 20 miles down the remote Hoko Ozette road from Clallam Bay.
Olympic Hiking Company operates a shuttle service to Ozette Trailhead and elsewhere across Olympic National Park.
Trailheads

The trailhead for the western terminus of the PNT is located at Chief Mountain Border Crossing. The trailhead for the eastern terminus of the PNT is located at the Ozette Triangle Coastal Trailhead. There is ample parking at both of these trailheads.
Post-Trip Favorite Restaurant/Bakery/Brewery/etc.
Mighty Pine Brewing in Port Angeles has excellent beer.
Seattle has endless breweries and restaurants. I went to Human People Beer Cafe after finishing the PNT and making it to Seattle. I had a blast.
Regulations
Follow Leave No Trace Ethics
Dogs are not allowed in the backcountry areas of Glacier, North Cascades, or Olympic National Park
You can camp in most areas along the PNT. There are some sections where the route goes through private property, and you can’t camp in these areas.
Group size is limited to 12 people. There are more restrictive group sizes in the national parks along the PNT.
Carry a printed and signed version of your permit while hiking in the national parks.
Resupply

Polebridge
Has a small mercantile and a saloon. You should mail a food box to the North Fork Hostel and you can also stay overnight there.
Eureka
Has a grocery store and several hotels, motels, and restaurants.
Yaak
Has a small mercantile that accepts resupply boxes. The Mercantile doesn’t stock enough food to reliably resupply. Yaak kas two restaurants and a coffee drive through. You can camp behind the coffee trailer for a fee.
Bonners Ferry
Has multiple grocery stores, hotels, motels, and restaurants.
Metaline Falls
Has a small grocery store and several restaurants, as well as a hotel.
Northport
Has a gas station and a bakery/coffee shop. The bakery has pizza on Fridays.
Orient
Small general store with a basic resupply. Restaurant in town.
Republic
Has a grocery store, multiple restaurants, and three motels.
Oroville
Has a grocery store, multiple restaurants, and hotels/motels.
Ross Lake Resort
No services or food here. You can only send a box.
Mazama
Getting to Mazama requires an extra 15 miles of hiking on the PCT (each way) and hitchhiking or walking another 10 miles down a high-clearance dirt road. Mazama has a hostel, grocery store, restaurant, and gear shop. Fuel canisters are available here. Treeline Review co-founder Naomi Hudetz can pick you up if you need a place to stay.
Concrete
Getting to Concrete requires a long hitch down Highway 20. There are multiple hotels, motels, and restaurants in town, though.
Glacier
Has a small store, restaurants, and a motel.
Algers/Bellingham
Algers has a gas station with a coffee trailer in the parking lot. From the Algers Park and Ride, you can take a 20-minute bus ride to Bellingham. Bellingham is a large city, with many restaurants, breweries, kombucha bars, hotels, motels, medical care, and outfitters.
Anacortes
Anacortes has multiple grocery stores, hotels, motels, and restaurants. There is a hiker/biker camping area in the Washington Park Campground.
Oak Harbor
Oak Harbor is 3 miles off the official PNT route on Whidbey Island. It is a full-service town with tons of restaurants, hotels, motels, and grocery stores.
Port Townsend
Port Townsend has multiple grocery stores, restaurants, and hotels/motels.
Port Angeles
Port Angeles has multiple grocery stores, restaurants, and hotels/motels. The Olympic National Park Wilderness Information Center is also in Port Angeles, but on the far north end of town, far from everything else. You can rent a bear canister for free from here for the Olympic National Park Coast section.
Forks
Forks has a grocery store, small outfitter and general store, multiple restaurants, and a few hotels/motels.
Camping

You can camp along most sections of the PNT without reservations or permits. You must have a backcountry camping permit to camp in Glacier, North Cascades, and Olympic National Parks. Wild camping is scarce in the Puget Sound section of the PNT as well. I stayed in several pay campgrounds in the Puget Sound region because that was the only legal option.
Water Planning
There is ample water along most of the PNT.
Bears and Food Storage
I used an Ursack bear-proof bag to store my food on the PNT. Unless required to do otherwise, I tied it to a sturdy tree overnight.
Olympic National Park requires that you store smellables, food, and garbage in a bear canister along the coastal wilderness section of the PNT. I carried a bear canister that I rented for free from the Wilderness Information Center in Port Angeles.
Through the rest of Olympic National Park, you’re required to hang your food and smellables on the provided bear hang cables.
Glacier National Park and North Cascades National Park also require you to hang your food on the provided bear cables.
For more bear canister recommendations, see REI’s Food Storage story or REI’s Bear Canister story. Read more about in our review of the BearVault BV One bear canister here.
Side Trips
Olympic Hot Springs
In Olympic National Park, the PNT passes the Olympic Hot Springs. You should plan to spend at least an afternoon at these hot springs, which you can only access on foot. There are several pools to choose from of varying temperatures.
Mount Baker Hot Springs
Just outside the Mount Baker Wilderness, a short side trail from the PNT leads to the Mount Baker Hot Springs.
Variations
You can hike the PNT westbound or eastbound. Two of the biggest highlights of the PNT are Olympic National Park and Glacier National Park, which are the eastern and western terminuses, respectively. You can’t go wrong with either direction, since you start at one of these national parks and finish at the other.
The majority of thru-hikers go westbound, but going eastbound is certainly feasible. If you want to hike Eastbound, you'll need to wait for most of the snow to melt in the Olympic National Park high country.
Gear Rentals
The Washington Trails Association put together this list of places to rent outdoor gear in the state.
Gear Strategy
Tent
I used the Zpacks Pivot solo on this trip because it’s lightweight, fully enclosed, and has plenty of interior space.
The Pivot Solo is our favorite ultralight tent for tall people in our ultralight tents guide. See our Best Backpacking Tents guide for more recommendations.
Backpack
I used the Pa’lante V2 on this trip because it’s lightweight, durable, and has excellent pockets.
See our Best Backpacking Backpacks guide for more recommendations.
Sleeping Bag
I used the Outdoor Vitals StormLoft 30-degree quilt on this trip because it’s lightweight and warm. It also has gold flakes fused to the down insulation to help the insulation dry faster if it gets wet, which was helpful during rainy periods on the PNT.
See our Best Backpacking Quilts or Best Sleeping Bags story for more recommendations.
Sleeping Pad
Getting a good night’s sleep is important on this trail. That's why I carried a Therm-a-Rest NeoAir XLite NXT sleeping pad.
See our Best Backpacking Sleeping Pads story for more recommendations.
Trekking Poles
I used a single Komperdell Carbon FXP trekking pole on this trip because it’s lightweight, durable, and looks like a light saber.
For more recommendations, see our Best Trekking poles story.
Cooking System
I used a TOAKS Titanium 750 mL pot and MSR PocketRocket 2 stove on this trip because this combination is lightweight, simple, and effective.
See our Best Backpacking Stoves story for more recommendations and our Best Cooking Pot section for our recommendations.
Headlamp
I carried the Nightcore NU25 UL headlamp, which is affordable, lightweight, and rechargeable. See our recommendations in our Best Headlamps story.
Satellite Messenger
Cell reception is not always guaranteed on this trail. I carried the Garmin inReach Mini 2 for this reason.
See our Best Personal Locator Beacon and Satellite Messenger guide.
Power Bank
The PNT eats through phone battery faster than any trail I've hiked. With most of the route unmarked and entire stretches that have no defined path at all, I was checking FarOut and Gaia GPS constantly — sometimes every few minutes through the bushwhack sections. That kind of navigation use, combined with the 200-plus mile stretch between Oroville and Glacier, Washington, means a careful charging plan matters here more than on a well-marked trail like the PCT.
I carried a 10,000 mAh USB-C power bank and recharged it at every town stop. Multi-day rain in Washington made keeping electronics dry as important as keeping them charged — wet ports won't accept a charge. For the full system I built around power bank sizing, cable choice, and a nightly charging routine that prioritizes safety devices first, see Treeline's outdoor battery strategy guide.
Food Storage
For this trip, I used an Ursack to store my food. I also used a bear canister in Olympic National Park, as required by regulation.
Water Filter
I used the Platypus Quickdraw on this trip.
Check out our guide to the Best Water Filters and Purifiers for Backpacking.
What to wear

Shoes or Boots
I used the Altra Olympus and La Sportiva Prodigio Max on this trip because they’re grippy, and well-cushioned.
For more recommendations, see our Best Trail Running Shoes story.
If you’d feel more comfortable in boots, check out our Best Hiking Boots story or our Best Lightweight Hiking Boots story.
A nice footwear compromise for this trip would’ve been hiking shoes, which are designed to feel like a trail runner but have stability more like a boot. See our Best Hiking Shoes story for footwear that’s more durable and stable than trail runners.
Rain Jacket
I used the La Sportiva Ethereal Pro rain jacket on this trip because it’s very light and breathable.
For more recommendations, see our Best Rain Jackets article.
Rain Pants
I used the Ultimate Direction Ultra rain pants because they’re lightweight and waterproof.
Down or Synthetic Insulating Jacket
I used the La Sportiva Lumina 100 Down Jacket on this trip because it’s very light and warm enough for chilly nights.
See our recommendations in our Best Synthetic Jackets article. If you prefer down for its better warmth-to-weight ratio, check out our Best Down Jackets guide.
Fleece or Midlayer
I used the Vado Alpha Direct fleece on this trip because it provides a lot of warmth for not much weight.
See our Best Fleece Jackets or Best Midlayer guide for more options.
Sun Shirt
I used the Royal Robbins Salathé sun shirt on this trip because it comes in cool patterns and has a quarter zip for ventilation. See our Best Sun Shirts guide for more recommendations.
You can see other options in our Best Men's Hiking Shirts and Best Women's Hiking Shirts guide.
Hiking Pants
I didn’t wear hiking pants on this trip..
See our guides to the Best Women's Hiking Pants and Best Men's Hiking Pants for more recommendations.
Hiking Shorts or Skirt
I used the REI Swiftland running shorts on this trip because I had an REI coupon and all my other shorts had holes in them.
For more recommendations, see our Best Men's Trail Running Shorts guide, Best Women's Trail Running Shorts guide, Best Men's Hiking Shorts guide, or Best Thru-hiking Shorts guide.
Base Layer
I used my Vado Alpha Fleece as a baselayer when I needed one. For more recommendations, see our Best Base Layers guide.
Hiking Socks
I used the Darn Tough Micro Crew on this trip because they’re durable and have a lifetime warranty. Check our Best Hiking Socks guide for more recommendations.
Warm Hat
I used the Kora Freedom Hat on this trip because it’s made of Yak wool, and I wanted to see if I could tell the difference between Yak and Merino wool. I don’t think there was much of a difference.
Sun Hat
I used a Ciele Athletics GOCap because it’s lightweight, breathable, and adjustable. Check out our Best Sun Hats guide for more recommendations.
Gloves or Mittens
I used the REI Co-op Merino Wool Liner Gloves on this trip because they’re lightweight, inexpensive, and provide some insulation when wet. For more recommendations on lightweight but warm gloves, see our Best Winter Gloves guide.
Miscellaneous Gear Items
Map and Compass
I used a smartphone for a map and compass on this trip.
First Aid Kit
4 squares of gauze
Antibiotic ointment
Alcohol wipes
Ibuprofen
Sun Protection
Running hat
Sunscreen - see our Best Face Sunscreen and Best Sunscreen for your Body guide for our recommendations
Pocket Knife
I carried Westcott 2.5” Titanium Scissors instead of a pocket knife.
Why you should trust us

Sam Schild is a thru-hiker, trail runner, cyclist, and mountain athlete based in Colorado. Sam has completed countless ultra-distance self-supported trail runs on trails throughout the American Southwest.
He has thru-hiked the Pacific Crest Trail, Continental Divide Trail, Appalachian Trail, Grand Enchantment Trail, Arizona Trail, and the Colorado Trail twice. And now he's completed the Pacific Northwest Trail.
You can read more about Sam on his author page, website, or Instagram.


